Control Panel
제어판은 Zivid Studio의 오른쪽에 있습니다. 여기에는 세 가지 주요 섹션이 포함되어 있습니다.
Cameras
Capture
Settings
Cameras
이 섹션은 사용 가능한 카메라를 검색하고, 구성하고, 연결하고, 연결을 해제하는 데 사용됩니다.
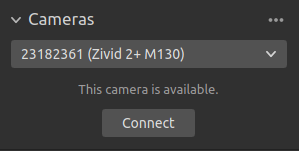
Cameras |
Function |
|---|---|
List all cameras |
카메라 메뉴를 열고 모든 카메라를 나열합니다. |
Scan for connected cameras |
PC에 연결된 모든 카메라를 표시하고 모델 및 일련 번호별로 나열합니다. |
Connect |
드롭다운 메뉴에서 선택한 카메라에 연결합니다. Zivid Studio는 한 번에 하나의 카메라에 연결할 수 있습니다. |
Configure this camera |
카메라 메뉴를 열고 선택한 카메라의 IP, 서브넷 마스크 및 모드를 구성합니다. |
Disconnect from active camera |
연결된 카메라와의 연결을 끊습니다. |
참고
여러 대의 카메라가 물리적으로 연결된 경우 이 섹션에 모두 표시됩니다. 그러나 Zivid Studio는 한 번에 단일 카메라와의 연결 설정만 지원합니다. Zivid Studio를 사용하여 여러 대의 카메라로 캡처하려면 Zivid Studio의 다른 인스턴스를 시작하십시오.
Firmware Update
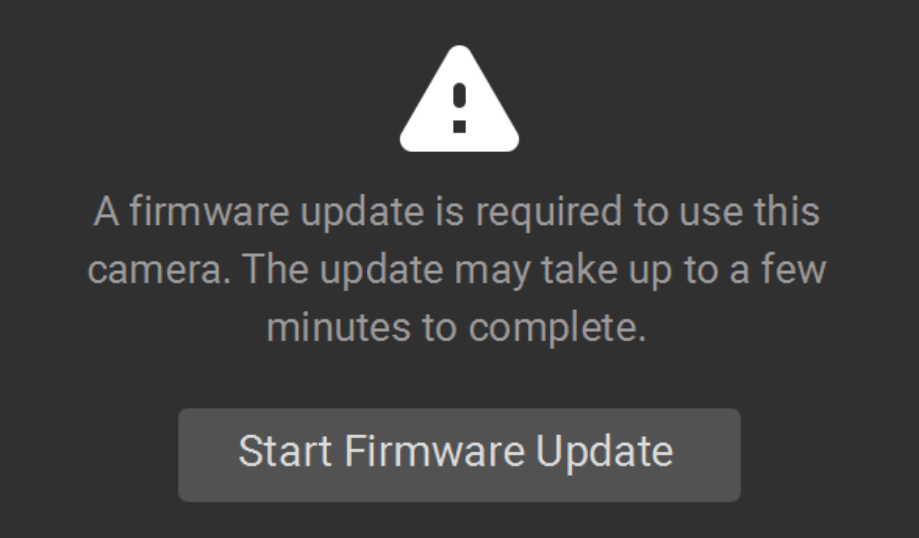
각 SDK 버전은 카메라 펌웨어와 일치하며, SDK는 카메라가 호환되는 펌웨어를 실행하도록 합니다. Zivid Studio가 카메라에 연결되면 카메라에 일치하는 펌웨어가 있는지 확인합니다. 펌웨어가 일치하지 않으면 카메라의 펌웨어를 업데이트하라는 메시지가 표시됩니다.
Firmware Update 에 대해 자세히 알아보세요.
Capture
이 섹션은 3D 및 2D 이미지를 캡처하는 데 사용됩니다. 여기서 카메라 설정을 제어하고 구성할 수 있습니다. 이 섹션에는 세 가지 모드가 있습니다.
2D capture
2D + 3D capture
3D capture
3D 캡처는 카메라가 색상 정보 없이 3D 포인트 클라우드를 캡처하도록 트리거하는 반면, 2D 캡처는 카메라가 컬러 혹은 흑백백 2D 이미지를 캡처하도록 트리거합니다. 2D + 3D 캡처는 카메라가 3D 포인트 클라우드와 2D 이미지를 모두 캡처하도록 트리거합니다.
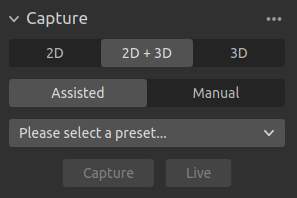
각 캡처에는 두 가지 모드가 있습니다.
Assisted Mode
Manual Mode
Assisted Mode
Assisted Mode에서는 Presets 에서 미리 정의된 설정 목록에서 선택할 수 있습니다. 이는 2D 및 3D 이미지를 캡처하는 데 권장되는 방법입니다. Presets은 다음 범주에 맞게 특별히 조정됩니다.
- Consumer Goods
광택 포장, 반투명 플라스틱, 불규칙한 모양의 품목 등 표면 피복이 중요한 이행 센터의 모든 SKU에 적용됩니다.
- Parcels
속도와 표면 처리가 중요한 무광 및 광택 플라스틱 배송 가방, 패딩 봉투, 골판지 상자의 경우.
- Manufacturing
표면 피복도와 형태의 정확성이 요구되는 광택이 있거나 어둡거나 질감이 있는 금속, 고무, 플라스틱 산업용 구성품에 사용됩니다.
- Inspection
최소한의 노이즈과 높은 정확도도가 요구되는 복잡한 표면, 미세한 디테일, 용접 이음새, 고무 개스킷, 3D 인쇄 부품의 경우.
- Depalletization
표면 커버리지가 중요한 플라스틱으로 포장된 무광 및 광택 골판지 상자, 병, 캔 및 기타 식료품의 경우.
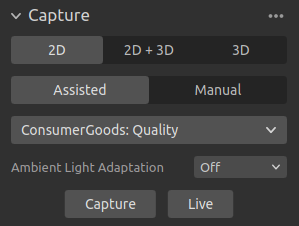
사용에 가장 적합한 카테고리를 선택하세요. 그러면 선택한 Presets에 따라 카메라 설정이 구성됩니다. 모든 카테고리가 모든 카메라 모델에 제공되는 것은 아니라는 점에 유의하세요. 수동 모드에서 선택한 설정을 보고 수정할 수 있습니다.
Presets을 선택하면 ambient light adaptation 을 선택할 수 있습니다.
참고
주변광 적응은 획득 및 캡처 시간을 늘릴 수 있습니다. 기본 Presets은 주변광 주파수에도 적응하지 않습니다.
Capture and Live
Capture 버튼을 클릭하면 지정된 설정으로 단일 캡처가 트리거되어 표시됩니다.
Live 버튼을 누르면 실시간으로 장면을 볼 수 있는 연속 캡처가 실행됩니다.
Manual Mode
수동 모드에서는 모든 설정을 수동으로 구성해야 합니다. 설정 패널에 대한 자세한 내용은 아래의 Acquisition Settings 및 Processing Settings 참조하세요.
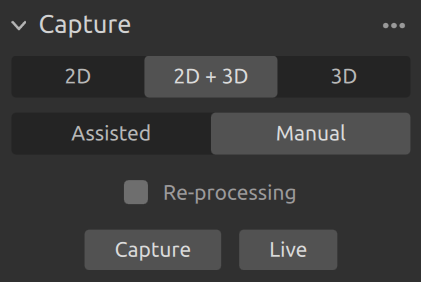
Re-processing 을 활성화하면 캡처를 다시 수행하지 않고도 다른 처리 설정을 사용하여 캡처를 재처리할 수 있습니다. ‘처리 설정’에서 설정을 변경하면 포인트 클라우드가 실시간으로 재처리되고 업데이트됩니다. 처리 설정 옆의 깜빡이는 점은 재처리가 진행 중임을 나타냅니다.

재처리를 활성화하려면 캡처하는 동안 Diagnostics 활성화해야 합니다.
Acquisition Settings
2D Options
Sampling (2D)
Setting |
Function |
|---|---|
2D 이미지의 색상을 샘플링하는 방법을 선택합니다. |
|
2D 이미지를 축소하려면 하위 샘플링 요소를 선택하세요. |
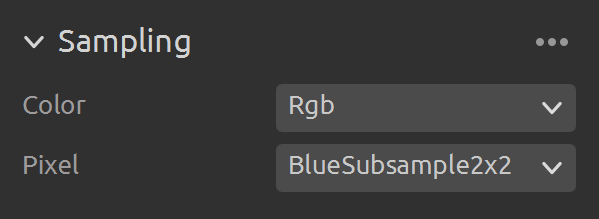
자세한 내용은 Sampling (2D) 을 확인하세요.
2D Acquisitions
Setting |
Function |
|---|---|
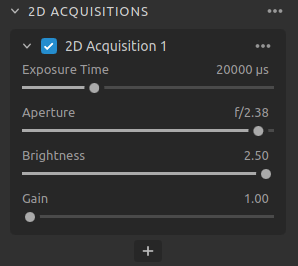
단일 카메라 이미지가 빛에 노출되는 시간입니다. |
|
렌즈를 통해 카메라 센서로 들어오는 빛의 양을 제어하는 개구부의 크기입니다. |
|
LED 프로젝터에서 방출되는 출력 전력(빛의 양)입니다. |
|
카메라 센서의 신호 증폭을 의미합니다. |
3D Options
Engine
Vision Engine은 포인트 클라우드 계산의 중추입니다. pattern projecting , imaging 및 투영된 패턴의 이미지 처리를 제어하여 최종 3D 포인트 클라우드를 생성합니다.
Setting |
Function |
|---|---|
다양한 프로젝터 패턴 중에서 선택합니다. |

자세한 내용은 Vision Engine 를 확인하십시오.
Sampling (3D)
Setting |
Function |
|---|---|
포인트 클라우드의 크기를 줄이려면 하위 샘플링 요소를 선택하세요. |

자세한 내용은 Sampling (3D) 을 확인하세요.
3D Acquisitions
Setting |
Function |
|---|---|
단일 카메라 이미지가 빛에 노출되는 시간입니다. |
|
렌즈를 통해 카메라 센서로 들어오는 빛의 양을 제어하는 개구부의 크기입니다. |
|
LED 프로젝터에서 방출되는 출력 전력(빛의 양)입니다. |
|
카메라 센서의 신호 증폭을 의미합니다. |
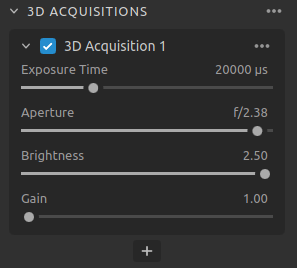
+ 버튼을 클릭하여 캡처 내에 여러 개의 인수를 추가할 수 있습니다. 이를 통해 HDR 캡처에서 다른 노출 설정으로 동일한 장면을 캡처할 수 있으며, 이는 높은 동적 범위가 있는 장면에 유용할 수 있습니다.
노출 설정을 조정하는 방법을 알아보려면 Capturing High Quality Point Clouds 을 확인하세요.
Region Of Interest
Setting |
Function |
|---|---|
3D에서 상자를 생성 및 구성하고 상자 외부의 점을 제거(NaN으로 변환)합니다. |
|
사용자 정의 깊이 범위(Z값) 밖의 점을 제거합니다. |
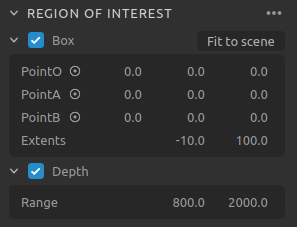
자세한 내용은 Region of Interest 을 확인하십시오.
Diagnostics
diagnostics setting 은 캡처된 파일에서 추가 진단 데이터를 수집하여 .zdf 파일에 저장할 수 있습니다. Zivid 지원팀에 문제를 보고할 때 이 기능을 활성화하세요.
다른 처리 설정을 사용하여 캡처한 내용을 다시 처리하지 않고도 reprocessing 를 다시 처리하려면 진단을 활성화해야 합니다.

조심
Diagnostics은 캡처 시간, RAM 사용량 및 .zdf 파일의 크기를 늘립니다.
Processing Settings
2D Color Balance & Gamma
Setting |
Function |
|---|---|
주변광의 색온도는 컬러 이미지의 모양에 영향을 줍니다. 색상 이미지가 자연스럽게 보이도록 파란색, 녹색 및 빨간색 색상 균형을 조정합니다. |
|
출력 컬러 이미지가 너무 어둡게 나타날 수 있습니다. 컬러 이미지의 밝기를 조정합니다. |
|
색상 이미지가 계산되는 방식을 제어합니다. 옵션은 Automatic 및 ToneMapping입니다. |
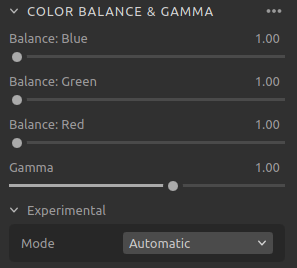
색상 설정을 조정하는 방법을 알아보려면 Optimizing Color Image 과 Adjusting Color Balance 을 확인하십시오.
3D Filters
Setting |
Function |
|---|---|
포인트 클라우드에서 Floating 포인트들과 작은 클러스터를 제거합니다. |
|
포인트들의 사이를 보간하여 제거된 포인트들을 채웁니다. |
|
투영된 패턴 신호 대 잡음비가 낮은 지점을 제거하거나 수정합니다. |
|
작은 로컬 영역 내에서 인접 픽셀까지의 거리가 mm로 지정된 임계값보다 큰 경우 포인트를 제거합니다. |
|
반사의 영향을 받아 잘못된 포인트를 제거합니다. |
|
포인트 클라우드에서 가우스 평활화를 수행합니다. |
|
카메라 렌즈에서 흐려짐의 영향을 받는 포인트를 수정 및 제거합니다. |
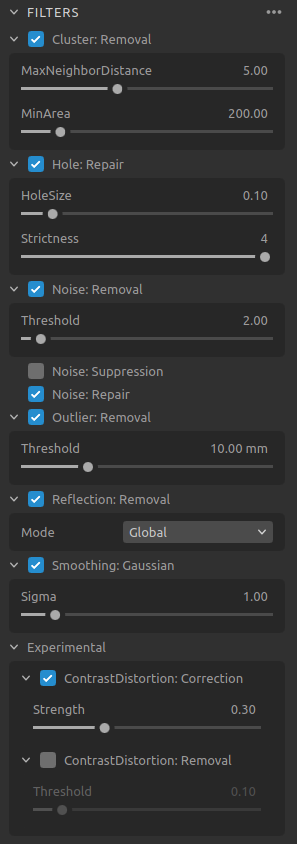
필터를 조정하는 방법을 알아보려면 Capturing High Quality Point Clouds 를 확인하십시오.
Resampling
Setting |
Function |
|---|---|
포인트 클라우드의 포인트 수를 줄이거나 늘립니다. |

Resampling에 대해 자세히 알아보려면 Resampling 을 확인하세요.
Available Views 에서 Zivid Studio에 대한 내용을 계속 읽어보세요.
Version History
SDK |
Changes |
|---|---|
2.16.0 |
새로운 재처리 기능으로 인해 획득 및 처리 설정이 재구성되었습니다. |
2.14.0 |
2D, 3D, 2D+3D 캡처로 재구성되었습니다. |
2.12.0 |
2D 설정이 3D 설정의 하위 집합임을 명확히 하기 위해 페이지를 재구성했습니다. |