Adjusting Color Balance
SDK에는 빨강, 녹색 및 파랑 색상 채널의 색상 균형 값을 조정하는 기능이 있습니다. 완벽하게 흰색이 아니거나 매우 강한 주변 조명은 컬러 이미지의 RGB 값에 영향을 미칩니다. 응용 프로그램에 올바른 RGB가 필요한 경우 카메라에서 색상 균형을 실행하십시오. Zivid 카메라 프로젝터를 사용하여 컬러 이미지를 캡처하지 않는 경우 특히 그렇습니다.
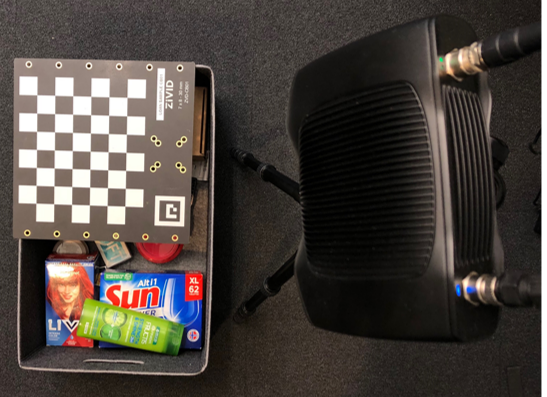
이 튜토리얼은 Zivid calibration board 의 이미지를 반복적으로 촬영하여 2D 이미지의 색상 균형을 맞추는 방법을 보여줍니다. 전제 조건으로 2D 획득 설정을 찾아 YML로 제공해야 하며 자습서에서는 해당 설정과 색상의 균형을 맞추는 방법을 보여줍니다. Zivid Studio 에서 설정을 내보내는 방법을 확인하려면 Toolbar 을 확인하십시오.

먼저 색상 균형을 맞추려는 2D 획득 설정에 대한 경로를 제공합니다.
def _options() -> argparse.Namespace:
    """Configure and take command line arguments from user.

    Returns:
        Arguments from user

    """
    parser = argparse.ArgumentParser(
        description=(
            "Balance the color of a 2D image\n"
            "Example:\n"
            "\t $ python color_balance.py path/to/settings.yml\n\n"
            "where path/to/settings.yml is the path to the 2D acquisition settings you want to find color balance for."
        ),
        formatter_class=argparse.RawTextHelpFormatter,
    )

    parser.add_argument(
        dest="path",
        type=Path,
        help="Path to YML containing 2D capture settings",
    )

    return parser.parse_args()
카메라에 연결합니다.
2D 획득 설정을 로드합니다.
이미지를 캡처하여 표시합니다.
그런 다음 균형을 잡을 흰색 기준으로 사용할 calibration board의 흰색 사각형을 감지하고 찾습니다.
사용자 지정 마스크(예: 종이나 흰 벽)를 사용하려는 경우 고유한 마스크를 제공할 수 있습니다. 예를 들어 다음을 사용하여 이미지의 중앙 픽셀을 마스킹할 수 있습니다.
def get_central_pixels_mask(image_shape: Tuple, num_pixels: int = 100) -> np.ndarray:
    """Get mask for central NxN pixels in an image.

    Args:
        image_shape: (H, W) of image to mask
        num_pixels: Number of central pixels to mask

    Returns:
        mask: Mask of (num_pixels)x(num_pixels) central pixels

    """
    height = image_shape[0]
    width = image_shape[1]

    height_start = int((height - num_pixels) / 2)
    height_end = int((height + num_pixels) / 2)
    width_start = int((width - num_pixels) / 2)
    width_end = int((width + num_pixels) / 2)

    mask = np.zeros((height, width))
    mask[height_start:height_end, width_start:width_end] = 1

    return mask
calibration 알고리즘을 실행합니다. 이 알고리즘은 이미지를 가져오고 calibration에 사용하는 흰색 픽셀을 제외한 모든 것을 마스킹하여 RGB 이미지의 색상 균형을 맞춥니다.
알고리즘의 완전한 구현은 아래와 같습니다.
def white_balance_calibration(
    camera: zivid.Camera, settings_2d: zivid.Settings2D, mask: np.ndarray
) -> Tuple[float, float, float]:
    """Balance color for RGB image by taking images of white surface (checkers, piece of paper, wall, etc.) in a loop.

    Args:
        camera: Zivid camera
        settings_2d: 2D capture settings
        mask: (H, W) of bools masking the white surface

    Raises:
        RuntimeError: If camera does not need color balancing

    Returns:
        corrected_red_balance: Corrected red balance
        corrected_green_balance: Corrected green balance
        corrected_blue_balance: Corrected blue balance

    """
    if not camera_may_need_color_balancing(camera):
        raise RuntimeError(f"{camera.info.model} does not need color balancing.")

    corrected_red_balance = 1.0
    corrected_green_balance = 1.0
    corrected_blue_balance = 1.0

    saturated = False

    while True:
        settings_2d.processing.color.balance.red = corrected_red_balance
        settings_2d.processing.color.balance.green = corrected_green_balance
        settings_2d.processing.color.balance.blue = corrected_blue_balance

        rgba = camera.capture_2d(settings_2d).image_rgba_srgb().copy_data()
        mean_color = compute_mean_rgb_from_mask(rgba[:, :, 0:3], mask)

        mean_red, mean_green, mean_blue = mean_color[0], mean_color[1], mean_color[2]

        if int(mean_green) == int(mean_red) and int(mean_green) == int(mean_blue):
            break
        if saturated is True:
            break
        max_color = max(float(mean_red), float(mean_green), float(mean_blue))
        corrected_red_balance = float(np.clip(settings_2d.processing.color.balance.red * max_color / mean_red, 1, 8))
        corrected_green_balance = float(
            np.clip(settings_2d.processing.color.balance.green * max_color / mean_green, 1, 8)
        )
        corrected_blue_balance = float(np.clip(settings_2d.processing.color.balance.blue * max_color / mean_blue, 1, 8))

        corrected_values = [corrected_red_balance, corrected_green_balance, corrected_blue_balance]

        if 1.0 in corrected_values or 8.0 in corrected_values:
            saturated = True

    return (corrected_red_balance, corrected_green_balance, corrected_blue_balance)
그런 다음 색상 균형 설정을 적용하고 새 이미지를 캡처하여 표시합니다.
settings_2d.processing.color.balance.red = red_balance
settings_2d.processing.color.balance.green = green_balance
settings_2d.processing.color.balance.blue = blue_balance
rgba_balanced = camera.capture_2d(settings_2d).image_rgba_srgb().copy_data()
display_rgb(rgba_balanced[:, :, 0:3], title="RGB image after color balance", block=True)
마지막으로 새로운 색상 균형 게인과 함께 2D 획득 설정을 파일에 저장합니다.
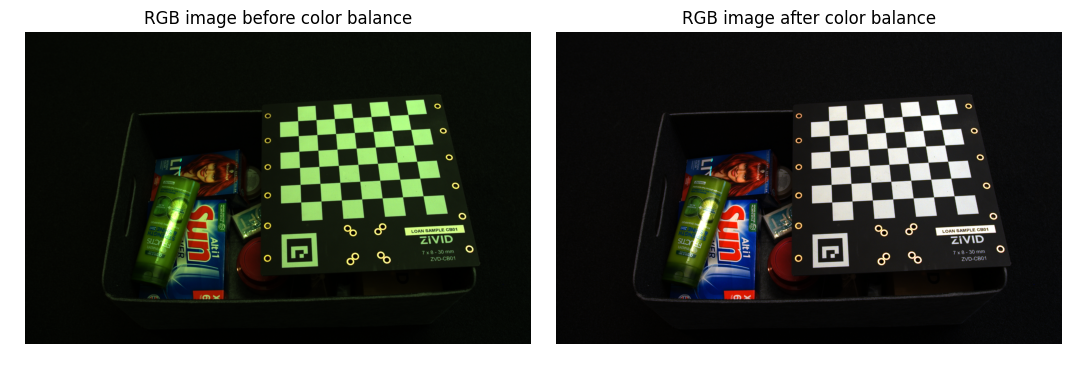
아래 그림은 컬러 밸런스를 적용하기 전과 후의 컬러 이미지를 보여줍니다.

2D 이미지의 색상 균형을 맞추기 위해 2D 획득 설정에 대한 경로와 함께 코드 샘플을 실행합니다.
Sample: color_balance.py
python color_balance.py /path/to/settings.yml
출력으로 새로운 색상 밸런스 게인을 사용한 2D 획득 설정이 파일에 저장됩니다.