Color Inconsistency (random Color Tint)
Problem
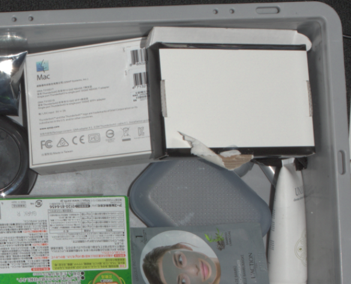
동일한 설정을 사용하여 촬영한 컬러 이미지에는 가끔 무작위적인 색상 색조(예: 녹색, 노란색, 분홍색, 보라색)가 나타날 수 있습니다.

Cause
장면의 주변광이 강하고 교류(AC) 전원 공급 장치로 작동하기 때문에 깜빡입니다. 2D 설정의 노출 시간은 그리드 주파수에 따라 보정되지 않습니다. 결과적으로 전력망으로 인해 interference from ambient light 이 발생하여 컬러 이미지에 불규칙한 색조가 나타납니다.
Potential Solutions
Modify capture settings
먼저, 해당 지역의 주변광(격자) 주파수를 확인하세요.
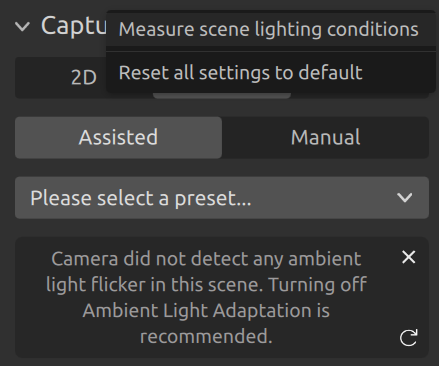
Zivid Studio를 열고 카메라에 연결합니다. Capture 섹션의 세 개의 점을 클릭합니다. 그런 다음 Measure scene lighting conditions 을 클릭합니다. 소프트웨어가 감지된 주변광 플리커 주파수를 표시합니다.

또는 SDK를 사용하여 주변광 상태를 측정할 수 있습니다. 이 방법은 주변광의 상당한 깜빡임이 감지되는지, 그리고 50Hz 또는 60Hz 전력망에 해당하는지 보고합니다.
std::cout << "Measuring scene conditions" << std::endl;
auto sceneConditions = camera.measureSceneConditions();
auto flickerClassification = sceneConditions.ambientLight().flickerClassification().toString();
std::cout << "Flicker classification: " << flickerClassification << std::endl;
    auto flickerFrequency = sceneConditions.ambientLight().flickerFrequency();
    std::cout << "Measured flickering frequency in the scene: " << flickerFrequency << " Hz." << std::endl;
Console.WriteLine("Measuring scene conditions");
var sceneConditions = camera.MeasureSceneConditions();
var flickerClassification = sceneConditions.AmbientLight.FlickerClassification.ToString();
Console.WriteLine("Flicker classification: " + flickerClassification);
    var flickerFrequency = sceneConditions.AmbientLight.FlickerFrequency;
    Console.WriteLine($"Measured flickering frequency in the scene: {flickerFrequency} Hz.");
print("Measuring scene conditions")
scene_conditions = camera.measure_scene_conditions()
flicker_classification = scene_conditions.ambient_light.flicker_classification
print(f"Flicker classification: {flicker_classification}")
    flicker_frequency = scene_conditions.ambient_light.flicker_frequency
    print(f"The measured flickering frequency in the scene: {flicker_frequency} Hz.")
적절한 Presets을 사용하세요
Presets을 사용하는 경우 50Hz 또는 60Hz에 맞는 Presets을 선택하세요. Presets은 Zivid Studio 또는 Presets 페이지에서 찾을 수 있습니다.
Adjust settings manually
수동으로 설정을 구성한 경우 노출 시간이 해당 지역의 그리드 주파수와 동기화되었는지 확인하세요.
강한 깜빡임 주변광이 있는 경우 그리드 주기의 배수로 샘플링 속도(노출 시간)를 사용합니다.
50Hz 그리드 주파수가 있는 경우 10,000µs의 배수입니다.
60Hz 그리드 주파수가 있는 경우 8,333µs의 배수입니다.
이 방법을 사용하면 아래 보정된 이미지에서 볼 수 있듯이 무작위 색조가 제거됩니다. 그리드 주파수에 맞춰 노출 시간을 보정한 설정을 사용하면 촬영 시간이 길어질 수 있다는 점에 유의하세요.

예를 들어 2D 이미지의 과다 노출로 인해 그리드 주파수에 맞게 노출 시간을 조정할 수 없는 경우, 대신 2D sampling interval (Zivid 3만 해당) 을 활성화하고 해당 지역의 전원 주파수와 동기화하세요.
10 000 µs in the presence of 50 Hz grid frequency.
8 333 µs in the presence of 60 Hz grid frequency.
이 방법은 무작위 색조도 제거합니다. 캡처 시간은 주변 조명의 주파수를 보정한 노출 시간만큼 또는 그보다 약간 더 증가합니다. 노출 시간이 샘플링 간격 지속 시간과 가까울 경우 캡처 시간에 약간의 변동이 있을 수 있습니다. 예를 들어, 노출 시간이 9,000µs이고 샘플링 간격 지속 시간이 10,000µs인 경우, 실제 샘플링은 20,000µs에 발생할 수 있습니다(노출 시간과 캡처 처리 시간이 10,000µs를 초과하는 경우). 또한, 연속적인 2D 캡처 간에 약간의 밝기 강도 차이가 있을 수 있습니다(단일 캡처를 사용하고 톤 매핑을 비활성화하며 노출 시간이 샘플링 간격 지속 시간보다 훨씬 짧은 경우).
Prevent ambient light
주변광을 처리하는 가장 좋은 방법은 주변광을 없애는 것입니다.
Zivid 카메라 근처의 불필요한 광원을 끄세요.
광원을 제거할 수 없는 경우, 장면 주변에 빛 차단막을 설치하여 빛을 차단합니다. 차단막은 꼭 단단할 필요는 없으며, 어두운 커튼이나 비슷한 재질이면 충분합니다.
Change ambient light
주변광을 제거하는 것이 불가능하다면 AC 전원 공급 장치로 인해 깜박임이 발생하지 않는 광원을 사용하는 것을 고려하세요.
주파수가 1kHz 이상인 스포트라이트 또는 LED와 같은 DC 전원 조명을 선택하세요. 이렇게 하면 깜박임을 줄이고 이미지의 색상 불일치를 방지할 수 있습니다.
Version History
SDK |
Changes |
|---|---|
2.17.0 |
Sampling Interval 설정에 대한 지원이 추가되었습니다. |