Zivid CLI Tool For Hand-Eye Calibration
이 튜토리얼에서는 명령줄 인터페이스(CLI) 도구를 사용하여 핸드아이(Hand-Eye) 보정하는 방법을 보여줍니다. 아래 스크린샷과 함께 단계별 지침을 제공합니다.
참고
로봇 포즈에 *.yaml 파일 형식을 사용하는 ZividExperimentalHandEyeCalibration.exe CLI 도구는 experimental 입니다. 이 기능은 추후에 GUI로 대체될 것입니다.
Requirements
Hand-Eye Calibration 에 대한 기본 지식
핸드-아이 칼리브레이션 데이터 세트 - 아래 첫 번째 단계에서 다룹니다.
Instructions
Acquire the dataset
Hand-Eye Calibration 에 대한 자세한 튜토리얼을 읽지 않으셨다면 읽어보시기 바랍니다. 데이터 세트를 획득하기 위한 최소한의 요구는 Hand-Eye Calibration Process 를 확인하여 필요한 로봇 포즈에 대해 자세히 알아보고 How To Get Good Quality Data On Zivid Calibration Object 을 배우는 것입니다. 또한, Cautions And Recommendations 을 읽는 것도 매우 도움이 될 수 있습니다.
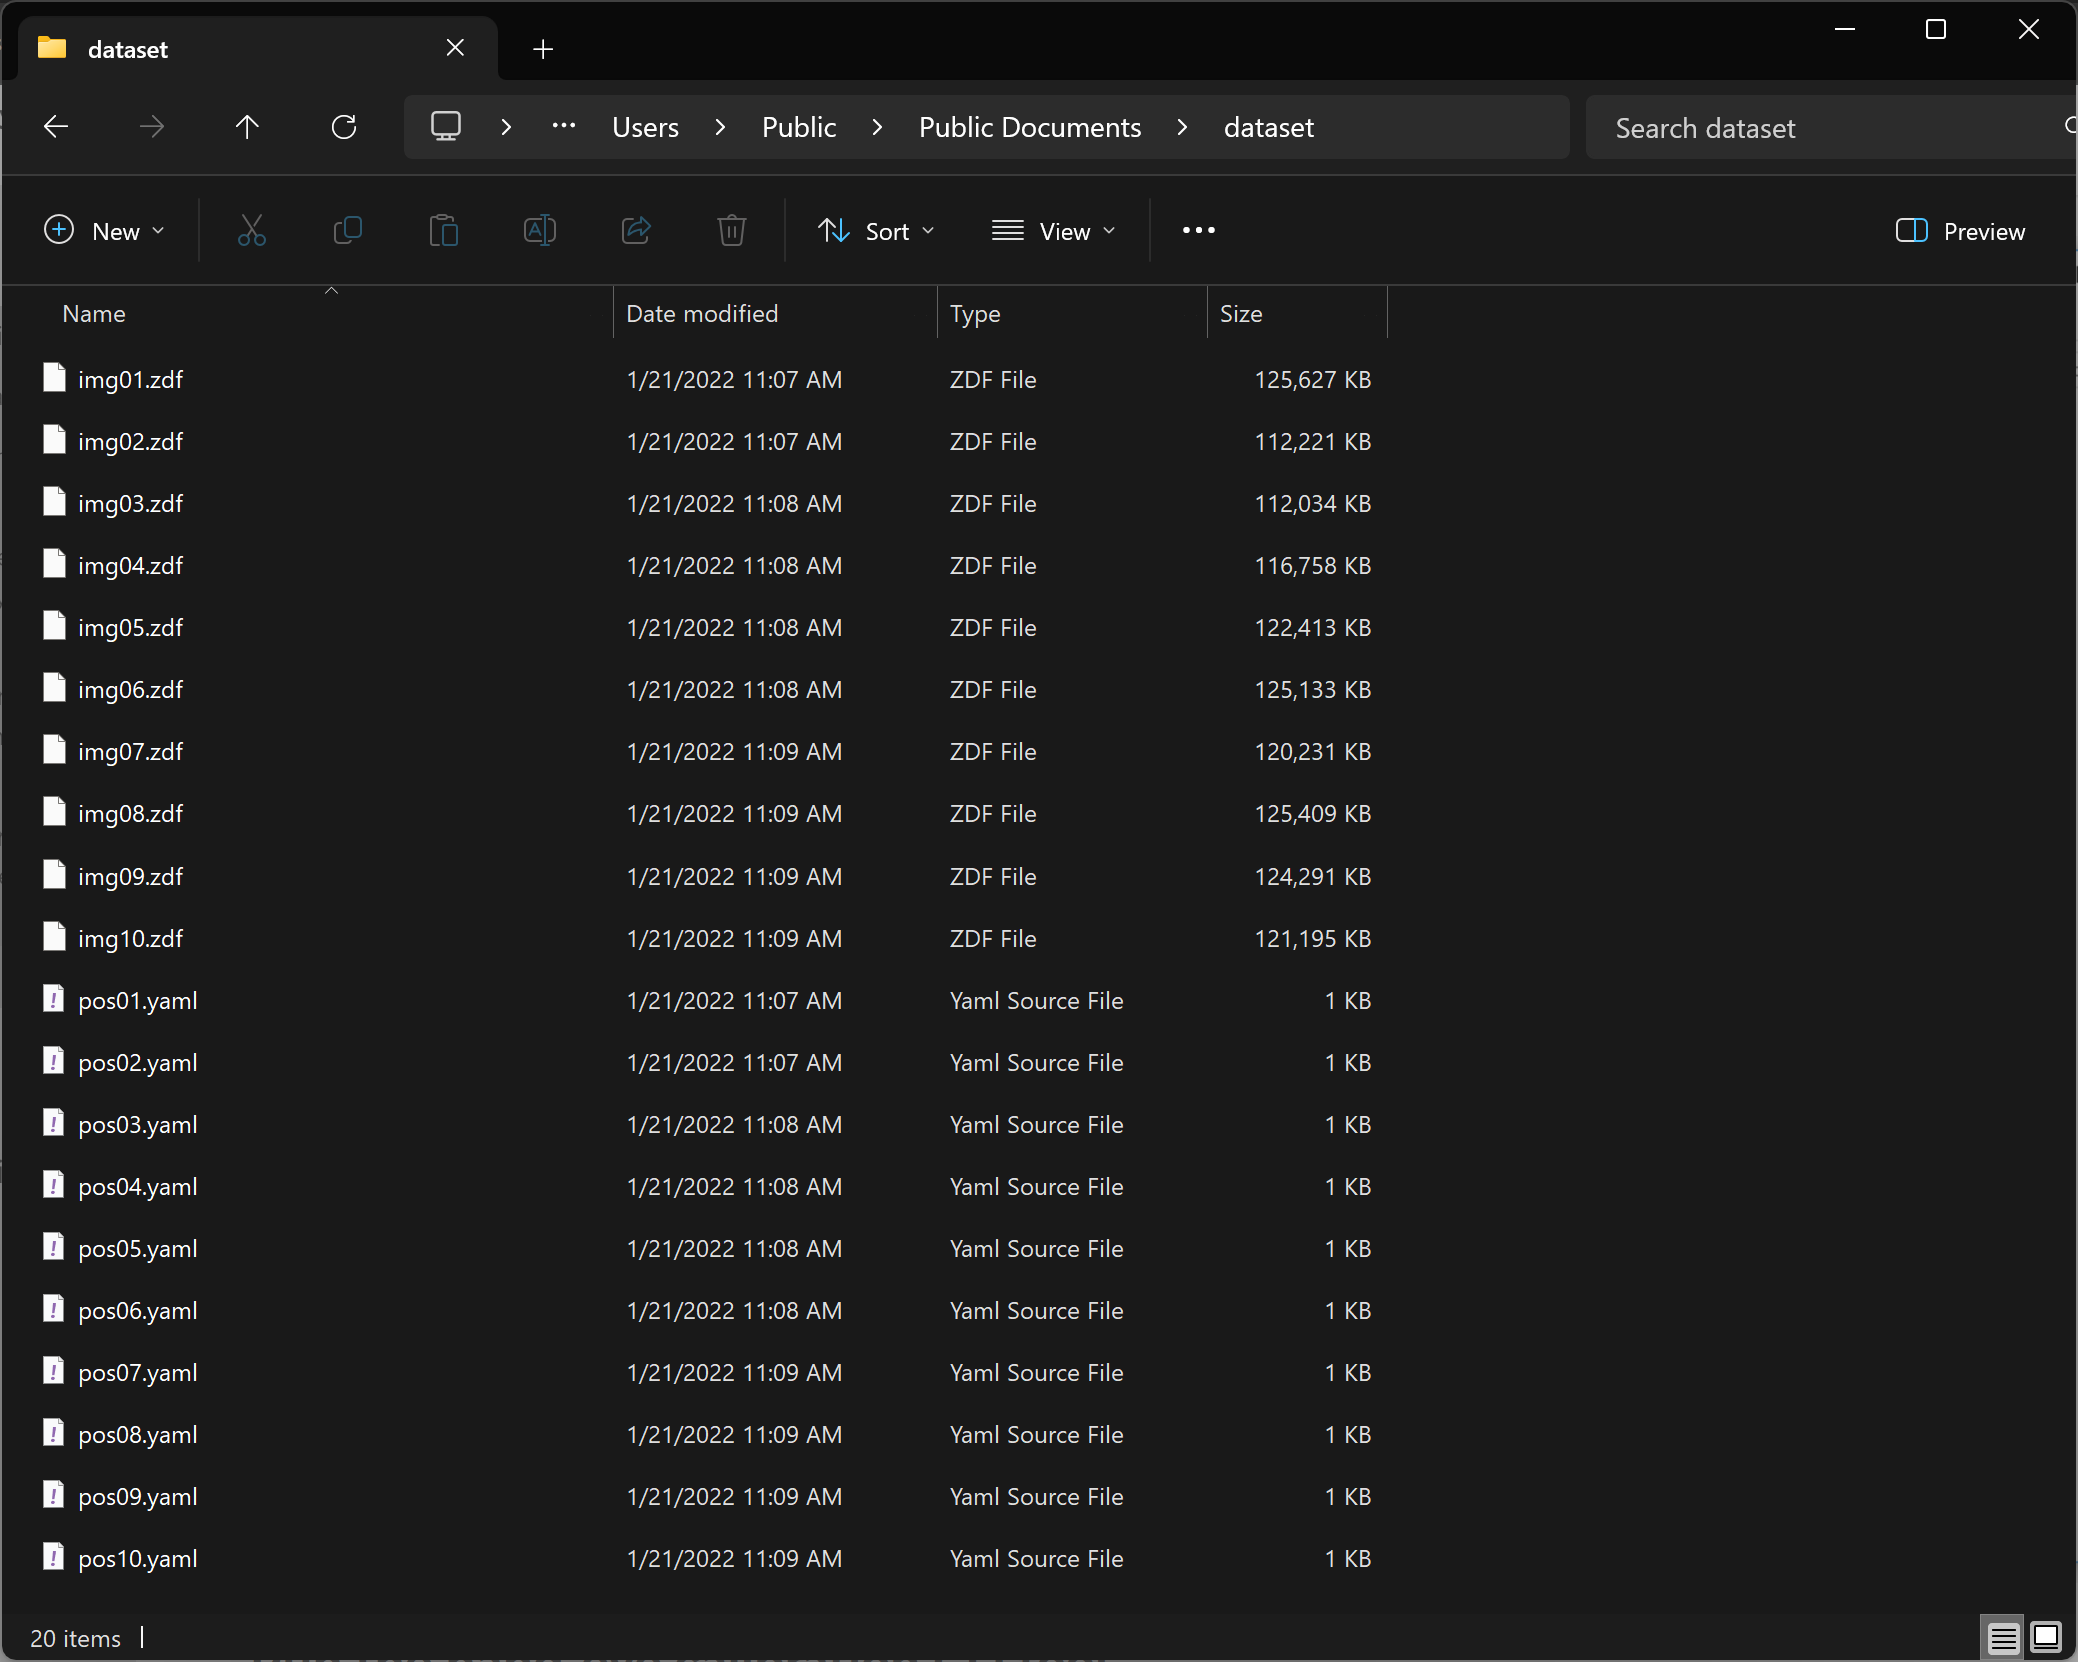
이 데이터세트는 .zdf 파일 형식의 Zivid calibration object 포인트 클라우드 10~20쌍과 .yaml 파일 형식의 해당 로봇 포즈를 가정합니다. 명명 규칙은 다음과 같습니다.
Point clouds: img01.zdf, img02.zdf, img03.zdf 등
Robot poses: pos01.yaml, pos02.yaml, pos03.yaml 등
조심
로봇 포즈의 변환 부분은 mm 단위여야 합니다.
CLI 도구는 Zivid 체커보드 또는 ArUco 마커와 함께 작동합니다. 하지만 SDK와 달리 CLI 도구는 단일 ArUco 마커 사전(DICT_4X4_50)과만 함께 작동합니다.
다음은 다운로드할 수 있는 로봇 포즈의 예입니다. - pos01.yaml . .yaml 형식으로 파일을 쓰고 읽는 방법을 배우려면 OpenCV YAML file storage class 를 확인하십시오. 데이터세트 폴더는 다음과 유사해야 합니다.
조심
로봇 포즈 파일은 .yaml 파일 형식인 반면, 카메라 설정 및 구성 파일은 .yml 파일 형식입니다.

Run the hand-eye calibration CLI tool
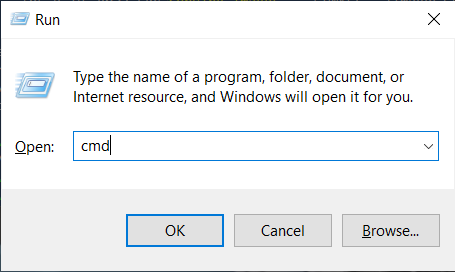
키보드에서 Win + R 키를 눌러 명령 프롬프트를 시작한 다음 cmd 을 입력하고 Enter 를 누릅니다.

Zivid 소프트웨어를 설치한 폴더로 이동합니다.
cd C:\Program Files\Zivid\bin

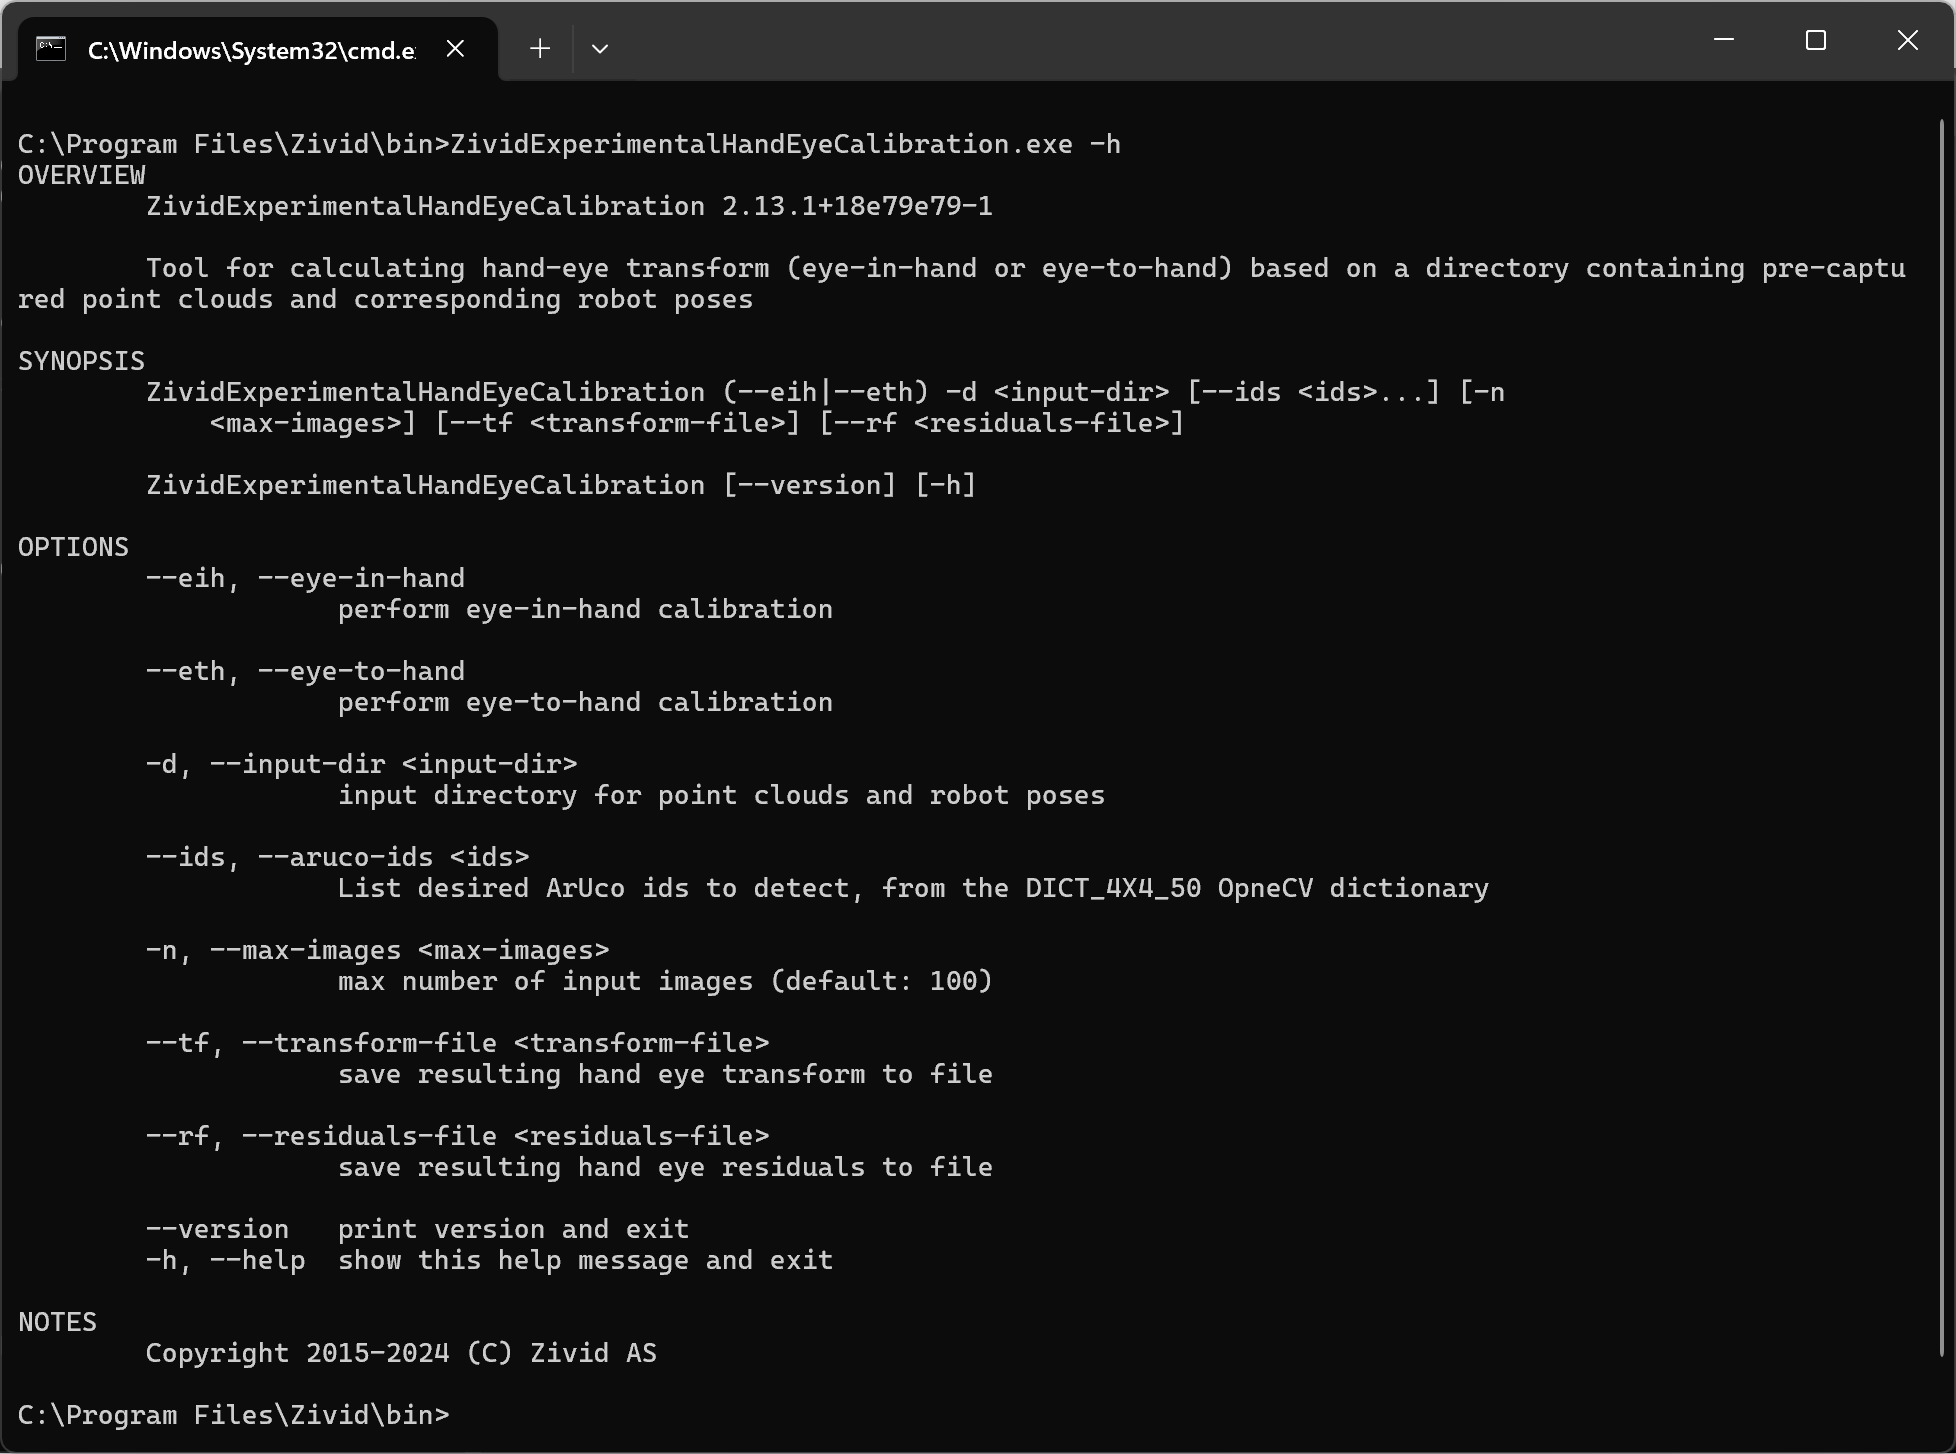
ZividExperimentalHandEyeCalibration.exe 의 입력 및 출력입니다. CLI 도구에 다음 명령을 입력하여 표시할 수 있습니다.
ZividExperimentalHandEyeCalibration.exe -h

ZividExperimentalHandEyeCalibration.exe CLI 도구를 실행하려면 다음을 지정해야 합니다.
칼리브레이션 유형(eye-in-hand or eye-to-hand)
데이터 세트(.zdf 파일 및 .yaml 로봇 포즈)가 포함된 디렉토리 경로
결과 핸드-아이 칼리브레이션 및 잔차를 저장할 위치를 지정하는 것도 편리합니다. 아래 예를 참조하십시오.
SET dataset=C:\Users\Public\Documents\Directory_where_dataset_is_located
ZividExperimentalHandEyeCalibration.exe --eth -d "%dataset%" --tf "%dataset%\transform.yaml" --rf "%dataset%\residuals.yaml"
칼리브레이션 유형(eye-in-hand or eye-to-hand)
데이터 세트(.zdf 파일 및 .yaml 로봇 포즈)가 포함된 디렉토리 경로
사용된 ArUco 마커의 ID
결과 핸드-아이 칼리브레이션 및 잔차를 저장할 위치를 지정하는 것도 편리합니다. 아래 예를 참조하십시오.
SET dataset=C:\Users\Public\Documents\Directory_where_dataset_is_located
ZividExperimentalHandEyeCalibration.exe --eth -d "%dataset%" --tf "%dataset%\transform.yaml" --rf "%dataset%\residuals.yaml" --ids 1, 2, 3
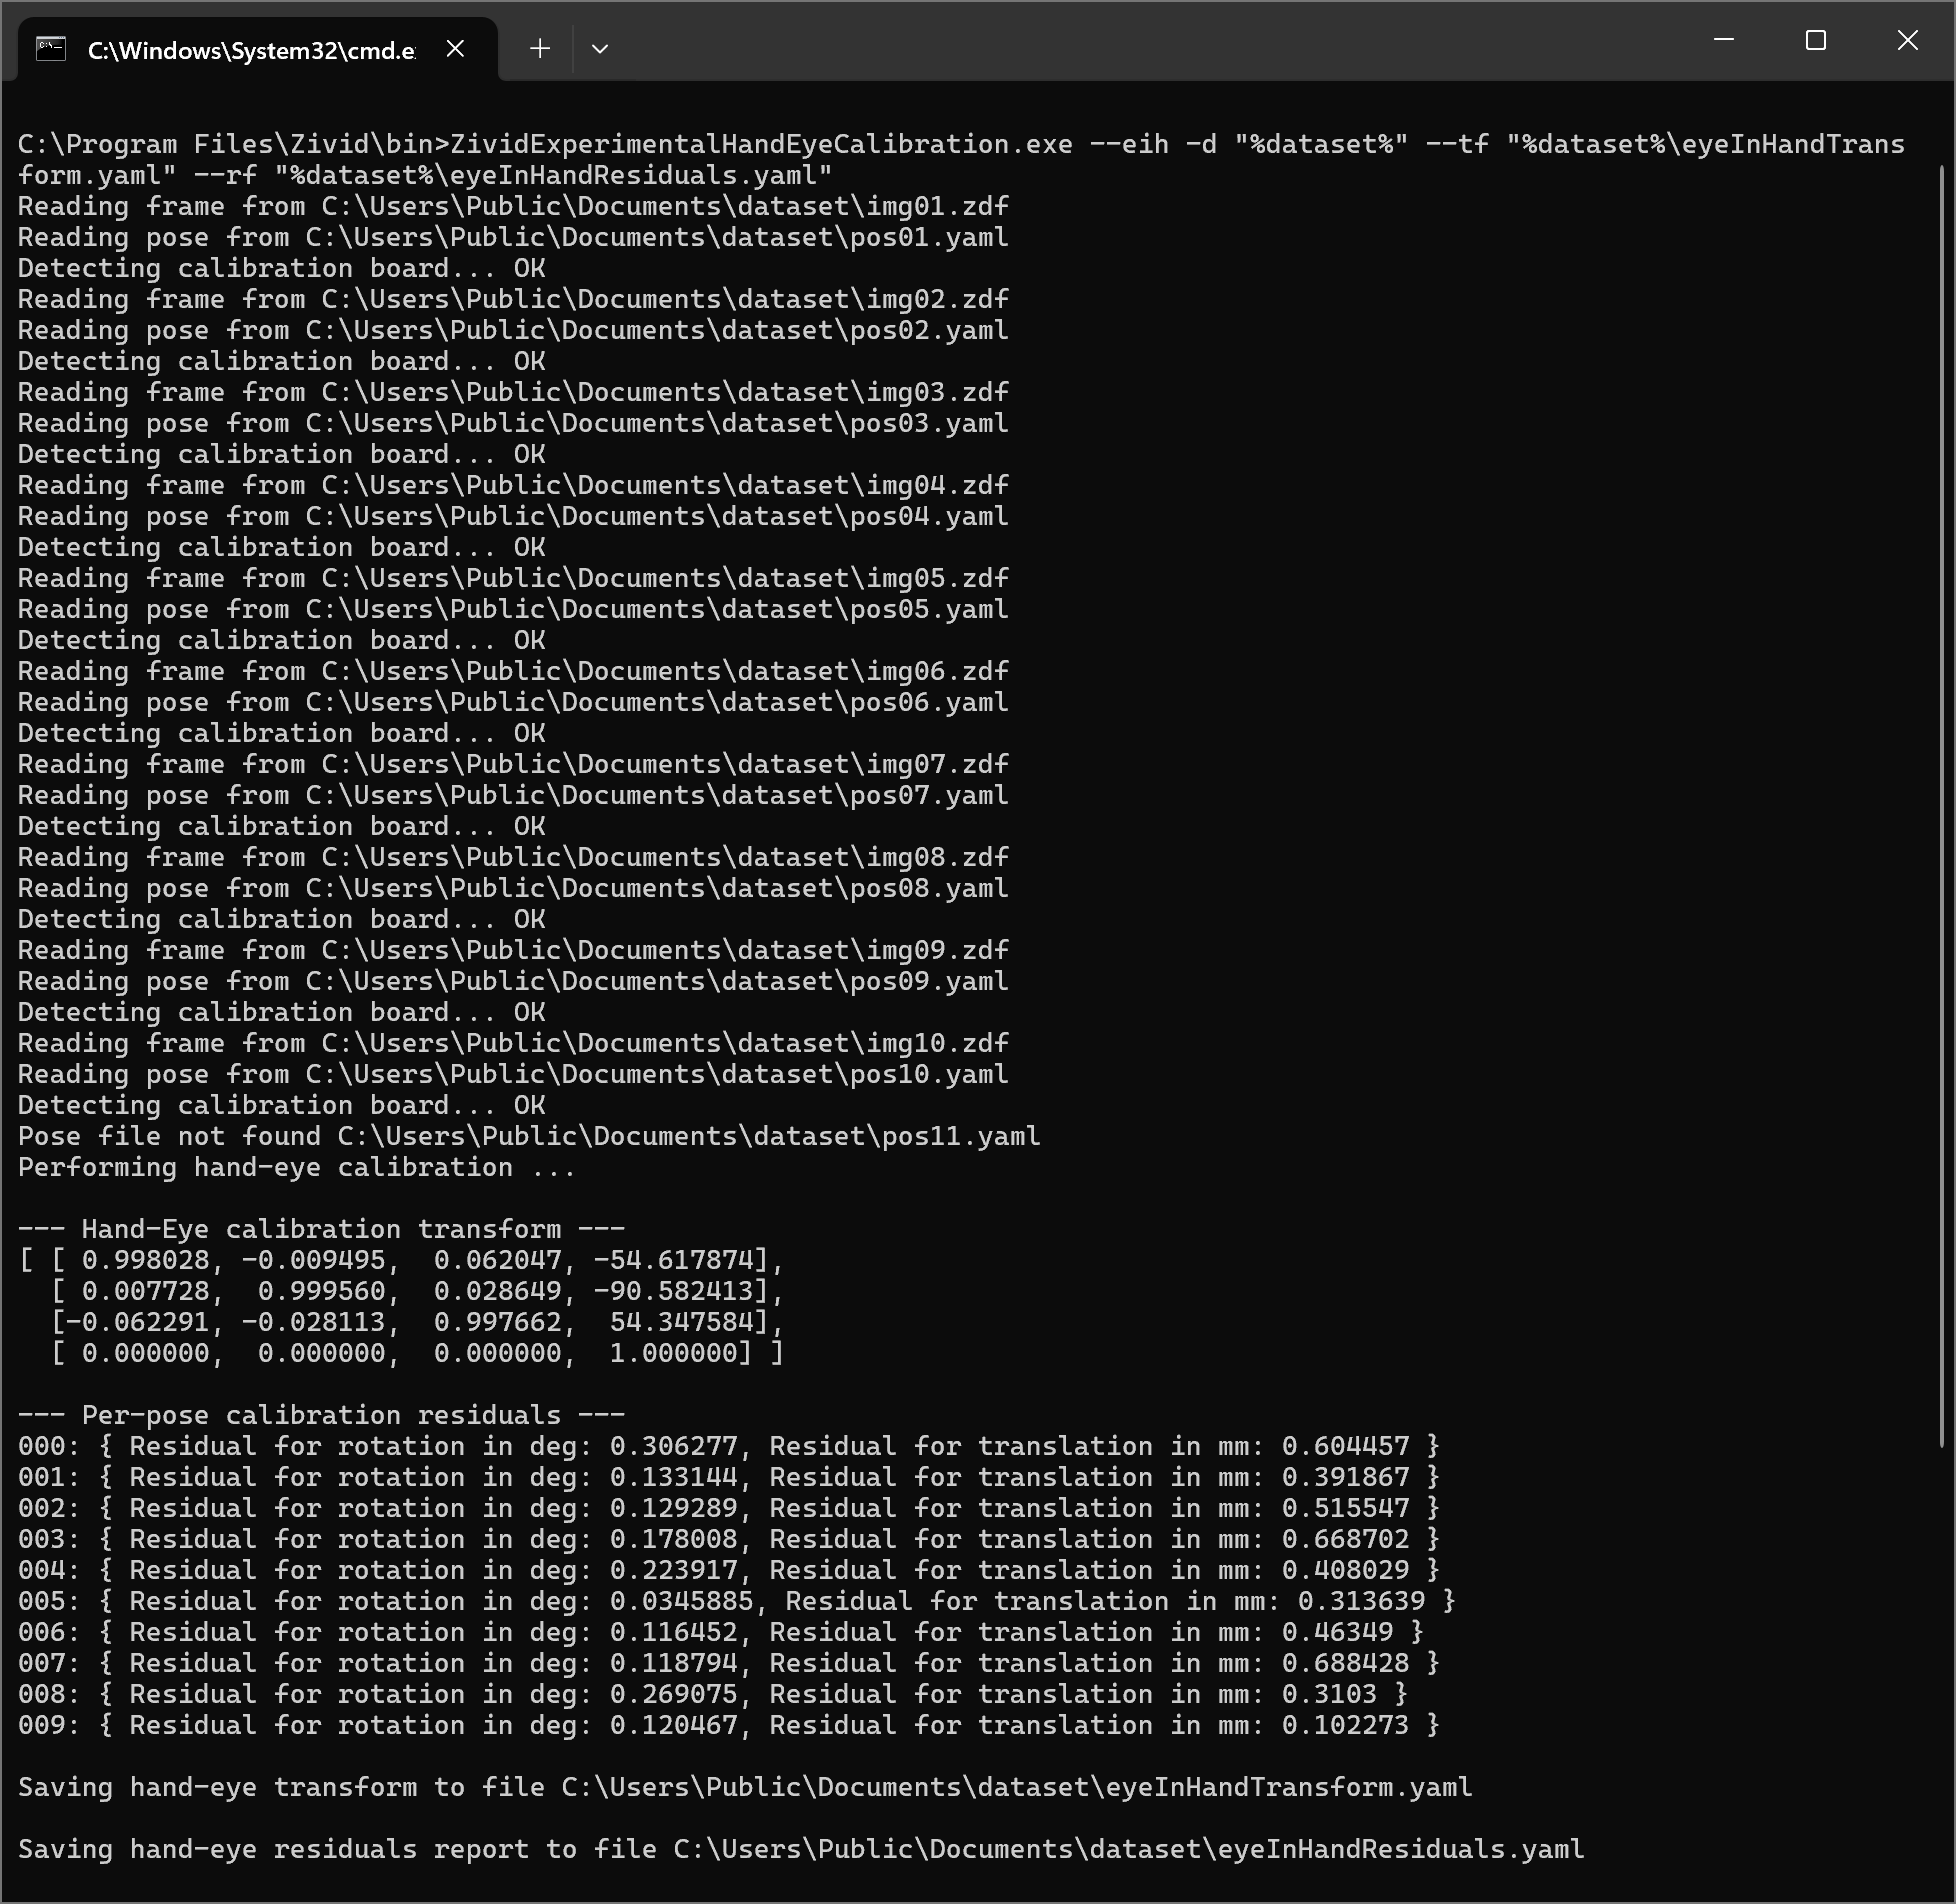
실행 중, 알고리즘은 보정 객체를 감지할 수 있으면 (“OK”) 를, 감지할 수 없으면 (“FAILED”) 를 출력합니다. 감지 단계 후, 결과적인 핸드-아이 변환(4x4 동차 변환 행렬)을 출력합니다. 마지막으로, 모든 포즈에 대해 Hand-Eye Calibration Residuals 출력합니다. 아래 출력 예시를 참조하세요.

생성된 동차 변환 행렬(eyeInHandTransform.yaml)을 사용하여 피킹 포인트 좌표 또는 전체 포인트 클라우드를 카메라 프레임에서 로봇 베이스 프레임으로 변환할 수 있습니다. 자세한 내용은 How To Use The Result Of Hand-Eye Calibration 를 참조하세요.