Dealing with Highlights and Shiny Objects
Introduction
이 글에서는 매우 반짝이는 물체의 포인트 클라우드를 캡처할 때 발생할 수 있는 과제와 이를 해결하는 방법에 대해 논의합니다.
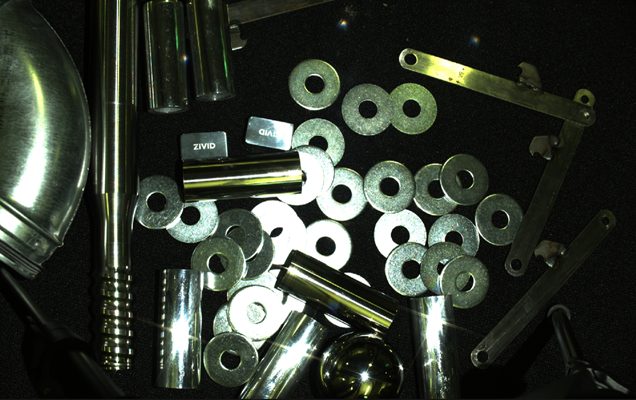
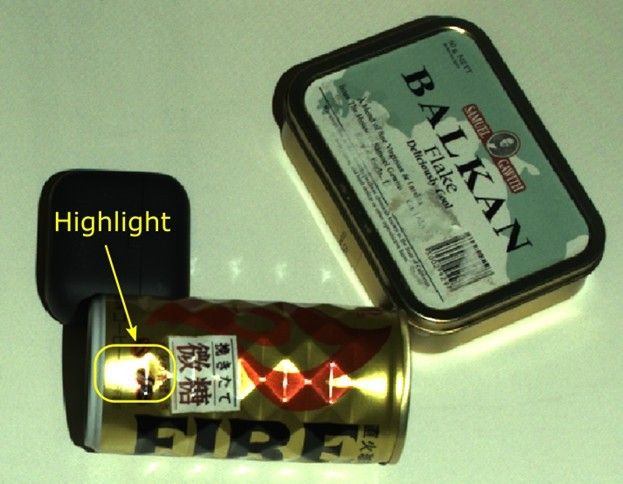
반사율이 높은 물체가 있는 경우, 해당 물체의 특정 영역에서 Zivid 카메라의 프로젝터가 이미징 센서로 직접 반사될 가능성이 있습니다. 물체가 매우 반사율이 높으면 반사되는 빛의 양이 이미지의 다른 광원보다 수천 배 강해질 수 있습니다. 이로 인해 픽셀이 과포화될 가능성이 높습니다. 이러한 영역의 예는 아래 두 이미지에서 확인할 수 있습니다.
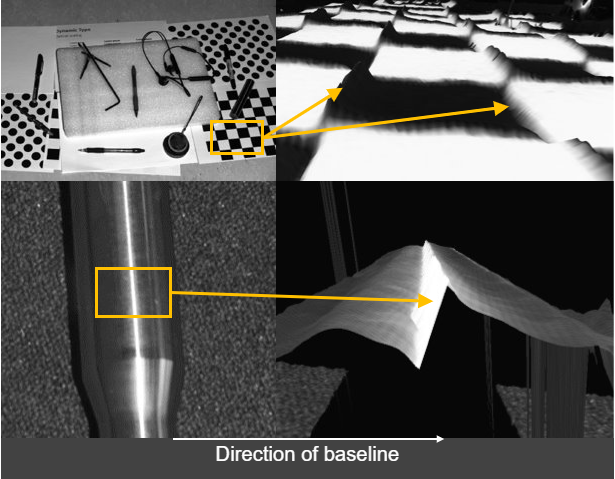
과포화 픽셀은 종종 주변 픽셀에 빛을 “bleed” 합니다.(영향을 미칩니다.) 이 렌즈 흐림 현상으로 인해 Contrast Distortion Artifact 이 발생할 수 있습니다. 이 효과는 검은색에서 흰색으로의 전환되는 영역과 반짝이는 실린더에서 확인할 수 있습니다. 아래 이미지를 참조하십시오.
Try the right Presets
하이라이트와 고도로 반사되는 물체를 처리하는 데 가장 적합한 Presets은 Manufacturing Specular and Semi-Specular Presets 입니다.
Try switching to Stripe Engine
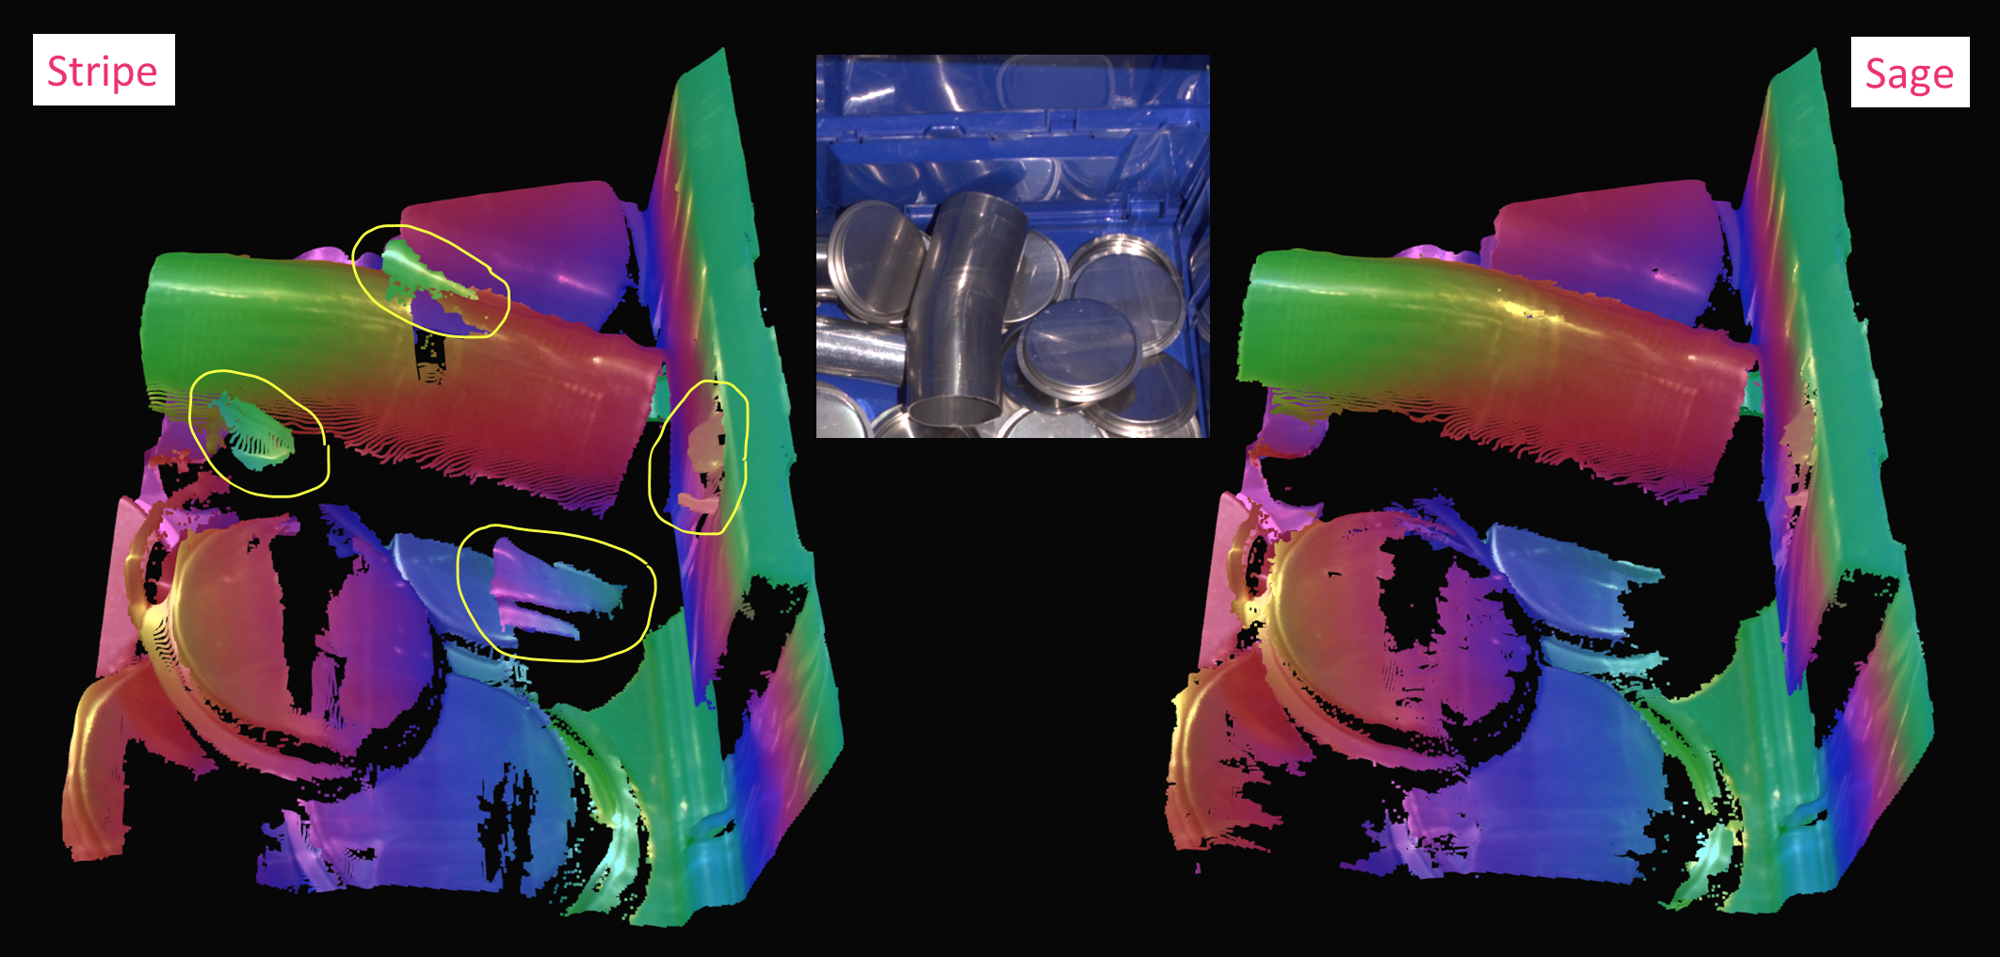
Stripe Engine을 사용하면 반짝이는 물체가 있는 장면에서 포인트 클라우드 품질을 크게 향상시킬 수 있습니다. Stripe Engine은 높은 다이내믹 레인지를 제공하여 하이라이트와 상호 반사를 잘 견뎌냅니다.

Sage Engine으로 전환해보세요
참고
Sage Engine은 Zivid 2+ MR130, MR60, LR110에서만 사용할 수 있습니다.
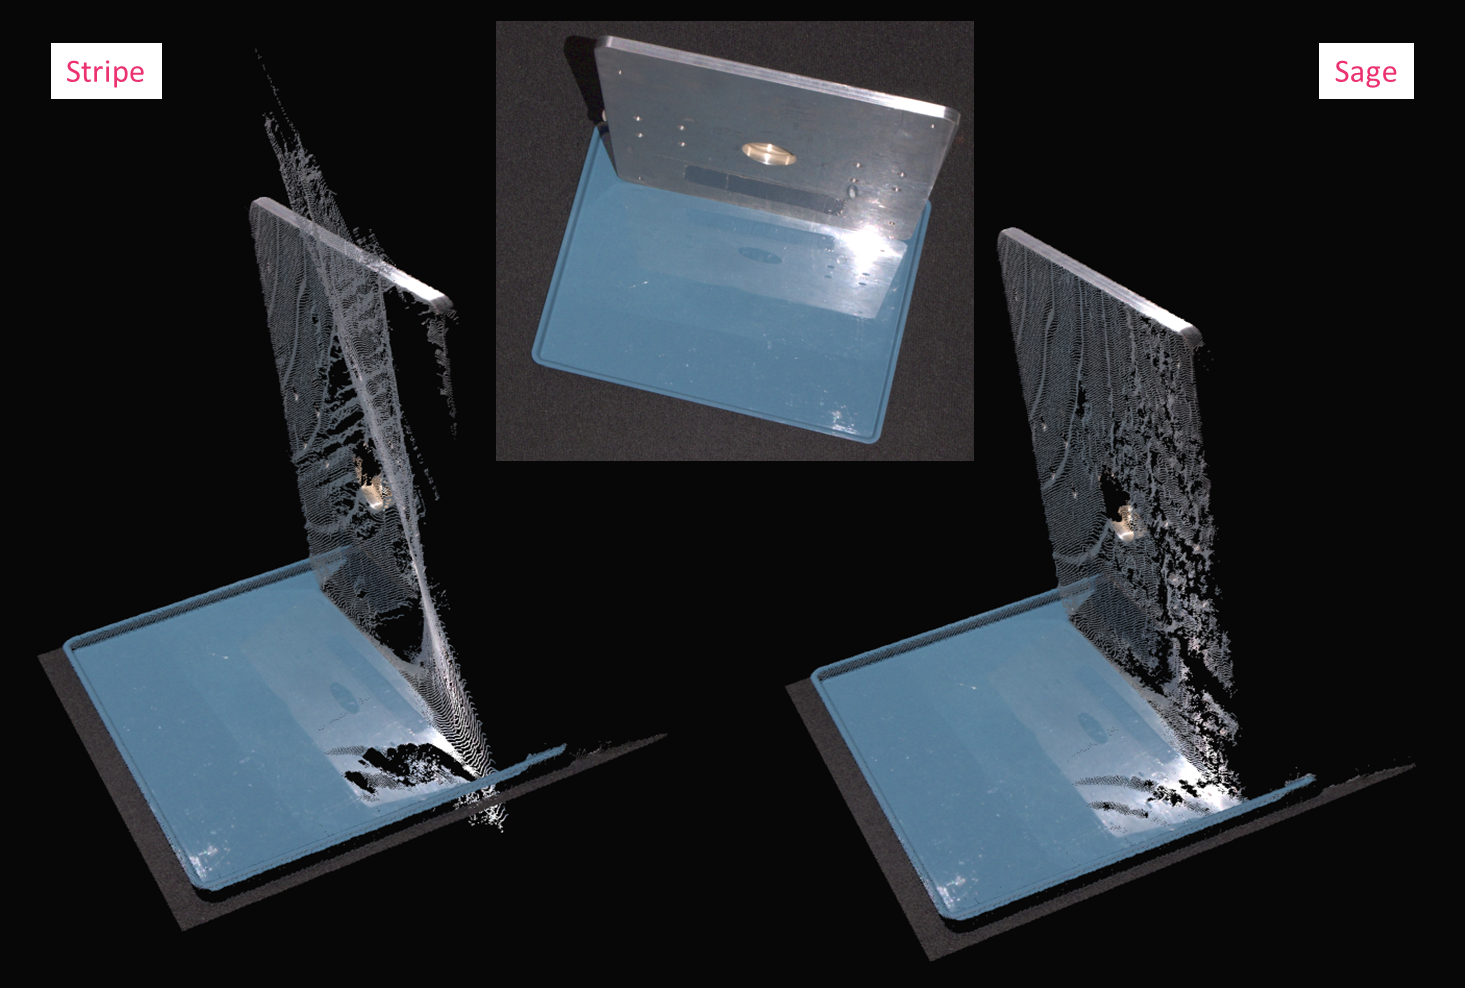
Sage 엔진은 수직 반사를 처리하는 데 가장 적합합니다. 일반적인 예로는 빈 벽, 주변 물체, 그리고 90도 각도로 마주 보는 두 개의 평평한 표면에서 반사되는 반사가 있습니다.
Omni Engine으로 바꿔보십시오.
참고
Omni Engine은 Zivid 2+에서만 사용할 수 있습니다.
The Omni Engine 은 Stripe Engine보다 더 높은 동적 범위와 더 큰 패턴 세트를 가지고 있어 Stripe Engine에서 부족했던 포인트 클라우드 품질을 향상시킵니다. 상호 반사 아티팩트 또는 누락된 데이터를 제공하는 장면에서 개선되지만 가장자리와 더 미세한 세부 사항을 어느 정도 부드럽게 할 수도 있습니다.
Maximize Dynamic Range
반짝이는 물체의 좋은 포인트 클라우드를 얻으려면 하이라이트와 로우라이트를 모두 캡처할 수 있어야 합니다. Zivid 3D 카메라는 다이나믹 레인지가 넓어 어둡거나 밝은 물체를 모두 촬영할 수 있습니다.
매우 까다로운 장면에는 일반적으로 3개의 HDR 획득이 필요합니다.
1 to cover the strongest highlights (very low exposure).
1 to cover most of the scene (medium exposure).
1 to cover the darkest regions (very high exposure).
Getting the Right Exposure for Good Point Clouds 을 따라 수집 설정을 최적화하세요.
Adjust Filters
필터는 포인트 클라우드의 품질을 향상시키는 강력한 도구입니다. Zivid Studio에서 필터를 조정하는 방법은 Adjusting Filters 튜토리얼을 참조하세요. 특히 다음 필터에 주의하세요.
Cluster Filter
Noise Filter - Repair and Suppression
Reflection Filter - Global Mode
Deal with Contrast Distortion
Contrast Distortion을 처리하는 방법은 크게 두 가지가 있습니다. 카메라의 다이내믹 레인지를 최대화하여 효과를 줄이고 전략적인 영역에 카메라를 배치할 수 있습니다. 그리고나서 왜곡의 영향을 받은 포인트들을 Contrast Distortion Filter 를 사용하여 수정/제거할 수 있습니다.
Position the camera correctly
먼저, 카메라가 초점 거리 또는 그 근처에 있는지 확인하세요. 카메라 모델명의 숫자는 초점 거리를 센티미터 단위로 나타냅니다. 예를 들어, Zivid 2+ MR130의 초점 거리는 130cm입니다.
Rotate and align objects in the scene
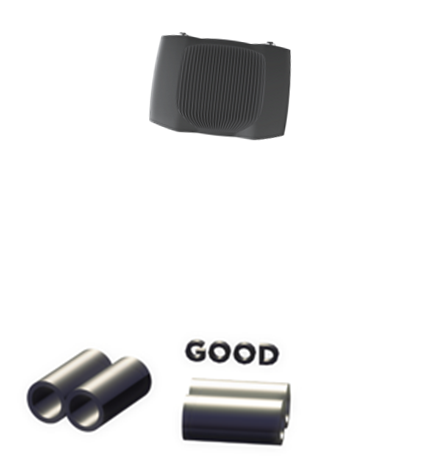
대비 왜곡은 3D 센서의 x축에서 발생하는 효과이며, 애플리케이션에서 카메라 y축의 문제 영역을 x축으로 회전할 수 있도록 설정하면 이 현상을 크게 완화할 수 있습니다. 예를 들어, 반짝이는 원통을 90° 회전하면 원통을 따라 과다 노출된 영역이 아래 그림과 같이 카메라의 기준선을 따라 이동합니다.
Match the background’s reflectivity to the specific object’s reflectivity
경험상 좋은 규칙은 장면(Scene)의 배경을 이미징하려는 개체와 유사한 밝기 또는 색상을 사용하는 것입니다.
밝은 물체의 경우 밝은 배경(예: 흰색 Lambertian)을 사용하십시오.
어두운 물체의 경우 어두운 배경(예: 대부분의 컨베이어 벨트에서 사용되는 검은색 고무)을 사용하십시오.
대부분의 색상이 있고 광택이 없는 개체의 경우 유사한 반사도의 배경을 사용합니다(예: 바나나의 경우 회색 또는 노란색 배경 사용).
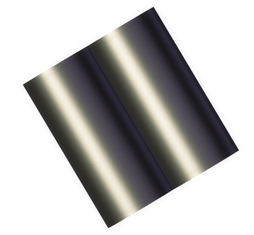
반짝이는 금속 물체, 특히 원통형, 원추형 및 구형 물체의 경우 검은색 고무와 같은 어두운 흡수 배경을 사용하십시오. 이는 대상 조명이 일반적으로 보이는 가장자리 근처의 개체에서 반사되어 매우 어둡게 표시되기 때문입니다(아래 이미지 참조). 동시에 주변 영역의 빛이 실린더 가장자리에 반사될 수 있습니다.
Tune Aperture and Contrast Distortion filter
조리개 설정이 잘못되면 초점이 흐려져 대비 왜곡 효과가 더 심해질 수 있습니다.
대비 왜곡 필터는 Contrast Distortion 으로 인해 발생하는 표면 높이 아티팩트(고대비 영역에서 초점 흐림 및 흐림 현상)를 보정 및/또는 제거합니다. 이를 통해 평면과 원통에서 특히 관찰 가능한 객체의 더욱 사실적인 기하 구조를 얻을 수 있습니다.
조리개 값을 적절히 설정하면 대비 왜곡 효과를 제거하거나 줄일 수 있으며, 대비 왜곡 필터를 더 쉽게 조정할 수 있습니다. tune Aperture and Contrast Distortion Filter 을 알아보세요.
참고
Zivid 3 에는 조절 가능한 조리개가 없습니다. 조리개 조정에 대한 다음 정보는 Zivid 2 및 Zivid 2+ 카메라에만 적용됩니다.
Example
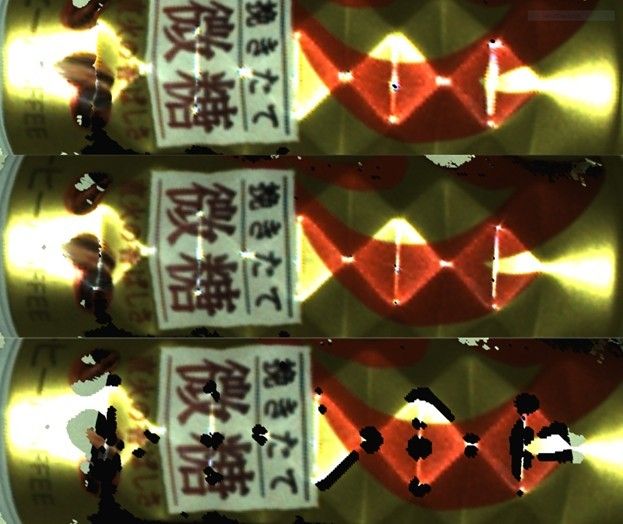
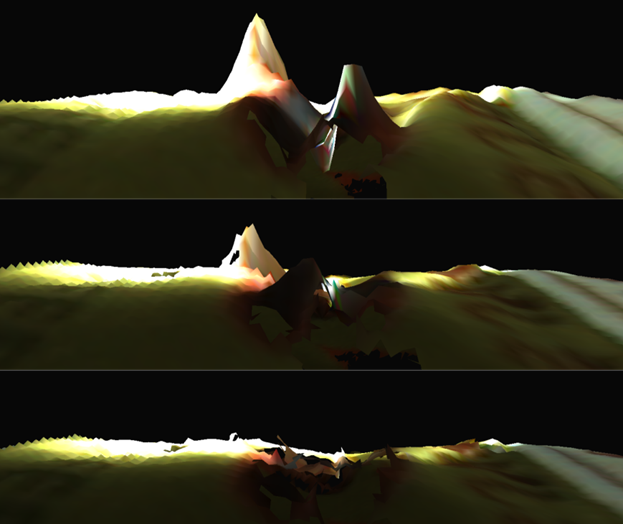
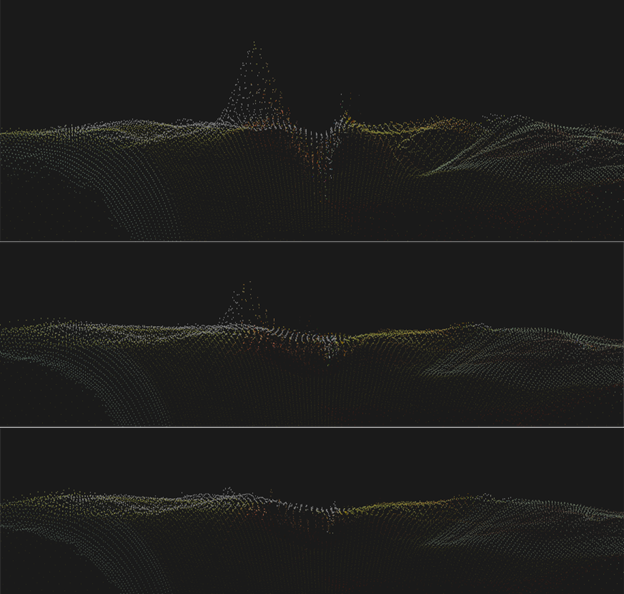
이제 아래 장면에서 Contrast Distortion 필터를 사용하여 하이라이트를 처리하는 방법을 보여줍니다.
아래 세 이미지 중 맨 위는 Contrast Distortion 필터를 사용하지 않은 포인트 클라우드 메시를 나타냅니다. 가운데 이미지는 보정 모드에서만 필터를 사용하고 아래쪽 필터는 제거와 보정 모드 모두 함께 사용합니다. 수정만으로도 아티팩트의 크기가 줄어듭니다. 필터의 제거 기능은 아티팩트를 완전히 제거하지만 이미지에서 강한 강도 전환이 있는 장면의 일부 다른 지점도 제거합니다.
Further reading
다음 기사에서 우리는 Dealing with Strong Ambient Light 에 대해 알아보겠습니다.