优化彩色图像
介绍
本教程旨在帮助您优化Zivid相机捕获的彩色图像的质量。我们将首先介绍如何使用获得良好颜色信息的基本工具:调整采集和颜色设置。然后我们将解决最常见的挑战(HDR中的光晕/过度饱和现象和颜色不一致性),并就如何克服这些问题提供我们的建议。
小技巧
与 Zivid 2 相机相比,Zivid 3 和 Zivid 2+ 相机具有更高的分辨率和改进的彩色图像算法。因此,Zivid 3 和 Zivid 2+ 相机能够生成更高质量的 2D 彩色图像。
调整采集设置
彩色图像的质量取决于 Acquisition Settings(采集设置)- 2D 。应调整采集参数,确保感兴趣区域的像素值远离噪声基底(noise floor),同时避免图像中出现像素饱和,尤其是在感兴趣区域。一个实用的经验法则是:让感兴趣区域的像素值尽可能高,但不要达到饱和状态,即 RGB 值应接近但不等于 255。这样可能会导致部分非关键区域像素饱和,但关键区域仍能获得良好曝光。在此情况下,请确保您的图像处理算法能够容忍一定程度的饱和。如需了解光强度如何转换为像素值,请参阅 相机捕获中可检测到的光强度 。
为了优化彩色图像的采集设置,您可以使用 Zivid Studio 中的 2D 视图和直方图,如下图所示。将鼠标光标悬停在感兴趣区域(图像中的红色十字)上方,即可在左下角显示像素的 RGB 值。
该像素的 RGB 值将在直方图视图中与其他具有相似 RGB 值的像素归入同一区间。如上图所示,像素 (783, 526) 的 RGB 值为:
红色值为 224
绿色值为 238
蓝色值为 215
这些RGB值表明该像素位于直方图的右上半部分,因此被认为是一个良好的像素。然而,我们也可以从直方图中看出,图像中有很多饱和像素(RGB值为255),这表明某些像素过曝了。
小心
要使用直方图作为调整采集设置的工具,您必须每次仅评估单次采集,并将 Color Mode 设置为 UseFirstAcquisition 或 Automatic 。此外,您还需将 Gamma 和 Color Balance 增益设置为 1.0。
这是因为默认的 Color Mode 为 Automatic ,这与使用不同采集设置的多采集HDR图像的 ToneMapping 设置相同。色调映射会修改像素值。 Gamma 和 Color Balance 设置也会改变像素值。
在调整采集设置以获得良好曝光的图像时,请考虑不同的采集设置会如何影响彩色图像的质量。
Exposure Time(曝光时间)和 Projector Brightness(投影仪亮度)
曝光时间和投影仪亮度不会影响彩色图像质量。我们建议使用投影仪的最大亮度值,这样可以缩短曝光时间,从而加快 2D 图像采集速度。前提是您的图像没有出现饱和现象,如上所述。
Aperture(光圈)
备注
Zivid 3 没有可调节光圈。以下关于光圈调节的信息仅适用于 Zivid 2 和 Zivid 2+ 相机。
正确的光圈值(f-number)对于避免彩色图像模糊至关重要;参见下图。一个实用的经验法则是:如果工作距离处于最佳范围内,建议使用较低的 f 值(最高至 4.0);如果相机位于最佳范围之外,则可尝试使用更高的 f 值,例如 5.6 或 8.0。如需更详细的说明和指导,请参阅: 焦深 和 Depth of Focus Calculator 。
 使用合适光圈设置的单次采集
 使用了不合适光圈设置的单次采集
备注
上面的图像是在最佳成像距离之外拍摄的,以强调大光圈值时的失焦效果,而在最佳范围内拍摄时,图像不会如此模糊。
Gain(增益)
我们建议使用较低的增益值,例如1-2,因为高增益值会增加图像噪声(粒度)水平,从而降低2D图像质量;见下图。
增益设置为1的单次采集捕获
 增益设置为16的单次采集捕获
调整颜色设置
除了采集设置外,彩色图像质量还取决于伽玛值(Gamma)、色彩平衡( Color Balance)和色彩模式(Color Mode )设置。本节旨在深入探讨如何优化这些设置,以获得理想的彩色图像色彩质量。
Gamma
相机对亮度的编码与人眼不同。人眼侧重于光谱的较暗端,相机则以线性比例编码亮度。为了补偿这种影响,gamma校正被应用于使图像变暗或变亮,使其更接近人类的感知。
Gamma值越低,场景会显得越亮。如果增加Gamma值,则场景会显得更暗。
 使用 Gamma 设置为 0.6 拍摄的图像
 使用 Gamma 设置为 1.3 拍摄的图像
是否需要gamma校正来优化图像质量用于机器视觉算法是有疑问的。尽管如此,它仍然可以帮助我们评估彩色图像质量的某些方面,例如焦点和颗粒/噪声水平。
有关示例的实现,请查看 Gamma校正。该教程展示了如何使用可配置的gamma校正捕获2D图像。
Color Balance(色彩平衡)
Zivid 3 以及 Zivid 2+ MR130、MR60 和 LR110 相机内置了自动白平衡功能,因此强烈的或非白色的环境光对彩色图像中的 RGB 值影响很小。这使得在这些相机型号上无需额外运行白平衡算法。
下图显示了在不同环境光条件下使用 Zivid 2+ MR130 拍摄的二维彩色图像的细节。
300 LUX |
1000 LUX |
2000 LUX |
|
3200K |
|
||
5000K |
|||
6500K |
|||
如果您使用的是 Zivid 3 或 Zivid 2+ MR130、MR60、LR110 相机,可以跳过本节其余内容。本节剩余部分仅适用于其他 Zivid 相机型号。
环境光的 色温 会影响彩色图像的显示效果。存在两种默认的颜色平衡设置:使用和不使用投影仪时的设置。当投影仪亮度设置为 0 或关闭时,颜色平衡校准为 4500 K,这在工业环境中是典型的。对于高于 0 的投影仪亮度值,颜色平衡则根据投影仪光源的色温进行校准。您可以通过调整红色、绿色和蓝色通道的数字增益,使彩色图像看起来更加自然。下面,您可以对比一张图像在颜色平衡前后的效果。
备注
Zivid相机的色彩平衡增益值范围在1.0到8.0之间。
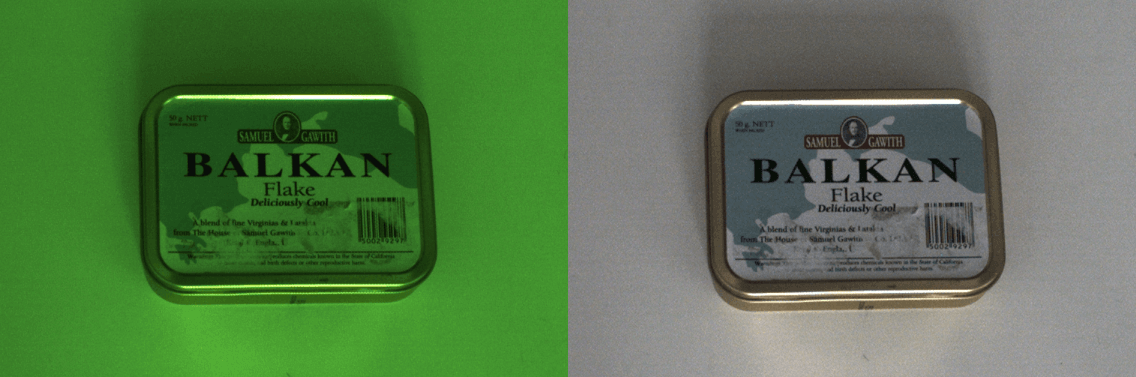
在强光且环境光变化较大的情况下,执行色彩平衡操作非常有益。关于具体实现方法,请参阅教程 调整色彩平衡 。该教程演示了如何通过循环拍摄白色表面(如一张纸、墙面等)来对 2D 图像进行白平衡校正。
Color Mode(颜色模式)
颜色模式设置控制了如何计算彩色图像。颜色模式设置可设为以下模式:
ToneMappingAutomatic
ToneMapping 功能使用了所有采集项来创建一个合并和标准化的彩色图像。对于多采集 HDR 捕获,捕获图像的动态范围通常高于 8 位彩色图像范围。色调映射将通过应用缩放因子将 HDR 颜色数据映射到 8 位颜色输出范围。色调映射还可用于单采集捕获,以将捕获的彩色图像标准化为完整的 8 位输出。使用 ToneMapping 时,如果您移动、添加或移除场景中的对象,颜色值在重复捕获中可能会不一致。
Automatic是默认设置。在进行具有不同采集设置的多次采集HDR时,
Automatic等同于ToneMapping。
对于单次采集捕获,色调映射可用于将较暗的图像变亮。
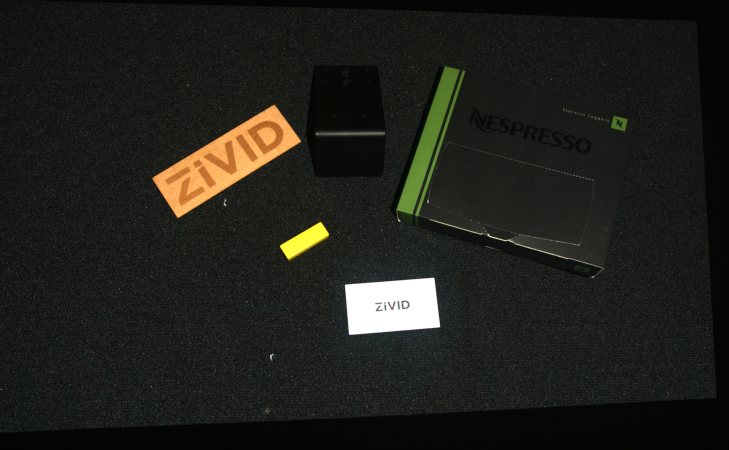
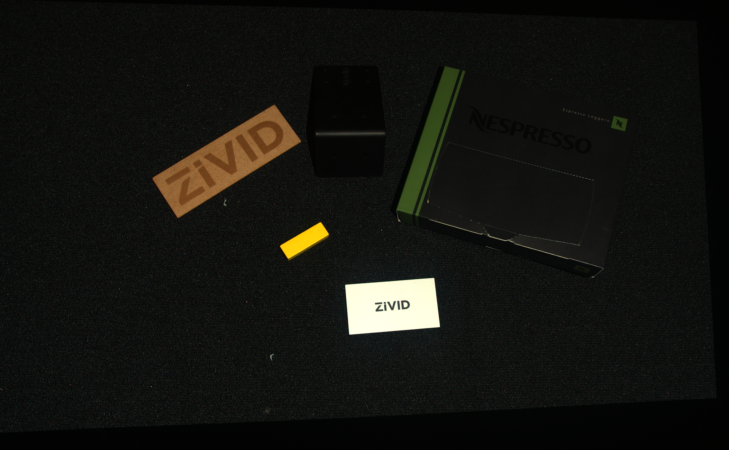
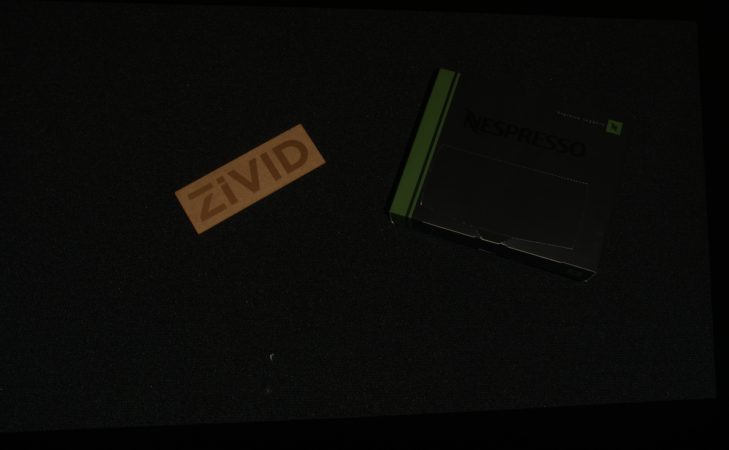 将色彩模式设置为自动(Automatic)(即无色调映射)的单次采集
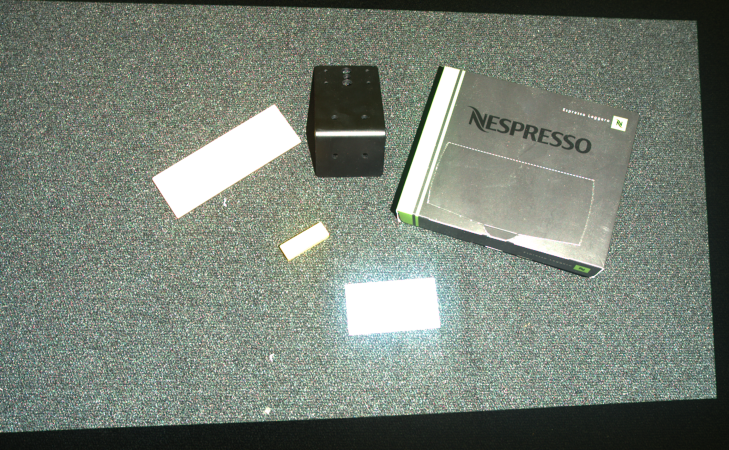
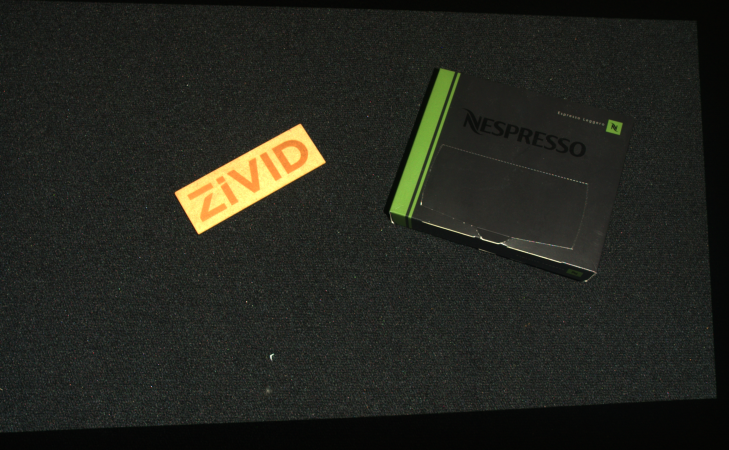 将色彩模式设置为色调映射 (ToneMapping) 的单次采集
对于多采集HDR,色调映射可用于将高动态范围颜色映射到更有限的动态输出范围。
 在色彩模式设置为自动(无色调映射)的情况下,对三次 HDR 采集中的第一次进行单次采集
 在色彩模式设置为自动(无色调映射)的情况下,对三次 HDR 采集中的第二次进行单次采集
 在色彩模式设置为自动(无色调映射)的情况下,对三次 HDR 采集中的第三次进行单次采集
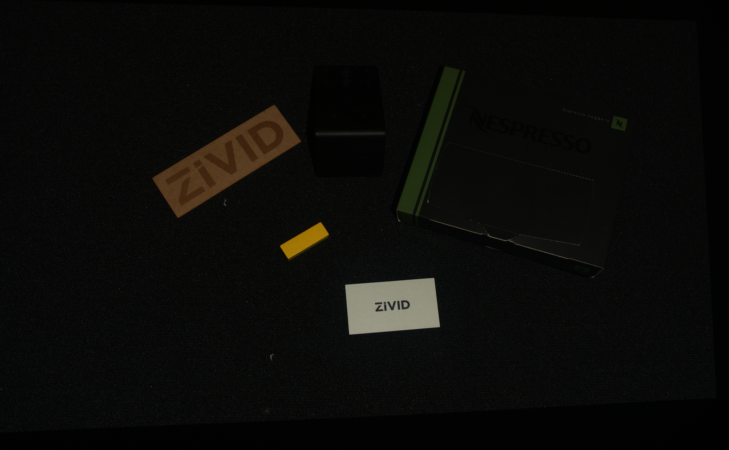
 Color Mode设置为ToneMapping或Automatic的具有三个采集项的HDR
查看如何使用Zivid SDK配置数据处理的设置,包括Gamma、Color Balance和Color Mode:

std::cout << "Configuring settings for capture:" << std::endl;
Zivid::Settings2D settings2D{
    Zivid::Settings2D::Sampling::Color::rgb,
    Zivid::Settings2D::Sampling::Pixel::all,
    Zivid::Settings2D::Sampling::Interval::Enabled::no,
    Zivid::Settings2D::Sampling::Interval::Duration{ microseconds{ 10000 } },

    Zivid::Settings2D::Processing::Color::Balance::Blue{ 1.0 },
    Zivid::Settings2D::Processing::Color::Balance::Green{ 1.0 },
    Zivid::Settings2D::Processing::Color::Balance::Red{ 1.0 },
    Zivid::Settings2D::Processing::Color::Gamma{ 1.0 },

    Zivid::Settings2D::Processing::Color::Experimental::Mode::automatic,
};
Console.WriteLine("Configuring settings for capture:");
var settings2D = new Zivid.NET.Settings2D()
{
    Sampling =
    {
        Color = Zivid.NET.Settings2D.SamplingGroup.ColorOption.Rgb,
        Pixel = Zivid.NET.Settings2D.SamplingGroup.PixelOption.All,
        Interval =
        {
            Enabled = false,
            Duration = Duration.FromMicroseconds(10000),
        },
    },
    Processing =
    {
        Color =
        {
            Balance =
            {
                Blue = 1.0,
                Green = 1.0,
                Red = 1.0,
            },
            Gamma = 1.0,
            Experimental = { Mode = Zivid.NET.Settings2D.ProcessingGroup.ColorGroup.ExperimentalGroup.ModeOption.Automatic },
        },
    },
};
print("Configuring settings for capture:")
settings_2d = zivid.Settings2D()

settings_2d.sampling.color = zivid.Settings2D.Sampling.Color.rgb
settings_2d.sampling.pixel = zivid.Settings2D.Sampling.Pixel.all
settings_2d.sampling.interval.enabled = False
settings_2d.sampling.interval.duration = timedelta(microseconds=10000)

settings_2d.processing.color.balance.red = 1.0
settings_2d.processing.color.balance.blue = 1.0
settings_2d.processing.color.balance.green = 1.0
settings_2d.processing.color.gamma = 1.0

settings_2d.processing.color.experimental.mode = zivid.Settings2D.Processing.Color.Experimental.Mode.automatic
故障排除
如果您遇到任何与彩色图像有关的问题,请查看 视觉 故障排除文章。
进一步阅读
继续阅读 处理高光和闪亮的物体 。
版本历史记录
SDK |
变更 |
|---|---|
2.17.0 |
新增对 Zivid 3 XL250 的支持。 |