工作距离和相机定位
介绍
在本教程中,我们将学习如何正确定位相机。我们将涵盖各种考虑因素,例如 FOV 和工作距离,以及它如何影响精度和空间分辨率等。有关物理安装,请查看可用的 Zivid 支架 。
找到合适的工作距离
在许多应用中,相机被固定安装以捕获具有恒定 FOV 的点云。在其它应用中,相机可以安装在机械臂上,这样可以更灵活地定位相机以捕获良好的点云。在这两种选择中,相机都需要进行定位,以便针对给定场景进行光学优化。
在确认正确的工作距离时,需要考虑以下几点:
相机需要观测的面积或体积是多少?
相机需要观测的物体尺寸是多少?
工作区域或体积所需的空间分辨率和精度是多少?
一旦我们知道这些问题的答案,我们就可以使用以下工具检查 Zivid 相机是否满足要求:
这些工具根据工厂验证程序给出理论值,但通过使用 Zivid Studio 捕获和检查点云进行手动验证也是一个选择。
小心
请注意,噪声与工作距离成正比,而空间分辨率与工作距离成反比。
如果某个相机位置可以满足工作距离,FOV,分辨率和精度的全部要求,我们可以继续进行下一步。 如果不行,我们需要考虑是否使用手臂安装,多台相机拍摄等其它方案。 在这种情况下,我们建议您联系 customersuccess@zivid.com, 我们将帮助您找到解决方案。
定位相机
将相机安装在场景正上方是最常见的,也是推荐的做法。
这种安装方式特别适合对透明物体和镜面反射率极高且特别暗的大表面进行成像。在这种情况下,将相机垂直于物体安装以最大限度地提高返回相机的信号将大有裨益。
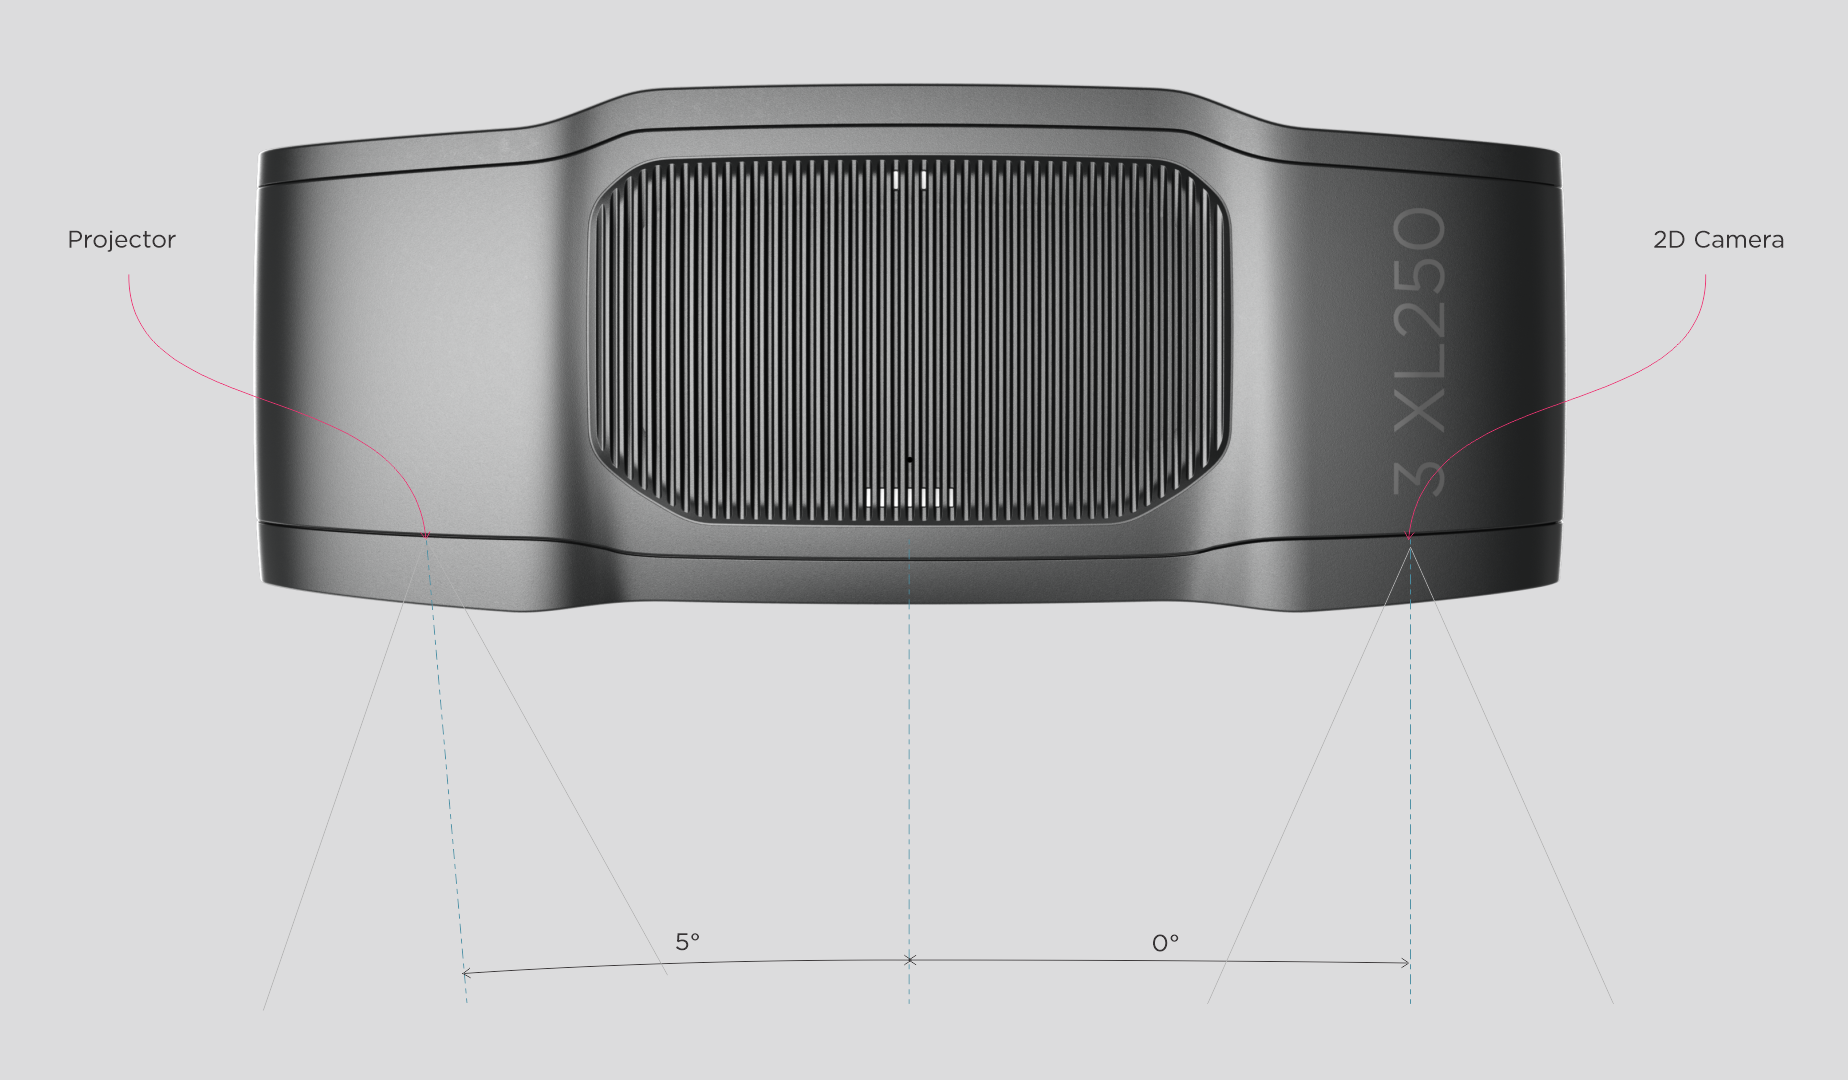
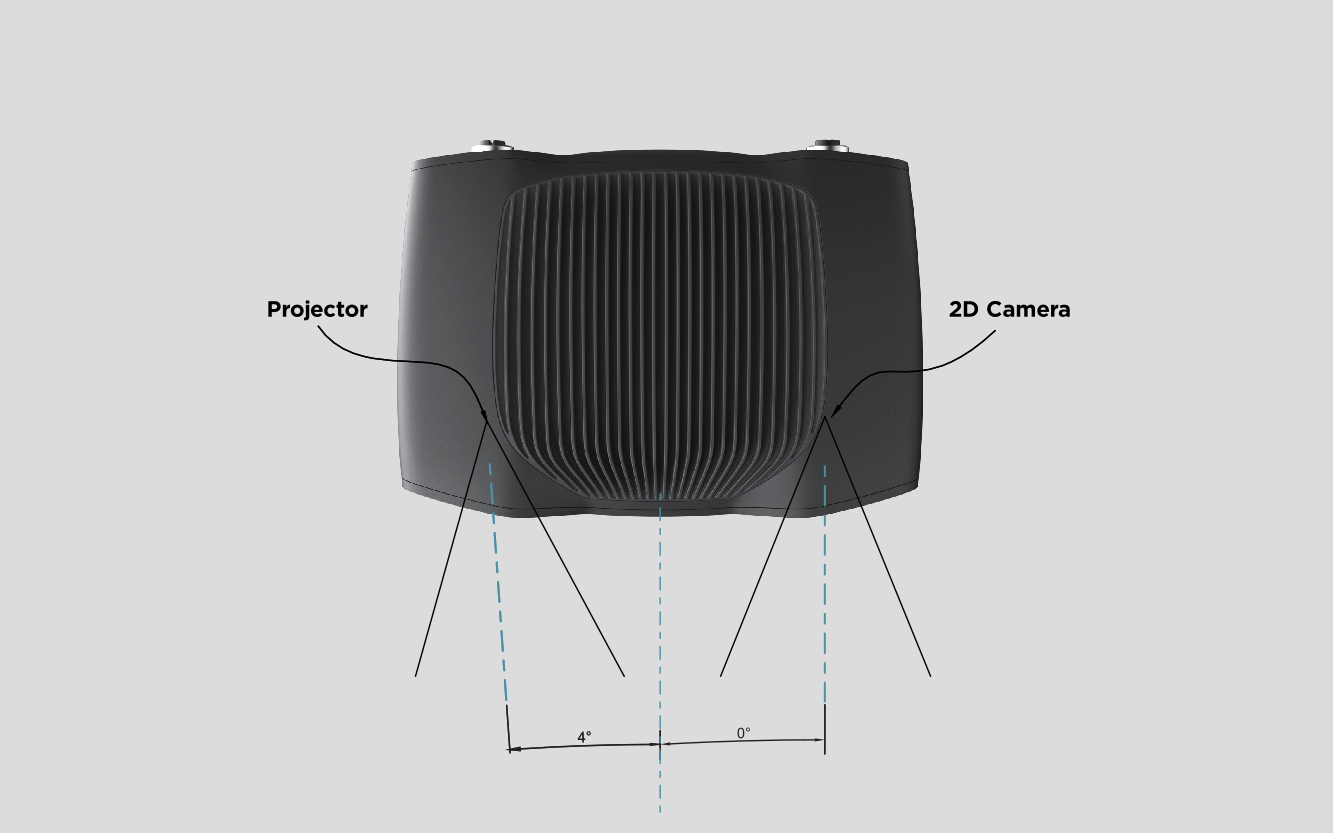
2D 相机和投影仪相对于中心轴有一个角度。如果希望相机垂直于场景,则应考虑到这一点。


在料箱抓取(bin-picking)的应用中
如果箱壁之间的相互反射非常强,您可以将 Zivid 相机投影仪放置在箱子后边缘或箱后角上方(见下图)。平移和倾斜它,使 2D 相机对准箱子的中心。投影仪光线不应落在最靠近投影仪的两面侧壁的内表面上;它们应该几乎与这两面侧壁平行。
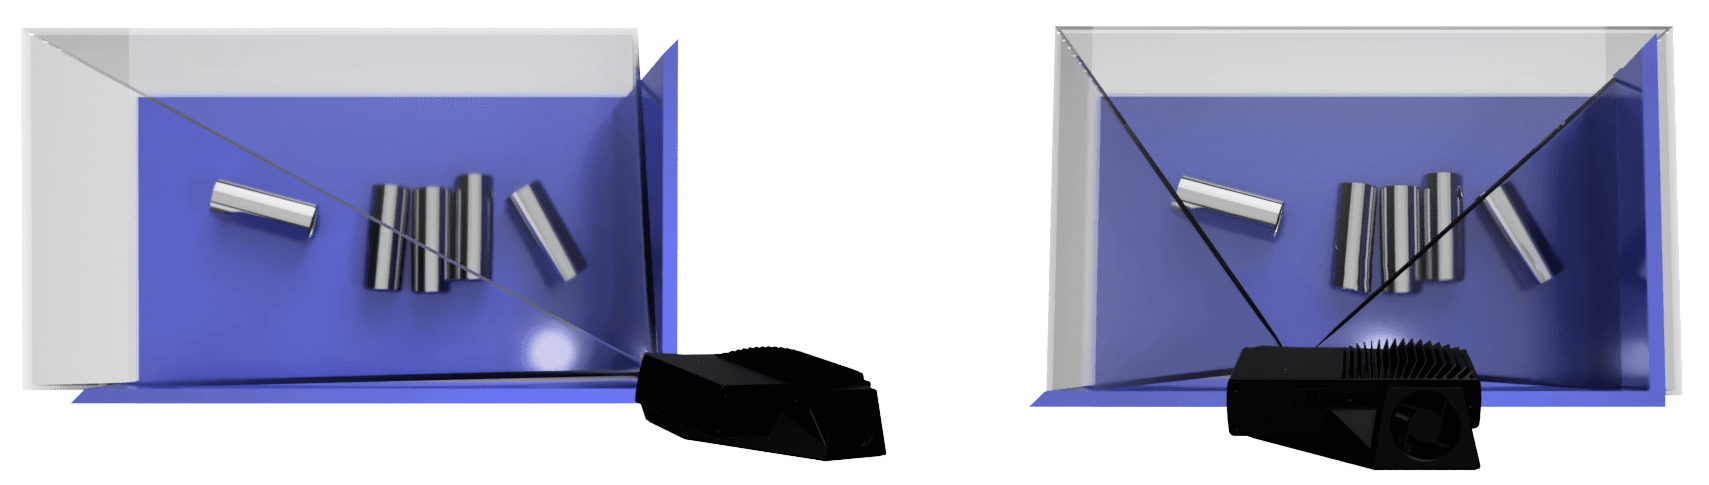
以这种方式安装相机可最大限度地减少箱壁的相互反射,同时释放场景上方的空间,以便于工具和机器人更容易接近。
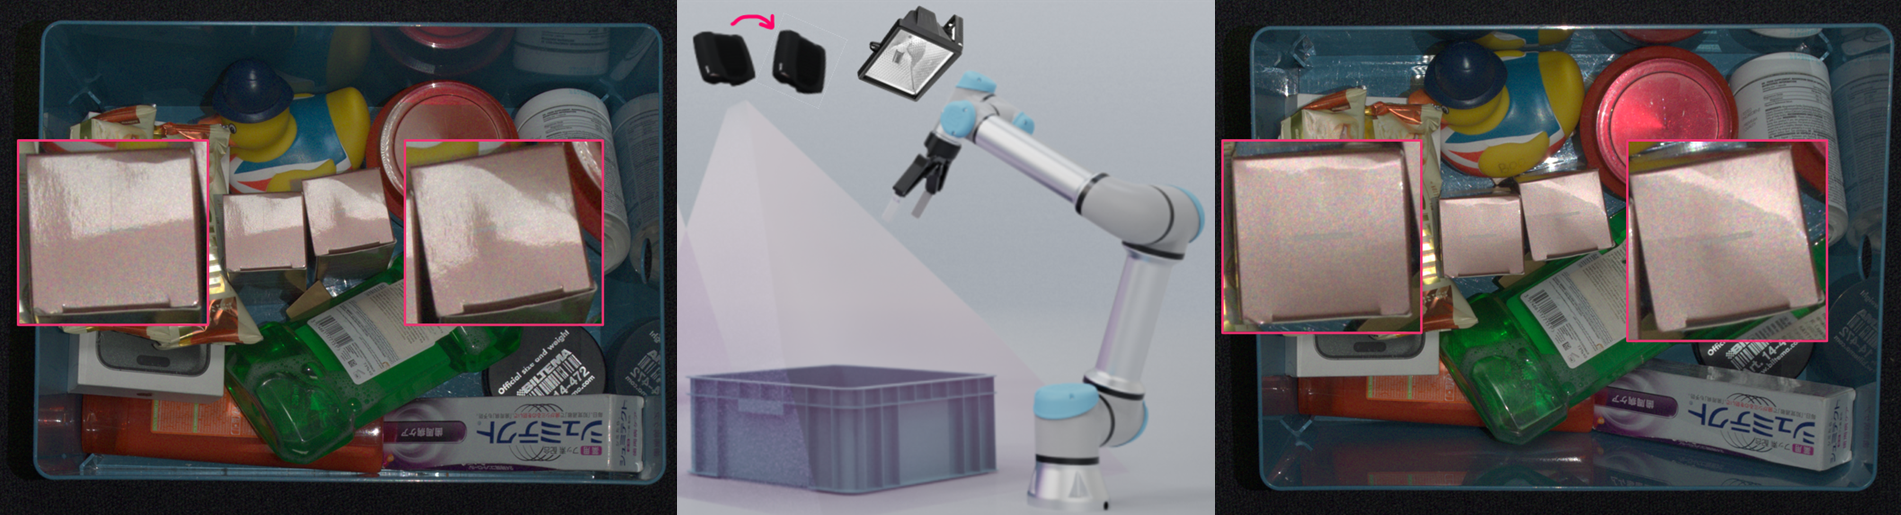
在强光环境下,光源的直接反射可能会在 2D 图像中产生高光现象。为了最大程度地减少这些高光,请尝试稍微移动或倾斜相机。
优化距离以满足高精度要求
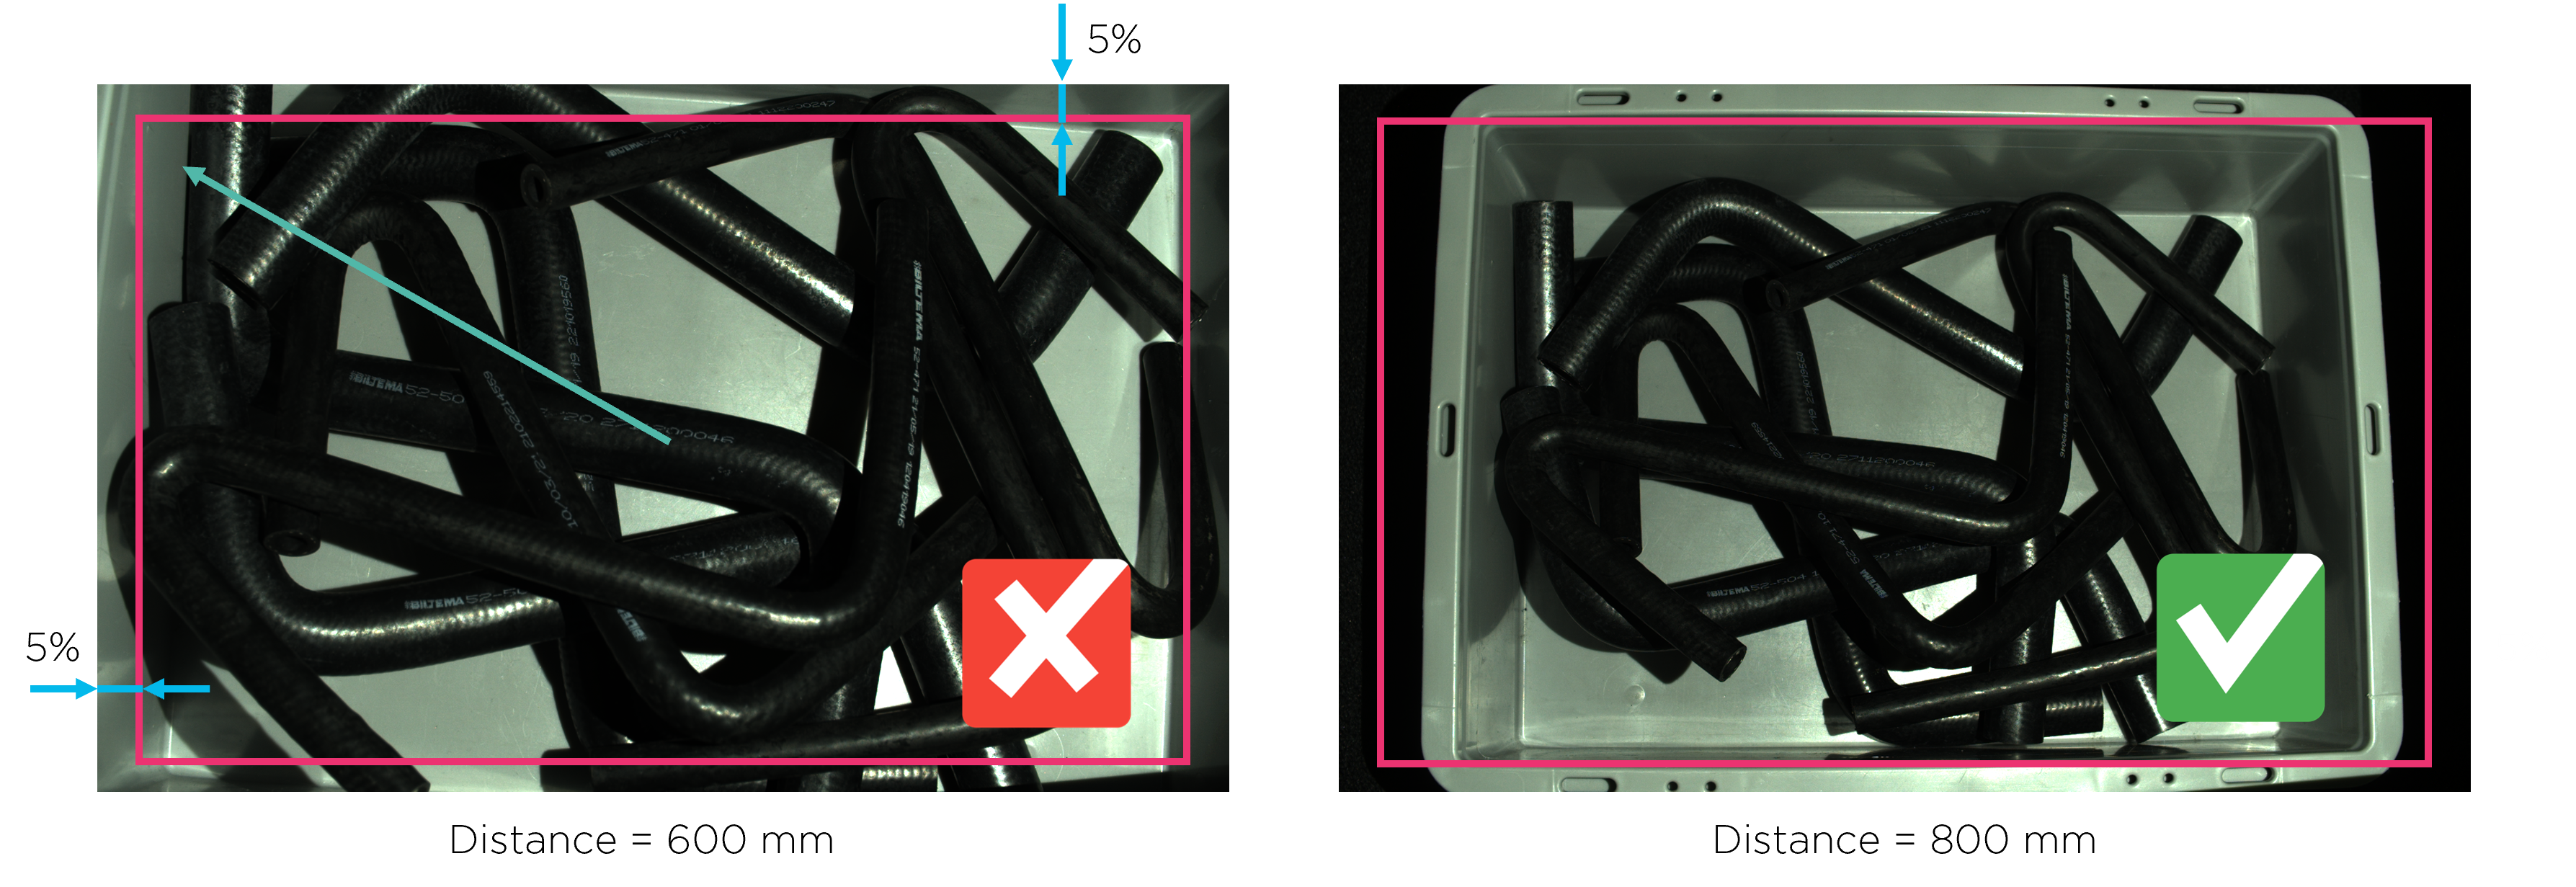
一般来说,建议将相机尽可能靠近场景。这是因为成像距离越近,精度越高。然而,精度在图像中心也最高,越靠近角落则略有下降,如下图所示。

因此,我们建议将相机安装在略大于要求的成像距离的位置,以避免使用其边缘5%的图像区域。对于大多数应用,由于安装的安全裕度,这会自然发生。
进一步阅读
确认合适的工作距离后,下一步将需要确认正确的相机设置。 我们将 在 调整合适的曝光以获取好的点云 中介绍这一点。