处理高光和闪亮的物体
介绍
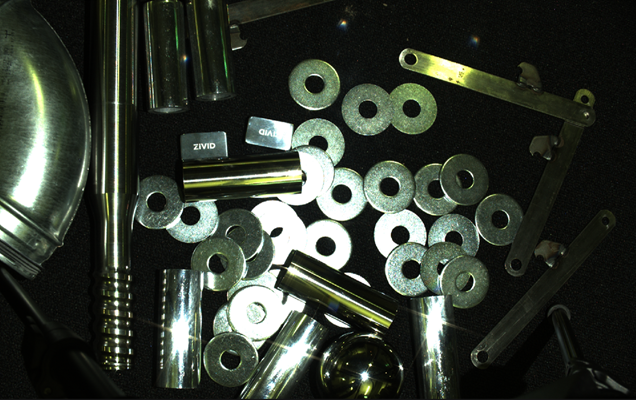
本文将讨论在捕获非常闪亮的物体的点云时可能遇到的挑战以及如何处理它。
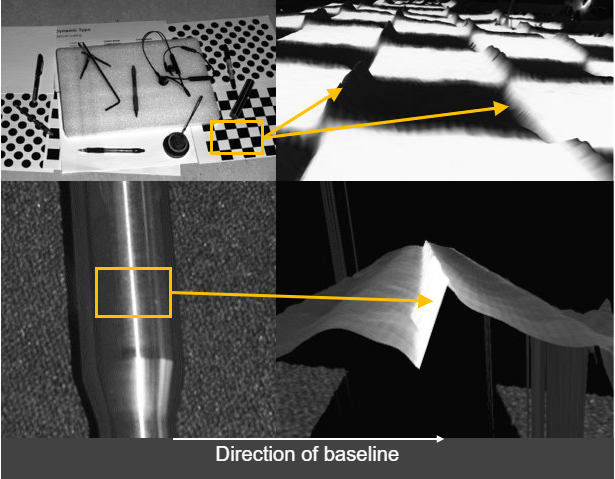
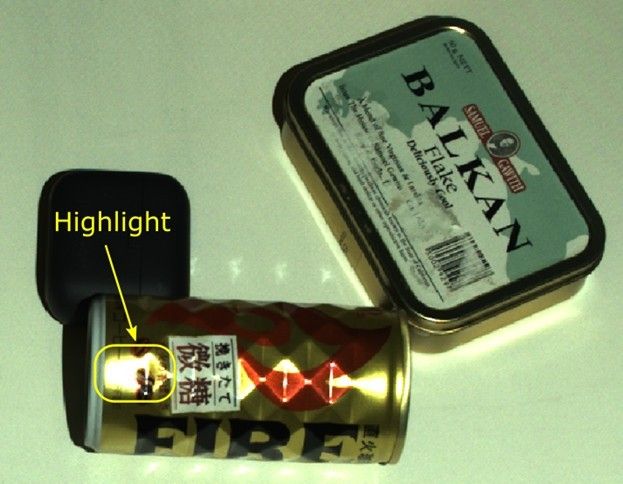
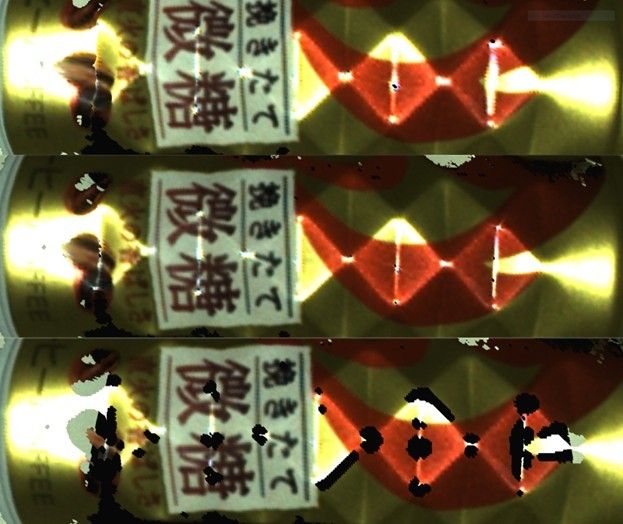
当存在高镜面反射物体时,该物体的某些区域可能会导致 Zivid 相机投影仪发出的光直接反射到成像传感器上。如果该物体的镜面反射性极强,那么反射光的强度可能比图像中其他光源强数千倍,从而很可能导致像素过曝(饱和)。下图中的两个示例展示了此类区域。
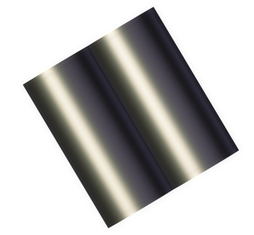
过饱和的像素通常会将光"溢出"到周围的像素上。 这种镜头模糊现象会导致 对比度失真伪像.这种效果在黑色到白色的过渡和光泽的圆柱体上尤其明显。见下图。
尝试使用合适的预设值(Presets)
处理高光和高镜面反射物体的最佳预设值是 Manufacturing Specular 和 Semi-Specular 。
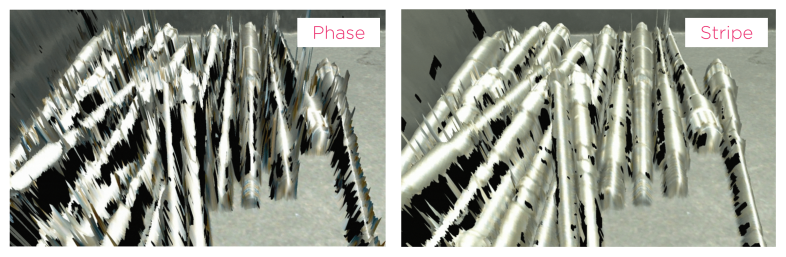
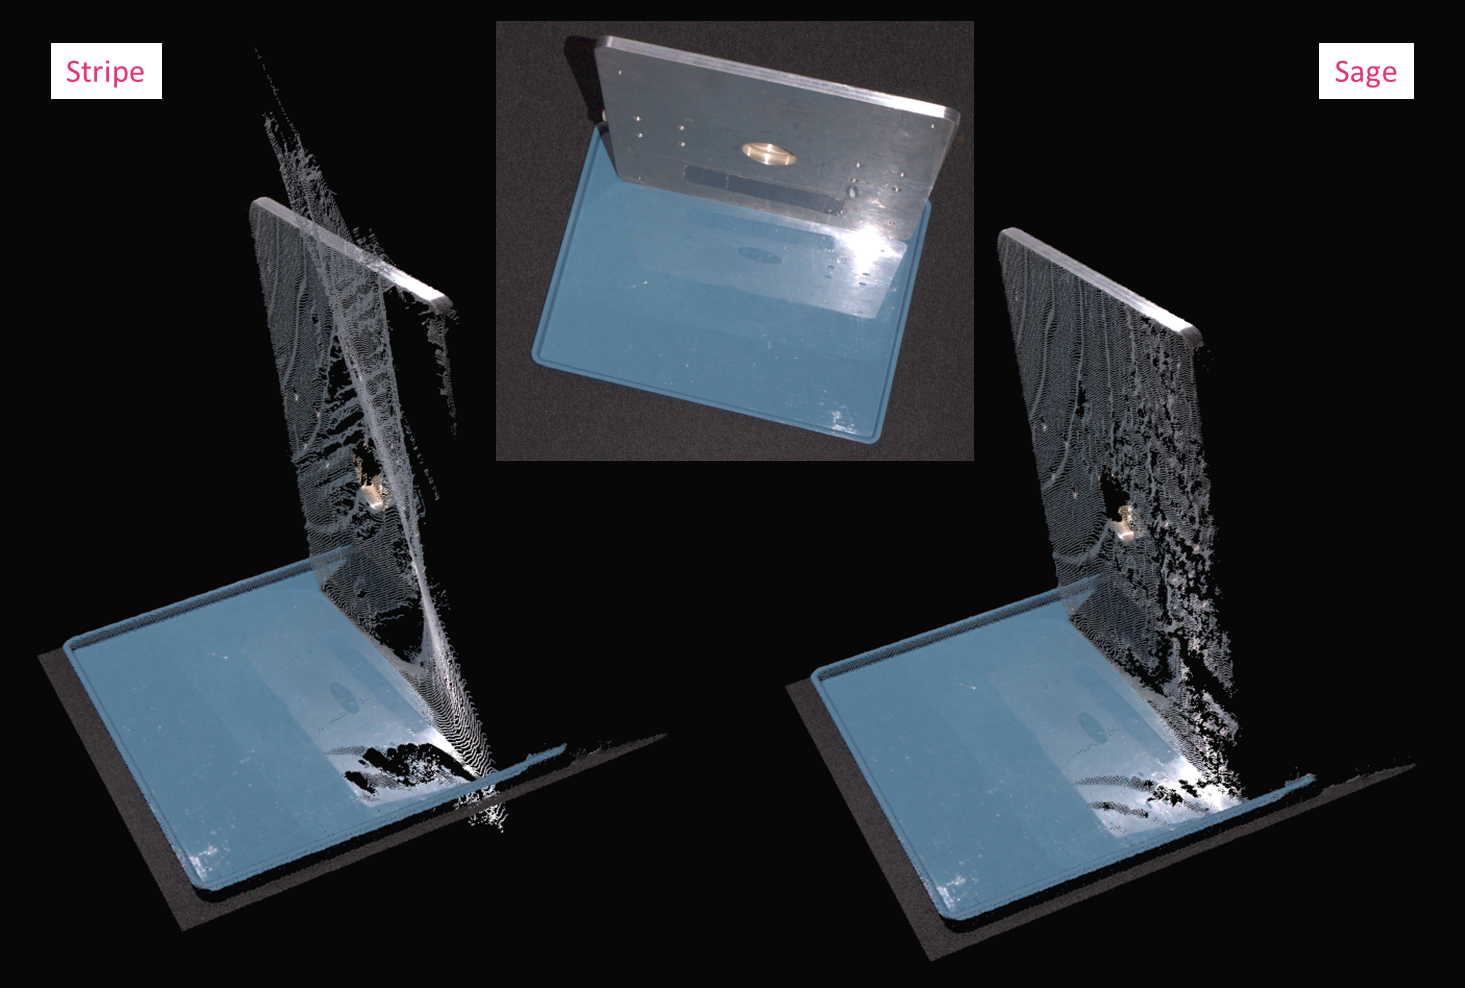
尝试切换到Stripe Engine
使用 Stripe Engine 可显著提升包含反光物体场景中的点云质量。Stripe Engine 具有高动态范围,能够有效应对高光和相互反射(互反射)现象。
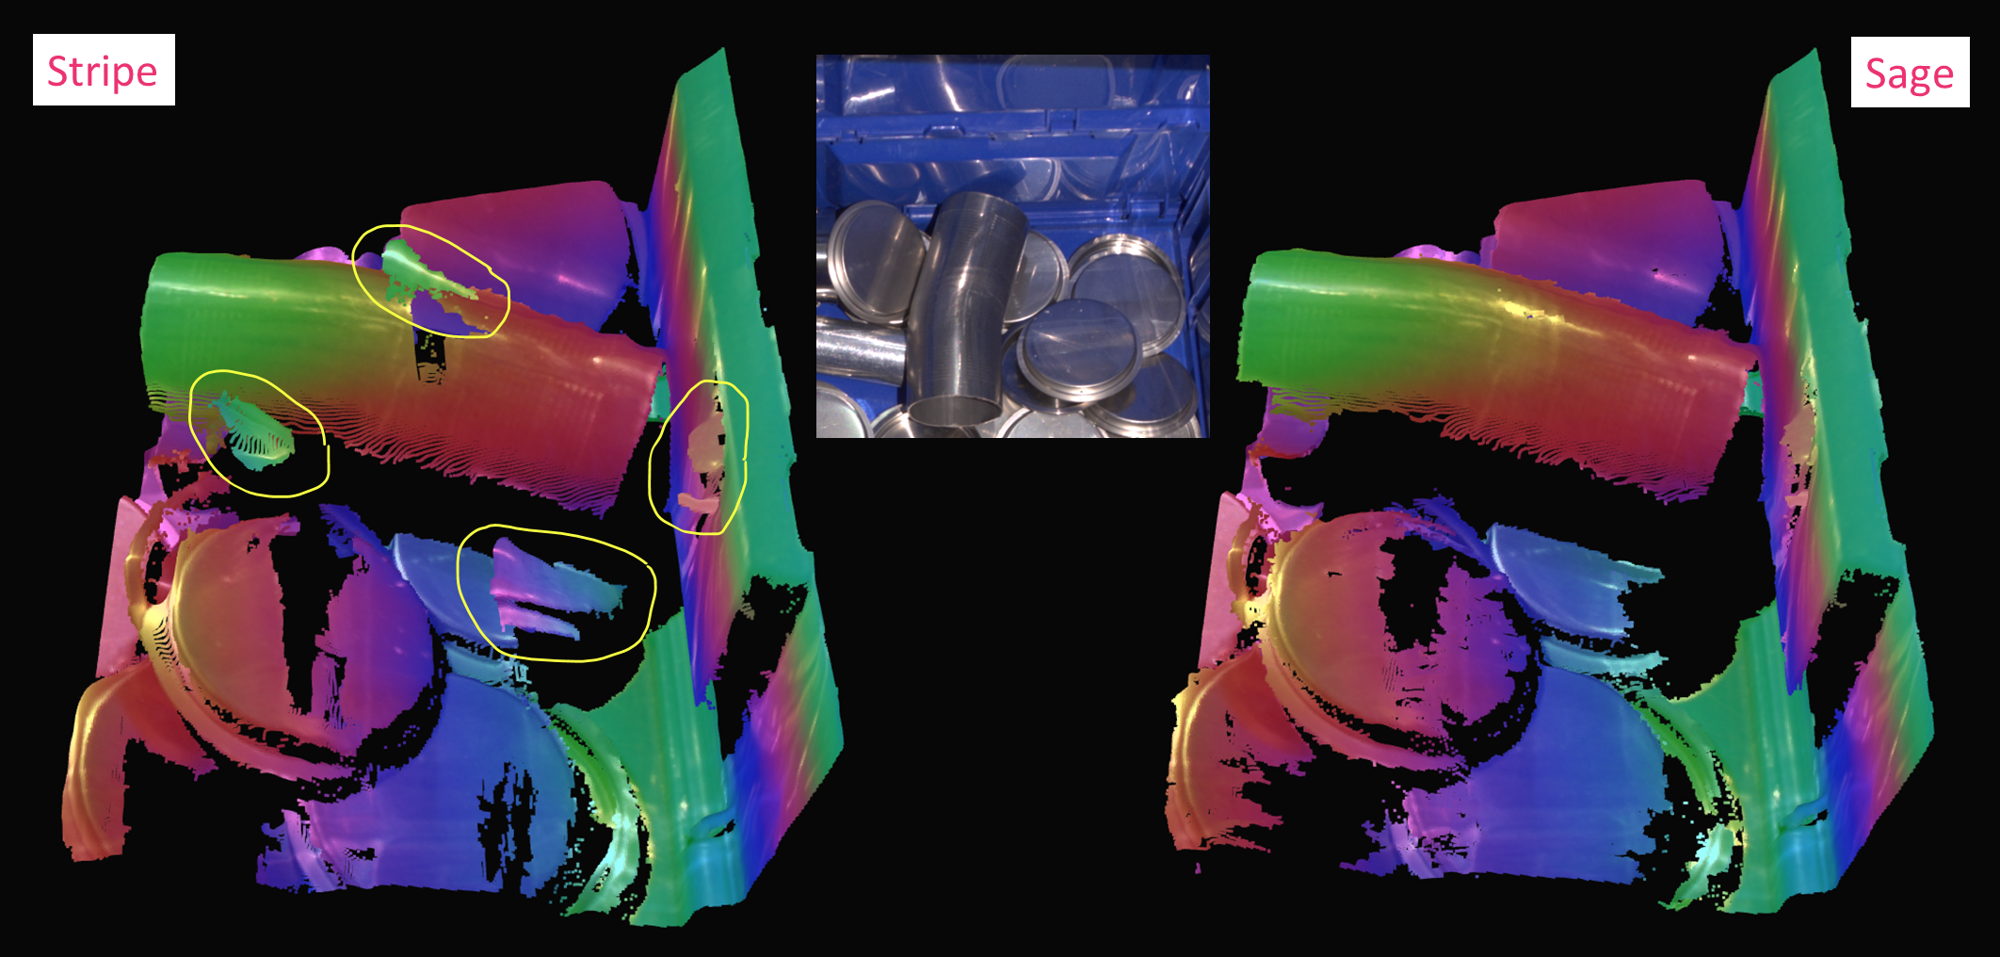
尝试切换到 Sage Engine
备注
Sage Engine 仅适用于 Zivid 2+ MR130、MR60 和 LR110。
Sage Engine 最擅长处理垂直反射。典型的例子是来自箱壁、邻近物体以及两个以 90 度角相对的平面的反射。
尝试切换到 Omni Engine
备注
Omni Engine 仅适用于 Zivid 2+。
Omni Engine 比 Stripe Engine 具有更高的动态范围和更大的投影图案集,可以改善在运行 Stripe Engine 的情况下点云仍然质量不佳的场景。它可以改进产生相互反射伪影或丢失数据的场景,但也可能在某种程度上平滑边缘和更精细的细节。
最大化动态范围
要获得闪亮的物体的高质量点云,需要同时捕获高光和低光区域。 Zivid 3D相机具有宽广的动态范围,可以同时拍摄深色和明亮的对象。
极具挑战性的场景通常需要 3 次 HDR 采集:
1个用于覆盖最强的高光区域(极低曝光)。
1个用于覆盖大部分场景(中等曝光)。
1个用于覆盖最暗的区域(极高曝光)。
请按照 调整合适的曝光以获取好的点云 优化采集设置。
调整过滤器
过滤器是提升点云质量的强大工具。请通过教程 调整过滤器 了解如何在 Zivid Studio 中调整过滤器。请特别关注以下过滤器:
Cluster Filter(聚类过滤器)
Noise Filter(噪声滤波器) - Repair(修复)和 Suppression(抑制)
Reflection Filter(反射滤波器) - Global Mode(全局模式)
处理对比度失真
处理对比度失真主要有两种方法。我们可以通过最大化相机的动态范围,并将相机定位到一个合适的位置上,以此减少失真现象。 然后我们可以使用 Contrast Distortion Filter(对比度失真过滤器) 修正/移除其余的受影响的点。
正确放置相机
首先,请确保相机放置在或接近其对焦距离的位置。相机型号名称中的数字表示对焦距离,单位为厘米。例如,Zivid 2+ MR130 的对焦距离为 130 厘米。
旋转和对齐场景中的对象
对比度失真是指3D传感器x轴方向上出现的一种效应,如果应用允许将相机y轴方向上的问题区域旋转到x轴方向,则可以显著减轻这种效应。例如,将一个光滑的圆柱体旋转90°,圆柱体上过曝的区域就会沿着相机的基线移动,如下图所示。
使背景的反射率与目标对象的反射率匹配
一个好的经验法则是,尝试使用与要成像的对象相似的亮度或颜色作为场景的背景:
对于明亮的物体,可使用明亮的背景(最好是白色朗伯(Lambertian)型)。
对于深色物体,请使用深色背景(例如,大多数传送带使用的黑色橡胶)。
对于大多数有色、无光泽的物体,使用具有相似反射率的背景(例如,对于香蕉,使用灰色或黄色背景)。
对于光泽的金属物体,尤其是圆柱形,圆锥形和球形物体,可使用深色的光吸收性背景,例如黑色橡胶。 这是因为目标光线通常会在物体的可见的边缘附近被反射离开,从而使它们显得非常暗(见下图)。 同时,来自周围区域的光可能会反射到圆柱边缘。
调整光圈和对比度失真过滤器
光圈设置不当会导致失焦,从而引起或加剧对比度失真效应。
对比度失真(Contrast Distortion)过滤器可用于校正和/或移除由 对比度失真 所引起的表面高度伪影——即在高对比度区域出现的散焦和模糊现象。这使得物体的几何形状更加真实,尤其在平面和圆柱体上效果更为明显。
良好的光圈设置可以消除或减少对比度失真效应,并使调整对比度失真过滤器更加容易。了解如何 调整光圈和对比度失真过滤器
备注
Zivid 3 没有可调节光圈。以下关于光圈调节的信息仅适用于 Zivid 2 和 Zivid 2+ 相机。
示例
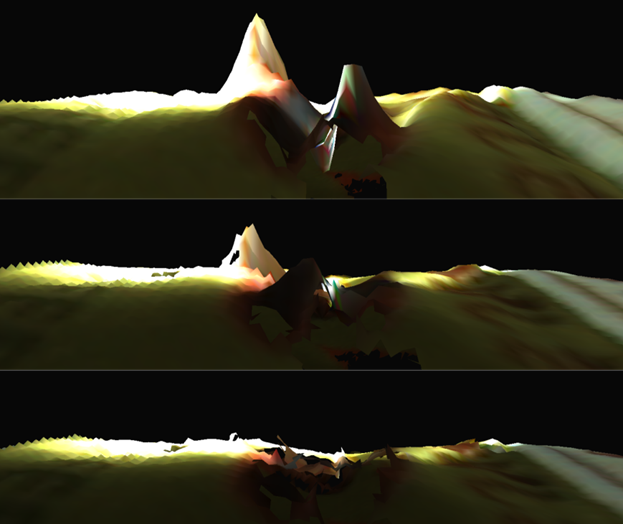
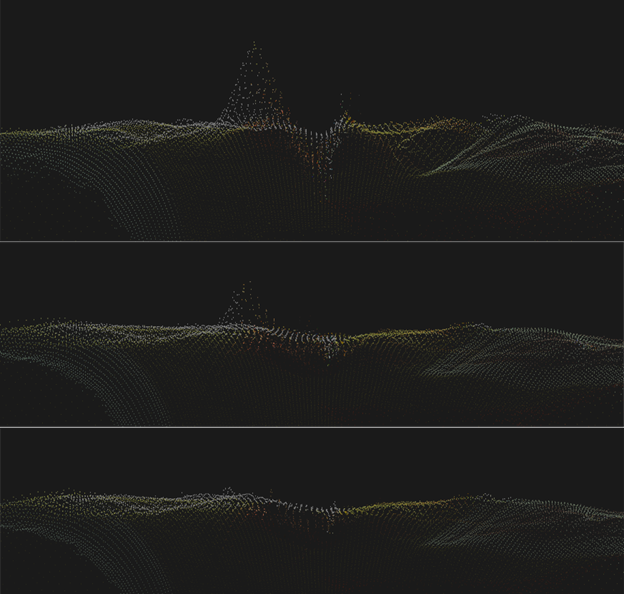
我们将在下面的场景中演示使用对比度失真过滤器处理高光的方法。
以下三张图片中最上面的一张是不使用对比度失真过滤器的点云网格图像,中间一张是仅启用了该过滤器的修正功能的图像,最下面的一张是同时启用了移除和修正功能的图像。 仅使用修正功能已经可以减小伪像的尺寸, 而过滤器的移除功能则可以完全移除伪像,但也会移除场景中强度变化强烈的其他点。
进一步阅读
在下一篇文章中,我们将 处理强环境光。