Working Distance and Camera Positioning
Introduction
이 튜토리얼에서는 카메라를 올바르게 배치하는 방법을 알아봅니다. FOV 및 작동 거리와 같은 다양한 고려 사항과 이러한 고려 사항이 정밀도 및 공간 해상도에 미치는 영향을 다룹니다. 실제 장착에 대한 자세한 내용은 사용 가능한 Zivid mounts 를 참조하세요.
Find the right working distance
많은 애플리케이션에서 카메라는 FOV 에서 포인트 클라우드를 캡처하기 위해 고정식으로 장착됩니다. 다른 애플리케이션에서는 카메라를 로봇 팔에 장착할 수 있으므로 좋은 포인트 클라우드를 캡처하기 위해 카메라를 배치하는 방법에 훨씬 더 많은 유연성을 제공합니다. 두 대안 모두에서 카메라는 주어진 장면에 대해 광학적으로 최적화되도록 배치해야 합니다.
올바른 working distance를 찾을 때 고려해야 할 몇 가지 사항이 있습니다.
카메라가 볼 필요가 있는 영역 또는 볼륨은 얼마입니까?
What is the size of the objects that the camera needs to see?
작업 영역 또는 볼륨에 필요한 공간 해상도와 정밀도는 얼마입니까?
이러한 질문에 대한 답을 알고 나면 다음 도구를 사용하여 Zivid 카메라가 요구 사항을 충족하는지 확인할 수 있습니다.
이러한 도구는 공장 검증 절차에 따라 이론적인 값을 제공하지만 Zivid Studio 사용하여 포인트 클라우드를 캡처하고 검사하여 수동으로 검증하는 것도 한 가지 방법입니다.
조심
노이즈는 Working Distance에 비례하고 공간 해상도는 Working Distance에 반비례합니다.
단일 카메라 위치에서 작동 거리, FOV, 해상도 및 정밀도에 대한 모든 요구 사항을 충족할 수 있는 경우 진행할 수 있습니다. 그렇지 않다면 로봇 마운팅, 다중 카메라 사용 등을 고려해야 합니다. 이 경우 customersuccess@zivid.com 에 문의하는 것이 좋습니다. 해결책을 찾도록 도와드리겠습니다.
Position the camera
가장 일반적이고 권장되는 방법은 촬영 장소 바로 위에 카메라를 설치하는 것입니다.
특히 투명한 물체와 반사율이 매우 높고 특히 어두운 넓은 표면을 촬영하는 데 유용합니다. 이 경우, 카메라를 물체에 수직으로 장착하여 카메라로 돌아오는 신호를 최대화하는 것이 좋습니다.
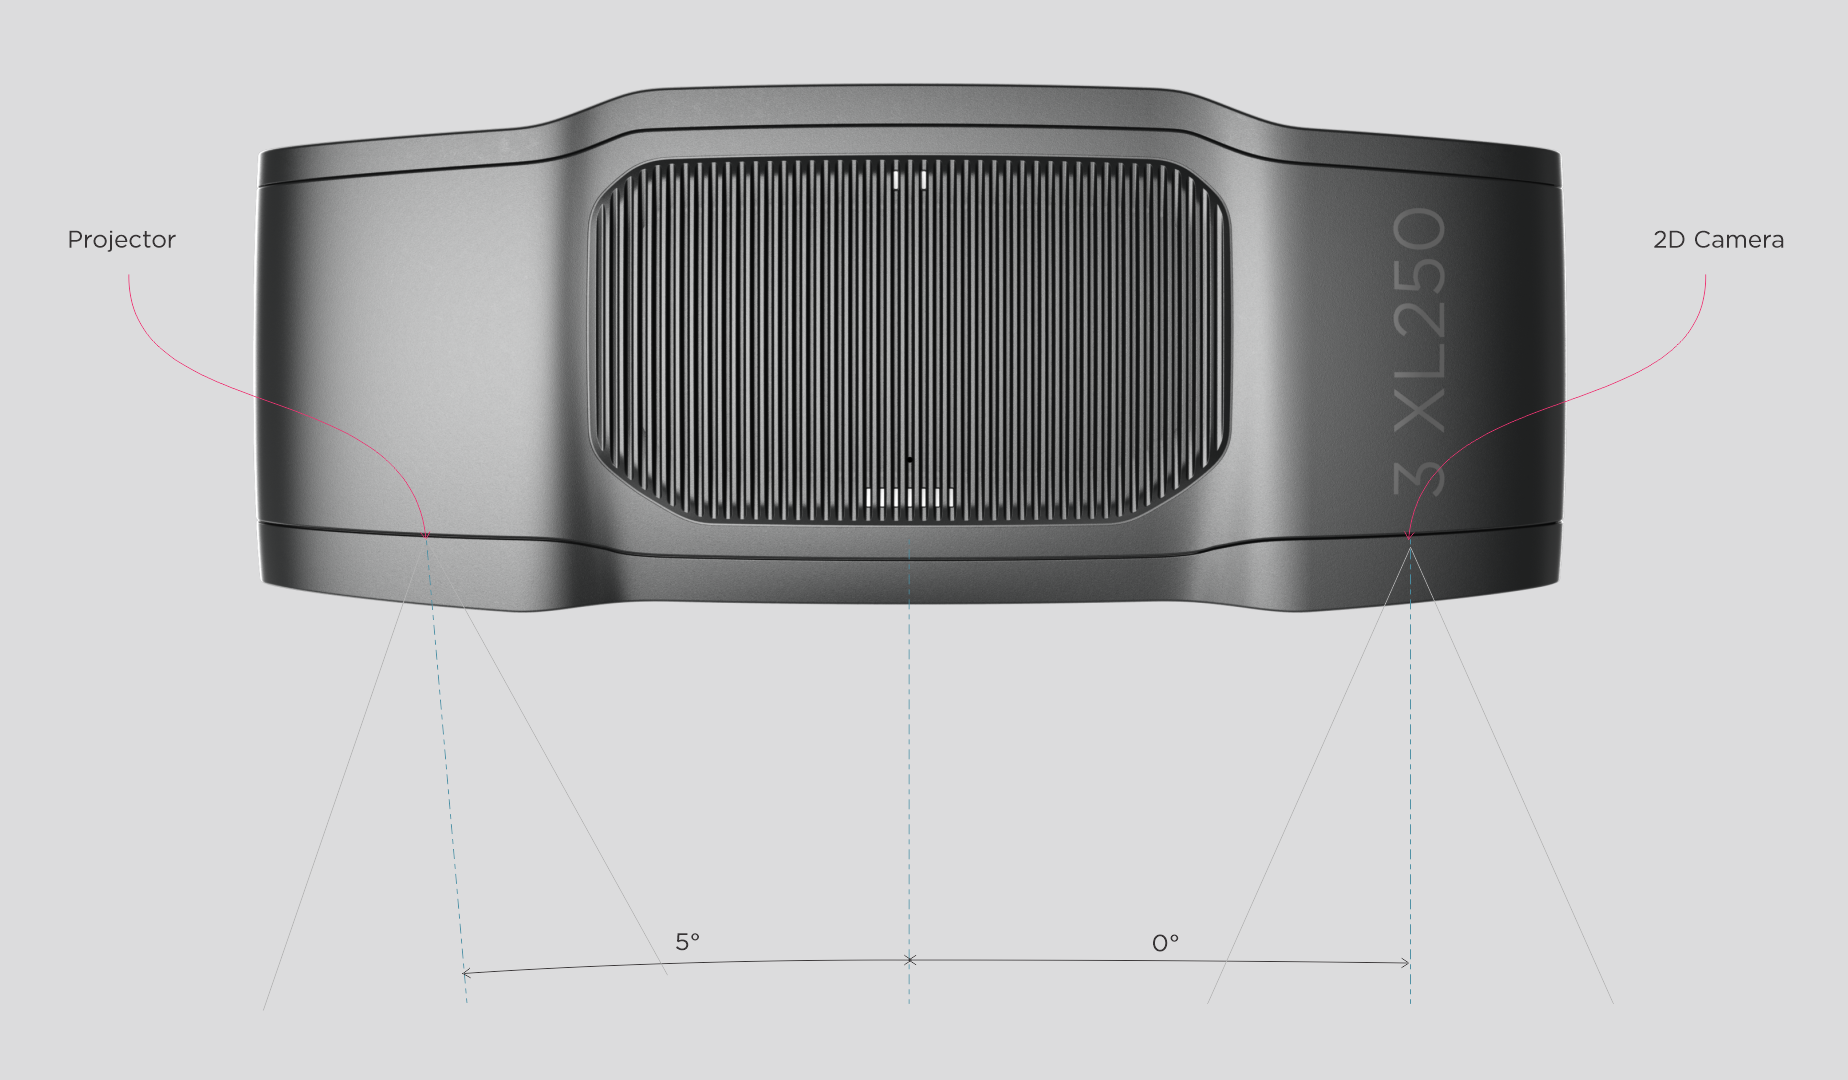
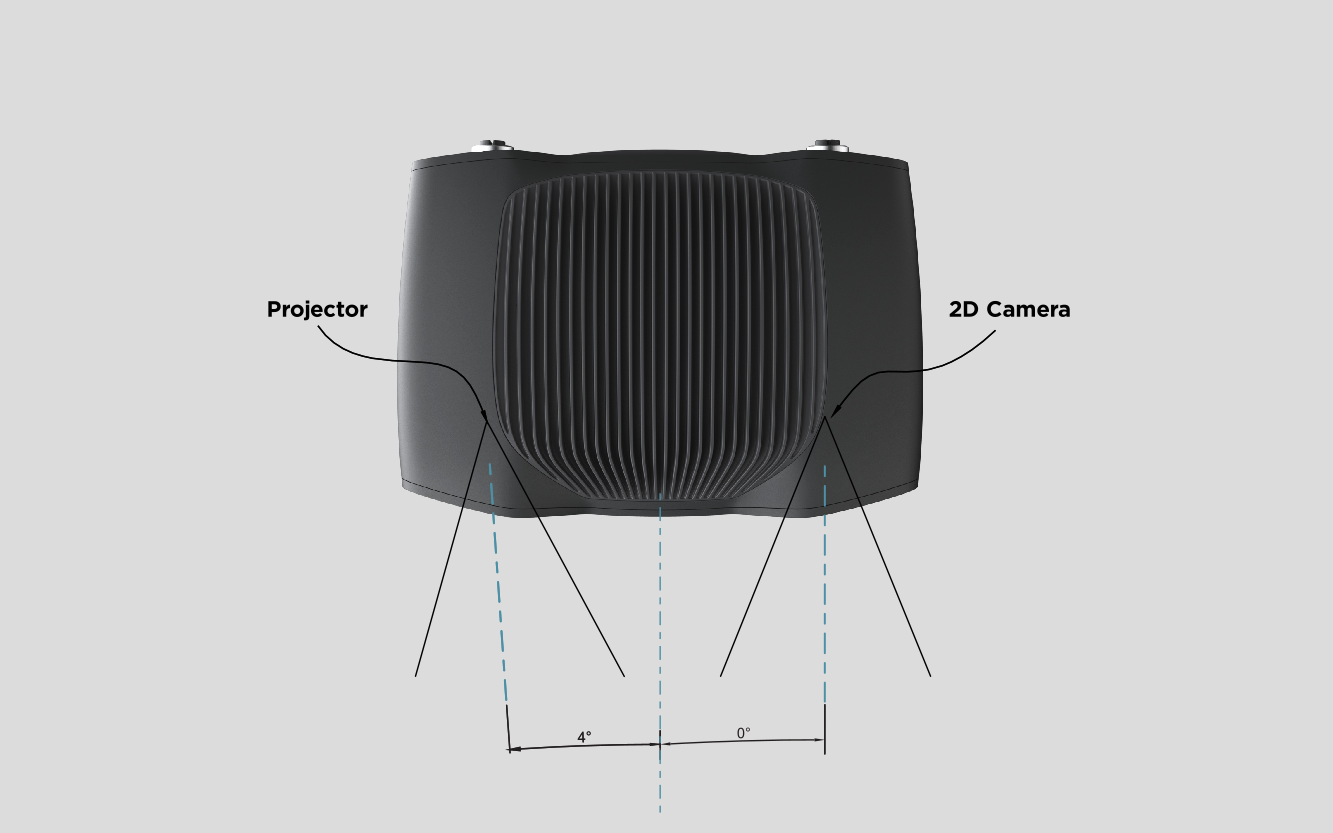
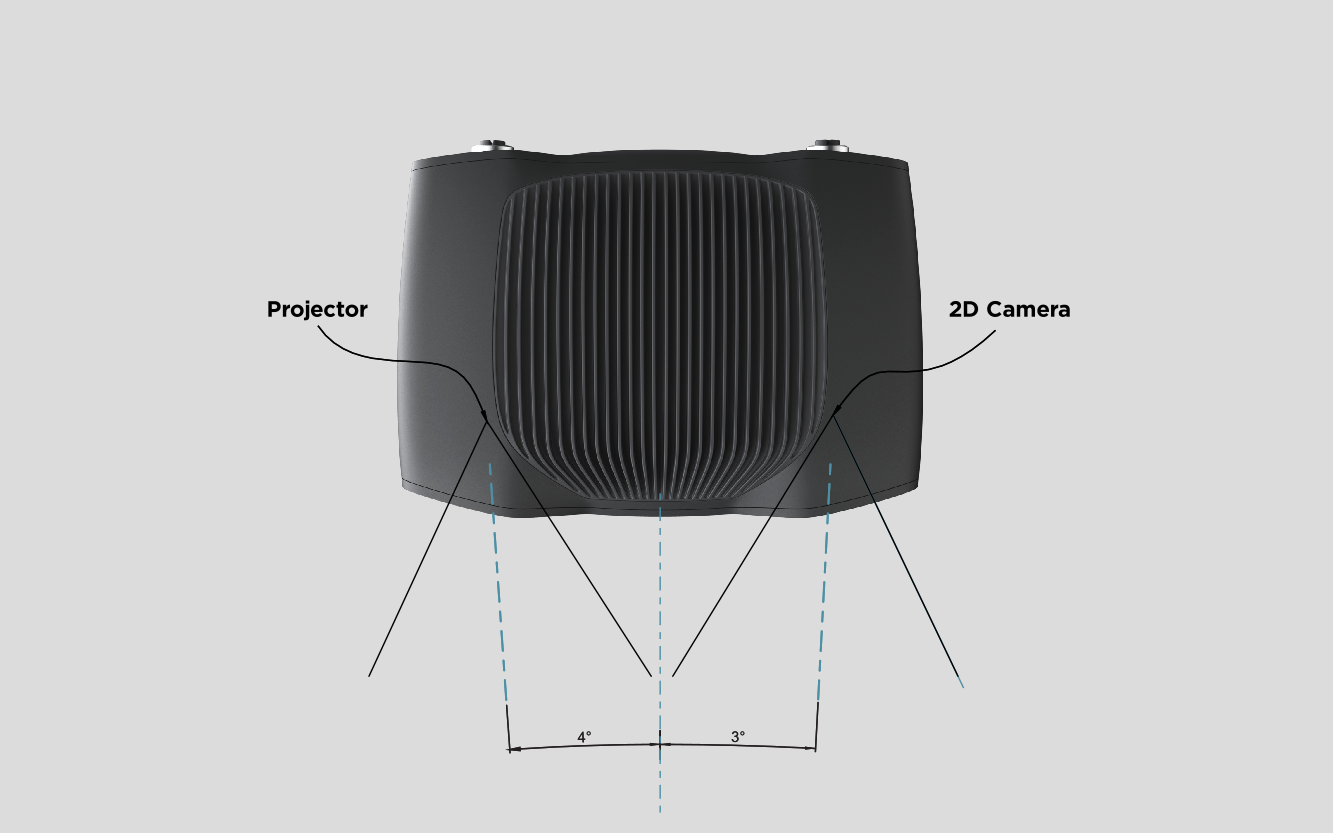
2D 카메라와 프로젝터는 중심축에 대해 각도를 갖습니다. 카메라를 장면에 수직으로 배치하려는 경우 이 점을 고려해야 합니다.
In bin-picking applications
빈 벽에서 강한 상호 반사가 발생하는 경우, Zivid 카메라 프로젝터를 빈 뒤쪽 가장자리 위나 뒤쪽 모서리 위에 설치할 수 있습니다(아래 이미지 참조). 2D 카메라가 빈 중앙을 향하도록 프로젝터를 팬 및 틸트합니다. 프로젝터 광선은 프로젝터에 가장 가까운 두 벽의 안쪽 표면에 닿지 않아야 하며, 두 벽과 거의 평행해야 합니다.

이런 방식으로 카메라를 장착하면 빈 벽에서의 상호 반사가 최소화되고, 장면 위쪽 공간이 확보되어 도구와 로봇이 더 쉽게 접근할 수 있습니다.
주변 조명이 강한 환경에서는 광원의 직접 반사로 인해 2D 이미지에 원치 않는 하이라이트가 발생할 수 있습니다. 이러한 하이라이트를 최소화하려면 카메라를 살짝 움직이거나 기울여 보세요.

높은 정확도 요구 사항에 맞게 거리 최적화
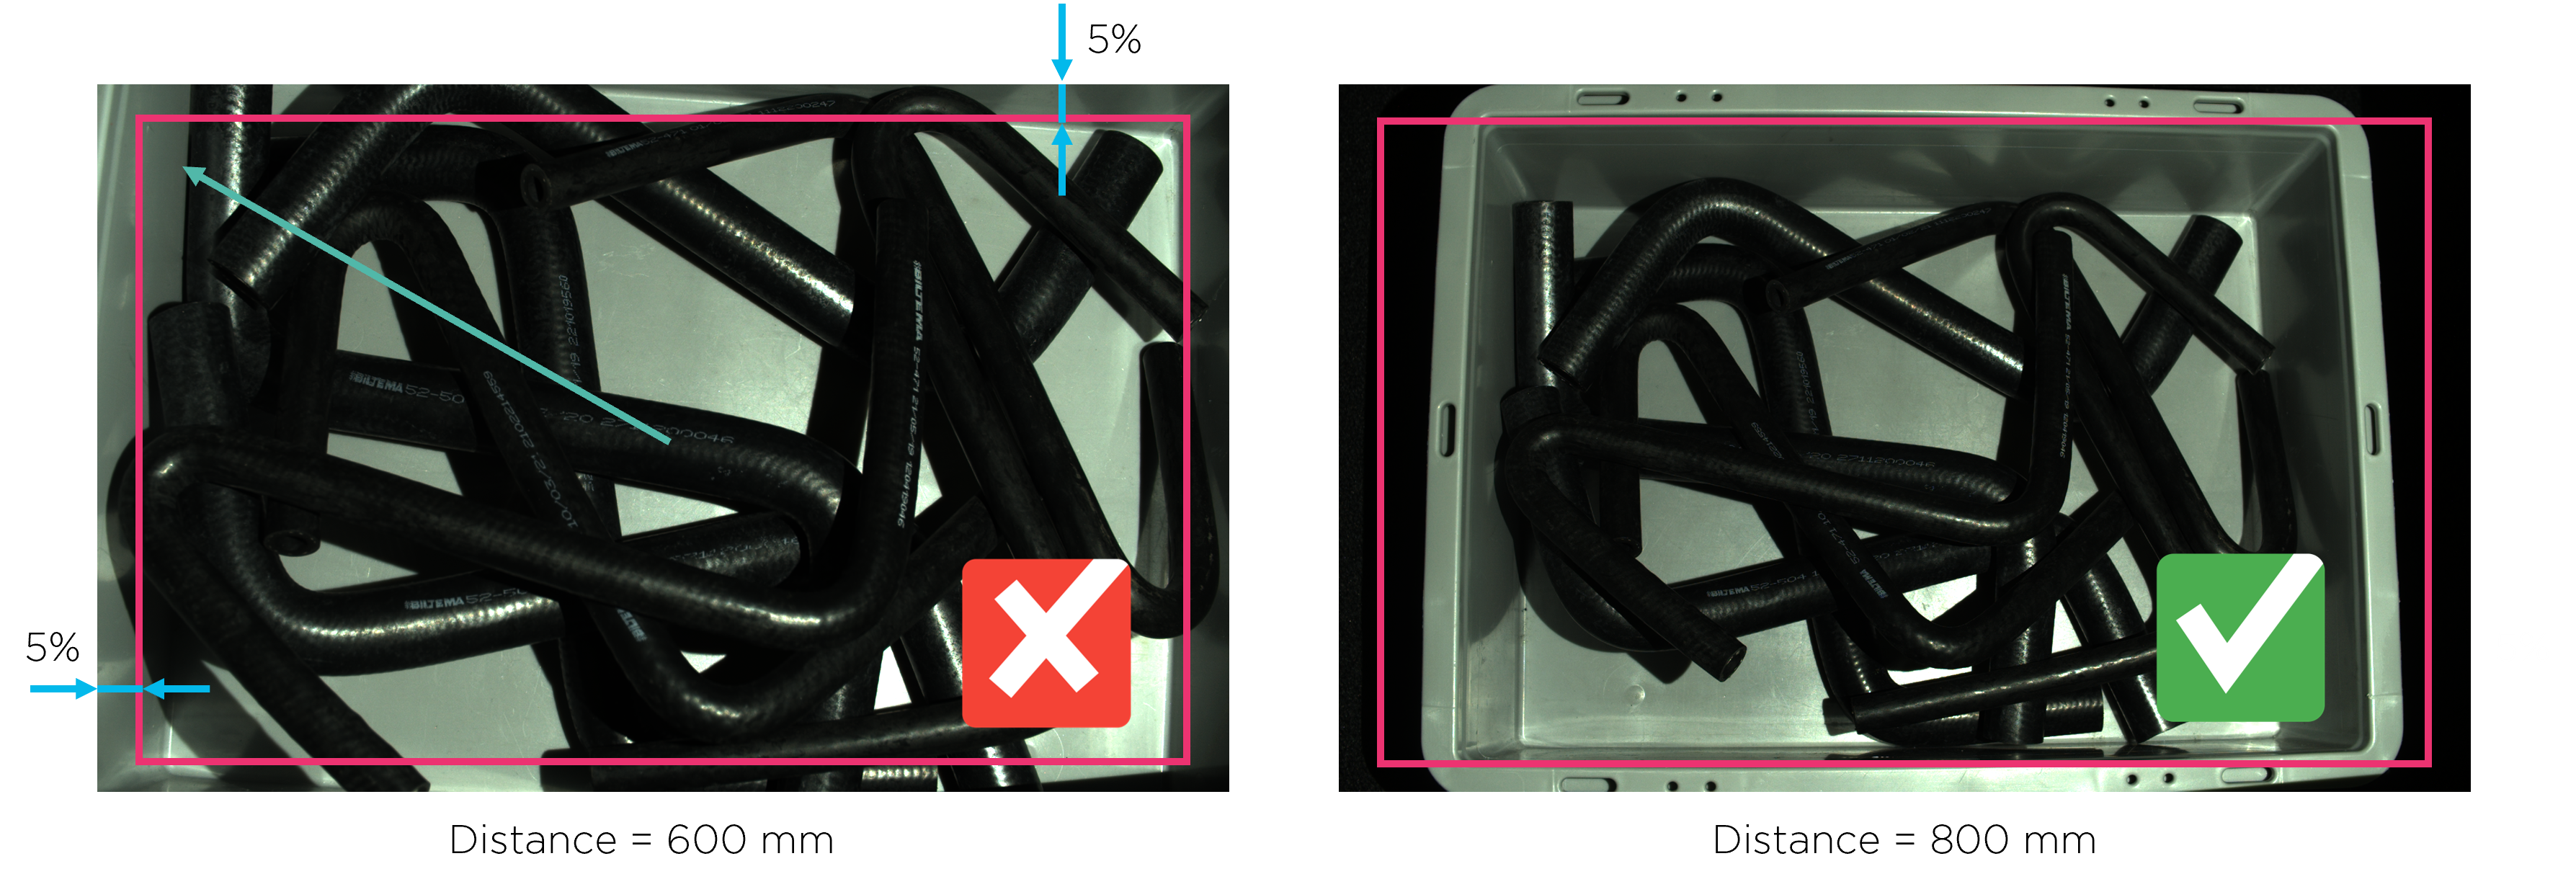
일반적으로 카메라를 최대한 피사체에 가까이 두는 것이 좋습니다. 촬영 거리가 짧을수록 정확도가 높아지기 때문입니다. 하지만 아래 이미지처럼 이미지 중앙에서 정확도가 가장 높고 모서리로 갈수록 정확도가 약간 떨어집니다.
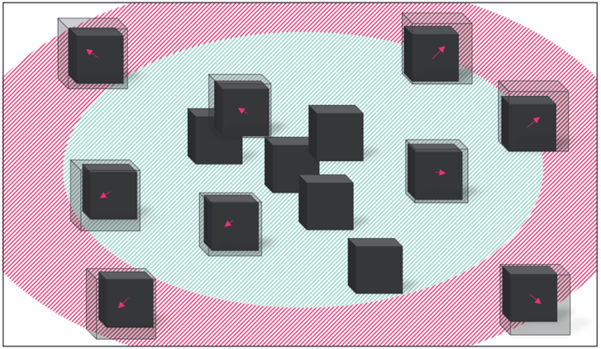
따라서 가장자리에서 이미지의 5%를 사용하지 않도록 최소보다 약간 큰 거리에 카메라를 설치하는 것이 좋습니다. 대부분의 어플리케이션에서 이것은 마운팅 안전 마진으로 인해 자연스럽게 발생합니다.
Further reading
작동 거리를 찾았으면 올바른 카메라 설정을 찾을 차례입니다. 우리는 이것을 Getting the Right Exposure for Good Point Clouds 에서 다룰 것입니다 .
