Transform via Checkerboard
이 튜토리얼은 체커 보드의 자세를 추정하고 4x4 Homogeneous transformation matrix를 사용하여 포인트 클라우드를 체커 보드 좌표계로 변환하는 방법을 보여줍니다. 이 샘플은 변환 행렬과 함께 YAML 파일도 저장합니다.
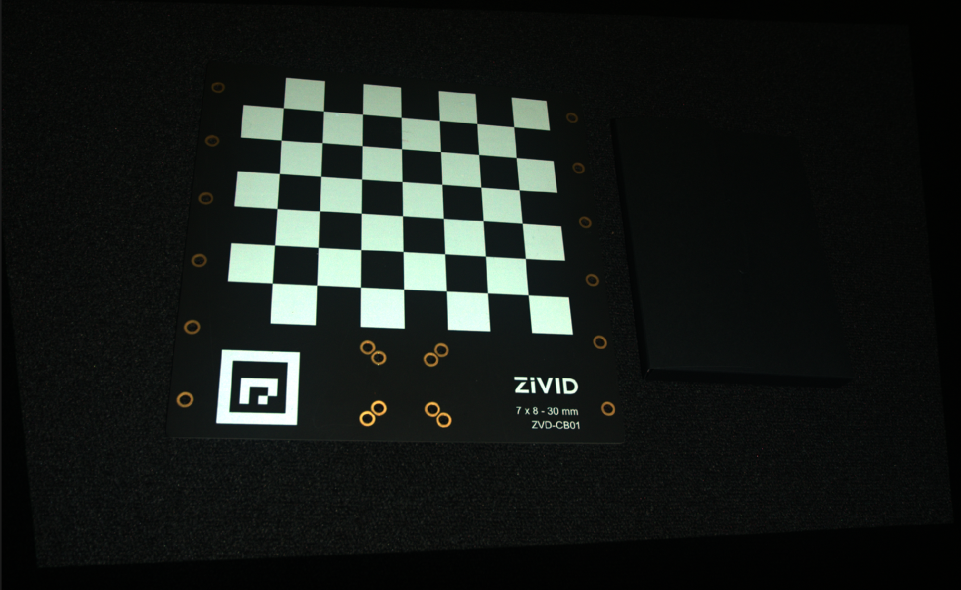
이 튜토리얼에서 사용할 체커보드의 포인트 클라우드는 아래 이미지에 표시되어 있습니다.

Zivid Studio에서 original point cloud 를 열 수 있습니다. 그리고 포인트 클라우드를 확인하십시오.
참고
포인트 클라우드 원본은 Sample Data 에서 다운로드 가능합니다.
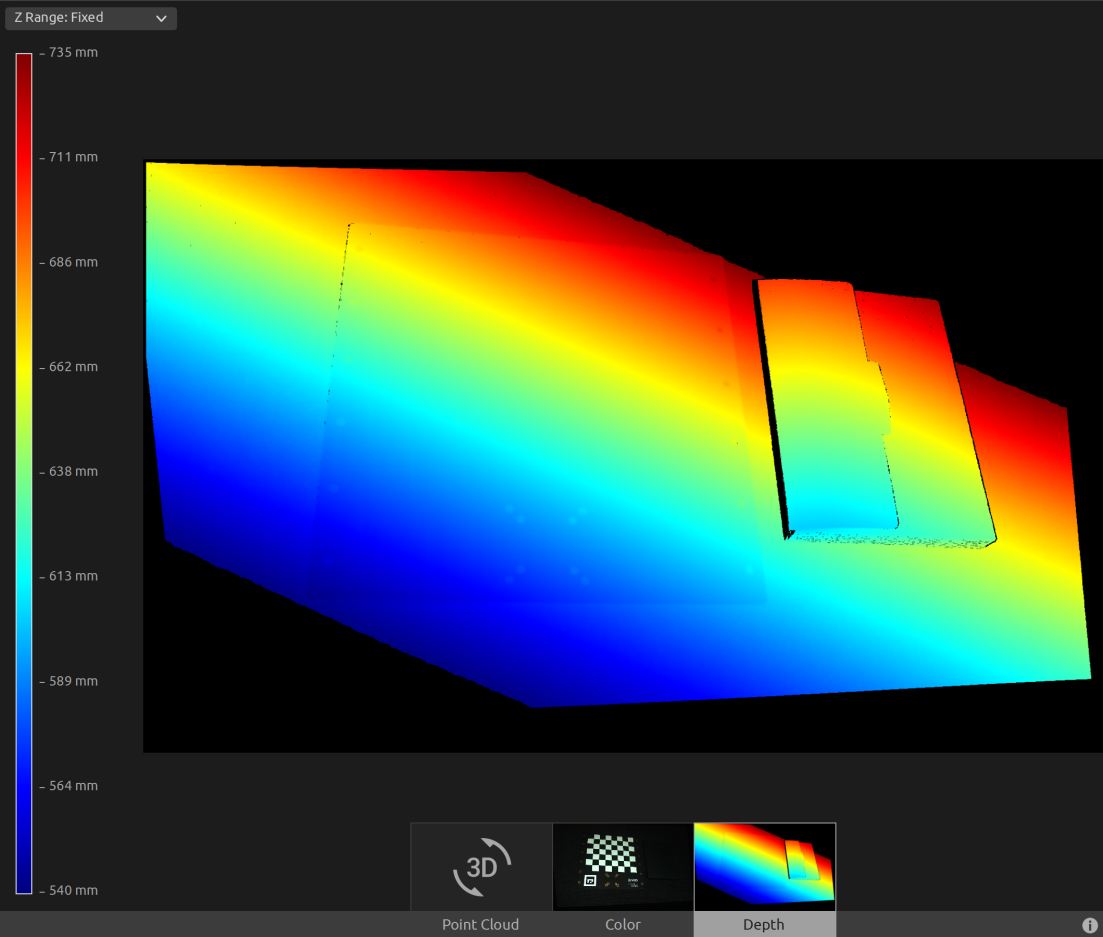
이제 깊이 보기에서 Z 범위를 540mm에서 735mm로 수동으로 설정할 수 있습니다. 이를 통해 카메라와 체커 보드 프레임 사이에 각도가 있음을 알 수 있습니다.

먼저 체커 보드의 포인트 클라우드를 로드합니다.
const auto calibrationBoardFile = std::string(ZIVID_SAMPLE_DATA_DIR) + "/CalibrationBoardInCameraOrigin.zdf";
std::cout << "Reading ZDF frame from file: " << calibrationBoardFile << std::endl;
const auto frame = Zivid::Frame(calibrationBoardFile);
auto pointCloud = frame.pointCloud();
그런 다음 체커 보드의 자세를 추정합니다.
std::cout << "Detecting and estimating pose of the Zivid checkerboard in the camera frame" << std::endl;
const auto detectionResult = Zivid::Calibration::detectCalibrationBoard(frame);
const auto cameraToCheckerboardTransform = detectionResult.pose().toMatrix();
Console.WriteLine("Detecting and estimating pose of the Zivid checkerboard in the camera frame");
var detectionResult = Detector.DetectCalibrationBoard(frame);
var cameraToCheckerboardTransform = new Zivid.NET.Matrix4x4(detectionResult.Pose().ToMatrix());
print("Detecting and estimating pose of the Zivid checkerboard in the camera frame")
detection_result = zivid.calibration.detect_calibration_board(frame)

if not detection_result.valid():
    raise RuntimeError(f"No Checkerboard detected. {detection_result.status_description()}")

camera_to_checkerboard_transform = detection_result.pose().to_matrix()
포인트 클라우드를 변환하기 전에 체커 보드 좌표계에서 카메라의 포즈를 얻기 위해 변환 행렬을 반전시킵니다.
std::cout << "Camera pose in checkerboard frame:" << std::endl;
const auto checkerboardToCameraTransform = cameraToCheckerboardTransform.inverse();
변환 후 포즈를 YAML 파일에 저장합니다.
const auto transformFile = "CheckerboardToCameraTransform.yaml";
std::cout << "Saving camera pose in checkerboard frame to file: " << transformFile << std::endl;
checkerboardToCameraTransform.save(transformFile);
다음은 YAML 파일의 내용입니다.
__version__:
  serializer: 1
  data: 1
FloatMatrix:
  Data: [
    [0.9791644, 0.04366289, 0.1983198, 17.74656],
    [0.0502592, 0.8941201, -0.444998, 431.1943],
    [-0.1967516, 0.4456936, 0.8732962, -547.7883],
    [0, 0, 0, 1]]
그런 다음 포인트 클라우드를 체커 보드 좌표계로 변환합니다.
std::cout << "Transforming point cloud from camera frame to checkerboard frame" << std::endl;
pointCloud.transform(checkerboardToCameraTransform);
힌트
자세한 내용은 Position, Orientation and Coordinate Transformations 에서 확인 가능합니다.
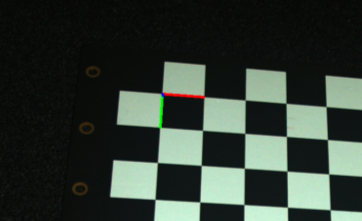
변환된 포인트 클라우드를 저장하기 전에 이를 OpenCV 2D 이미지 형식으로 변환하고 좌표계를 그릴 수 있습니다.
std::cout << "Converting to OpenCV image format" << std::endl;
const auto bgraImage = pointCloudToColorBGRA_SRGB(pointCloud);
std::cout << "Visualizing checkerboard with coordinate system" << std::endl;
drawCoordinateSystem(frame, cameraToCheckerboardTransform, bgraImage);
displayBGRA(bgraImage, "Checkerboard transformation frame");
여기서 우리는 표시될 이미지를 볼 수 있고 바둑판의 좌표계가 어디에 있는지 관찰할 수 있습니다.

마지막으로 변환된 포인트 클라우드를 디스크에 저장합니다.
const auto checkerboardTransformedFile = "CalibrationBoardInCheckerboardOrigin.zdf";
std::cout << "Saving transformed point cloud to file: " << checkerboardTransformedFile << std::endl;
frame.save(checkerboardTransformedFile);
힌트
자세한 내용은 Position, Orientation and Coordinate Transformations 에서 확인 가능합니다.
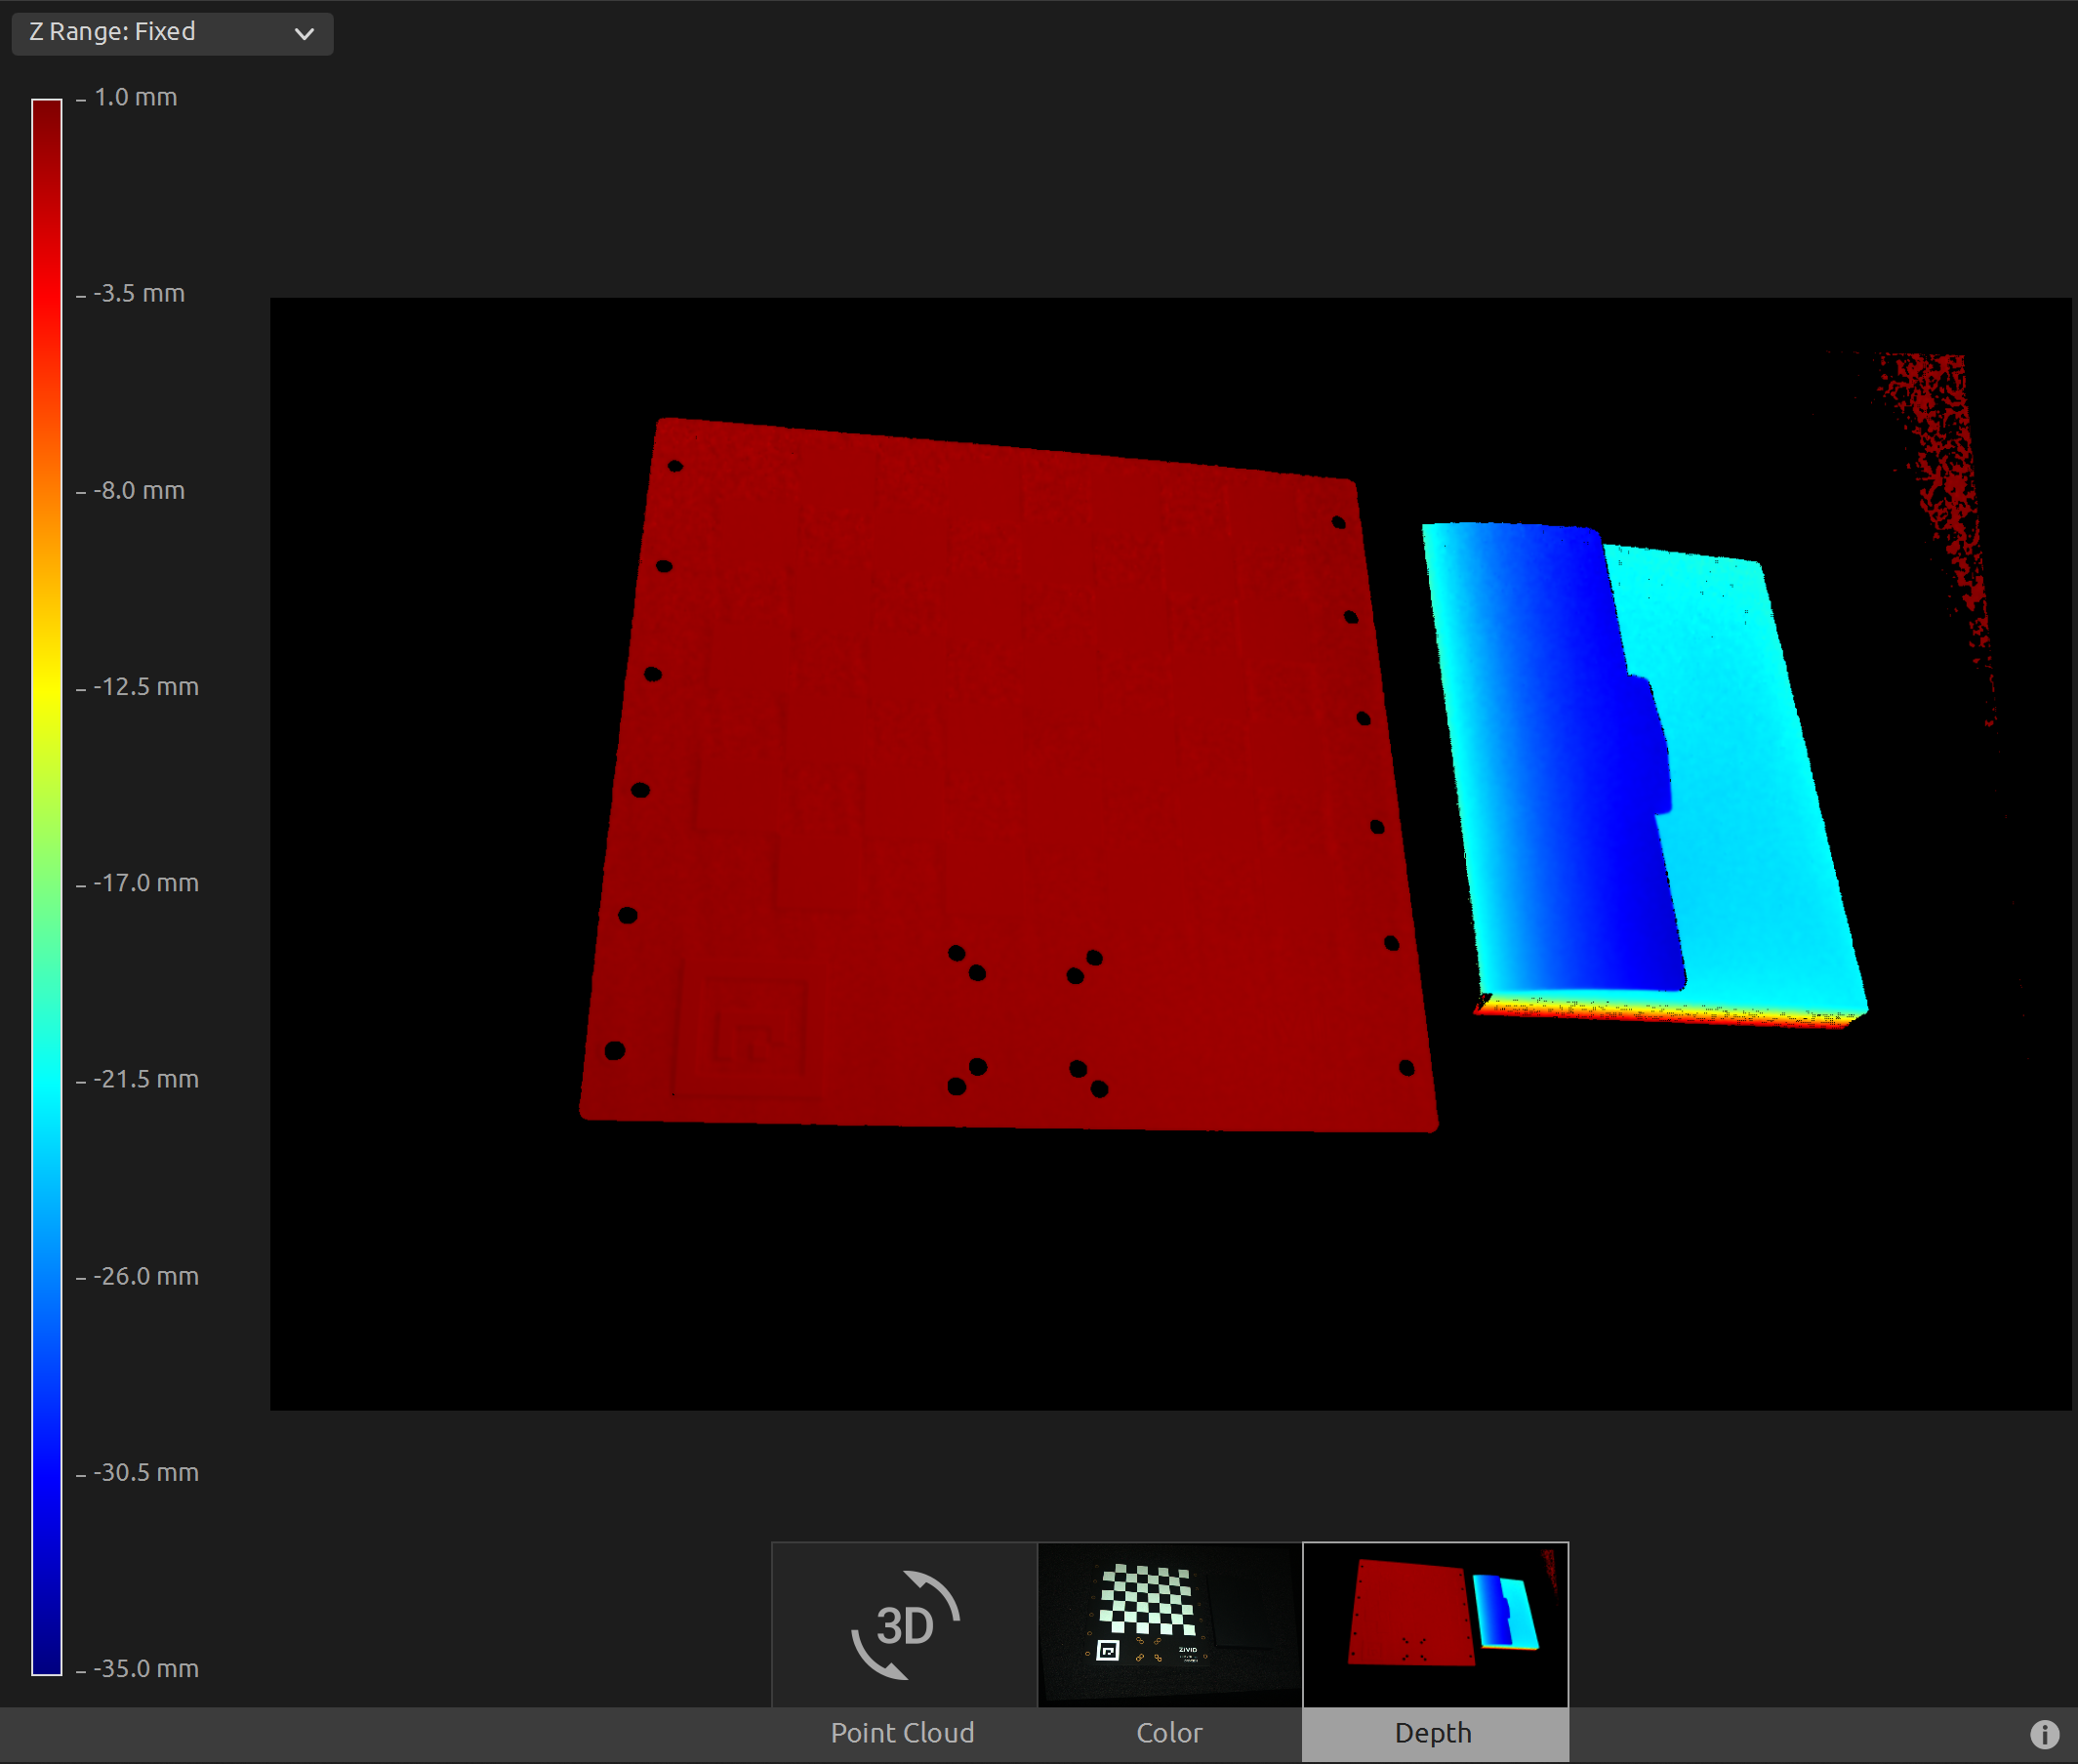
이제 Zivid Studio에서 transformed point cloud 를 열 수 있습니다. 그리고 포인트 클라우드를 확인하십시오.
참고
변환된 포인트 클라우드에는 시점 원점이 부적절하므로 Zivid Studio에서 축소하여 데이터를 찾습니다.
이제 깊이 보기에서 Z 범위를 -35mm에서 1mm로 수동으로 설정할 수 있습니다. 이렇게 하면 칼리브레이션 보드와 그 옆에 있는 개체를 제외한 모든 데이터를 필터링할 수 있습니다. 이를 통해 칼리브레이션 보드 전체에 동일한 Z 값이 있음을 알 수 있으며 색상 그라디언트에서 값이 0인지 확인할 수 있습니다. 이는 포인트 클라우드의 원점이 체커 보드에 있음을 의미합니다.

포인트 클라우드를 칼리브레이션 보드 좌표계로 변환하려면 코드 샘플을 실행하면 됩니다.
Sample: TransformPointCloudViaCheckerboard.cpp
./TransformPointCloudViaCheckerboard
Sample: TransformPointCloudViaCheckerboard.cs
./TransformPointCloudViaCheckerboard
Sample: transform_point_cloud_via_checkerboard.py
python transform_point_cloud_via_checkerboard.py
팁
이것을 자신의 설정에 사용하려면 코드 샘플을 수정하세요.
ZDF 파일을 실제 카메라와 설정으로 바꾸세요.
장면에 체커보드를 배치하세요.
샘플을 실행해 보세요!