Transform via ArUco marker

이 튜토리얼은 ArUco 마커의 포즈를 추정하고 4x4 Homogeneous transformation matrix를 사용하여 포인트 클라우드를 ArUco 마커 좌표계로 변환하는 방법을 보여줍니다.

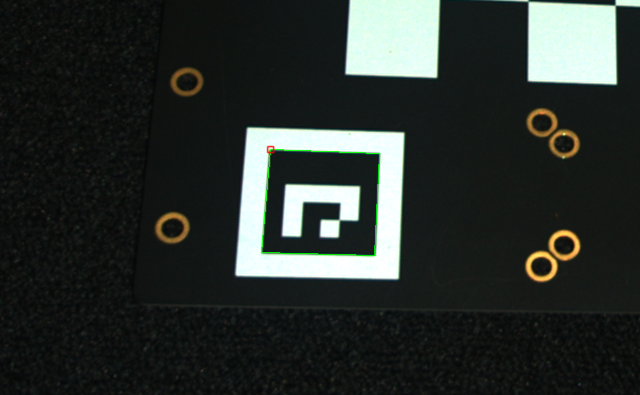
Zivid calibration board 에는 ArUco 마커가 포함되어 있습니다.

이 튜토리얼은 아래 이미지에 표시된 ArUco 마커의 포인트 클라우드를 사용합니다.
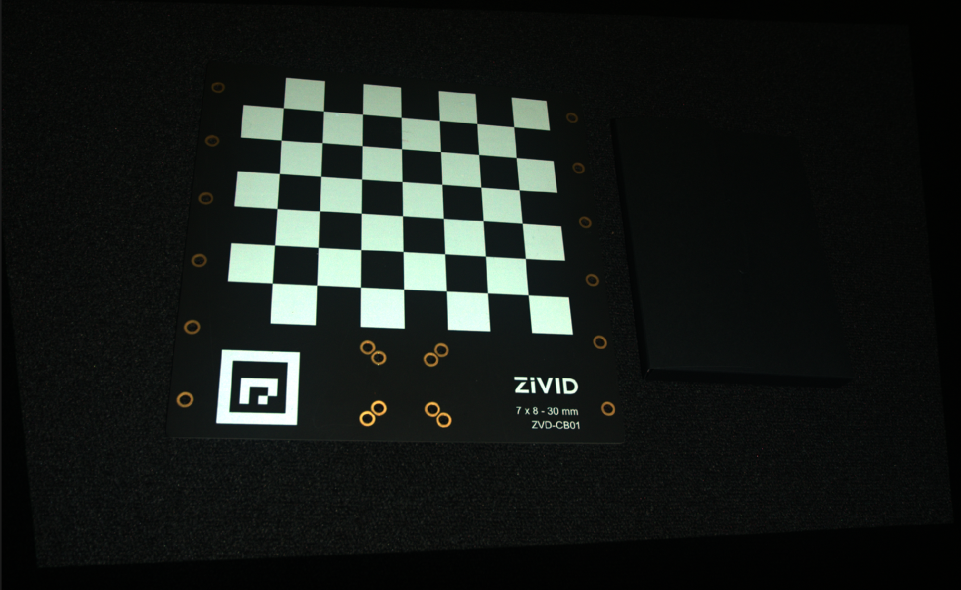
ArUco marker 2D image

Zivid Studio에서 original point cloud 를 열 수 있습니다. 그리고 포인트 클라우드를 확인하십시오.

참고

포인트 클라우드 원본은 Sample Data 에서 다운로드 가능합니다.

이제 깊이 보기에서 Z 범위를 540mm에서 735mm로 수동으로 설정할 수 있습니다. 이를 통해 마커가 약 570mm 거리에 있고 카메라와 마커 프레임 사이에 각도가 있음을 알 수 있습니다.
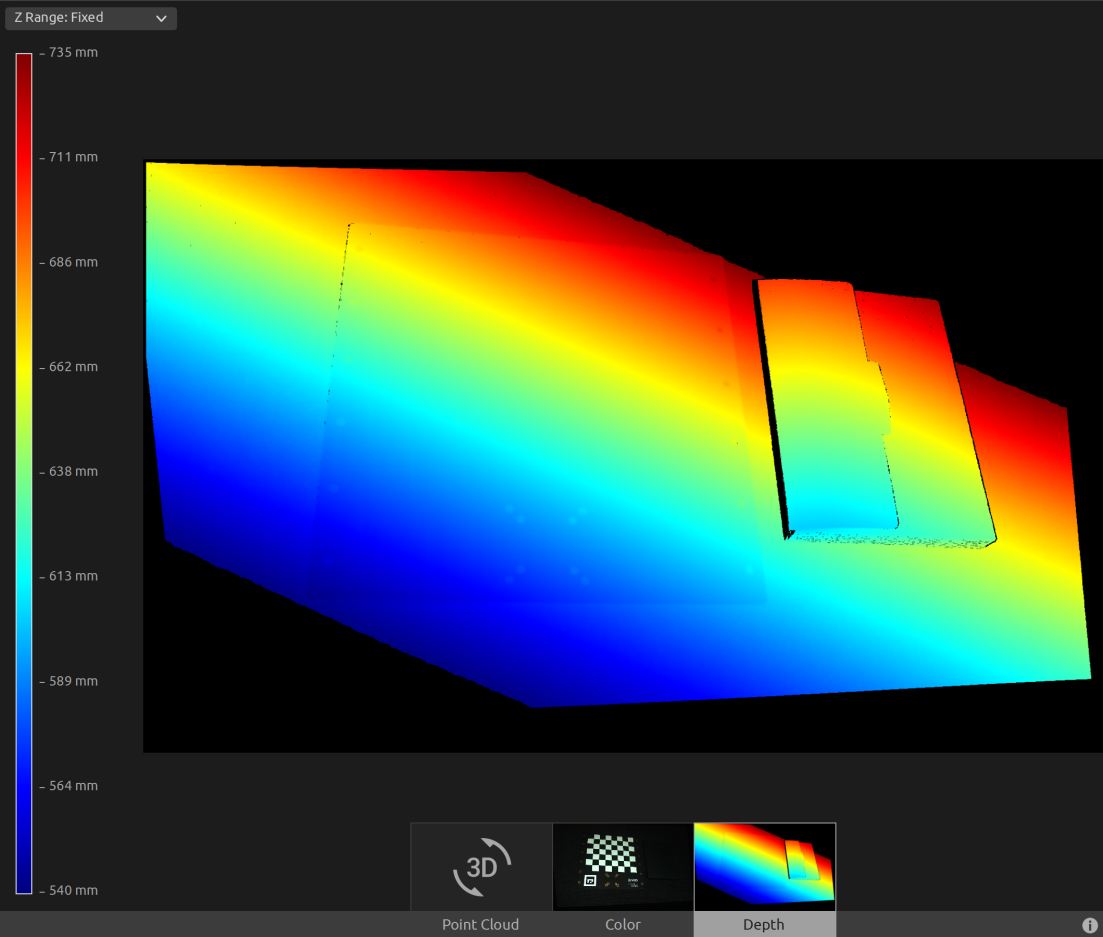
카메라 좌표계에서의 ArUco 마커

먼저 ArUco 마커의 포인트 클라우드를 로드합니다.

소스로 이동

source

const auto arucoMarkerFile = std::string(ZIVID_SAMPLE_DATA_DIR) + "/CalibrationBoardInCameraOrigin.zdf";
std::cout << "Reading ZDF frame from file: " << arucoMarkerFile << std::endl;
const auto frame = Zivid::Frame(arucoMarkerFile);
auto pointCloud = frame.pointCloud();
소스로 이동

source

var calibrationBoardFile = Environment.GetFolderPath(Environment.SpecialFolder.CommonApplicationData)
               + "/Zivid/CalibrationBoardInCameraOrigin.zdf";
Console.WriteLine("Reading ZDF frame from file: " + calibrationBoardFile);
var frame = new Zivid.NET.Frame(calibrationBoardFile);
var pointCloud = frame.PointCloud;
소스로 이동

source

data_file = get_sample_data_path() / "CalibrationBoardInCameraOrigin.zdf"
print(f"Reading ZDF frame from file: {data_file}")
frame = zivid.Frame(data_file)
point_cloud = frame.point_cloud()

그런 다음 ArUco 마커를 구성합니다.

소스로 이동

source

std::cout << "Configuring ArUco marker" << std::endl;
const auto markerDictionary = Zivid::Calibration::MarkerDictionary::aruco4x4_50;
std::vector<int> markerId = { 1 };
소스로 이동

source

Console.WriteLine("Configuring ArUco marker");
var markerDictionary = Zivid.NET.MarkerDictionary.Aruco4x4_50;
var markerId = new List<int> { 1 };
소스로 이동

source

print("Configuring ArUco marker")
marker_dictionary = zivid.calibration.MarkerDictionary.aruco4x4_50
marker_id = [1]

We then detect the ArUco marker.

소스로 이동

source

std::cout << "Detecting ArUco marker" << std::endl;
const auto detectionResult = Zivid::Calibration::detectMarkers(frame, markerId, markerDictionary);
소스로 이동

source

Console.WriteLine("Detecting ArUco marker");
var detectionResult = Detector.DetectMarkers(frame, markerId, markerDictionary);
소스로 이동

source

print("Detecting ArUco marker")
detection_result = zivid.calibration.detect_markers(frame, marker_id, marker_dictionary)

ArUco 마커의 포즈를 추정합니다.

소스로 이동

source

std::cout << "Estimating pose of detected ArUco marker" << std::endl;
const auto transformCameraToMarker = detectionResult.detectedMarkers()[0].pose().toMatrix();
소스로 이동

source

Console.WriteLine("Estimating pose of detected ArUco marker");
var cameraToMarkerTransform = new Zivid.NET.Matrix4x4(detectionResult.DetectedMarkers()[0].Pose().ToMatrix());
소스로 이동

source

print("Estimating pose of detected ArUco marker")
transform_camera_to_marker = detection_result.detected_markers()[0].pose.to_matrix()

Before transforming the point cloud, we invert the transformation matrix in order to get the pose of the camera in the ArUco marker coordinate system.

소스로 이동

source

std::cout << "Camera pose in ArUco marker frame:" << std::endl;
const auto markerToCameraTransform = transformCameraToMarker.inverse();
소스로 이동

source

Console.WriteLine("Camera pose in ArUco marker frame:");
var markerToCameraTransform = cameraToMarkerTransform.Inverse();
소스로 이동

source

print("Camera pose in ArUco marker frame:")
transform_marker_to_camera = np.linalg.inv(transform_camera_to_marker)

After transforming we save the pose to a YAML file.

소스로 이동

source

const auto transformFile = "ArUcoMarkerToCameraTransform.yaml";
std::cout << "Saving a YAML file with Inverted ArUco marker pose to file: " << transformFile << std::endl;
markerToCameraTransform.save(transformFile);
소스로 이동

source

var transformFile = "ArUcoMarkerToCameraTransform.yaml";
Console.WriteLine("Saving a YAML file with Inverted ArUco marker pose to file: " + transformFile);
markerToCameraTransform.Save(transformFile);
소스로 이동

source

transform_file = Path("ArUcoMarkerToCameraTransform.yaml")
print("Saving a YAML file with Inverted ArUco marker pose to file: ")
assert_affine_matrix_and_save(transform_marker_to_camera, transform_file)

This is the content of the YAML file:

__version__:
    serializer: 1
    data: 1
FloatMatrix:
    Data:
        [
            [0.978564, 0.0506282, 0.1996225, 21.54072],
            [-0.04527659, -0.892707, 0.4483572, -208.0268],
            [0.2009039, -0.4477845, -0.8712788, 547.6984],

After that, we transform the point cloud to the ArUco marker coordinate system.

소스로 이동

source

std::cout << "Transforming point cloud from camera frame to ArUco marker frame" << std::endl;
pointCloud.transform(markerToCameraTransform);
소스로 이동

source

Console.WriteLine("Transforming point cloud from camera frame to ArUco marker frame");
pointCloud.Transform(markerToCameraTransform);
소스로 이동

source

print("Transforming point cloud from camera frame to ArUco marker frame")
point_cloud.transform(transform_marker_to_camera)

Before saving the transformed point cloud, we can convert it to an OpenCV 2D image format and draw the detected ArUco marker.

소스로 이동

source

std::cout << "Converting to OpenCV image format" << std::endl;
const auto bgraImage = pointCloudToColorBGRA(pointCloud);
std::cout << "Displaying detected ArUco marker" << std::endl;
const auto bgr = drawDetectedMarker(bgraImage, detectionResult);
displayBGR(bgr, "ArucoMarkerDetected");
소스로 이동

source

print("Converting to OpenCV image format")
bgra_image = point_cloud.copy_data("bgra")
print("Displaying detected ArUco marker")
bgr = _draw_detected_marker(bgra_image, detection_result)
display_bgr(bgr, "ArucoMarkerDetected")

Here we can see the image that will be displayed and we can observe where the coordinate system of the checkerboard is.

aruco marker

Lastly we save the transformed point cloud to disk.

소스로 이동

source

const auto arucoMarkerTransformedFile = "CalibrationBoardInArucoMarkerOrigin.zdf";
std::cout << "Saving transformed point cloud to file: " << arucoMarkerTransformedFile << std::endl;
frame.save(arucoMarkerTransformedFile);
소스로 이동

source

var arucoMarkerTransformedFile = "CalibrationBoardInArucoMarkerOrigin.zdf";
Console.WriteLine("Saving transformed point cloud to file: " + arucoMarkerTransformedFile);
frame.Save(arucoMarkerTransformedFile);
소스로 이동

source

aruco_marker_transformed_file = "CalibrationBoardInArucoMarkerOrigin.zdf"
print(f"Saving transformed point cloud to file: {aruco_marker_transformed_file}")
frame.save(aruco_marker_transformed_file)

힌트

자세한 내용은 Position, Orientation and Coordinate Transformations 에서 확인 가능합니다.

이제 Zivid Studio에서 transformed point cloud 를 열 수 있습니다. 그리고 포인트 클라우드를 확인하십시오.

참고

변환된 포인트 클라우드에는 시점 원점이 부적합하므로 Zivid Studio에서 축소하여 데이터를 찾습니다.

이제 깊이 보기에서 Z 범위를 -35mm에서 1mm로 수동으로 설정할 수 있습니다. 이렇게 하면 칼리브레이션 보드와 그 옆에 있는 개체를 제외한 모든 데이터를 필터링할 수 있습니다. 이를 통해 칼리브레이션 보드 전체에 동일한 Z 값이 있음을 알 수 있으며 색상 그라디언트에서 값이 0인지 확인할 수 있습니다. 이는 포인트 클라우드의 원점이 ArUco 마커에 있음을 의미합니다.
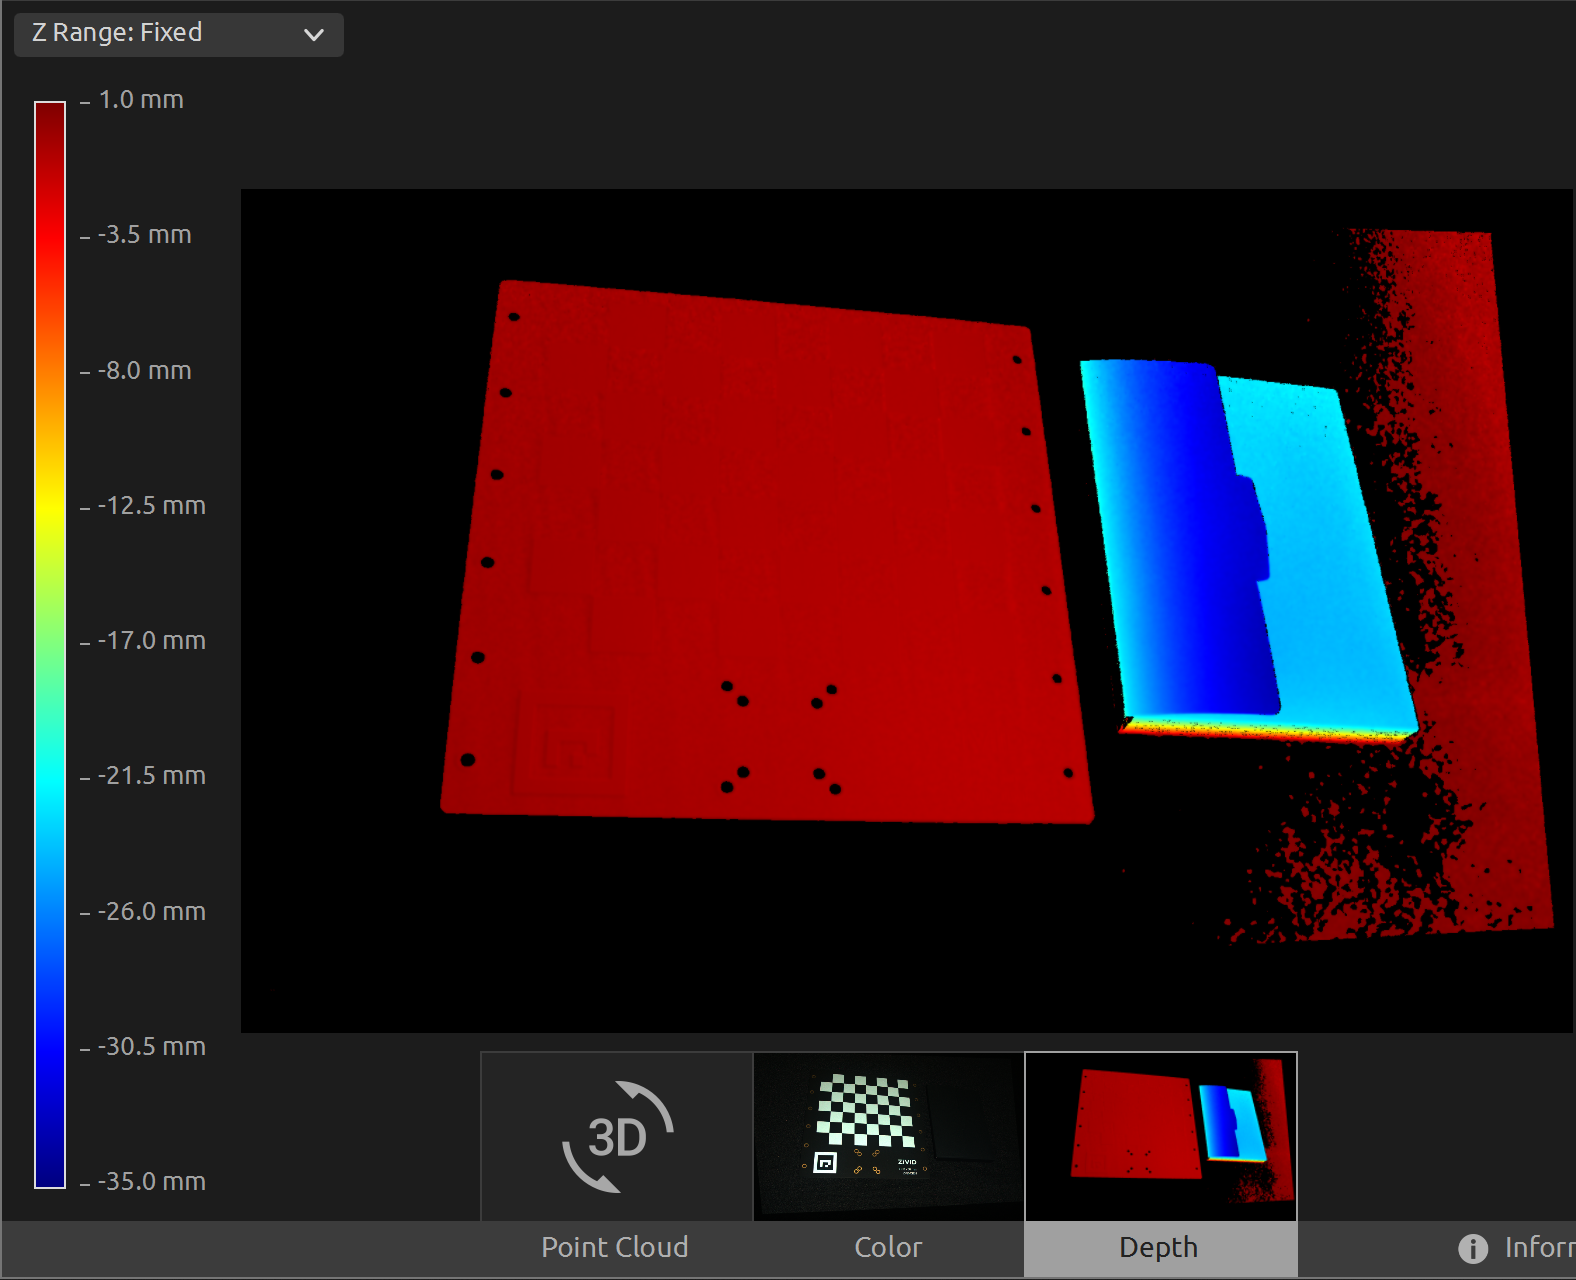
카메라 좌표계에서의 ArUco 마커

To transform the point cloud to the ArUco marker coordinate system, you can run our code sample.

Sample: TransformPointCloudViaArucoMarker.cpp

./TransformPointCloudViaArucoMarker

Sample: TransformPointCloudViaArucoMarker.cs

./TransformPointCloudViaArucoMarker

Sample: transform_point_cloud_via_aruco_marker.py

python transform_point_cloud_via_aruco_marker.py

Modify the code sample if you wish to use this in your own setup:

  1. Replace the ZDF file with your actual camera and settings.

  2. Place the ArUco marker in your scene.

  3. Run sample!