設定セレクター
このセクションでは、取得をトリガーしてから点群を取得するまでの時間的制約に基づき、最適なカメラ設定に関する詳細なガイダンスを提供します。データ転送と点群処理は PC のスペックにも依存するため、PC のスペックも考慮に入れています。3D キャプチャで良好な点群を取得するための設定と、2D キャプチャで良好なカラー画像を取得するための設定について説明します。
パレット化・脱パレット化アプリケーションに使用する Zivid カメラを決定し、正しく設置・配置しました。次のステップは、PC のスペックを考慮した上で、サイクルタイムの要件を満たすカメラ設定を選択することです。まだ PC をお持ちでない場合は、このセクションでは、使用する設定と組み合わせることで、キャプチャ時間の要件を満たす PC スペックを見つける方法についても説明します。
3D 設定
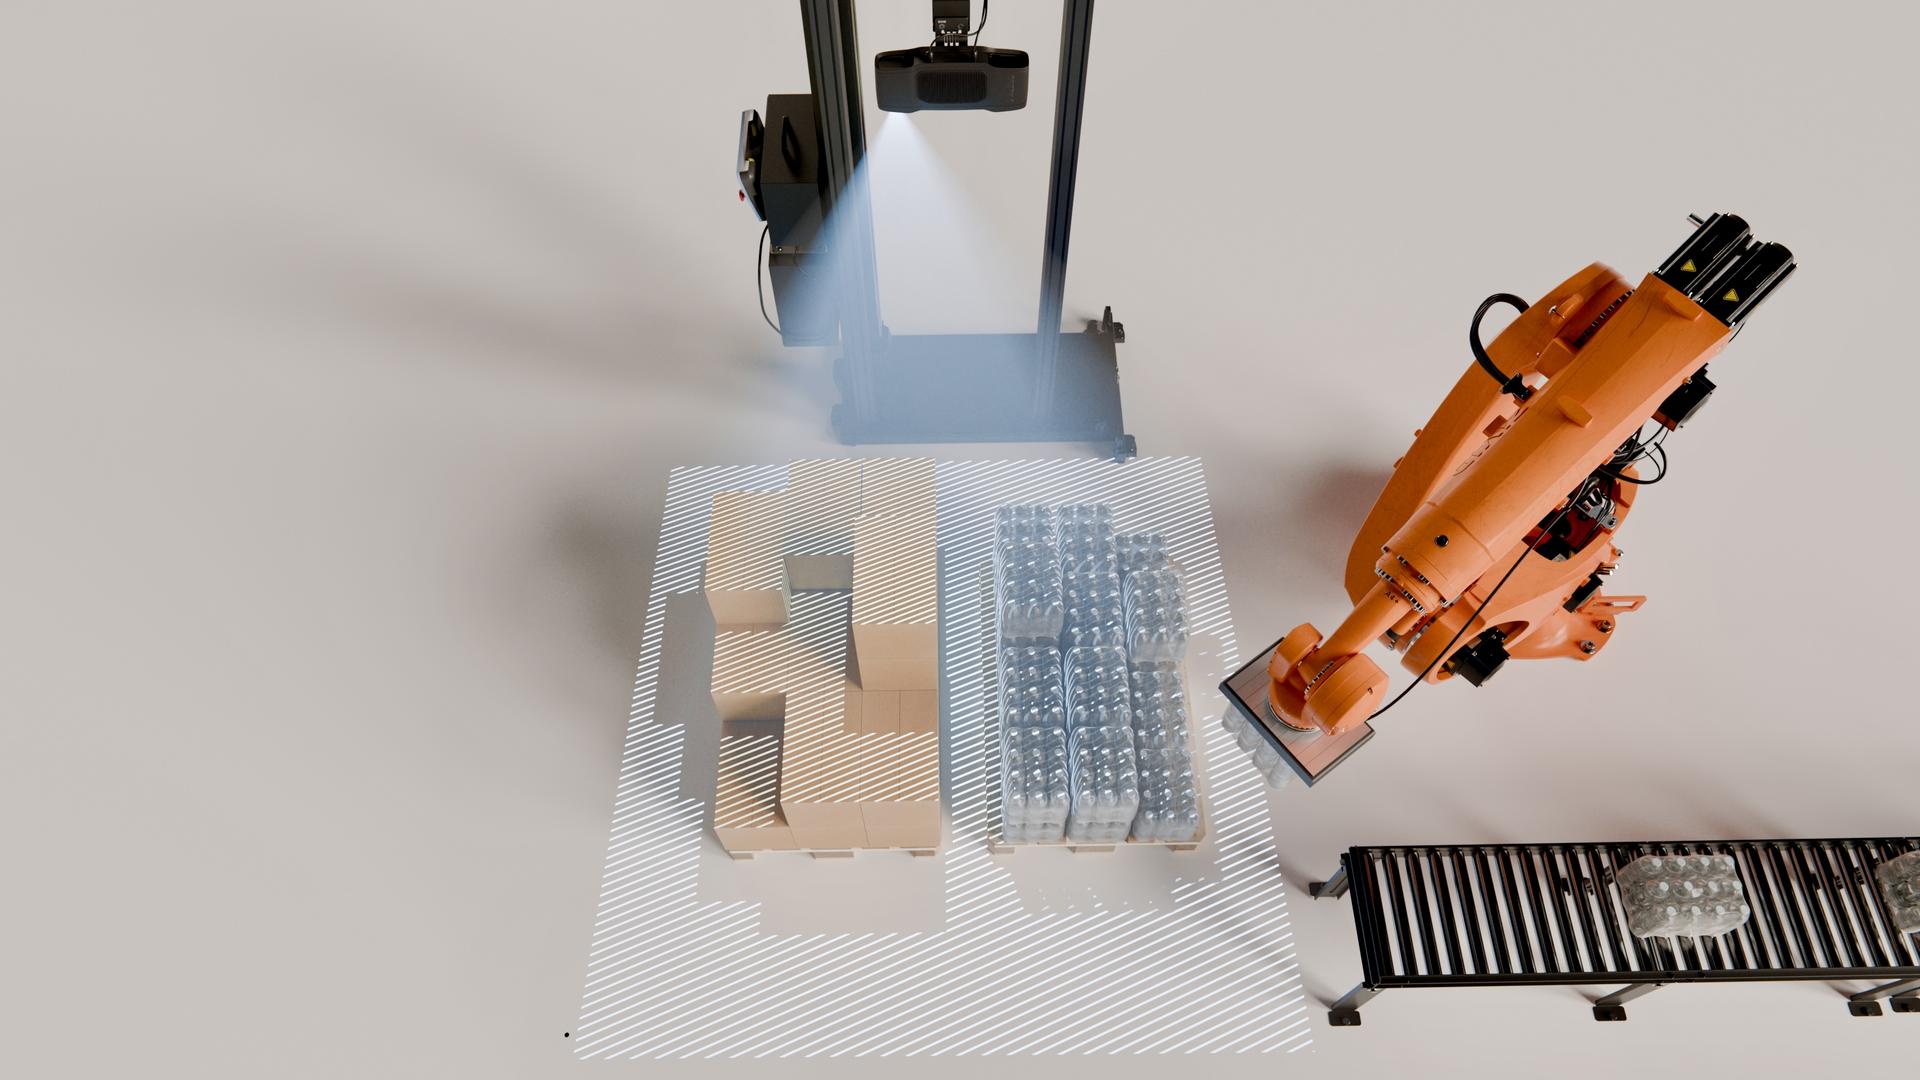
単純なオブジェクトを使用した単純なシナリオの場合(上の画像の左側のパレットを参照)、 Z3 XL250 Fast プリセットを使用してください。
複数の SKU が混在するより複雑なシナリオでは、 Z3 XL250 Quality プリセットを使用してください。
Settings Selector Table
The following table shows benchmark capture times per camera model and PC configuration. Use it to determine which settings meet your cycle time requirements, then download them below. For more information about recommended hardware, see 推奨産業用 PC.
If you experience artifacts in the form of ripples/waves across the whole point cloud, choose 50/60 Hz to select presets adapted to the ambient light (grid) frequency. If the ambient light is unproblematic, select Off for optimal performance. To be sure, you can check if there is flickering light in the scene with the Zivid camera.
Camera |
Depalletization Fast |
Depalletization Quality |
|---|---|---|
Zivid Three XL250 |
To download the desired settings file, you can also connect to the camera (your specific model) in Zivid Studio, select the preset settings, turn on Ambient Light Adaption, and export the settings.
注意
The capture time with settings adapted for ambient light frequency might be longer.
Camera |
Depalletization Fast |
Depalletization Quality |
|---|---|---|
Zivid Three XL250 |
To download the desired settings file, you can also connect to the camera (your specific model) in Zivid Studio, select the preset settings, turn on Ambient Light Adaption, and export the settings.
注意
The capture time with settings adapted for ambient light frequency might be longer.
Camera |
Depalletization Fast |
Depalletization Quality |
|---|---|---|
Zivid Three XL250 |
2D 設定
デパレタイズプリセットには 2D 設定が含まれています。
遠距離撮影や高照度環境下で推奨されるプリセットは、色を強調する特殊な RGB モードを使用します。ただし、キャプチャ時間が増加するというデメリットがあります。
ちらつく光による干渉を避ける
バーコードリーダーや蛍光灯などのちらつきのある光源(10〜1000 Hz)は、 Zivid カメラに干渉する可能性があります。この干渉は カラー画像の色の不整合 として現れることがあります。これを防ぐには、ちらつきのある光源が以下のいずれかであることを確認してください。
連続的で、周波数が Zivid カメラの露光時間と相関している
連続的で、周波数が Zivid カメラのサンプリング間隔と相関している
Zivid カメラによる取得中は非アクティブ
アクティブ光源が存在する場合の設定
まず最初に、アクティブな光源の周波数を特定する必要があります。周波数が不明な場合は、 Zivid カメラで測定できます。
周囲光の周波数を検出および測定する
Zivid Studio を開き、カメラに接続します。 Capture セクションの 3 つの点をクリックします。次に、 Measure scene lighting conditions をクリックします。ソフトウェアが検出された周囲光のちらつき周波数を表示します。
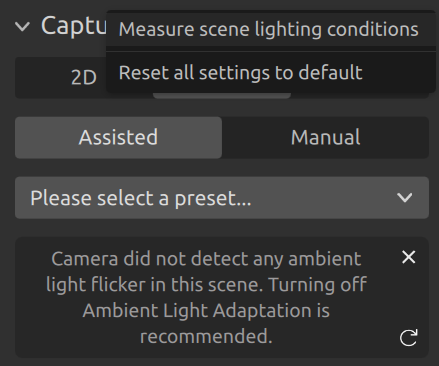
あるいは、 SDK を使用して周囲の光環境を測定することもできます。この方法では、顕著な周囲光のちらつきが検出されたかどうか、またそれが 50 Hz または 60 Hz の電力網に対応するかどうかを報告します。

std::cout << "Measuring scene conditions" << std::endl;
auto sceneConditions = camera.measureSceneConditions();
auto flickerClassification = sceneConditions.ambientLight().flickerClassification().toString();
std::cout << "Flicker classification: " << flickerClassification << std::endl;
    auto flickerFrequency = sceneConditions.ambientLight().flickerFrequency();
    std::cout << "Measured flickering frequency in the scene: " << flickerFrequency << " Hz." << std::endl;
Console.WriteLine("Measuring scene conditions");
var sceneConditions = camera.MeasureSceneConditions();
var flickerClassification = sceneConditions.AmbientLight.FlickerClassification.ToString();
Console.WriteLine("Flicker classification: " + flickerClassification);
    var flickerFrequency = sceneConditions.AmbientLight.FlickerFrequency;
    Console.WriteLine($"Measured flickering frequency in the scene: {flickerFrequency} Hz.");
print("Measuring scene conditions")
scene_conditions = camera.measure_scene_conditions()
flicker_classification = scene_conditions.ambient_light.flicker_classification
print(f"Flicker classification: {flicker_classification}")
    flicker_frequency = scene_conditions.ambient_light.flicker_frequency
    print(f"The measured flickering frequency in the scene: {flicker_frequency} Hz.")
測定対象が 1 つの光源(例:バーコードスキャナー)の場合は、シーン内の他の光源(例:環境光)をすべて消灯してください。
その後、干渉を避けるために、アクティブな光源または Zivid カメラの設定を構成することを選択できます。
Configuring active light source
アクティブな光源(例:バーコードスキャナ)の周波数( \(f_c\) )を、 Zivid カメラの露光時間( \(t_z\) )に合わせるには、以下を使用します。
例えば:
Configuring Zivid camera
Adjusting exposure time
Zivid カメラの露光時間( \(t_z\) )を、バーコードスキャナなどのアクティブな光源の周波数( \(f_c\) )に合わせるには、以下を使用します。
例えば:
Adjusting sampling interval (Zivid 3 only)
計算された露光時間が実現不可能な場合は、同じ式を使用して、 2D サンプリング間隔 ( \(t_z\) )をアクティブな光源周波数( \(f_c\) )に一致するように設定します。
例えば:
An example of such case is when compensating with the longer exposure time requires lowering the projector brightness too much, thus causing noticeable noise in the color image.
This is the case when using rgb mode for Settings2D::Sampling::Color, and not when using the rgbStrongAmbientLight mode.
Another example is overexposure, which occurs if long exposure times cannot be adequately compensated for using other acquisition settings such as gain or projector brightness.
アクティブ光源と交流電源によるちらつき光源の両方が存在する場合の設定
電力線周波数変調(例えば、米国では 60 Hz、EU では 50 Hz)で動作する強力で制御不能な光源が存在する場合、さらなる課題が生じる可能性があります。蛍光灯などの交流電源光源の周波数を変更することは現実的ではないため、 Zivid カメラの設定とアクティブな光源の周波数を調整する必要があります。
Adjusting exposure time
周囲光による干渉 を軽減するには、 Zivid カメラの露光時間を電力線の周期の倍数に合わせます。
10 000 µs or 20 000 µs in the presence of 50 Hz grid frequency.
8 333 µs or 16 667 µs in the presence of 60 Hz grid frequency.
Adjusting sampling interval (Zivid 3 only)
2D 画像での露出過多などの理由で、グリッド周波数に合わせて露光時間を調整できない場合は、代わりに 2D サンプリング間隔 を有効にして、地域のグリッド周波数に同期させてください。
10 000 µs in the presence of 50 Hz grid frequency.
8 333 µs in the presence of 60 Hz grid frequency.
2D 取得の場合、 Color Inconsistency (random Color Tint) を回避するために、露光時間または 2D サンプリング間隔の長さを設定する必要があります。3D 取得の場合は、 Ripples from Ambient Light Interference が観測されない限り、この設定は不要です。
露光時間マッチングを用いたソリューションは、より優れたパフォーマンスとより安定したキャプチャ時間を提供するため、2D サンプリング間隔マッチングよりも好ましい方法です。
アクティブ光源の設定
最後に、 Zivid カメラの露光時間に合わせたアクティブなちらつき光源の周波数は、次のように計算できます。
次のセクションでは、マルチスレッドを活用して高速化するための ロボットのサイクルタイムを最適化する を説明します。