连接和电源

Zivid cameras connect to power and to your computer via two M12 connectors: a power connector and an Ethernet connector.

连接器

Zivid cameras have a power connector and an Ethernet connector: Zivid 3, Zivid 2+, or Zivid 2.

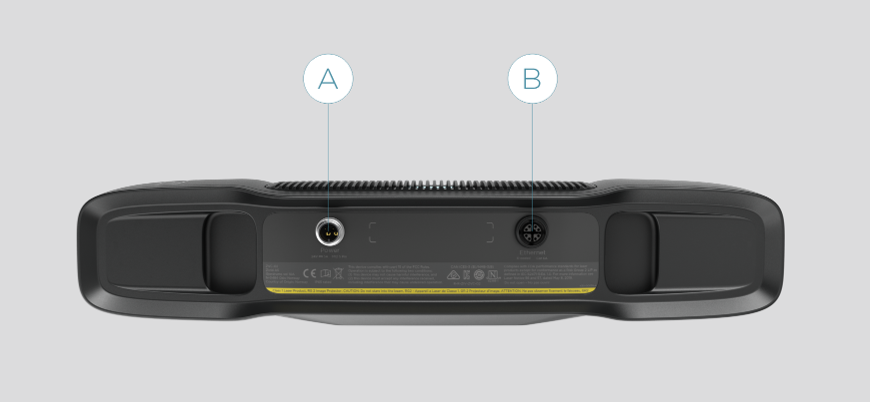
Zivid 3
../../../_images/zivid-three-backside-without-reset-button.png
  1. M12-5:电源连接器24V,5A DC

  2. M12X:以太网连接器CAT 6A

查看Zivid 数据电缆 了解更多信息。

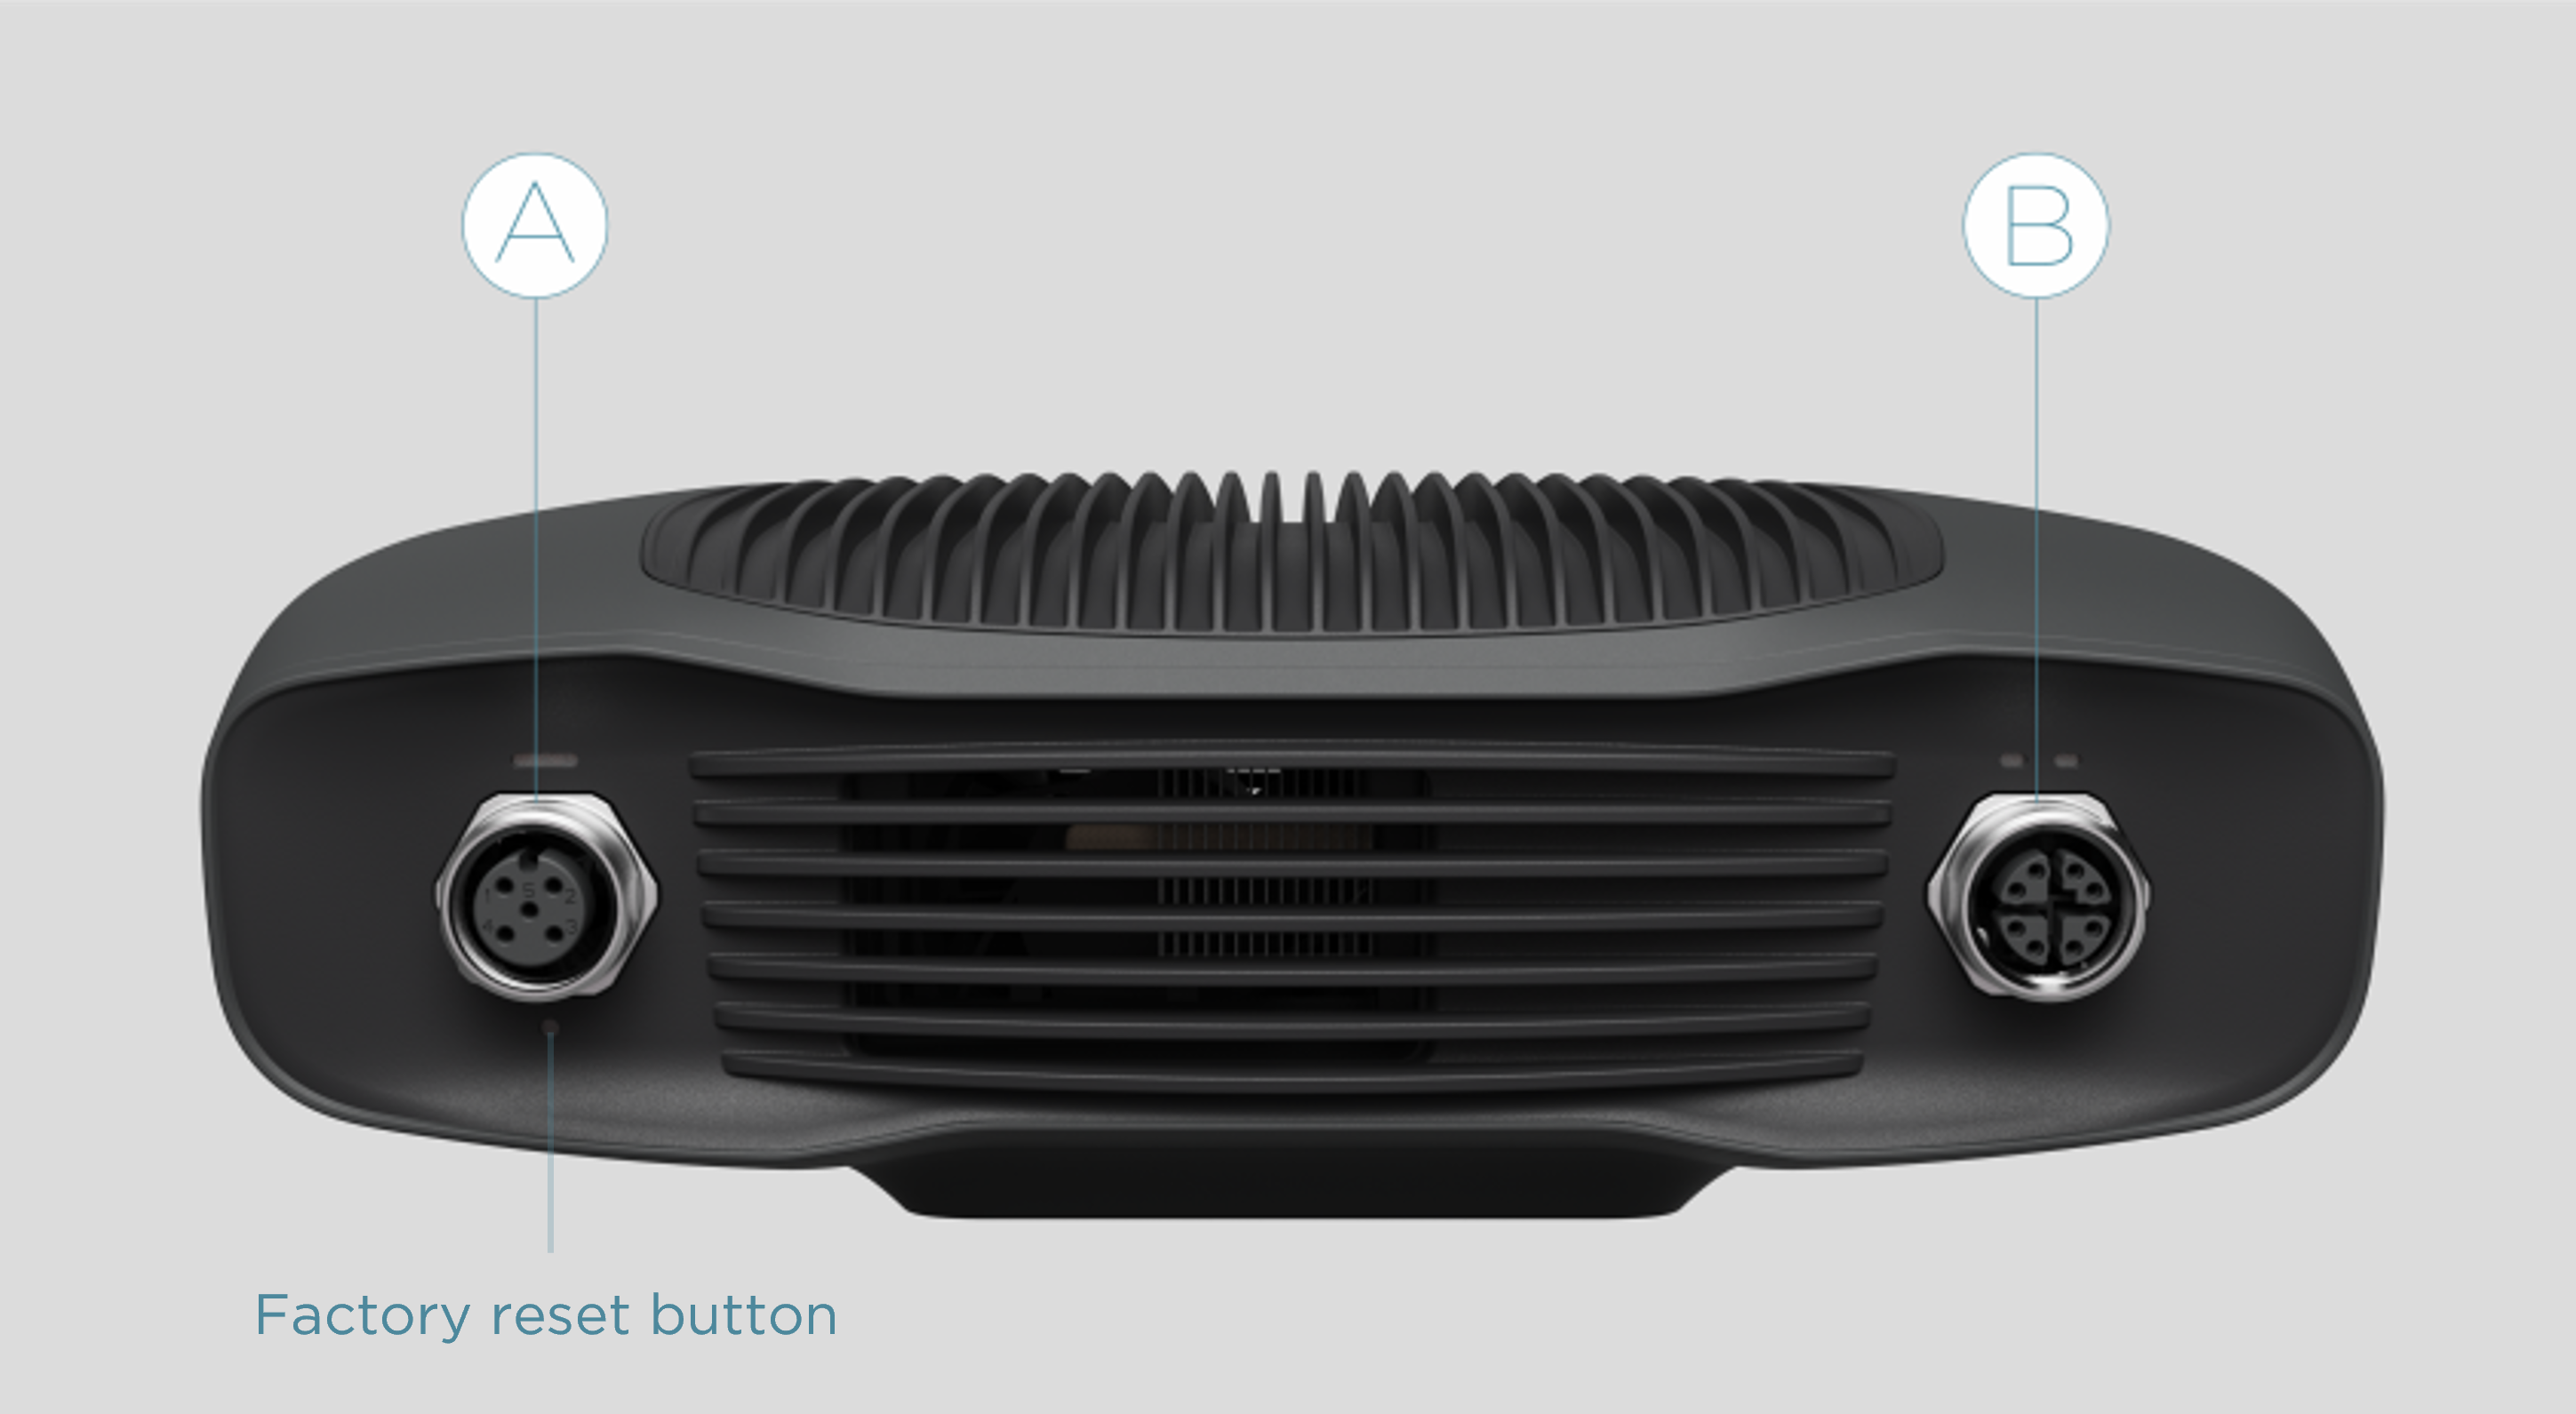
Zivid 2+
../../../_images/zivid-two-backside-with-reset-button.png
  1. M12-5:电源连接器24V,5A DC

  2. M12X:以太网连接器CAT 6A

查看Zivid 数据电缆 了解更多信息。

For the factory reset button, see 恢复出厂设置按钮.

Zivid 2
../../../_images/zivid-two-backside-with-reset-button.png
  1. M12-5:电源连接器24V,5A DC

  2. M12X:以太网连接器CAT 6A

查看Zivid 数据电缆 了解更多信息。

For the factory reset button, see 恢复出厂设置按钮.

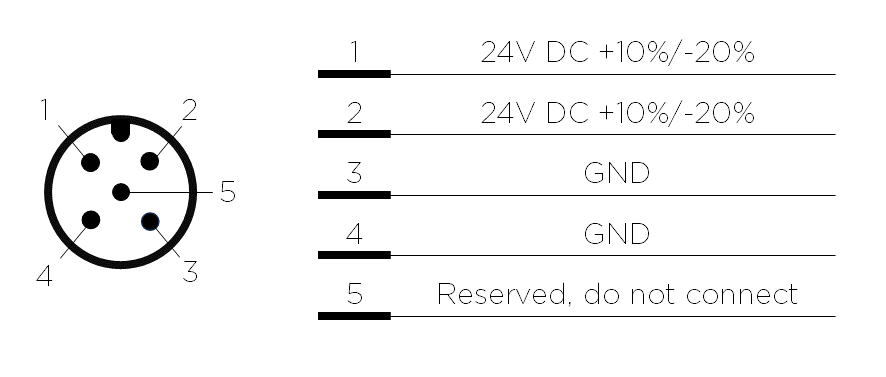
电源接口

../../../_images/power_supply_interface_pinout.png

24V和GND的两个引脚都需要连接。

Zivid 3: optional mating connector TE Connectivity AMP, 1838274-3 (Digikey: A97642-ND).

Zivid 2+ and Zivid 2: optional mating connector TE Connectivity AMP, 1838275-3 (Digikey: A97645-ND).

警告

Power supplies or cables that do not meet the specified requirements can damage the camera and void the warranty, particularly when using third-party or custom solutions. See 电源和电缆 for more information.

数据线

Zivid 相机使用专用以太网电缆进行数据传输。请参阅 Zivid 数据电缆 了解更多信息。

下表提供了 Zivid 以太网电缆引脚排列。
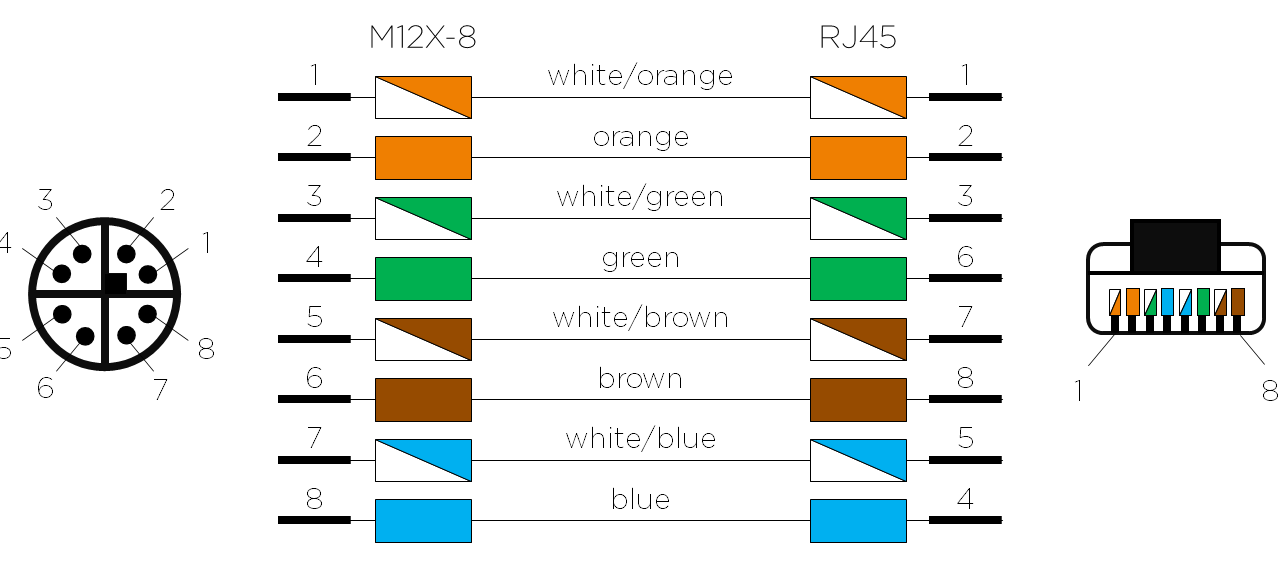
../../../_images/data_cable_m12x8_rj45_interface.png

连接到计算机

To connect the camera, plug in power first, then the Ethernet cable to your computer.

  1. Plug the power supply into the camera's power connector ("24V").

  2. 将以太网电缆插入相机并将其连接到您的计算机。

  3. 将电源插头插入电源插座。

备注

断开连接时,按照相反的步骤进行,首先断开主电源。
Ensure that all connections are screwed in tightly. The coupling nut of the M12 screw connectors can in some cases be hard to screw in. However, when installed correctly they provide a reliable connection.
考虑性能表现时可参考 系统要求 来评估,并通过观察 LED状态指示灯 来确认数据传输性能表现。

使用随设备提供的AC/DC适配器以确保符合辐射和抗扰度标准。

Zivid相机通过一个热敏电阻使用物理切断电源的方式来防止极性反接和设备过热。

The Zivid camera uses Ethernet communication and needs 10 Gbps for best performance. Not all computers have a port for 10 Gigabit Ethernet. In that case, you can connect to it using an adaptor for 10GBASE-T (10 Gbps copper Ethernet) to Thunderbolt 3. At a reduced performance you can also use 1000BASE-T and NBASE-T (1 Gbps, 2.5 Gbps, and 5 Gbps over copper) to USB adapters.

推荐的网卡和适配器

小心

基于USB的网络适配器会降低捕获速度,使速度变得不稳定,并且在使用相机时偶尔会出现错误。我们的建议是使用10Gb PCI Express卡以获得最佳性能。

警告

仅使用 Zivid认可的以太网电缆

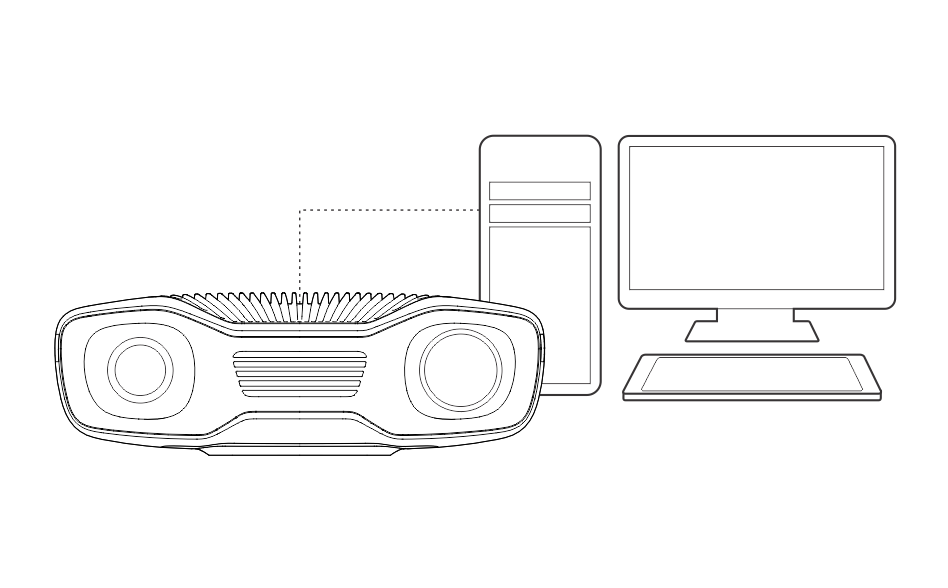
网络拓扑

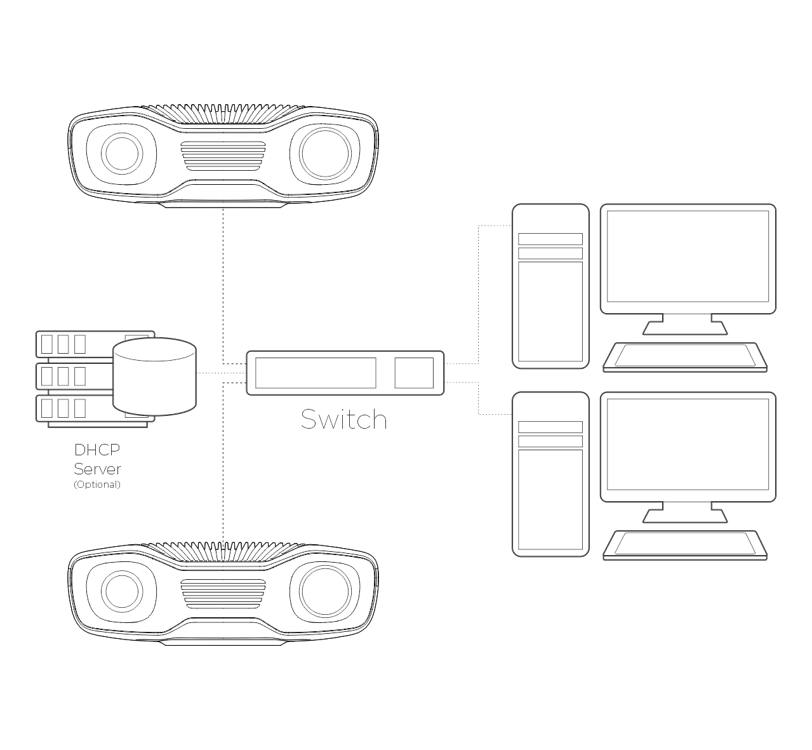
Zivid相机支持以下网络拓扑:

直接连接

通过交换机连接

../../../_images/zivid-two-pc-direct-connection.png ../../../_images/zivid-two-pc-connection-via-switch.png

Continue to Software Installation where you will also find Network Configuration.

Version History

SDK

变更

2.17.0

增加了对 Zivid 3 XL250 的支持。

2.14.0

增加了对 Zivid 2+ MR130、LR110 和 MR60 的支持。

2.12.0

Zivid One+ 已达到其生命周期的终点并且不再受支持。

2.4.0

添加了多个 Zivid 2 相机支持。