正确定位
本页介绍相机定位的一般准则,以及针对 料箱拾取 和 表面成像 应用的具体指导,以及 Zivid 相机的 散热间隙 和 信号保护 要求。
将相机安装在场景正上方是最常见的,也是推荐的做法。
这种安装方式特别适合对透明物体以及同时具有镜面反射性和暗色的表面进行成像。在这种情况下,将相机垂直于物体安装可以最大限度地提高返回相机的信号。
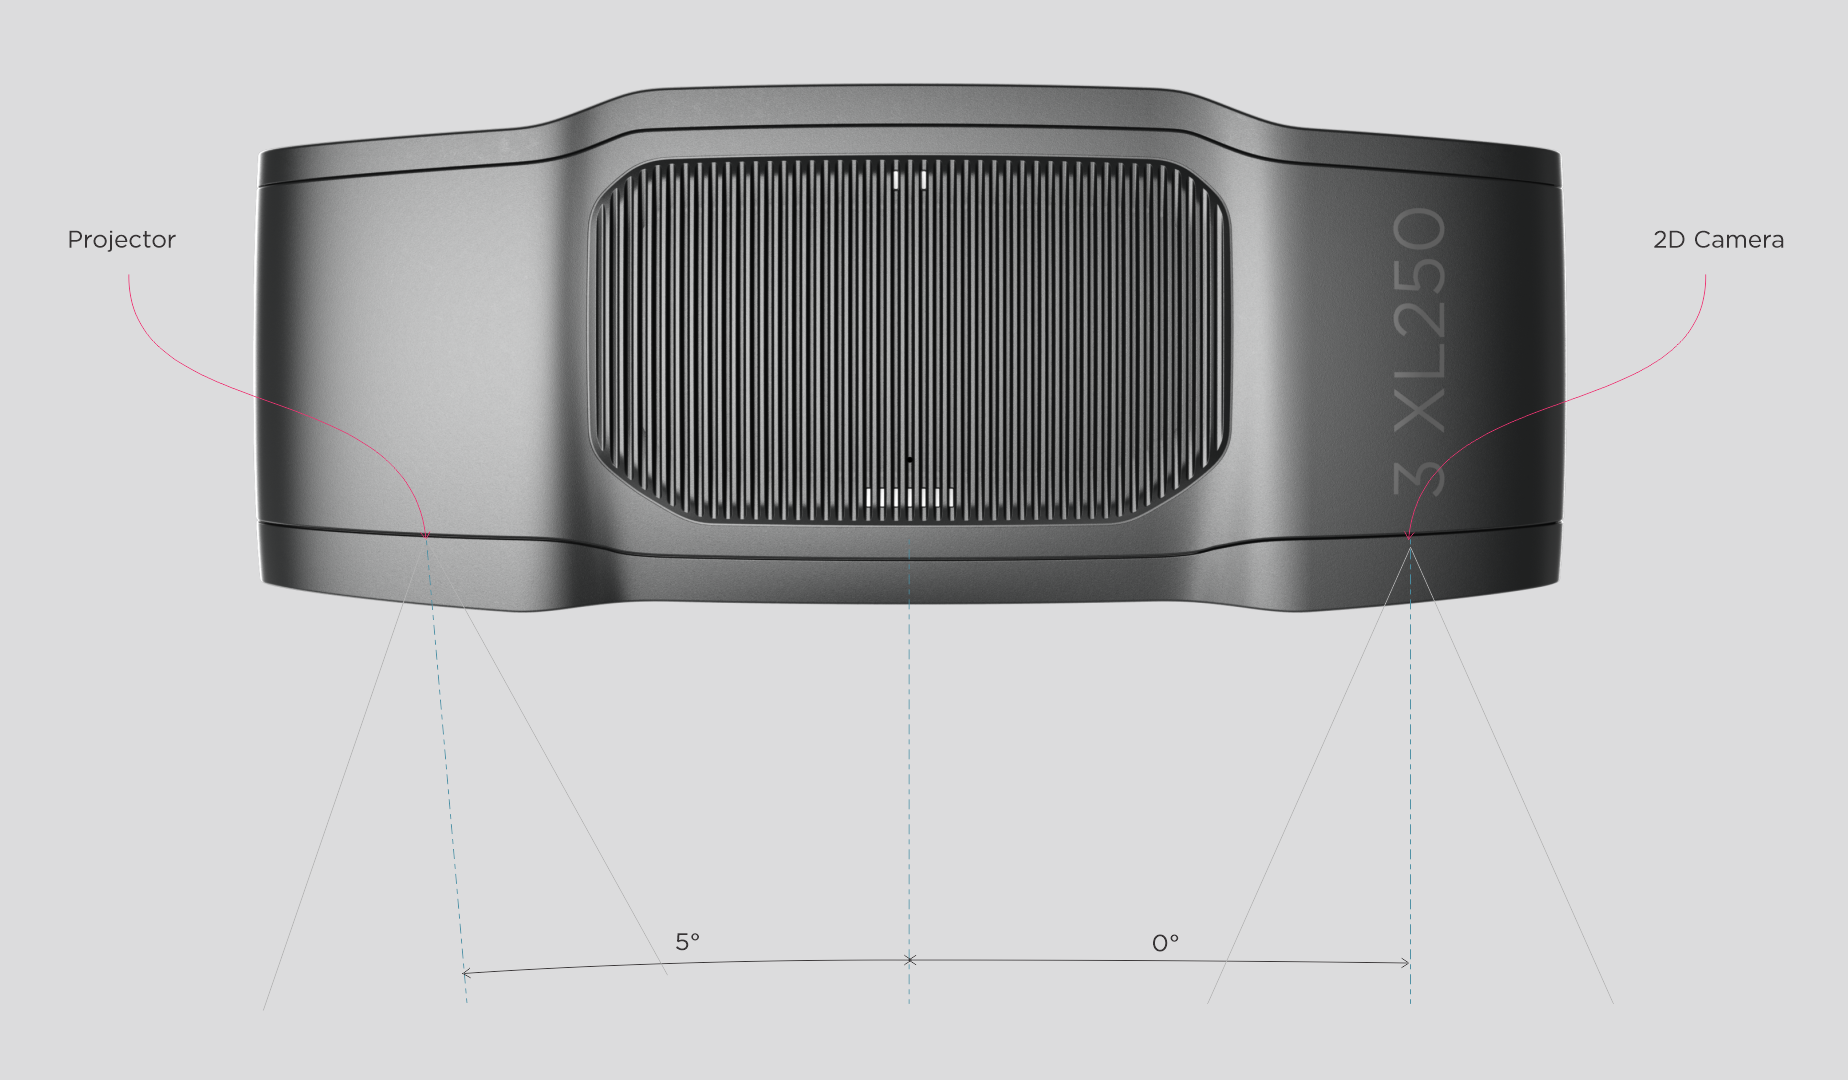
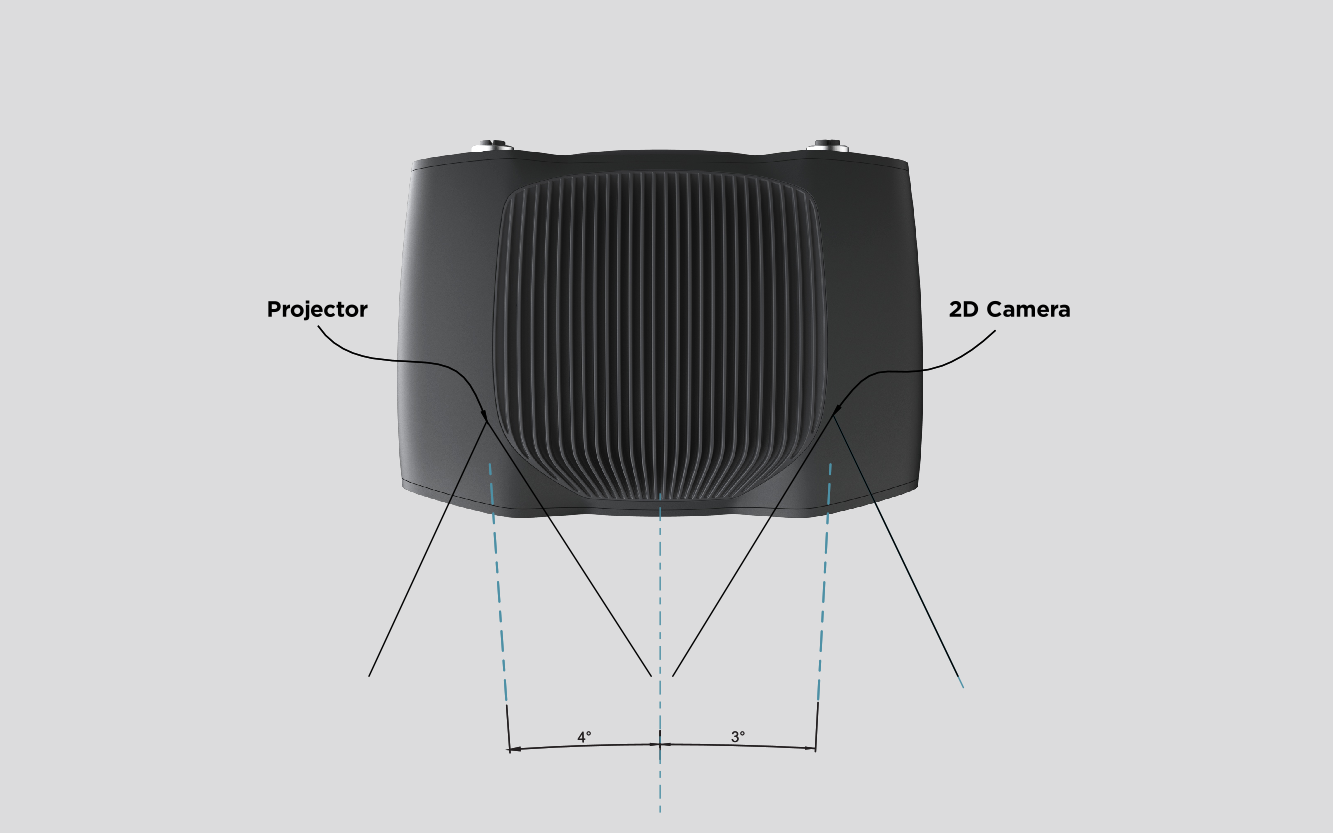
2D 相机和投影仪相对于中心轴有一定角度。如果您希望相机垂直于场景,应考虑这一点。
Zivid 3
XL250
Zivid 2+
MR130/M130
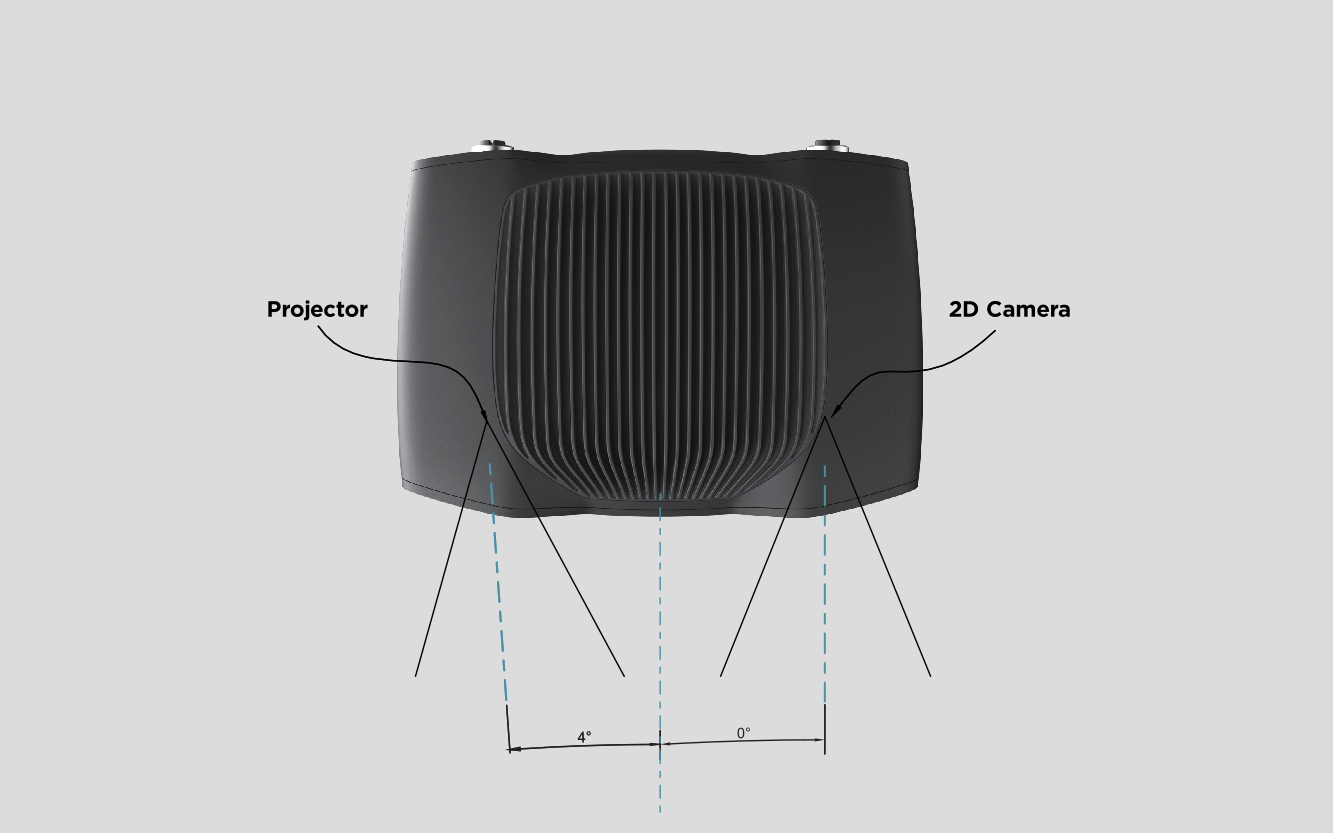
LR110/L110
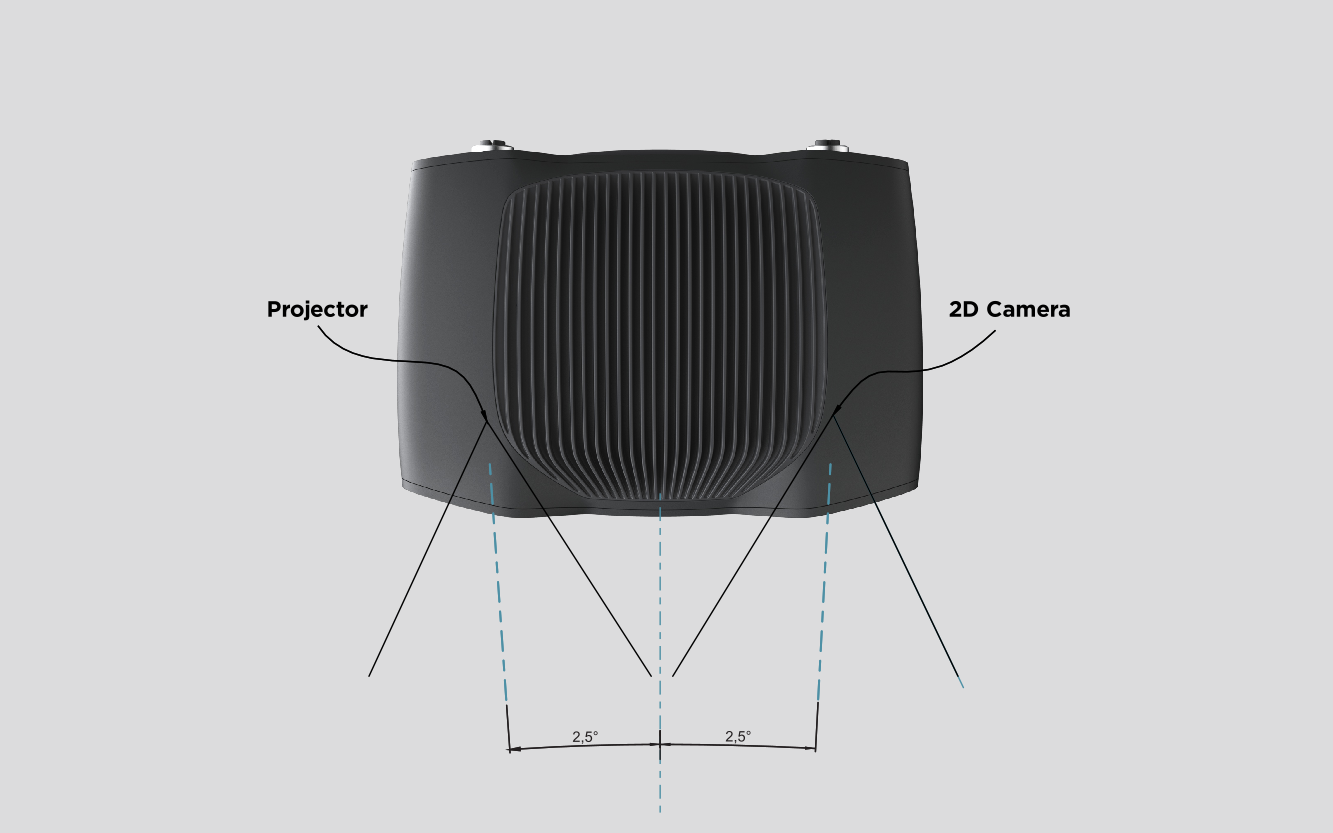
MR60/M60
Zivid 2
在料箱抓取应用中
在箱壁存在强烈相互反射的情况下,您可以将 Zivid 相机投影仪放置在料箱后边缘上方或后角上方(见下图)。平移和倾斜相机,使 2D 相机对准料箱中心。使投影仪光线远离最靠近投影仪的两面侧壁的内表面;使光线几乎与这两面侧壁平行。
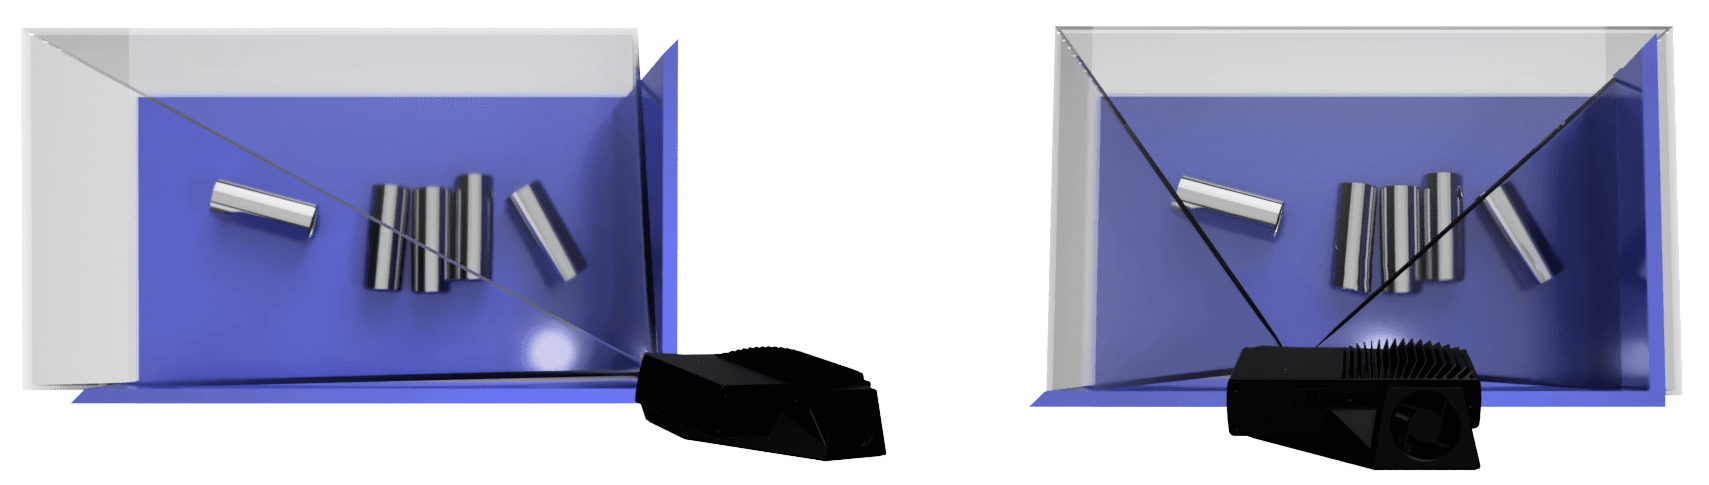
以这种方式安装相机可最大限度地减少箱壁的相互反射,同时释放场景上方的空间,以便于工具和机器人更容易接近。
Zivid 相机无需任何额外的光源;投影仪即可提供 2D 和 3D 捕获所需的所有照明。强而集中的光线,例如安装在料箱正上方的聚光灯,可能会直接反射到相机中,导致传感器饱和,并在 2D 图像中引起 泛光(blooming) 。应避免将相机安装在会直视此类反射光的位置。为尽量减少此影响,如果不需要额外光源,请将其移除,或者尝试稍微移动或倾斜相机。有关在此类条件下拍摄的更多信息,请参阅 处理强环境光 。
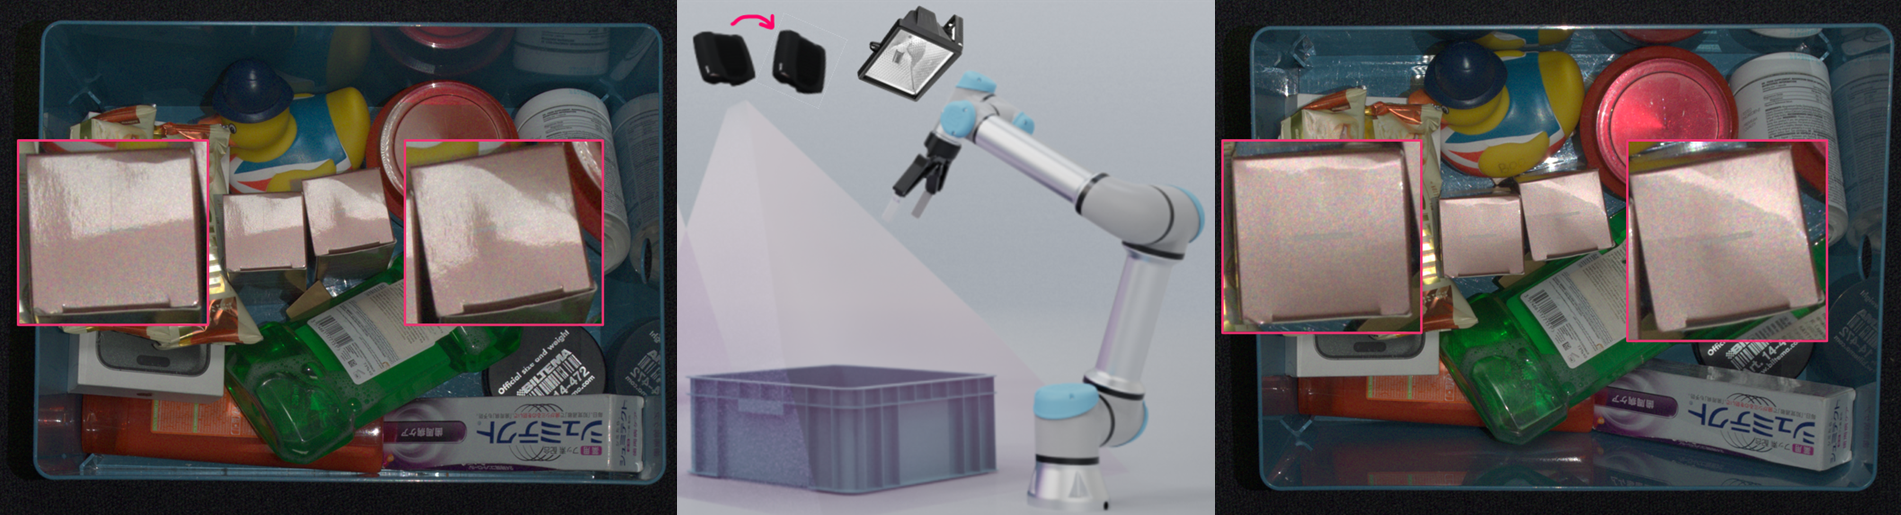
在表面成像应用中
对于高反射表面,光源(无论是来自相机投影仪还是外部光源)的直接反射都会在 2D 图像中产生不必要的高光。为了最大限度地减少这些反射,请将相机稍微倾斜安装,使反射光远离相机的视野。调整光源位置或使用漫射光也可以减少眩光。
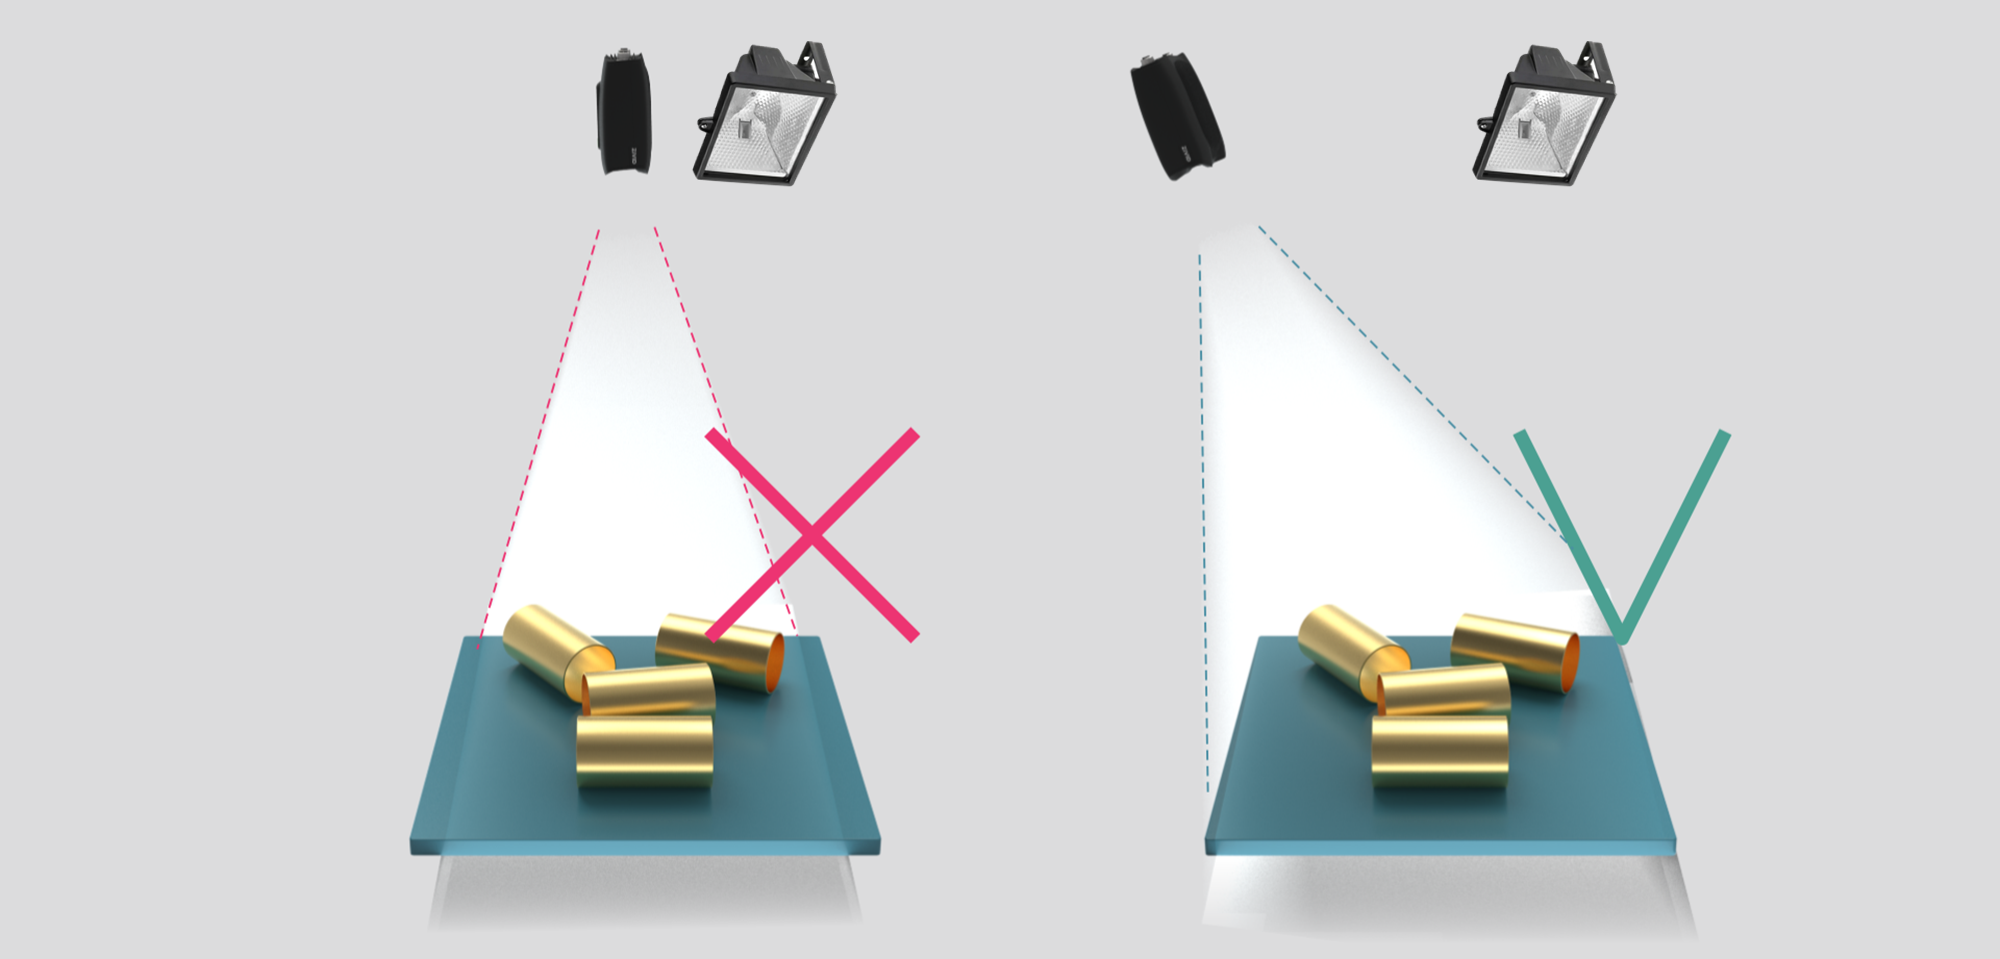
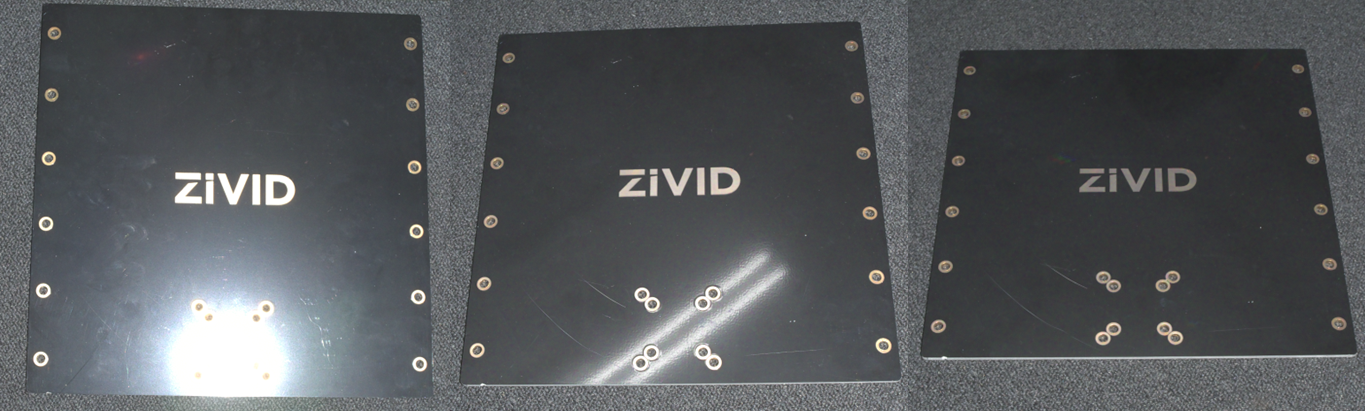
2D 图像中是否会包含来自投影仪的高光(左)、环境光(中)和无高光(右),具体取决于相机的位置和角度。
散热间隙
Zivid 相机同时采用了主动和被动散热方式,请在设备周围留出一些空间以供气流流通,并且不会阻塞其前后侧的空气开口。建议 在 datasheets 中描述的工作温度范围内使用您的相机。
信号保护
请勿将 Zivid 相机和电缆安装在会产生高强度电磁干扰的高压设备旁边。请勿将相机电缆与交流电源线和会发出高强度干扰的电缆穿过相同的干线/导管。
继续阅读关于 连接和电源 的文章。
Version History
SDK |
变更 |
|---|---|
2.17.0 |
增加了对 Zivid 3 XL250 的支持。 |
2.15.0 |
添加了如何针对料箱拾取和表面成像应用处理 2D 图像中的高光部分。 |
2.14.0 |
增加了对 Zivid 2+ MR130、LR110 和 MR60 的支持。 |
2.12.0 |
Zivid One+ 已达到其生命周期的终点并且不再受支持。 |