Stationary Mounting
모든 Zivid 3D 카메라 모델은 고정형으로 장착할 수 있습니다. Zivid 마운트 사용을 권장합니다.
Zivid Stationary Mount 는 빠르고 정밀한 조정이 가능한 독특한 단일 나사 조임 시스템을 갖춘 로우 프로파일의 유연한 카메라 마운트입니다.
Why use Zivid Stationary Mount?
Modularity
하나의 마운트는 당사의 모든 카메라 모델에 적합하며, 완전히 분해하지 않고도 카메라 분리가 가능합니다(나사 1개만 사용). 마킹을 활용하면 카메라를 동일한 방향으로 재조립할 때 각도를 정밀하게 조정할 수 있습니다.
Flexibility
2가지 장착 구성과 2가지 자유도를 통해 여러 카메라 방향을 설정할 수 있습니다.
Robustness
견고한 디자인은 진동에 노출된 경우에도 마운트가 조인트에서 움직이지 않도록 합니다.
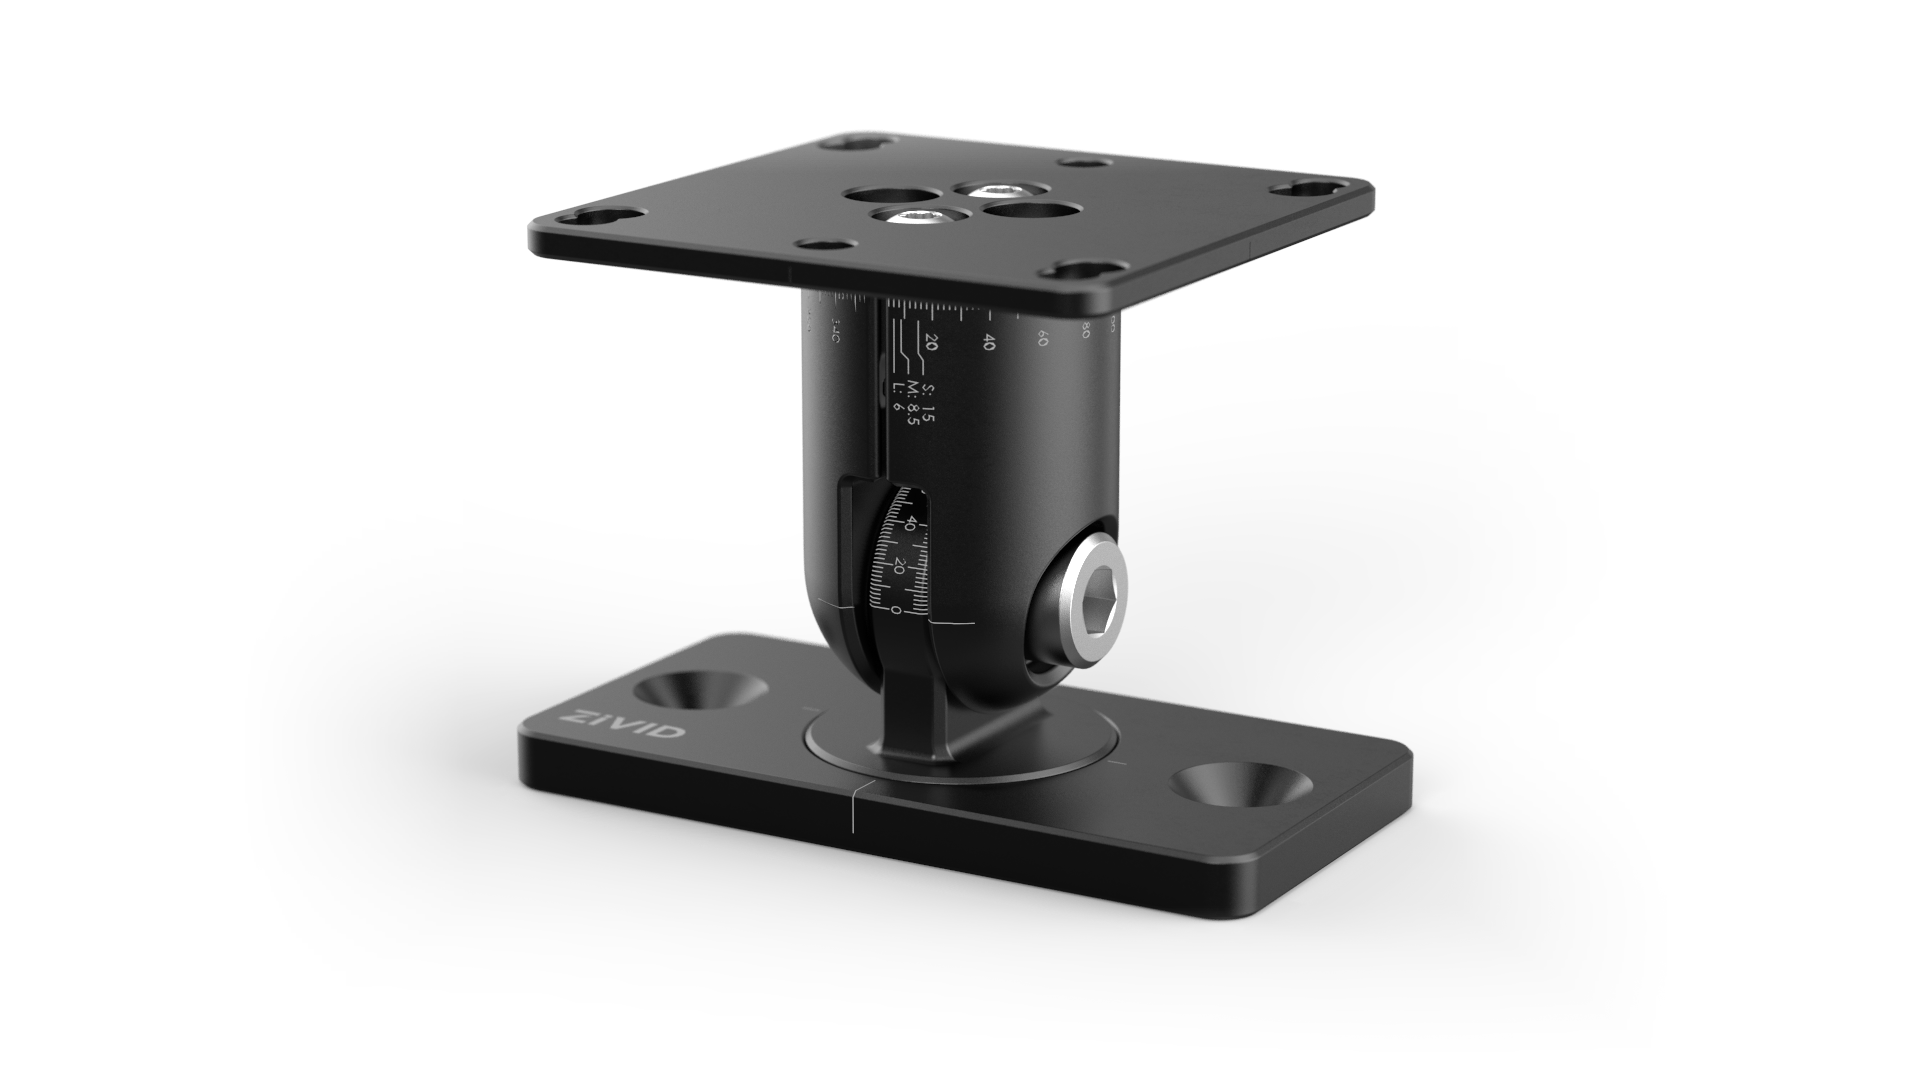
데이터시트 및 사용자 가이드 PDF 및 CAD 파일은 Accessories Downloads 에서 찾을 수 있습니다.
Mounting Instructions

Included in the box |
Required tools |
|---|---|
Zivid Stationary Mount |
Hex 4 및 6 mm |
Mounting screws |
Torx 20, 25 및 30 |
Configure the Mount
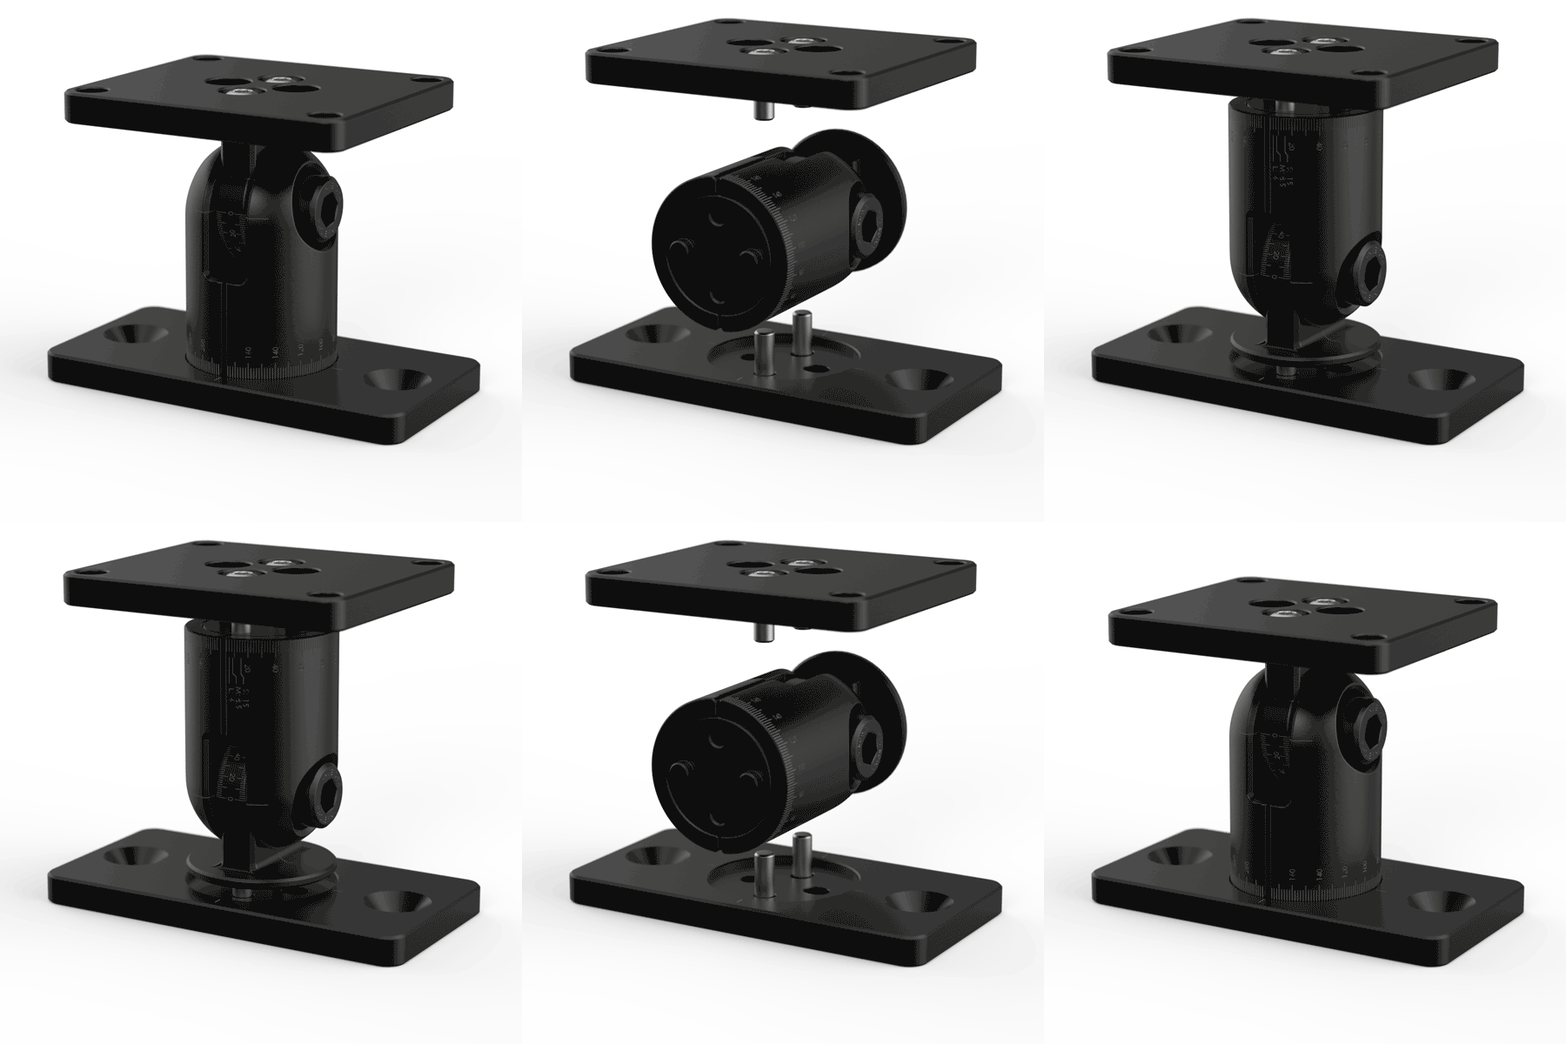
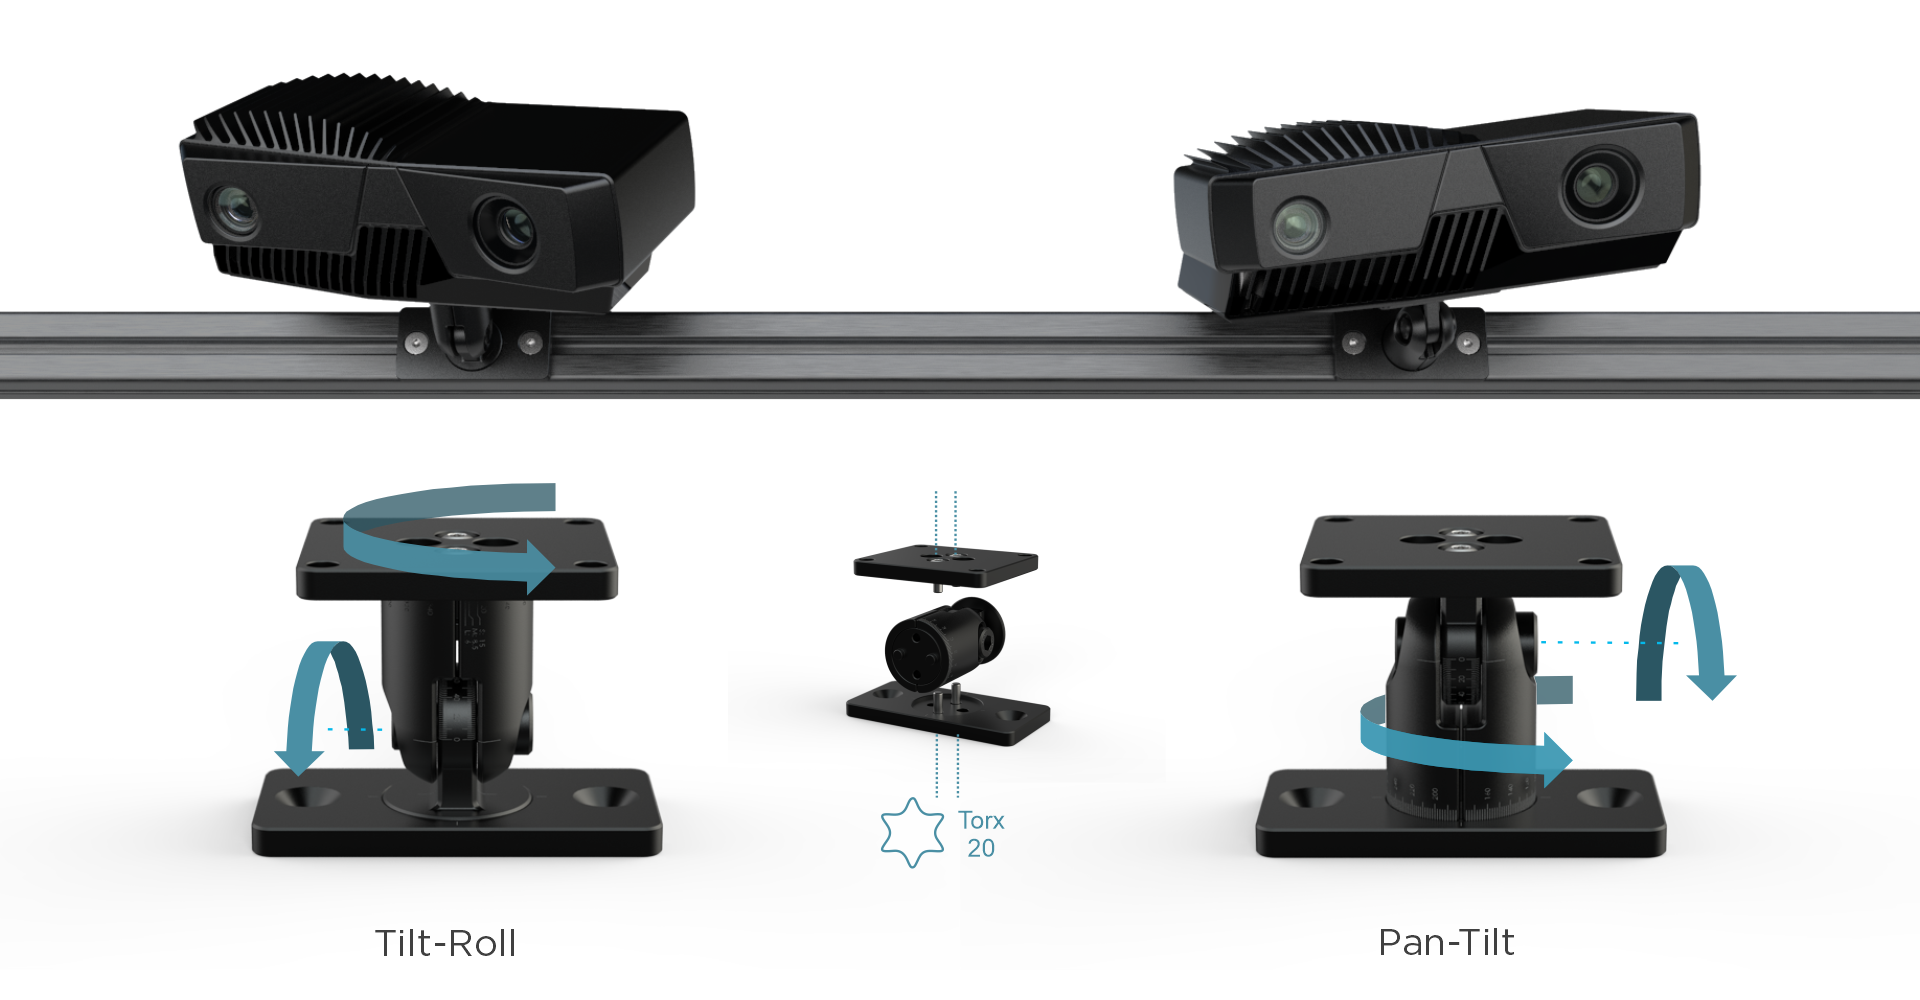
마운트는 pan-tilt 또는 tilt-roll로 재구성할 수 있습니다. 마운트를 설치하기 전에 애플리케이션에 가장 적합한 구성을 평가하십시오.
팁
틸트-롤 구성에서 수평 프로파일 측면에 마운트를 설치하면 두 가지 이점이 있습니다. 롤 조인트는 카메라를 장면에 수직으로 정렬할 수 있게 하고, 틸트 조인트는 배경의 반사 및 간섭을 피하기 위해 카메라를 기울일 수 있게 합니다. 자세한 내용은 Positioning Correctly 를 참조하세요.
마운트를 다시 구성하려면 상단 및 하단 플레이트에 있는 4개의 M4 나사를 풀고 4Nm 토크로 새 구성으로 다시 부착합니다.
Attach the Mount to the V-slot Profile
M6 나사와 T너트를 사용하여 마운트를 V 슬롯 프로필에 고정하고 육각 4 렌치로 조입니다.
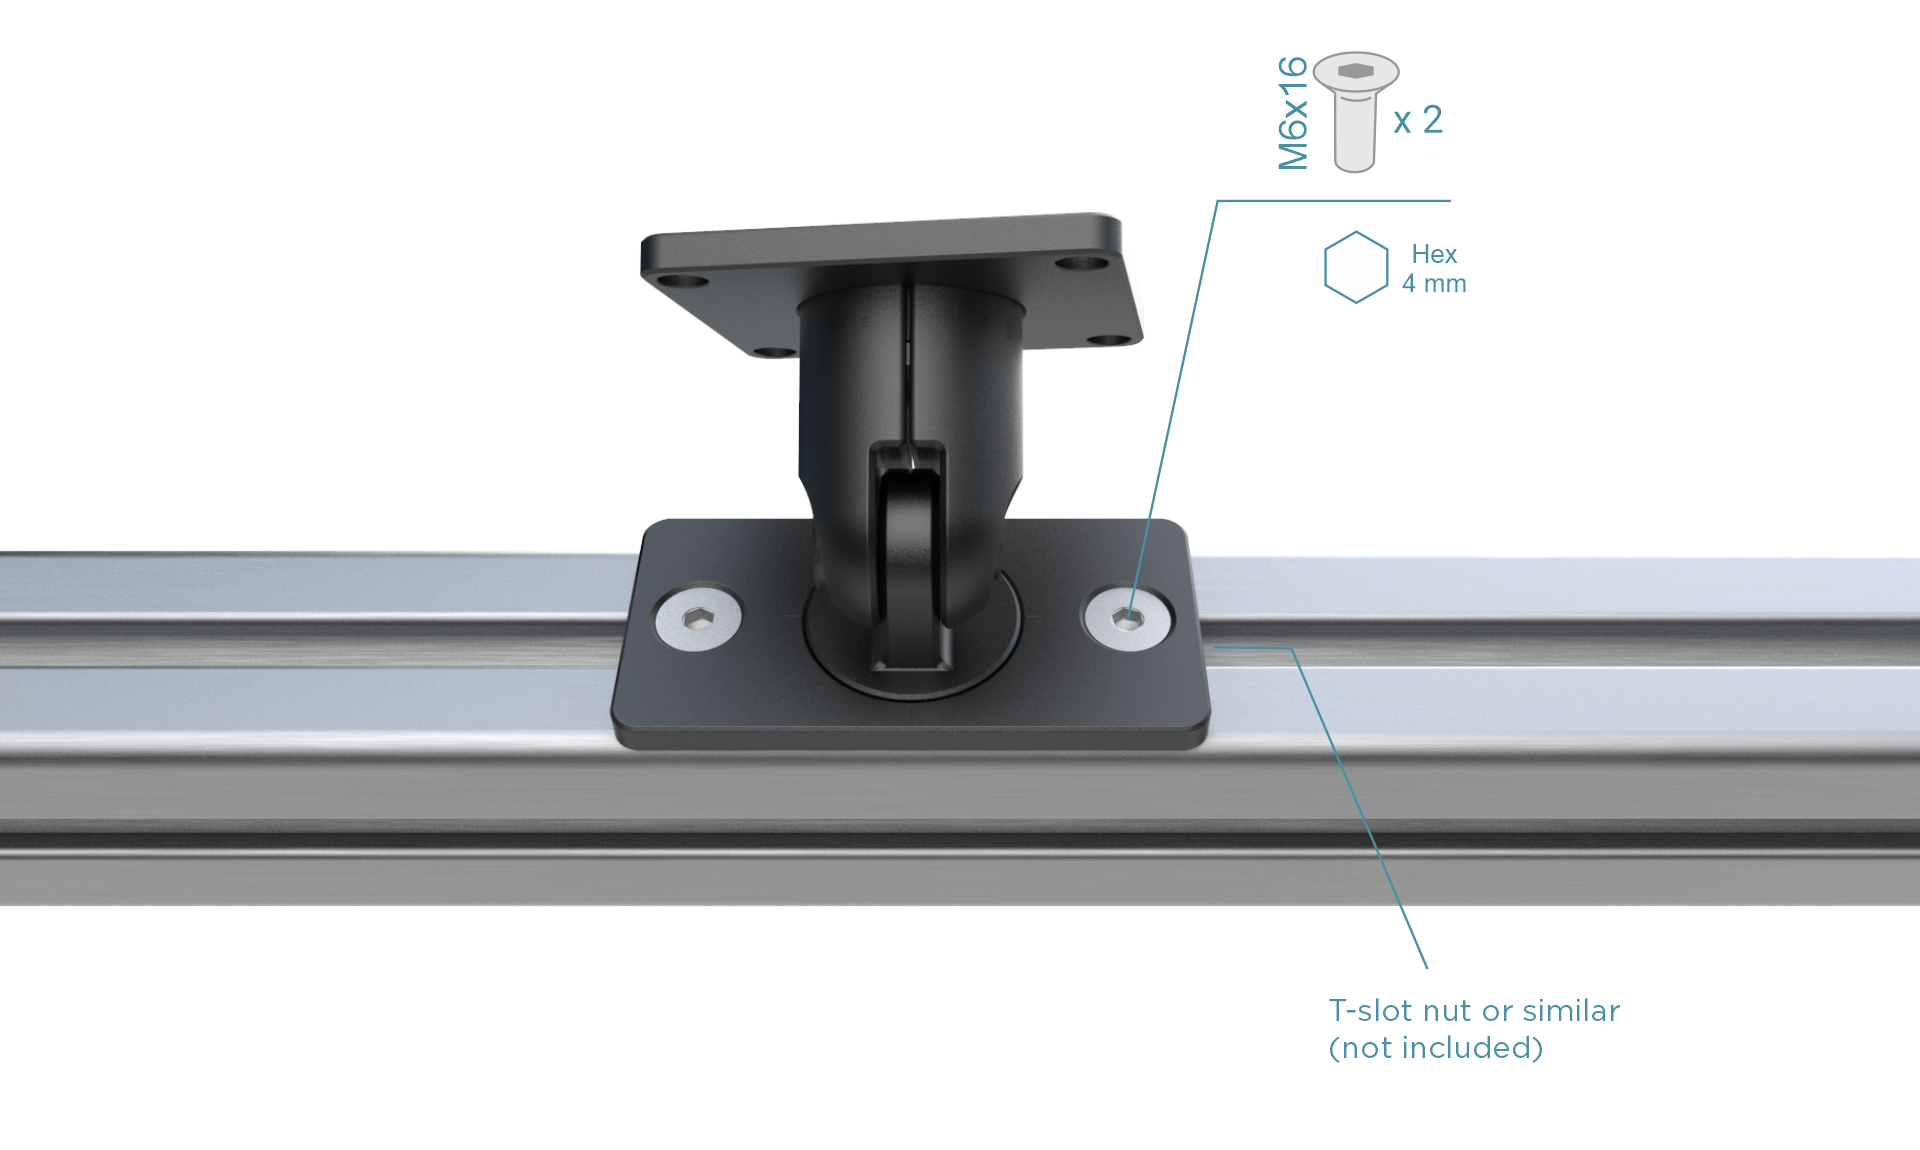
마운트는 수평 또는 수직, 위, 아래 또는 옆을 가리키는 임의의 방향으로 카메라를 향하게 하여 프로파일의 모든 표면에 설치할 수 있습니다. Zivid 카메라에 사용할 나사에 대한 자세한 내용은 Mounting Specifications 를 참조하십시오.
Adjust and Secure
카메라 각도를 조정하려면 중앙 볼트를 풀어주세요. 진동에 노출될 경우 좋은 그립을 위해 6mm 육각 키를 사용하여 중앙 볼트를 8-9Nm의 토크로 조입니다. 안정된 표면에서 연구실을 사용하려면 5Nm의 토크로 충분합니다.
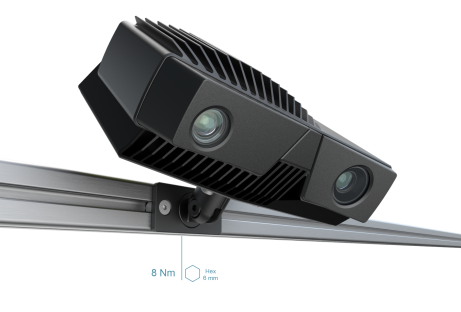
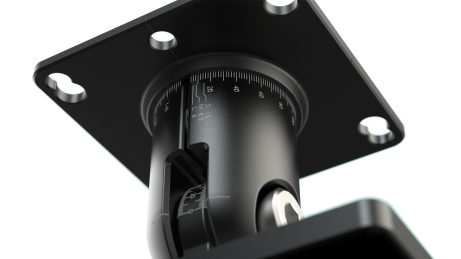
360도 레이저 각인 표시를 사용하여 각도를 정밀하게 조정하세요. 또한 표시를 통해 카메라를 분리했다가 나중에 다시 장착해야 하는 경우 시스템의 카메라 방향을 기억할 수 있습니다.
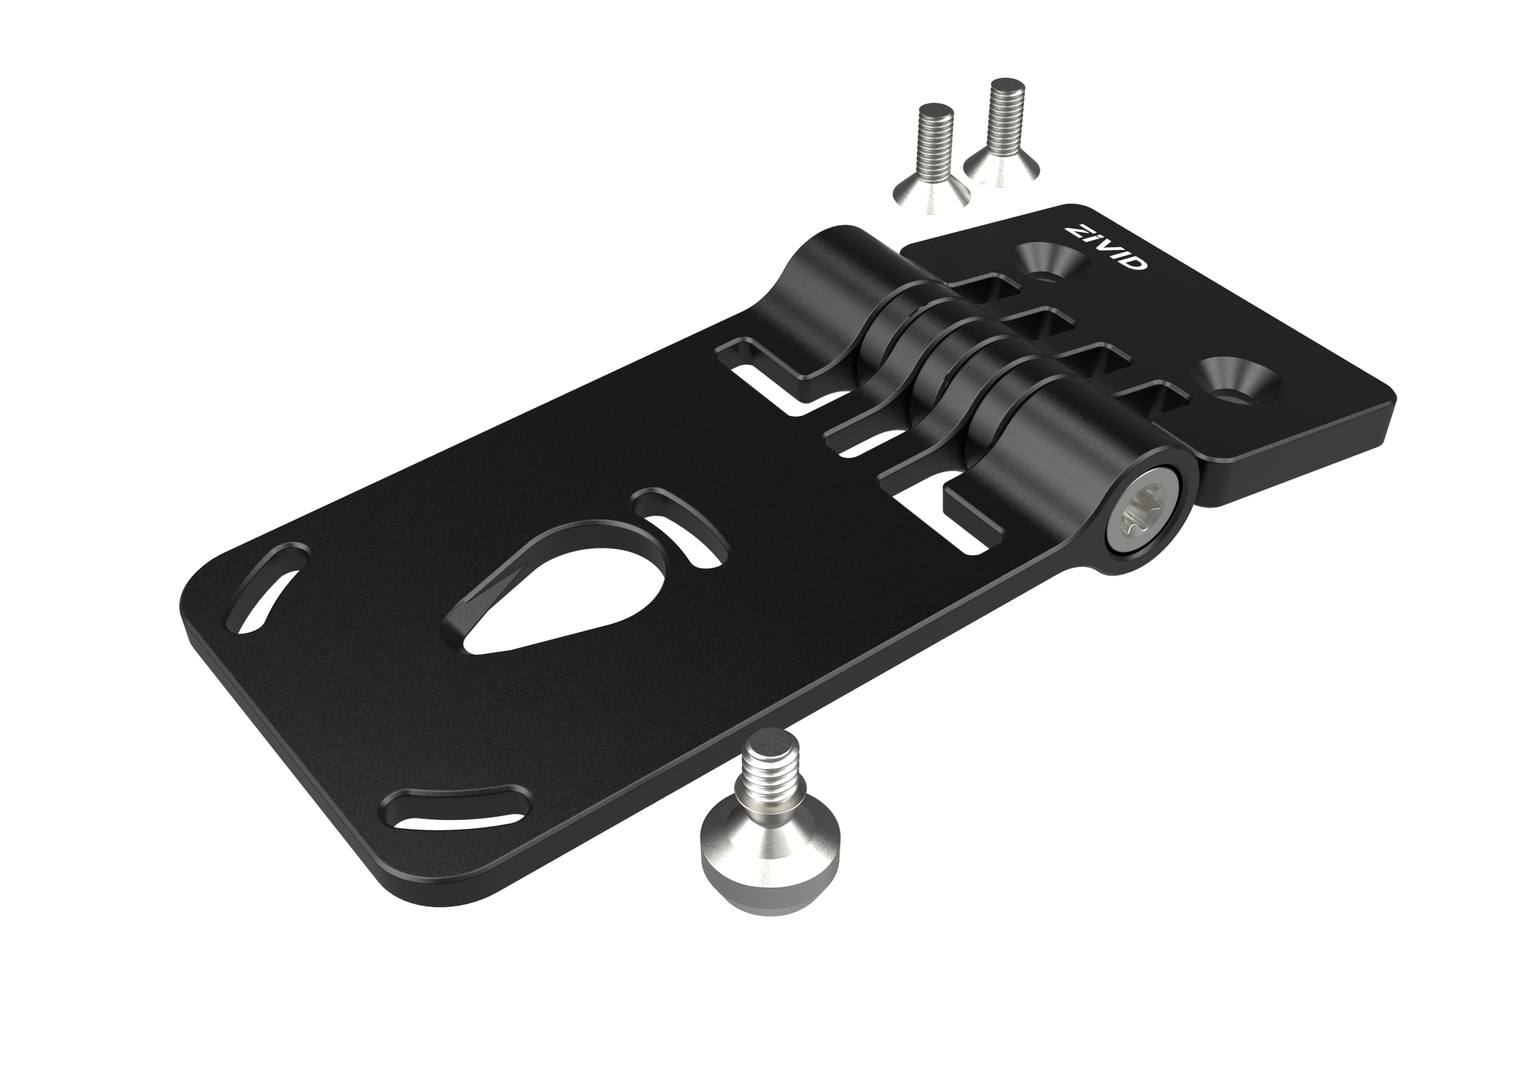
Zivid Quick Mount 손쉽게 설치할 수 있도록 설계된 사용자 친화적인 틸트-롤 카메라 마운트입니다.
Why use Zivid Quick Mount?
Easy Installation
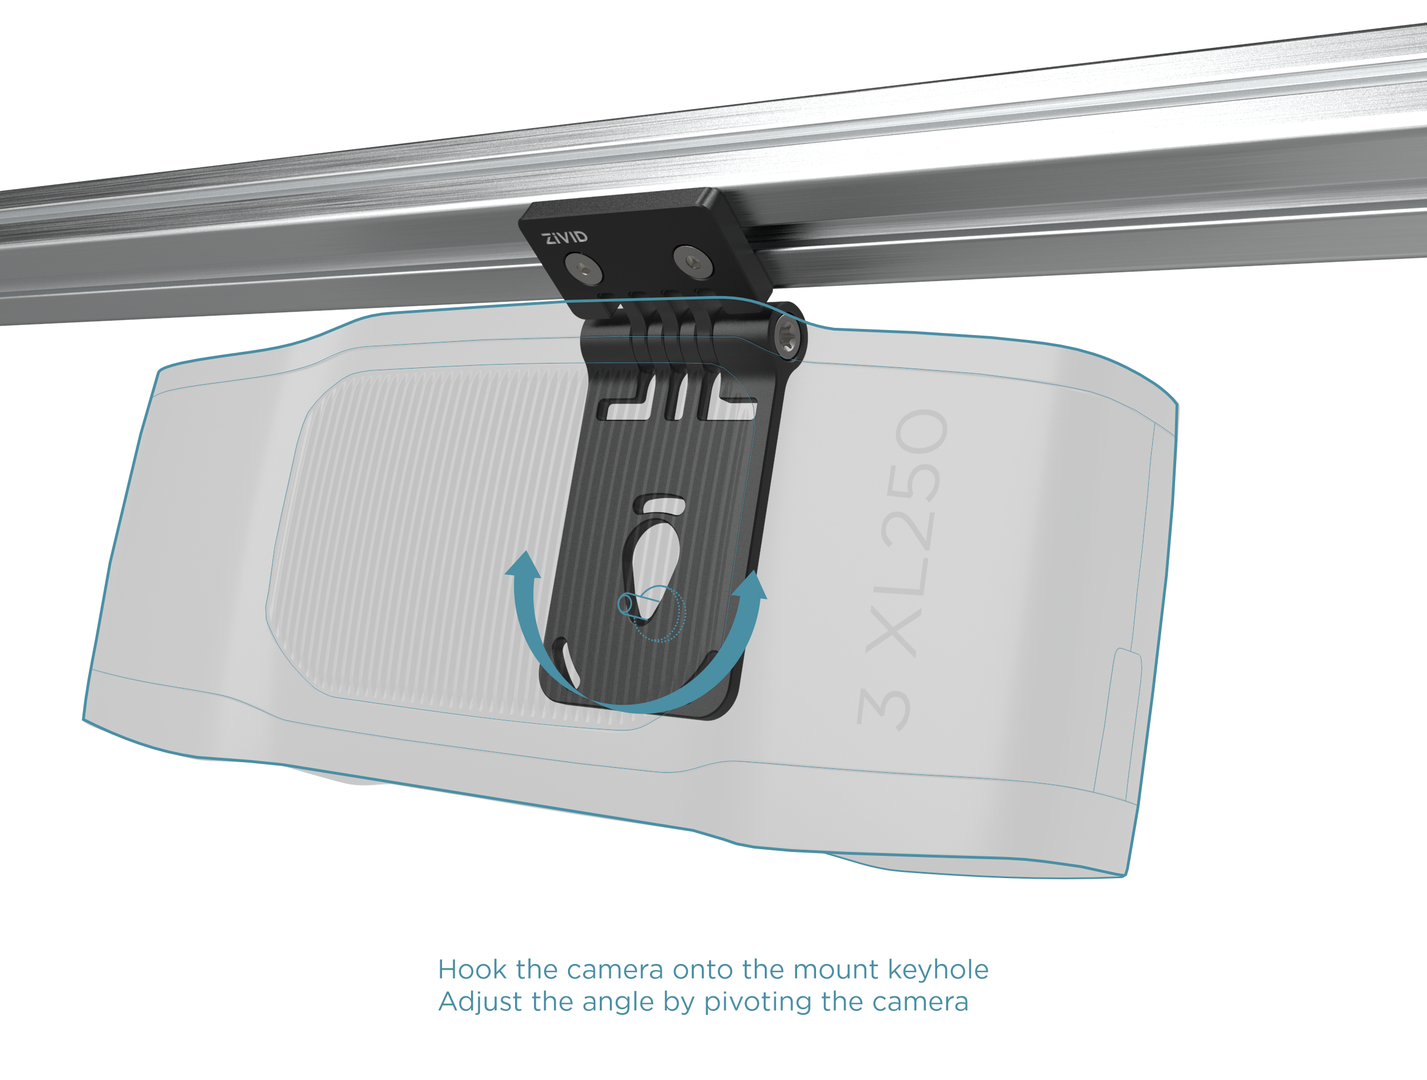
독특한 걸이 메커니즘 덕분에 나사를 조이기 전에 카메라를 마운트에 걸어둘 수 있습니다. 즉, 설치 중에 카메라의 무게를 지탱할 필요가 없습니다. 이는 Zivid 3 카메라에도 해당됩니다. 다른 모델의 경우, 나사를 조이는 동안 카메라의 무게를 지탱해야 합니다.
Robustness
견고한 디자인으로 진동이 있는 환경에서도 뛰어난 안정성을 보장합니다.
데이터시트 및 사용자 가이드 PDF 및 CAD 파일은 Accessories Downloads 에서 찾을 수 있습니다.
Mounting Instructions

Included in the box |
Required tools |
|---|---|
Zivid Quick Mount |
Hex 4mm |
Mounting screws |
Torx T45 |
Prepare the Camera
Zivid 3 카메라의 경우 모든 단계를 따르세요. 다른 모델의 경우 Secure and Adjust 섹션으로 건너뛰세요.
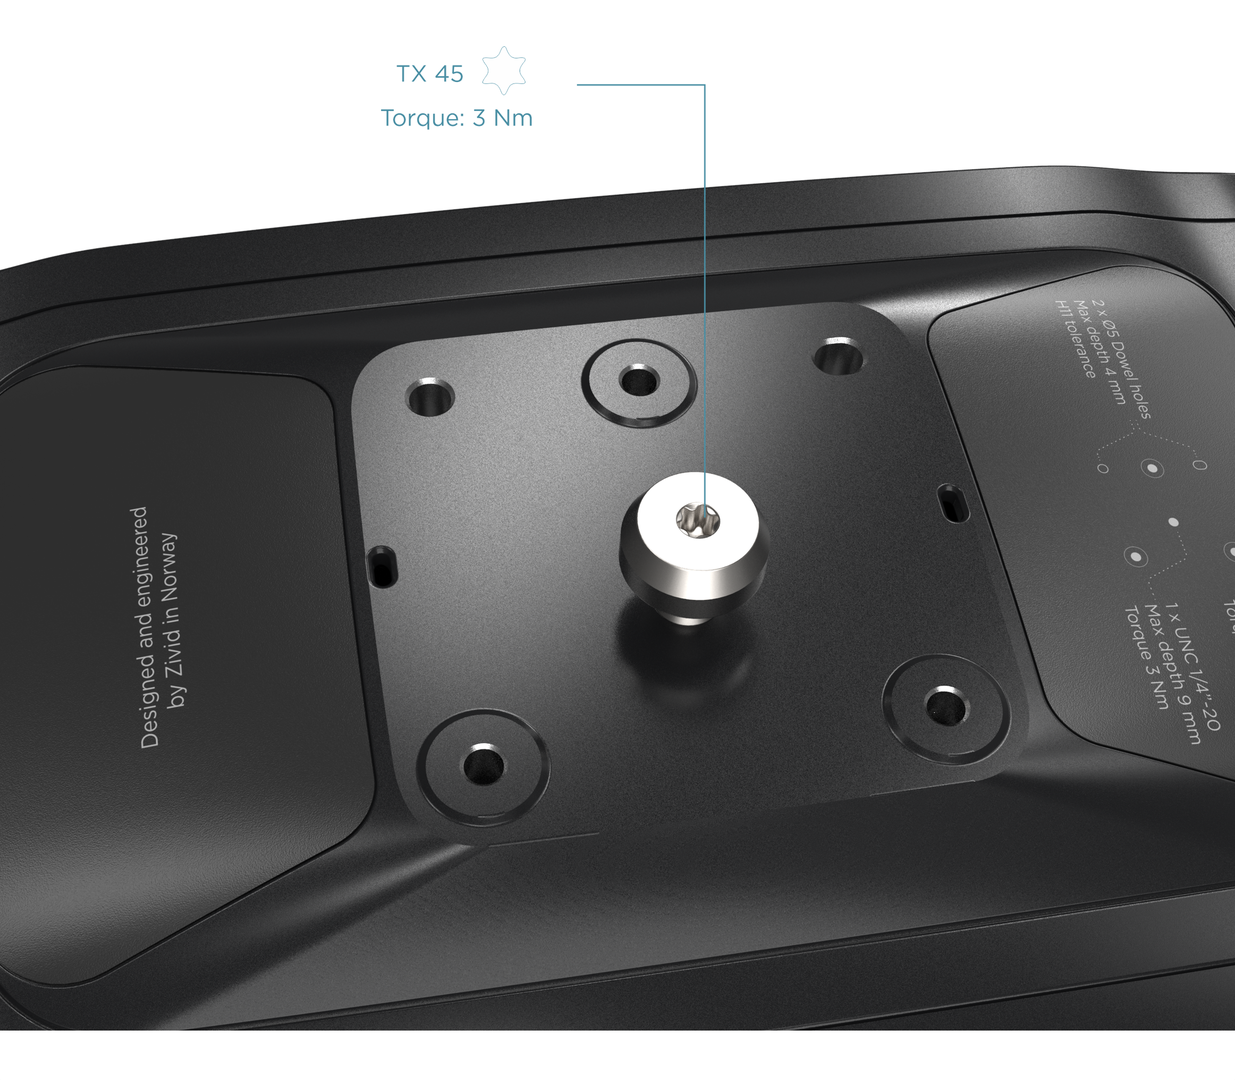
카메라 하단 중앙에 있는 UNC 1/4”-20 암나사에 걸이 장치 나사를 설치하세요. 손으로 조이거나 Torx T45 렌치를 사용하여 3Nm 토크로 조일 수 있습니다.
Attach the Mount to the V-slot Profile
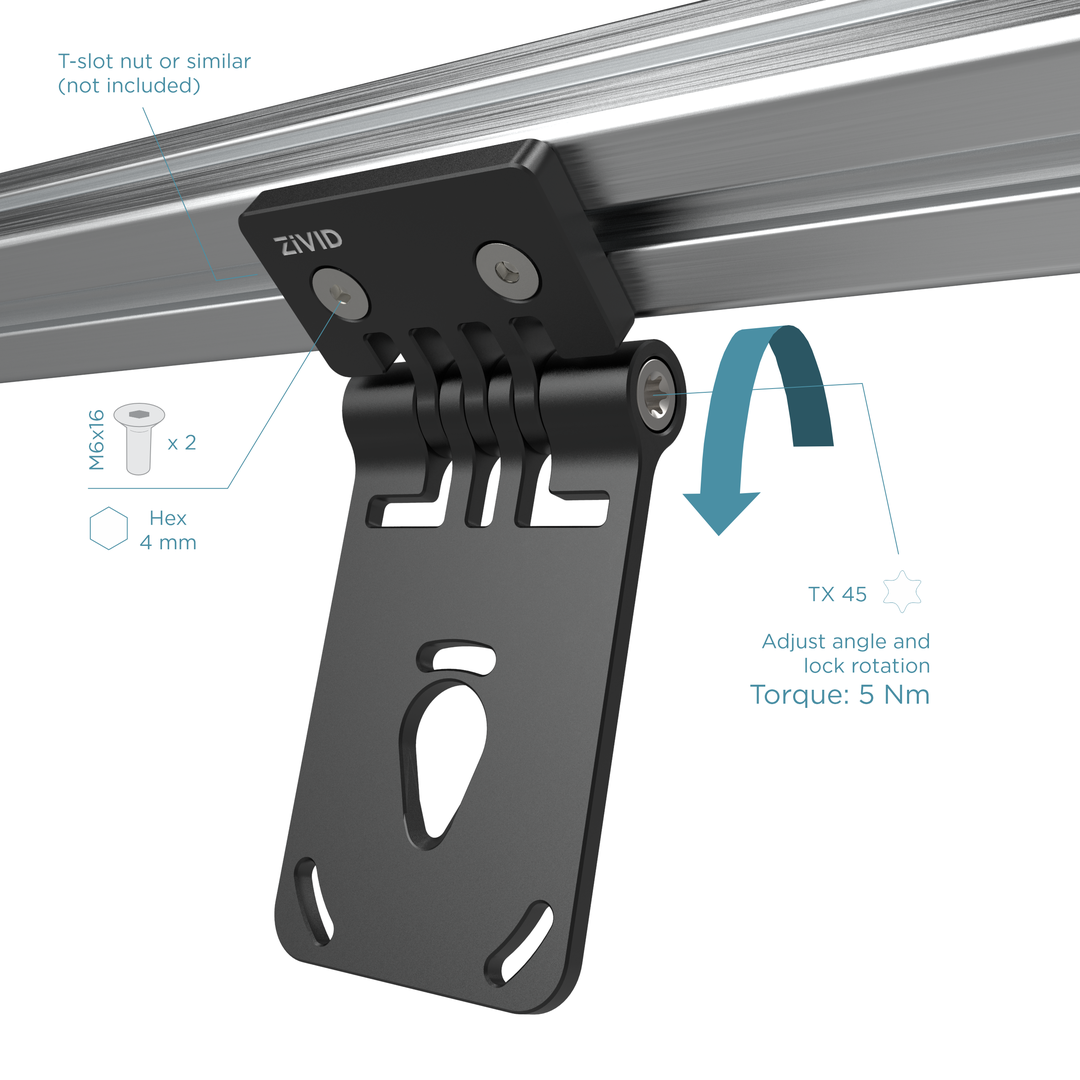
M6 나사와 T 너트를 사용하여 마운트를 V 슬롯 프로파일에 고정하고 육각 렌치 4개로 조입니다. 마운트는 프로파일의 어느 표면에나 설치할 수 있으므로 수평, 수직, 위쪽, 아래쪽, 또는 옆으로 카메라 방향을 유연하게 조정할 수 있습니다.
Hang the Camera
나사를 제자리에 끼운 후 카메라를 마운트에 걸어 놓습니다.
Secure and Adjust
곡선 슬롯을 사용하여 롤 각도를 조정하고 카메라를 마운트에 3Nm 토크로 조이세요. Zivid 카메라에 호환되는 나사에 대한 자세한 내용은 Mounting Specifications 을 참조하세요.
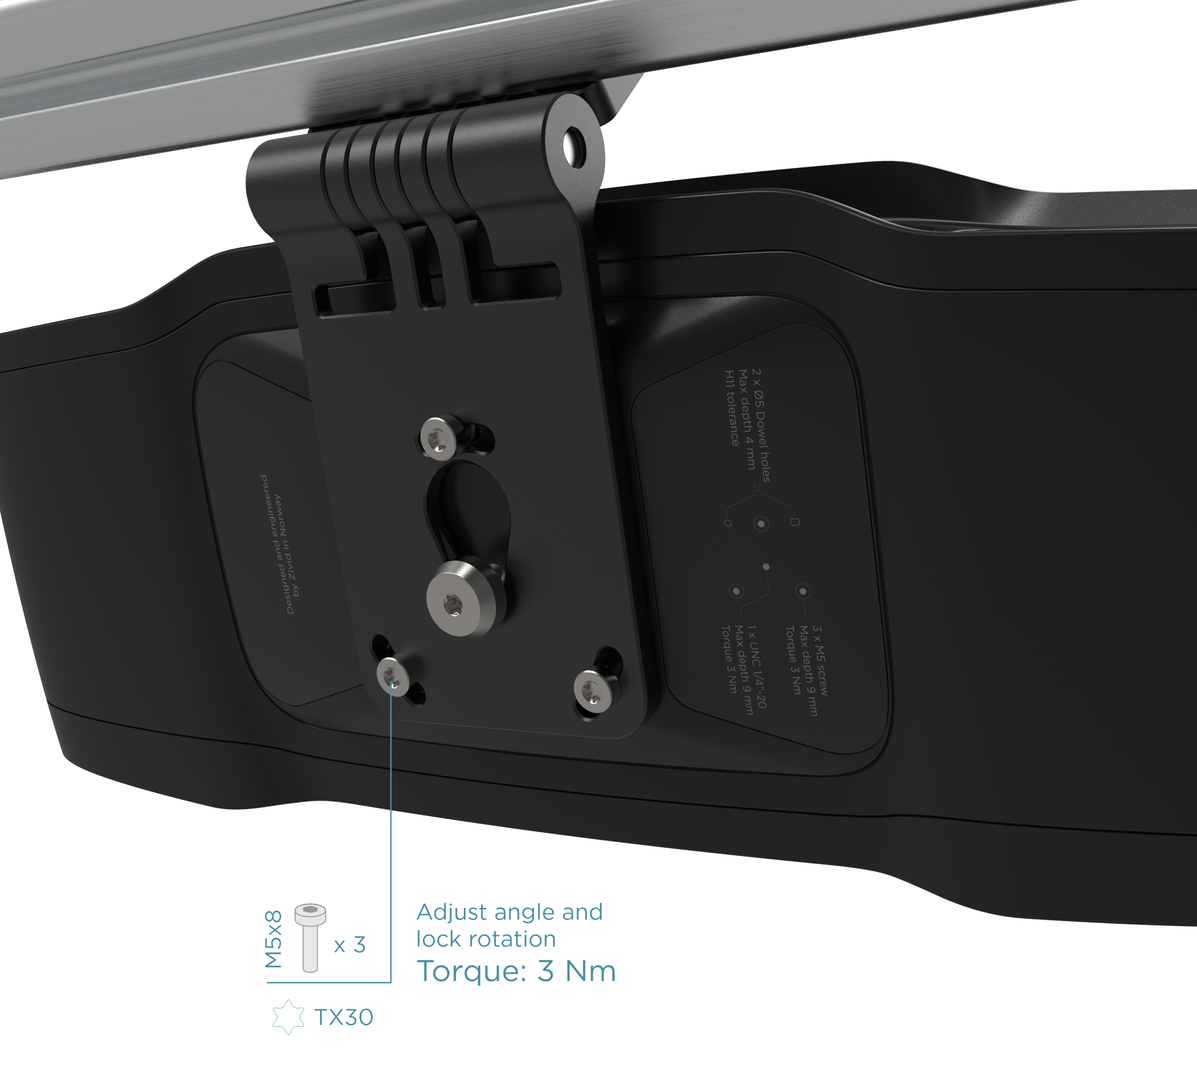
마지막으로 기울기 각도를 조정하고 Torx T45 키를 사용하여 중앙 볼트를 5Nm 토크로 조입니다. 다음 그림을 참조하세요. figure
팁
틸트 및 롤 조인트는 카메라를 장면에 수직으로 배치하고 반사나 배경 간섭을 최소화하는 데 도움이 됩니다. 자세한 내용은 Positioning Correctly 을 참조하세요.
Robot Mounting 에 대해서도 확인하십시오.
ersion History
SDK |
Changes |
|---|---|
2.17.0 |
Zivid 3 XL250에 대한 지원이 추가되었습니다. |
2.14.0 |
Zivid 2+ MR130, LR110, MR60에 대한 지원이 추가되었습니다. |
2.12.0 |
Zivid One+의 지원이 종료되어 더 이상 지원되지 않습니다. |