Positioning Correctly
가장 일반적이고 권장되는 방법은 촬영 장소 바로 위에 카메라를 설치하는 것입니다.
특히 투명한 물체와 반사광이 매우 강하고 어두운 넓은 표면을 촬영할 때 유용합니다. 이 경우 카메라를 물체에 수직으로 장착하여 카메라로 되돌아오는 신호를 최대화할 수 있습니다.
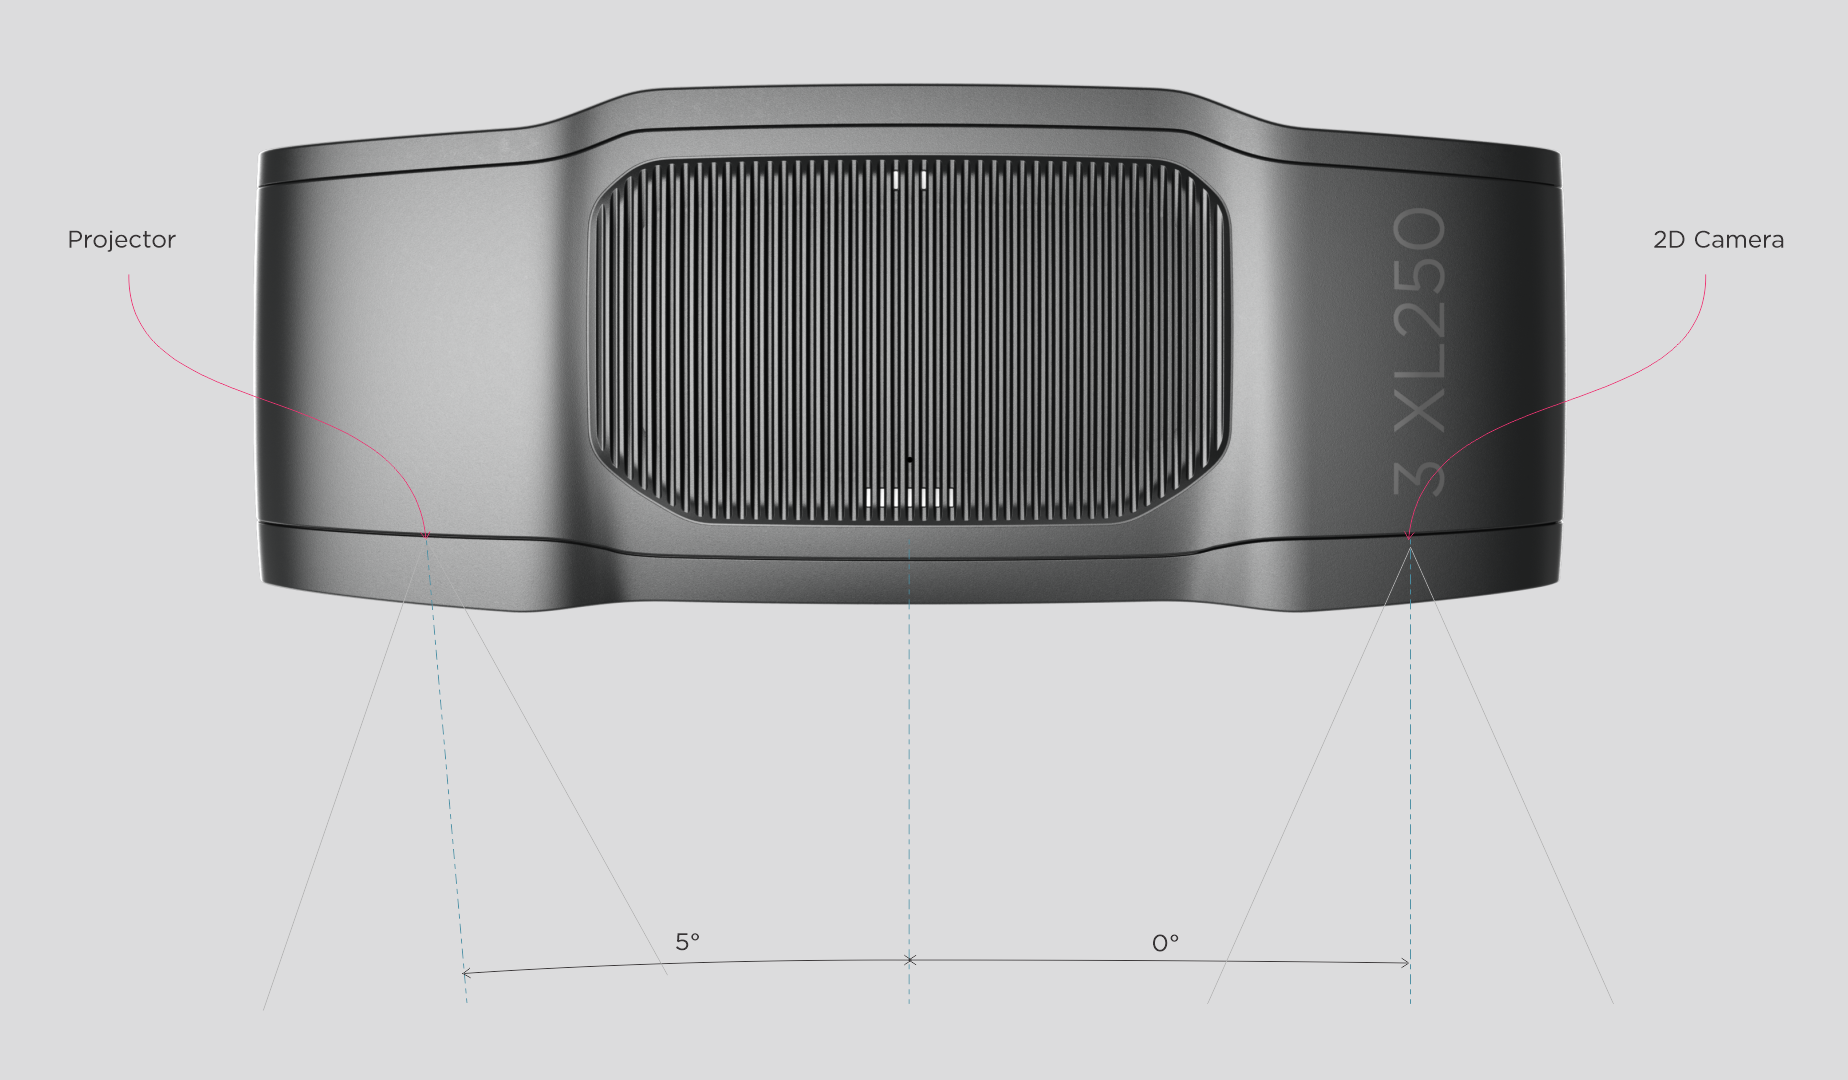
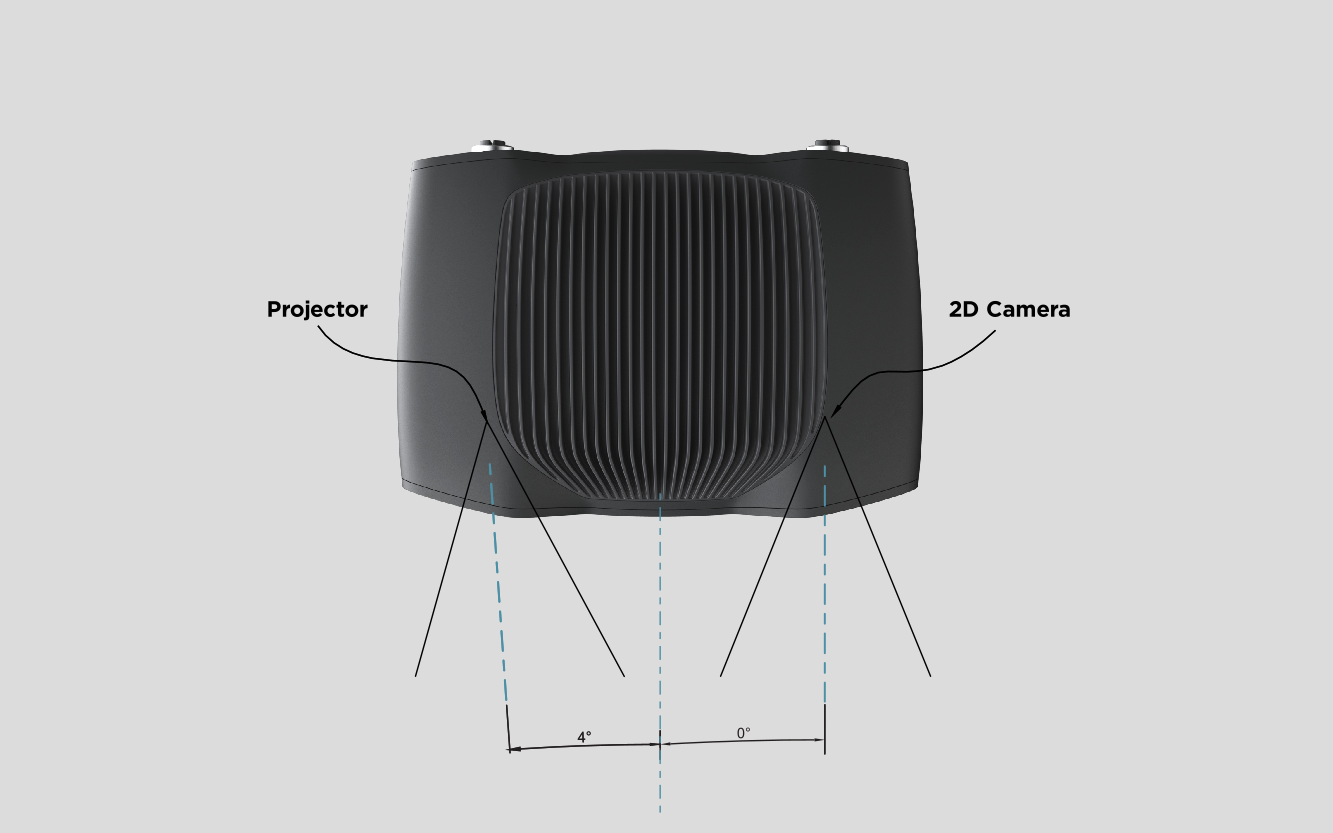
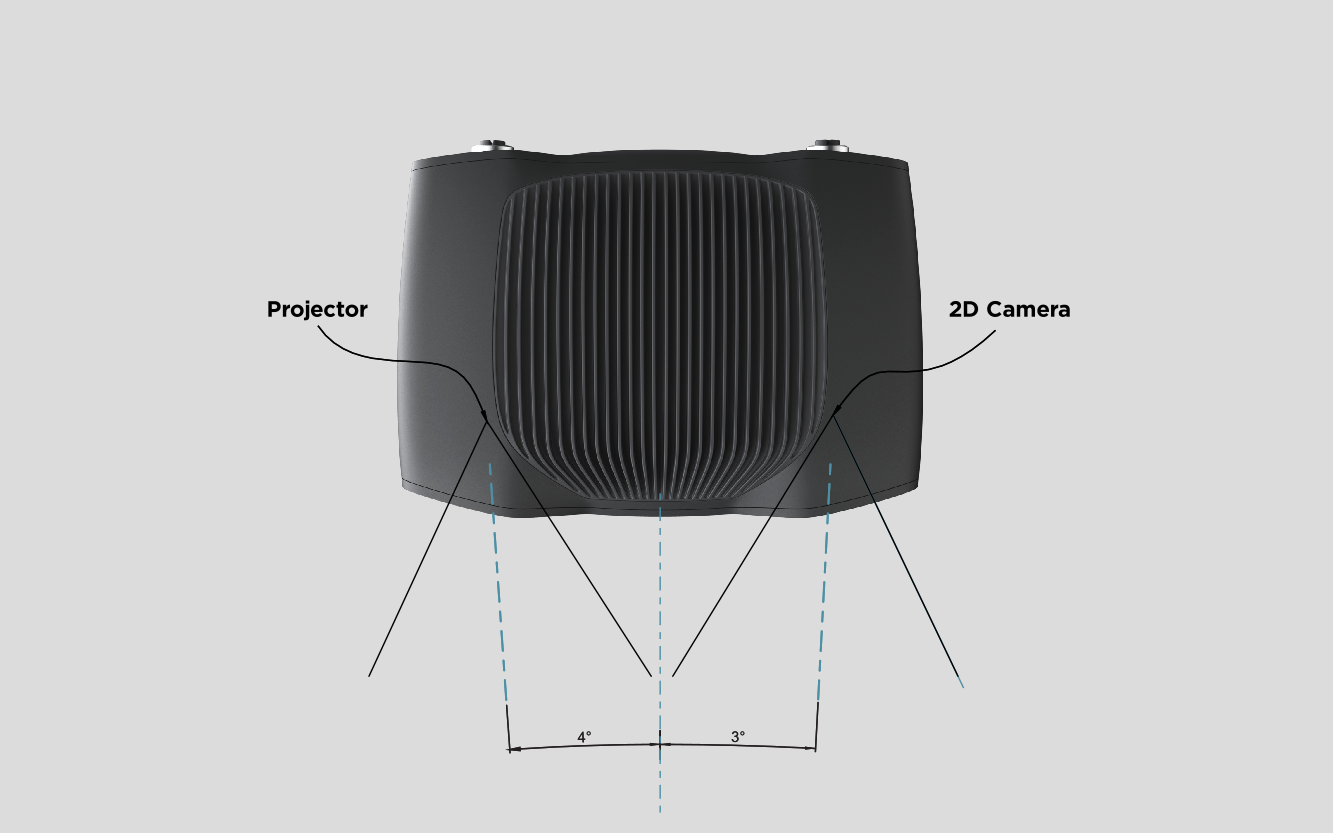
2D 카메라와 프로젝터는 중심 축에 대해 각도를 갖습니다. 카메라를 장면에 수직으로 배치하려는 경우 이를 고려해야 합니다.
In bin-picking applications
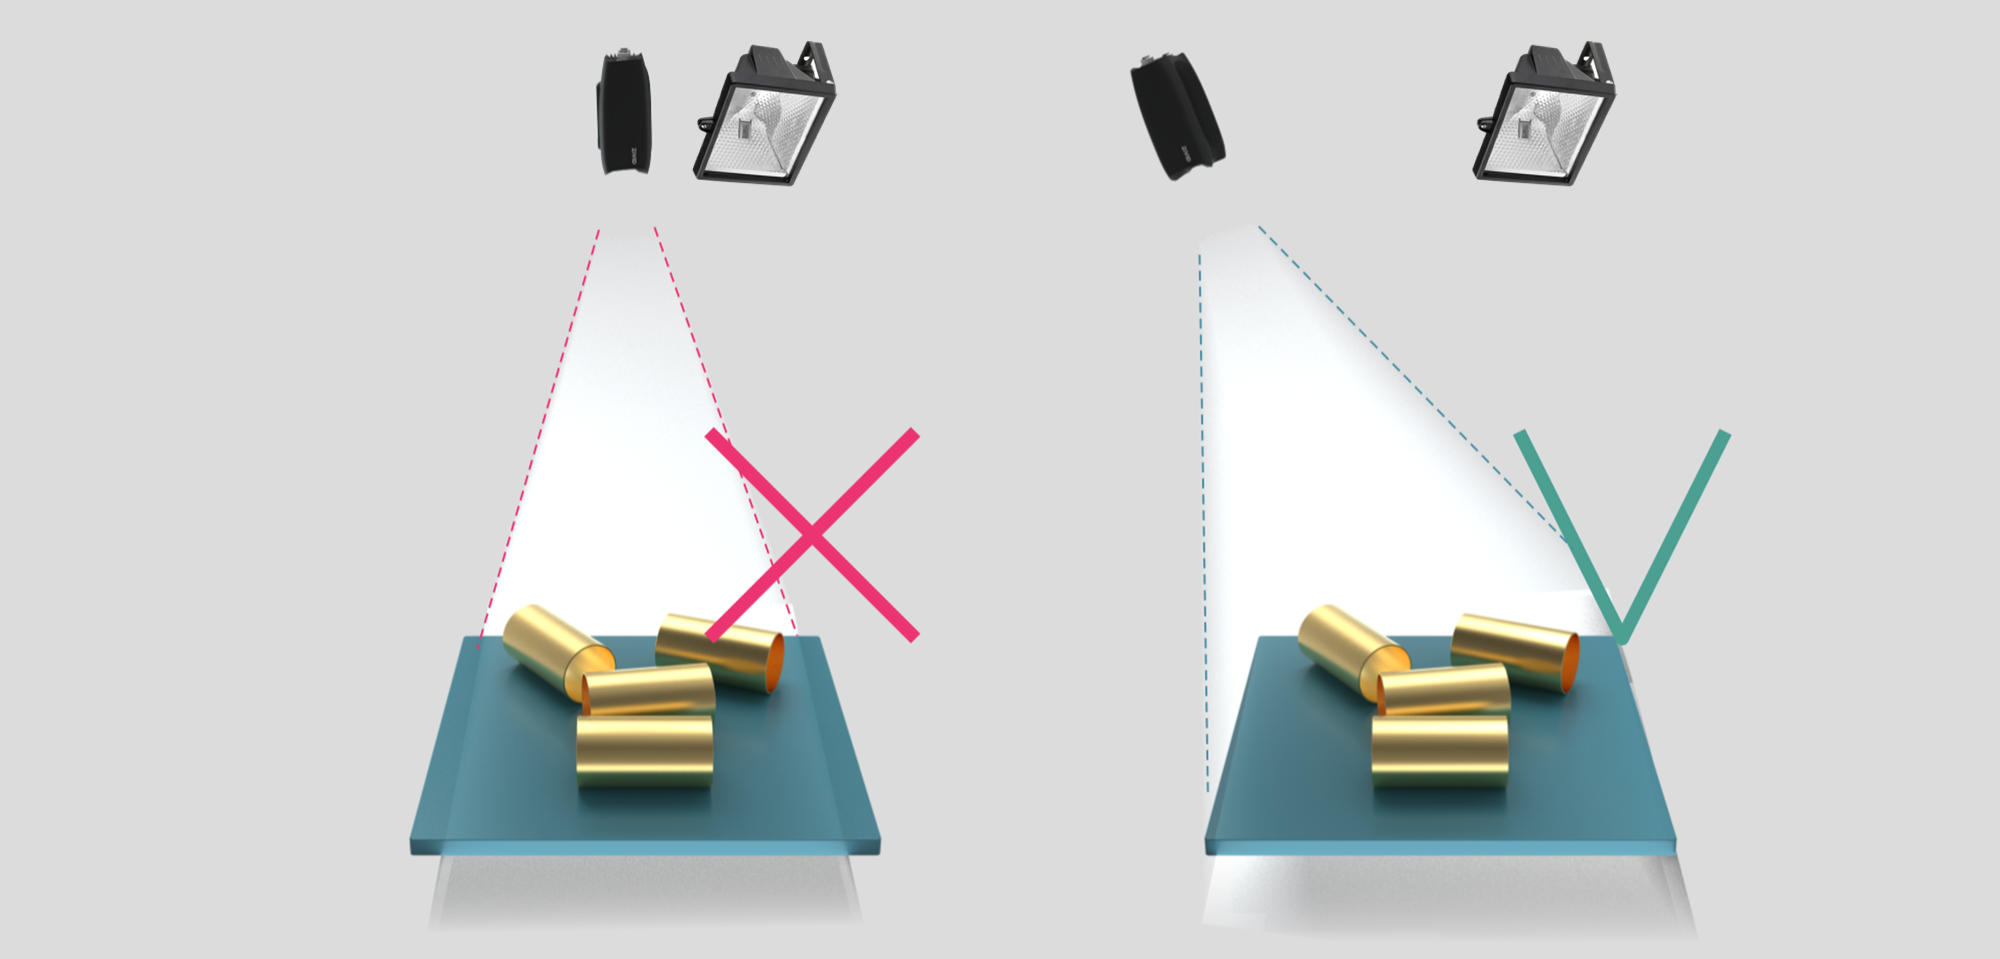
상자(Bin) 벽의 강한 상호 반사가 있는 경우, Zivid 카메라 프로젝터를 상자 뒤쪽 가장자리 위나 뒤쪽 모서리 위에 배치할 수 있습니다(아래 이미지 참조). 2D 카메라가 상자 중앙을 바라보도록 이동 및 기울입니다. 프로젝터 광선이 프로젝터에서 가장 가까운 두 벽의 안쪽 표면에 떨어지지 않아야 하며, 두 벽과 거의 평행이 되어야 합니다.

이런 식으로 카메라를 장착하면 상자 벽에서의 상호 반사가 최소화되고, 장면 위쪽 공간이 확보되어 도구와 로봇이 더 쉽게 접근할 수 있습니다.
주변 조명이 강한 환경에서는 광원의 직접 반사로 인해 2D 이미지에 원치 않는 하이라이트가 발생할 수 있습니다. 이러한 하이라이트를 최소화하려면 카메라를 살짝 움직이거나 기울여 보세요.

표면 이미징 응용 분야에서
반사율이 높은 표면의 경우, 카메라 프로젝터든 외부 조명이든 광원에서 직접 반사되는 빛이 2D 이미지에 원치 않는 하이라이트를 생성할 수 있습니다. 이러한 반사를 최소화하려면 카메라를 약간 기울여 반사광이 카메라 시야에서 벗어나도록 설치하십시오. 광원의 위치를 조정하거나 확산 조명을 사용하는 것도 눈부심을 줄이는 데 도움이 됩니다.


프로젝터의 하이라이트가 있는 2D 이미지(왼쪽), 주변광이 있는 2D 이미지(가운데), 하이라이트가 없는 2D 이미지(오른쪽)는 카메라 위치와 각도에 따라 달라집니다.
Cooling clearance
Zivid 카메라는 능동 냉각 및 수동 냉각을 사용하며 장치 주변에 공기 흐름을 위한 공간을 확보해야 하고 전면 및 후면의 공기 구멍을 막지 않아야 합니다. 카메라의 작동 온도 범위에 대한 datasheets 를 참조하십시오.
Signal protection
높은 수준의 전자파 장애를 일으킬 수 있는 고전압 장치 옆에 Zivid 카메라 및 케이블을 설치하지 마십시오. 높은 수준의 방해를 방출하는 AC 전원 케이블 및 케이블이 있는 동일한 트렁크/도관을 통해 카메라 케이블을 배선하지 마십시오.
Connectivity and Power Supply 에 대한 내용을 계속 읽어보세요.
Version History
SDK |
Changes |
|---|---|
2.17.0 |
Zivid 3 XL250에 대한 지원이 추가되었습니다. |
2.15.0 |
빈 피킹 및 표면 이미징 애플리케이션을 위해 2D 이미지의 하이라이트를 처리하는 방법을 추가했습니다. |
2.14.0 |
Zivid 2+ MR130, LR110, MR60에 대한 지원이 추가되었습니다. |
2.12.0 |
Zivid One+는 제품 수명이 종료되어 더 이상 지원되지 않습니다. |


