固定安装
所有 Zivid 3D 相机型号均可使用 Zivid Stationary Mount 或 Zivid Quick Mount 进行固定安装;请展开下方各部分查看安装说明。
Zivid Stationary Mount
Zivid Stationary Mount 是一款薄型、灵活的相机支架,具有独特的单螺钉拧紧系统,可以快速、精确地进行调整。
为什么要使用 Zivid 固定支架?
模块化
一个安装座适合我们所有的相机型号,无需完全拆卸(只需一颗螺丝)即可拆卸相机。借助标记,您可以在以相同方向重新组装相机时精确调整角度。
灵活性
两种安装配置和两种自由度可实现多种相机安装方向。
鲁棒性
刚性设计确保了安装座即使在受到振动时也不会在关节中移动。
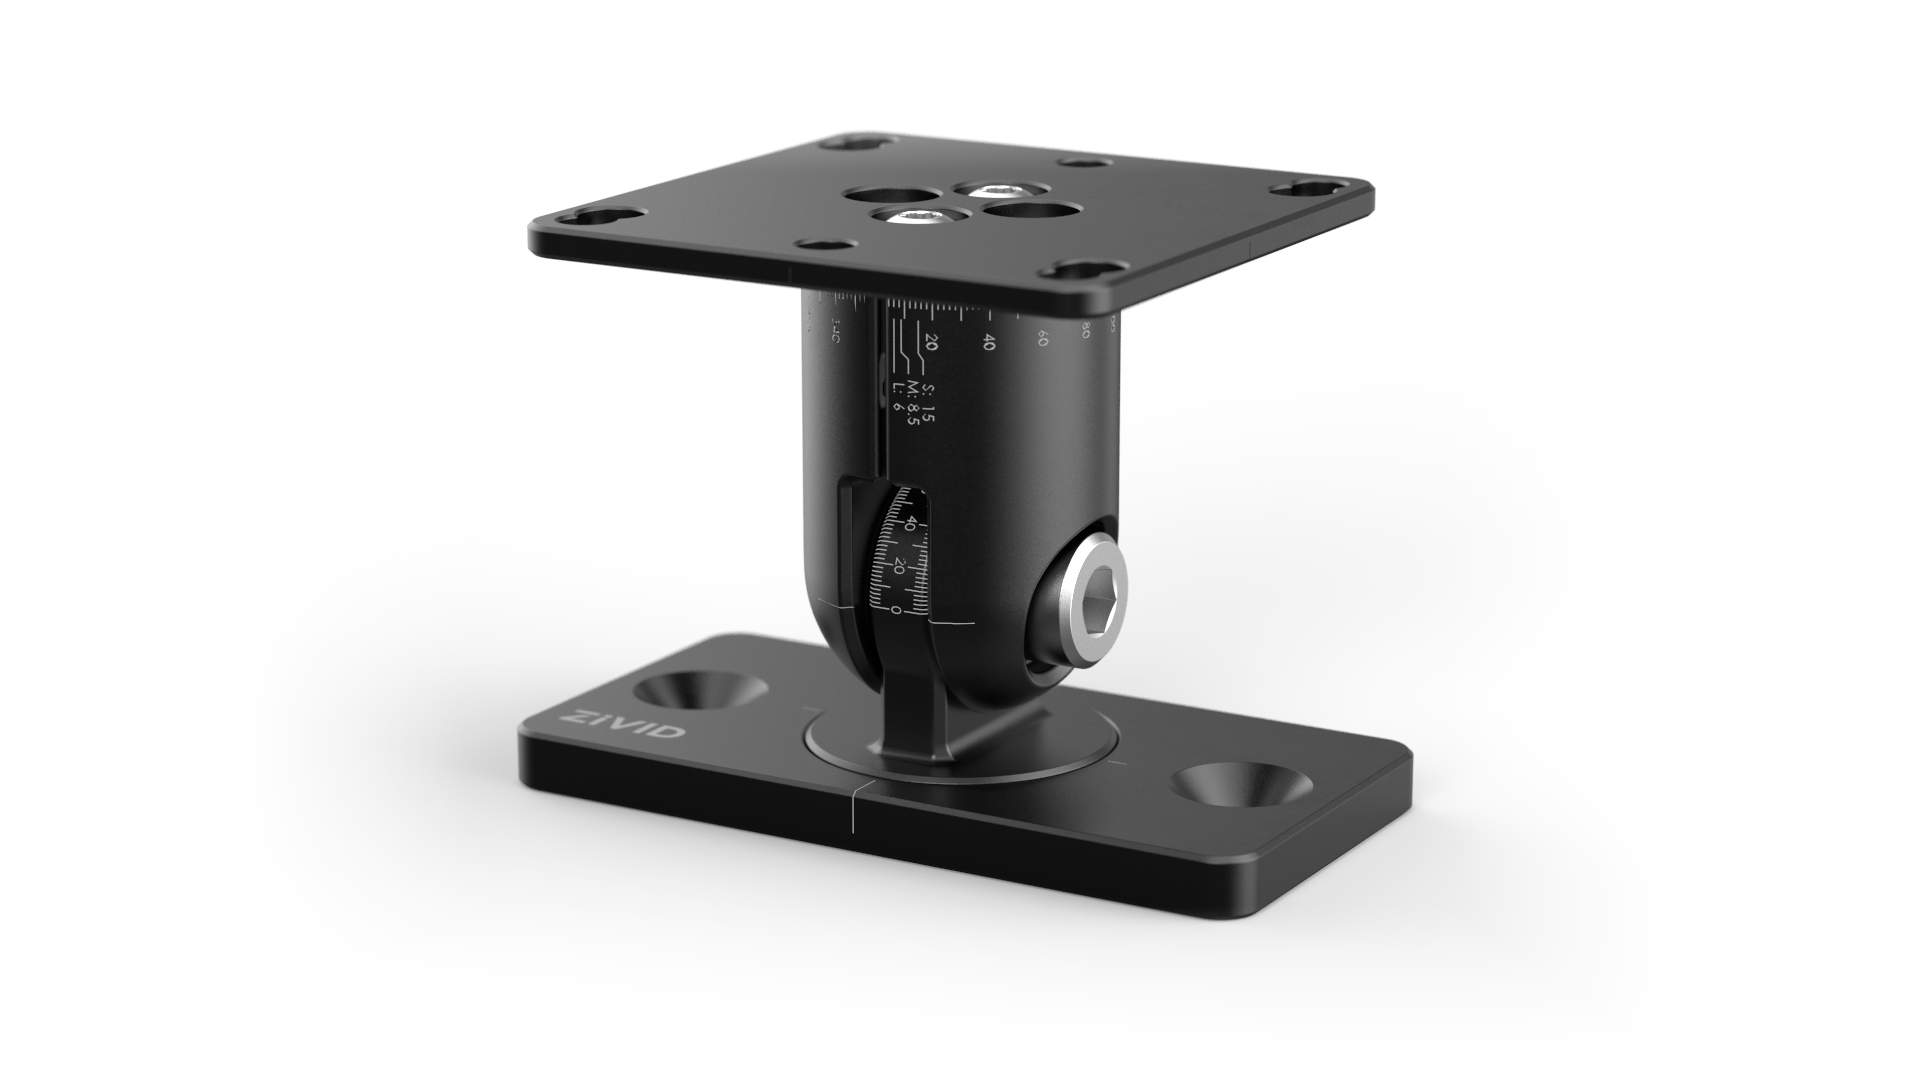
规格书和用户指南的 PDF 文档及 CAD 文件可 从 Accessories Downloads 下载。
安装说明
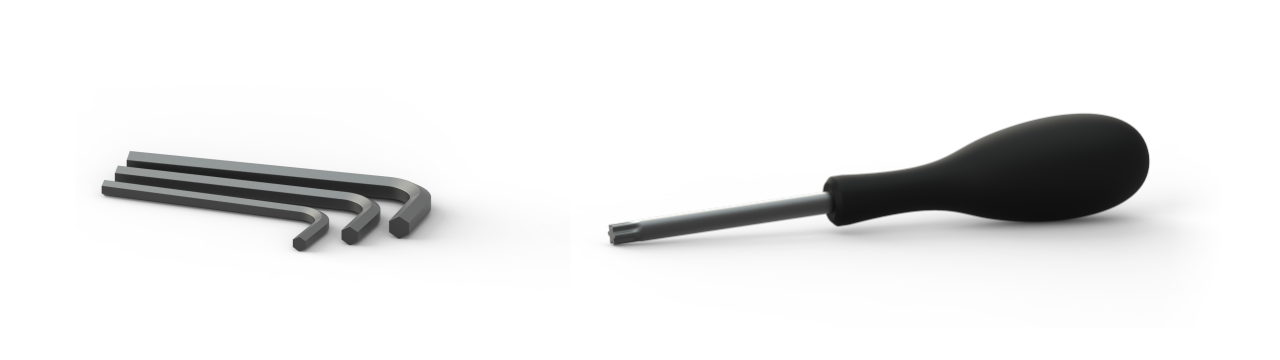
包装盒内包含 |
所需工具 |
|---|---|
Zivid 固定安装支架 |
4 和 6mm 的六角扳手 |
安装螺丝 |
20、25 和 30 尺寸的星型螺丝刀 |
配置支架
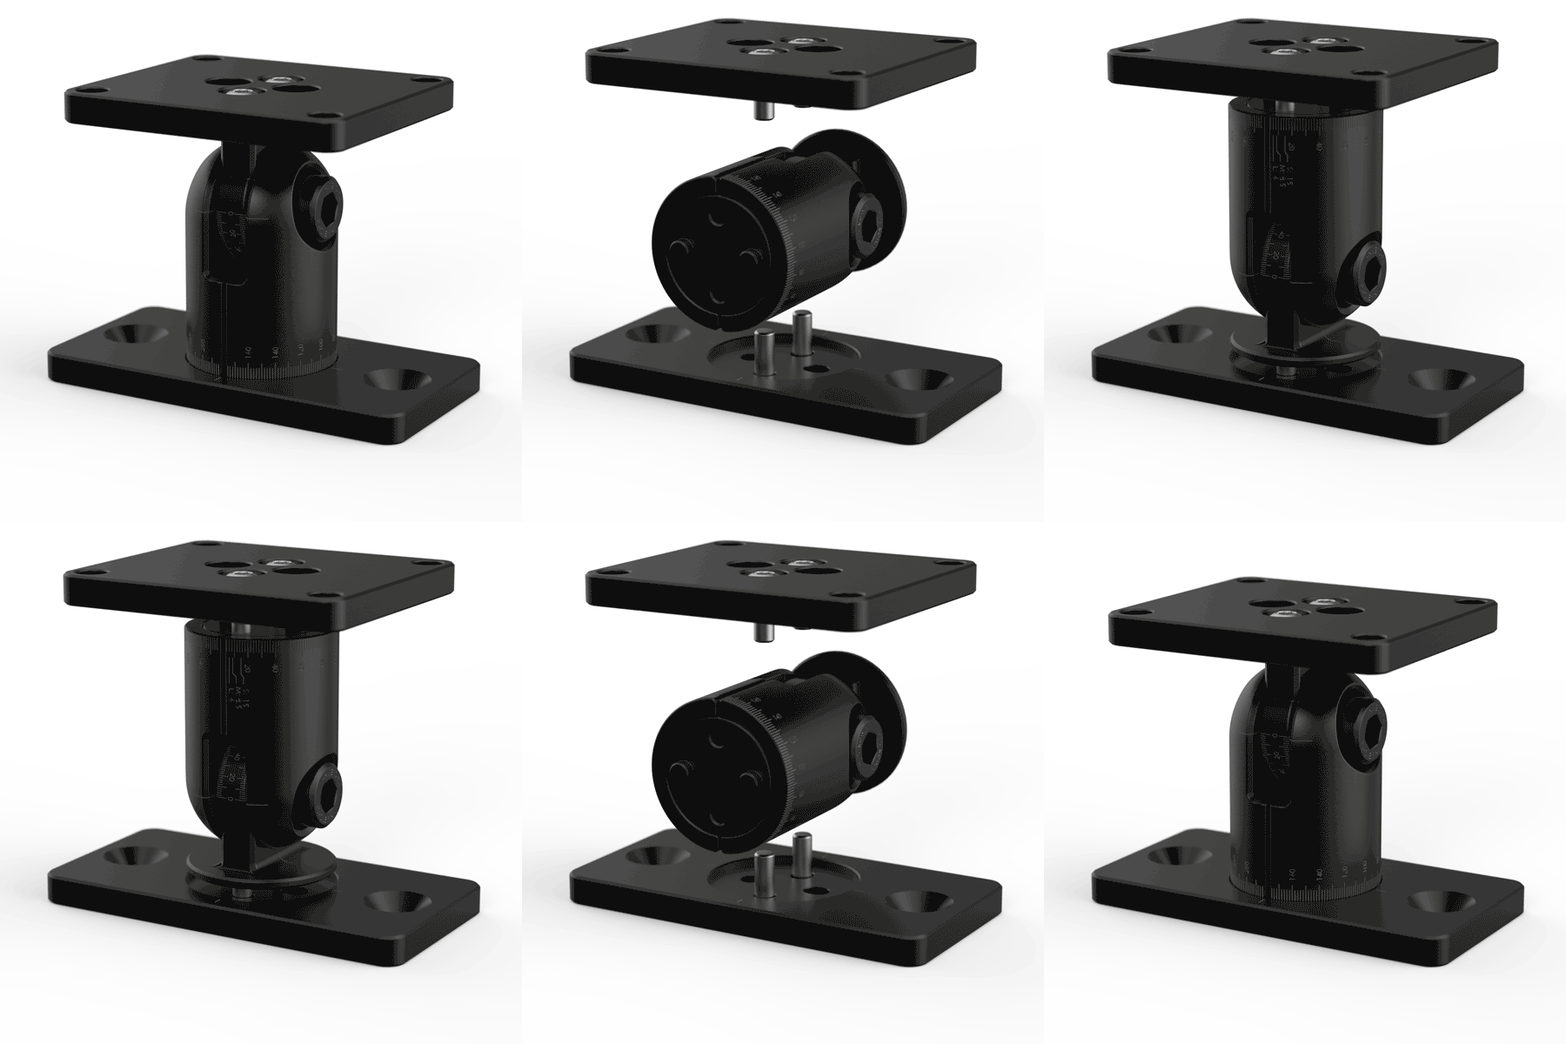
安装支架可以重新配置为 pan-tilt 或 tilt-roll 模式。在安装支架之前,请评估哪种配置最适合您的应用。
小技巧
在 tilt-roll 配置中将安装架安装在水平面的一侧有两个好处。可通过翻转关节将相机垂直于场景对齐,也可以通过倾斜关节将相机倾斜一定角度来避免来自背景的反射和干扰。更多相关信息,请参阅 正确定位 。
要重新配置支架,请松开顶板和底板的四个 M4 螺钉,然后以 4Nm 的扭矩将它们重新安装到新的配置。
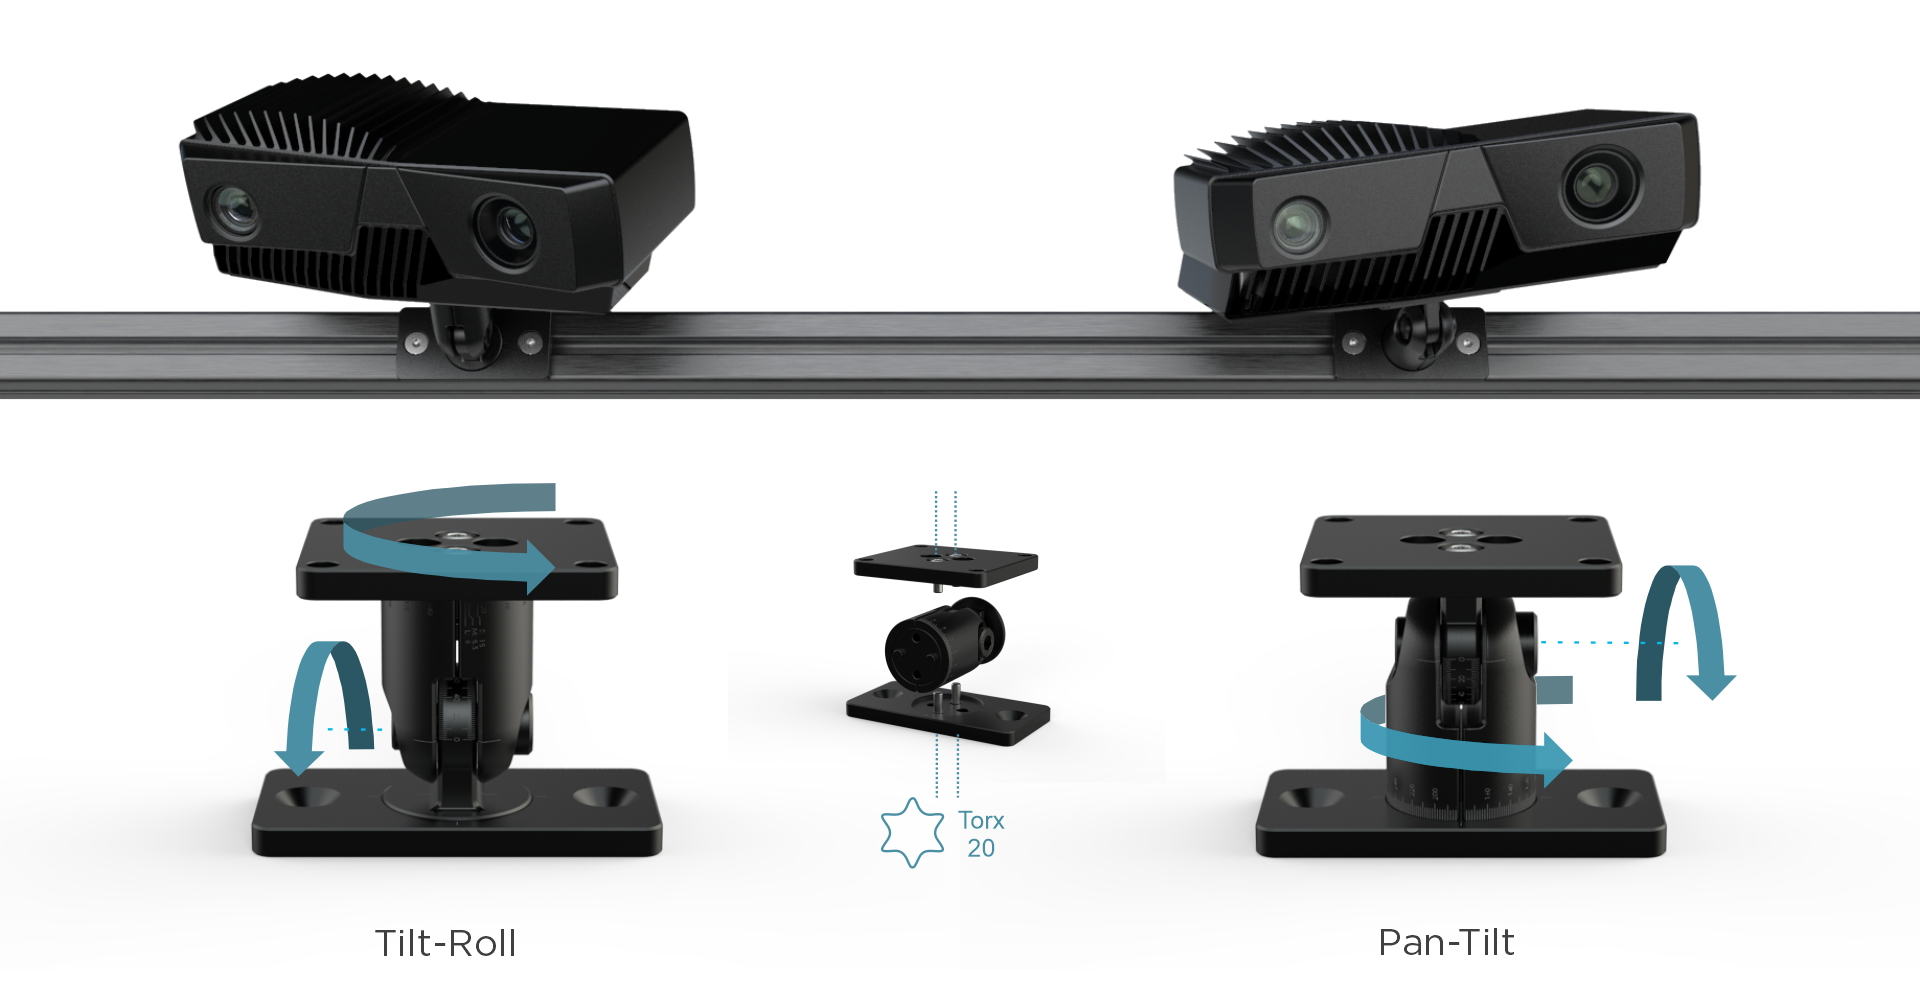
将支架安装到 V 型槽型材上
使用 M6 螺钉和 T 型螺母将支架固定到 V 型槽型材上,用 4 号六角扳手拧紧。
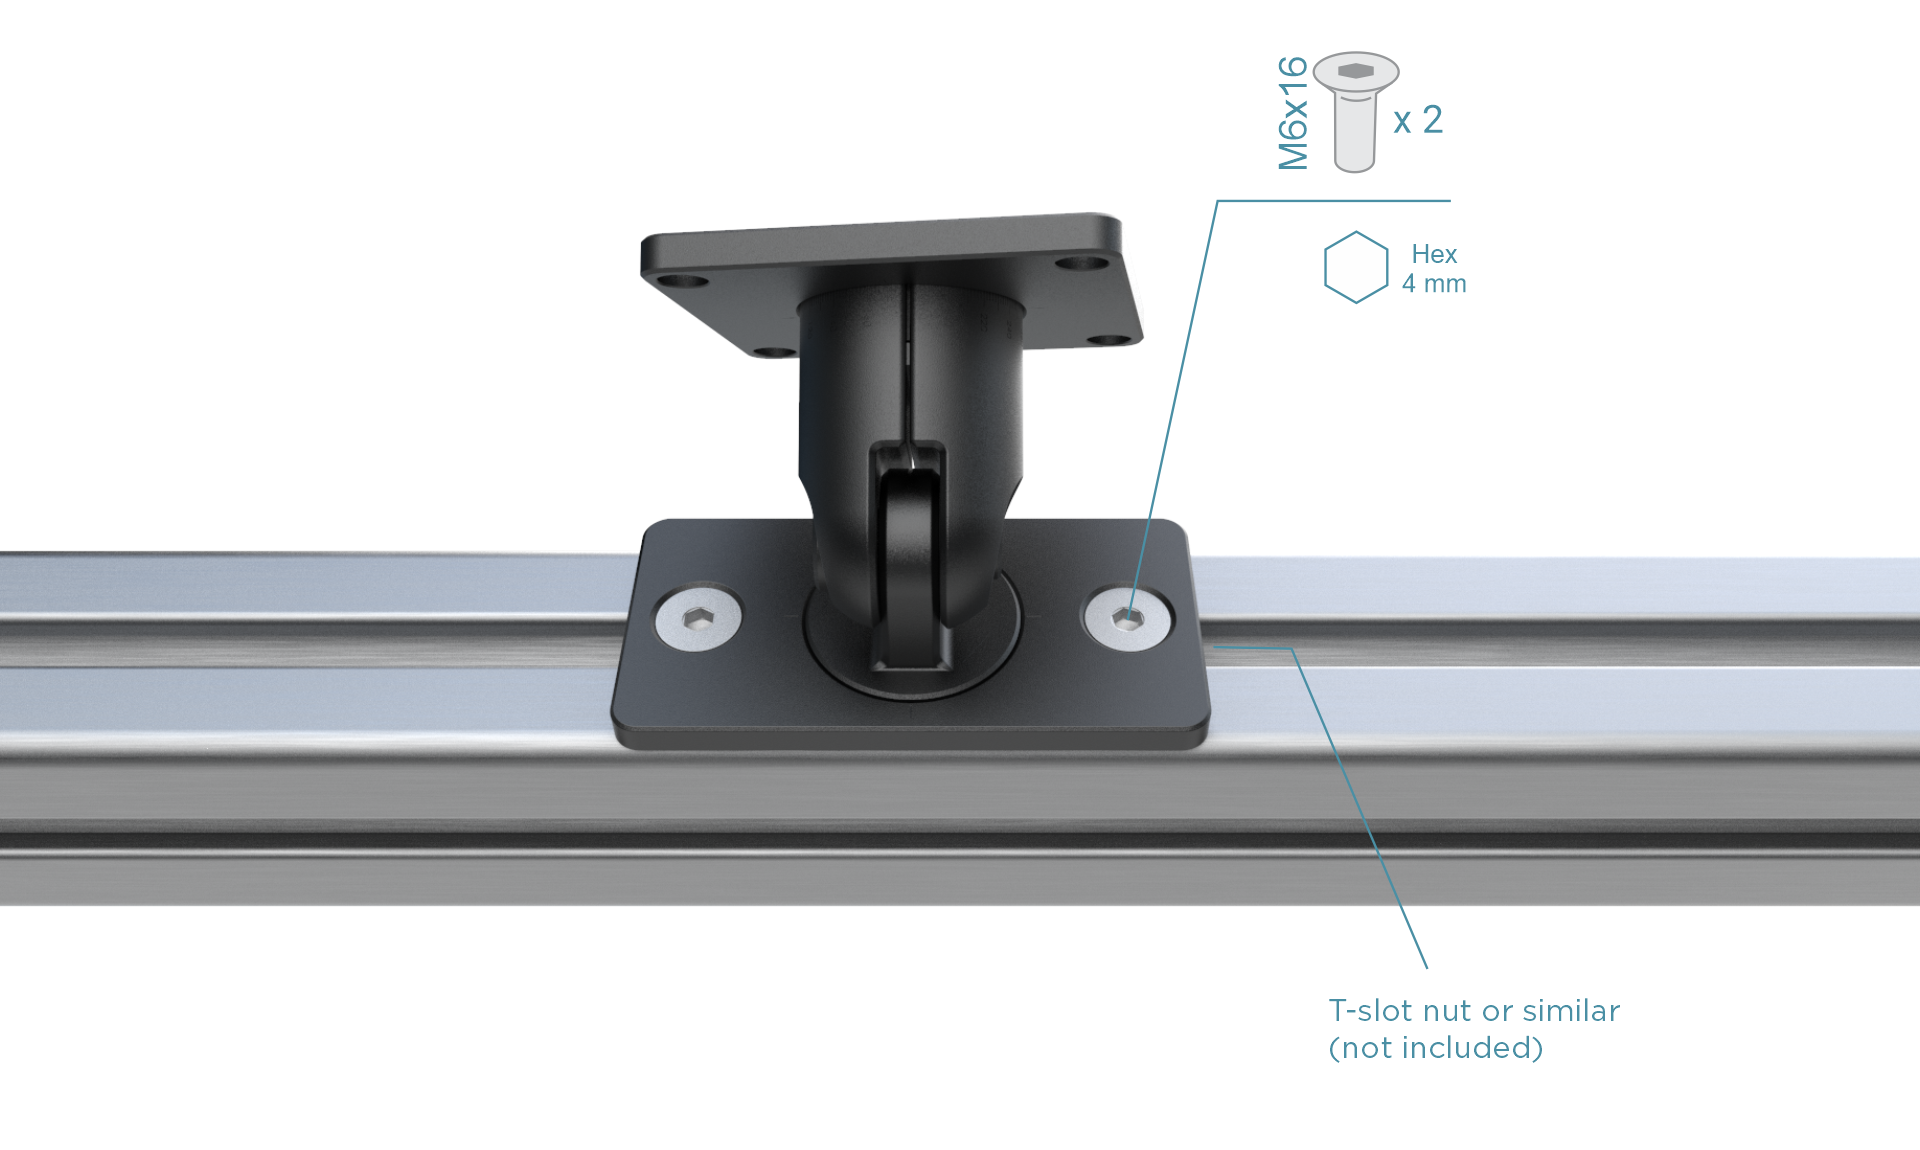
安装支架可以安装在型材的任何表面上,相机可朝向任何方向,水平或垂直,向上、向下或侧向。关于用于 Zivid 相机的螺丝的更多信息,请查看 安装规范 。
调整并固定
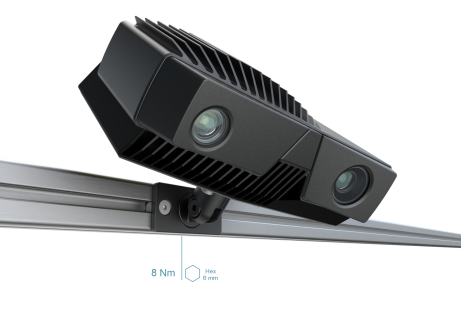
可以松开中心螺栓来调整相机的角度。然后使用 6 mm 六角扳手将中心螺栓拧紧至 8-9 Nm 的扭矩(比常见的手动拧紧感更紧),以便在受到振动时也能牢固固定。5 Nm 的扭矩足以在实验室中将相机固定在稳定的表面上。
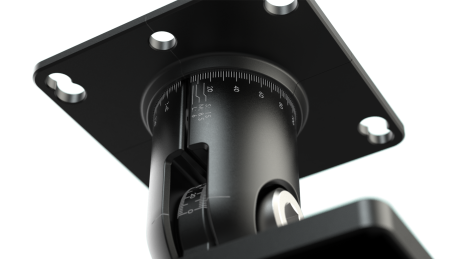
使用 360 度激光雕刻标记来精确调整角度。如果您需要卸下相机并稍后重新安装,这些标记可以帮助您记住系统中的相机方向。
Zivid Quick Mount
Zivid Quick Mount 是一款用户友好的倾斜/滚动相机支架,设计安装简便。
为什么要使用 Zivid 快速安装支架?
安装简便
对于 Zivid 3 相机,独特的悬挂机制可让您在拧紧螺丝前将相机悬挂在支架上,因此在安装过程中无需支撑相机的重量。其他型号不具备该悬挂机制,因此在拧紧螺丝时需要支撑相机的重量。
鲁棒性
坚固的设计确保了出色的稳定性,即使在有振动的环境中也是如此。
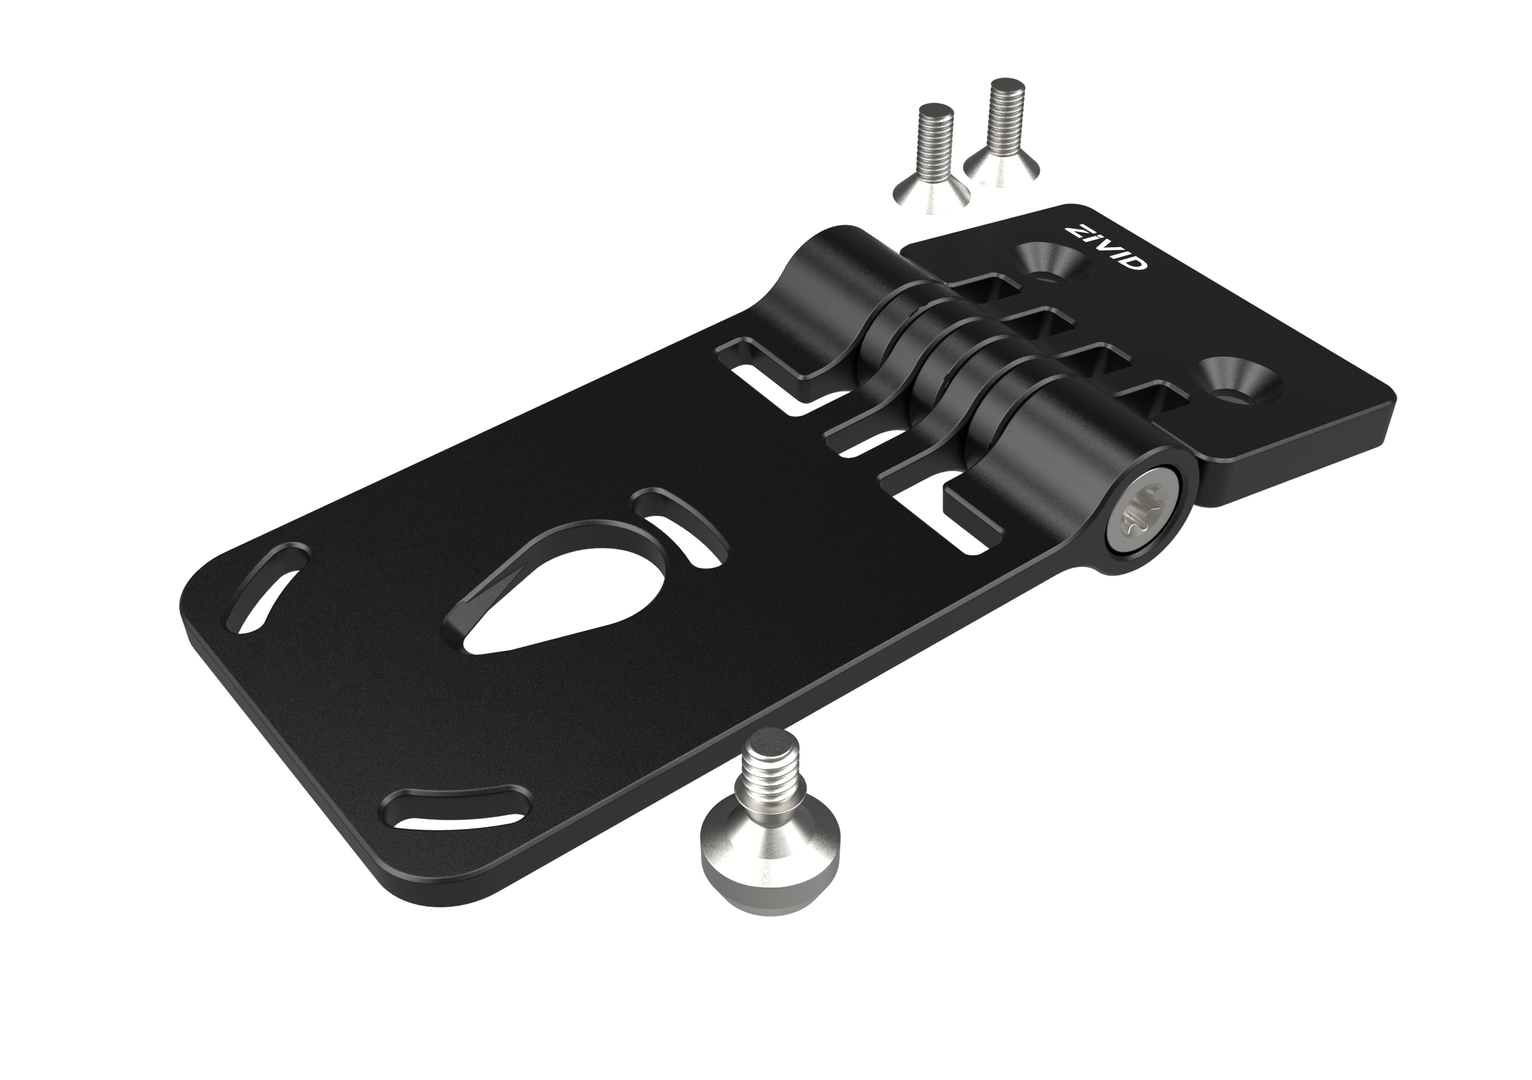
规格书和用户指南的 PDF 文档及 CAD 文件可 从 Accessories Downloads 下载。
安装说明
包装盒内包含 |
所需工具 |
|---|---|
Zivid 快速安装支架 |
Hex 4 mm |
安装螺丝 |
Torx T45 |
准备好相机
对于 Zivid 3 相机,请按照所有步骤操作。对于其他型号,请查看 固定和调整 部分。
将悬挂机构螺丝安装到位于相机底部中心的 UNC 1/4"-20 内螺纹孔中。您可以用手指拧紧,也可以使用 Torx T45 扳手将其拧紧至 3 Nm。
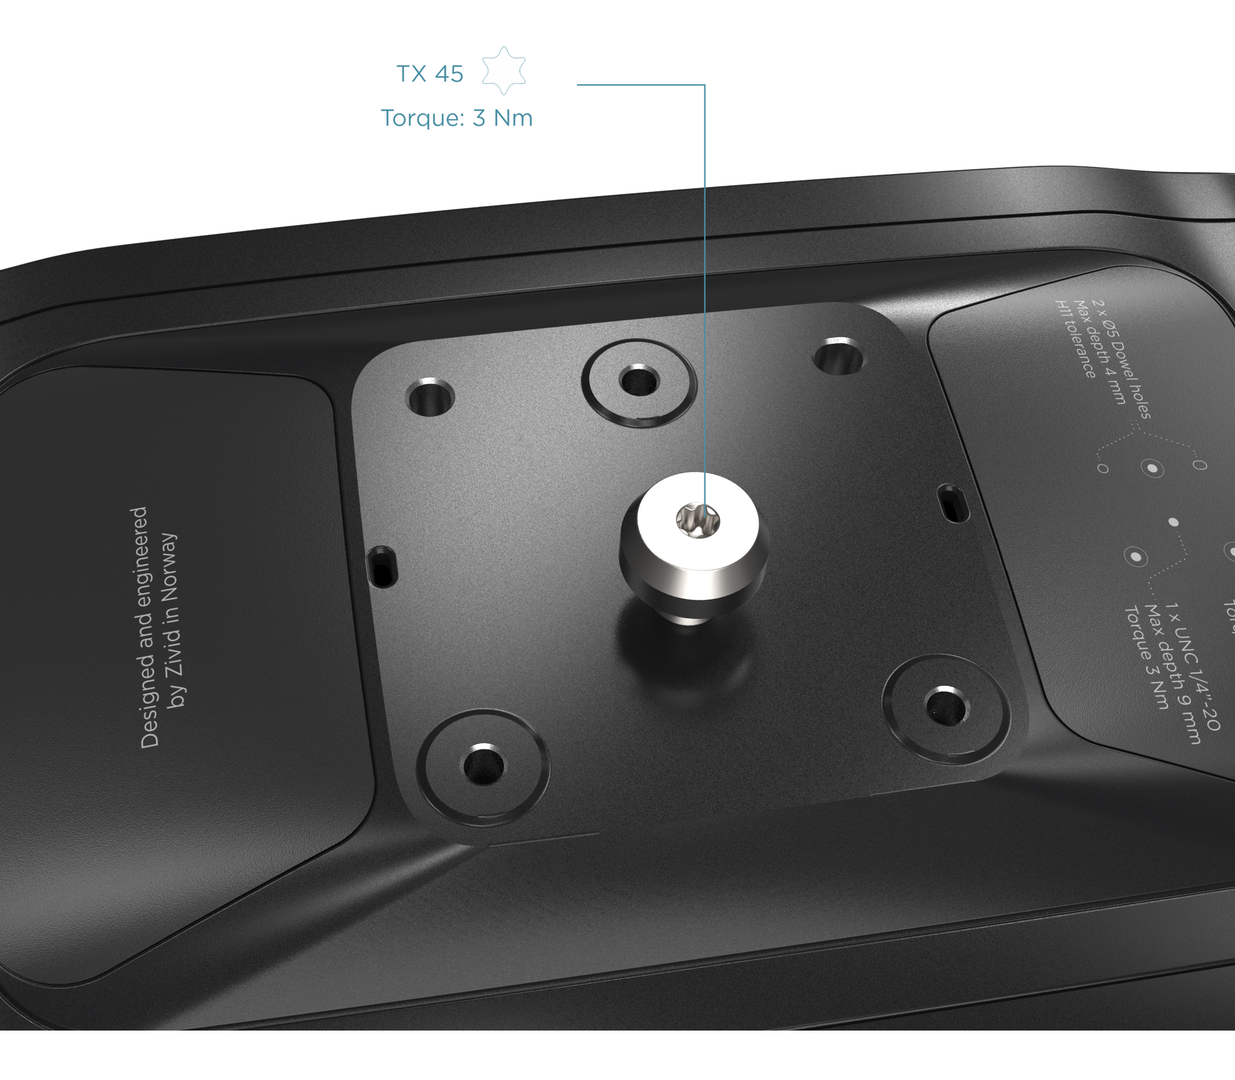
将支架安装到 V 型槽型材上
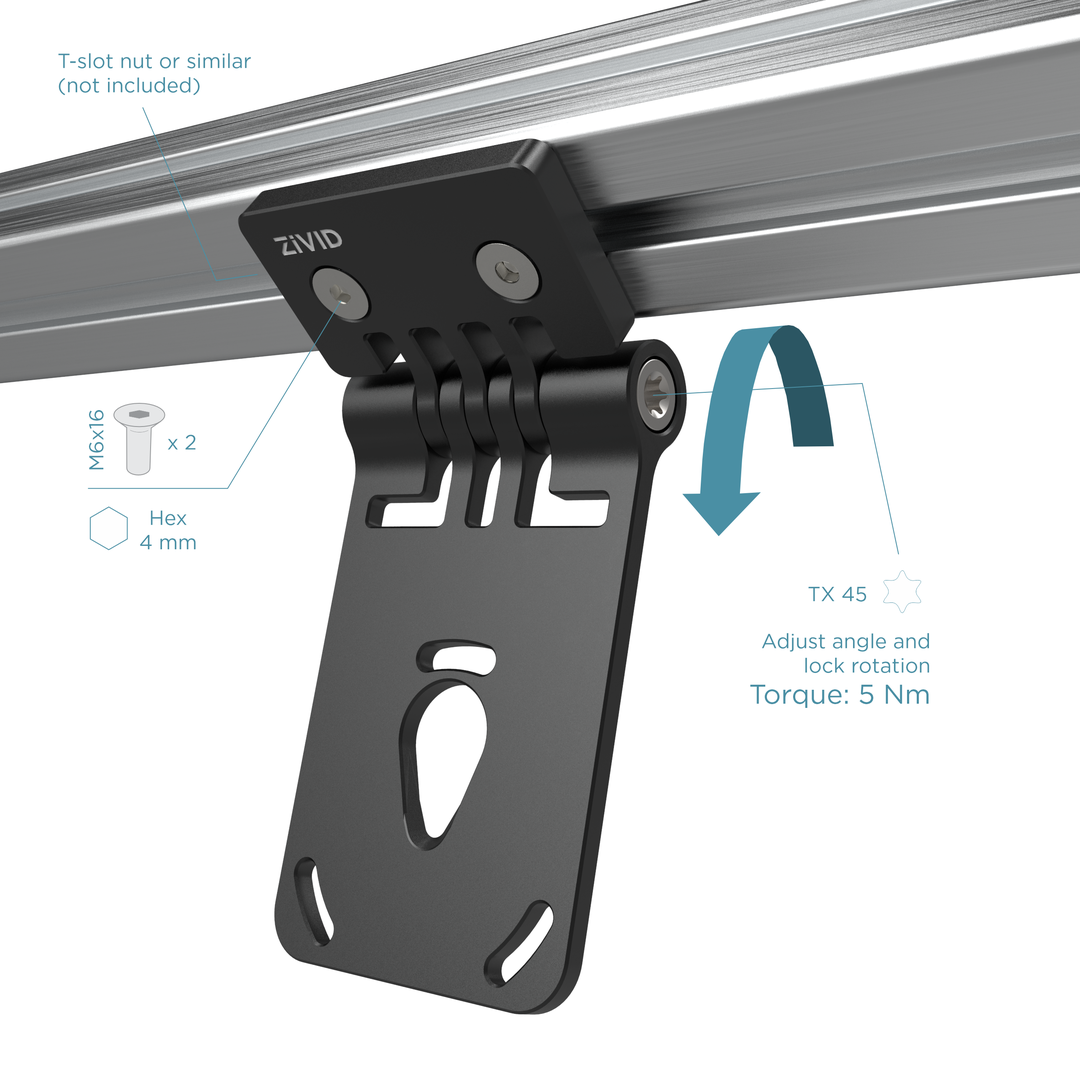
使用 M6 螺钉和 T 型螺母将支架固定到 V 型槽型材上,并用 4 号内六角扳手拧紧。支架可以安装在型材的任何表面上,从而实现灵活的相机方向:水平、垂直、向上、向下或侧向。
悬挂相机
螺丝拧好后,将相机挂在支架上,让它悬挂起来。

固定和调整
使用弧形槽调整滚动角度,并将相机拧紧到支架上,扭矩为 3 Nm。有关适用于您的 Zivid 相机的兼容螺丝的详细信息,请参阅 安装规格 。

最后调整倾斜角度,并使用 Torx T45 扳手将中心螺栓拧紧至 5 Nm 扭矩。参见此 图 。
小技巧
倾斜和滚动关节有助于将相机定位到与场景垂直的位置,并最大限度地减少反射或背景干扰。更多相关信息,请参阅 正确定位 。
继续阅读有关 手臂安装 的文章。
Version History
SDK |
变更 |
|---|---|
2.17.0 |
新增对 Zivid 3 XL250 的支持。 |
2.14.0 |
新增对 Zivid 2+ MR130、LR110 和 MR60 的支持。 |
2.12.0 |
Zivid One+ 已达到其生命周期的终点并且不再受支持。 |