手臂安装
所有 Zivid 3D 相机型号均可通过 Zivid 手臂安装支架安装到机器人上,并可选配 Zivid 手臂安装支架延长器。
Zivid 手臂安装支架
Zivid On-Arm Mount 是用于将 Zivid 相机安装到工业和协作机器人的安装支架。Zivid 2 和 Zivid 2+ 型号因体积小、重量轻、捕获速度快以及特殊设计的视野,尤其适合手臂安装。
为什么使用 Zivid 手臂安装支架解决方案?
轻质
Zivid 手臂安装支架重量轻,对机器人手臂的承载能力影响较小,这对于协作机器人和更微型的工业机器人尤其重要。这意味着可以应用更重的工具和夹具,并从系统中获得尽可能多的有效载荷。
模块化
一个 Zivid 手臂安装支架相机座适用于我们所有的相机型号,无需完全拆卸即可更换相机。
集成电缆管理
Zivid 手臂安装支架在相机端有一个应力消除装置,可在电缆缠结的情况下保护连接器。它可以安装在相机的背面或任一侧,以适应各种独特的安装场景。
遮挡预防
Zivid 手臂安装支架提供两种相机座选项,可选择平面或 15 度倾斜安装,适用于会遮挡相机视野的大型夹具。
高灵活性和碰撞预防
由于 Zivid 手臂安装支架外形小巧,因此可降低与其他物体碰撞的风险,并为夹具和机器人手臂提供良好的间隙。延长器和灵活的配置允许多种安装形式,例如,相机支架可以以两种方式定向。这样的设置使相机能够远离大型夹具,并为具有挑战性的机器人运动获得空间,从而防止自碰撞。向后倾斜安装的相机支架使相机看起来更靠近夹具,从而可能减少所需的机器人运动。
适应性
由于它有多种变体,Zivid 手臂安装支架支持多种型号的机器人。此外,其模块化设计允许轻松定制适配器以适应更多机器人型号。
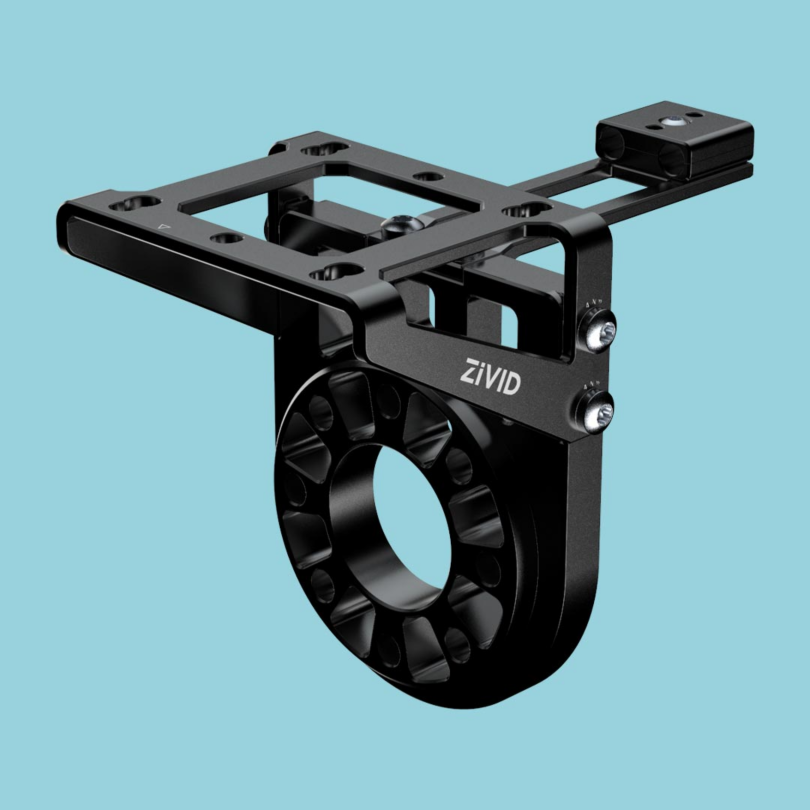
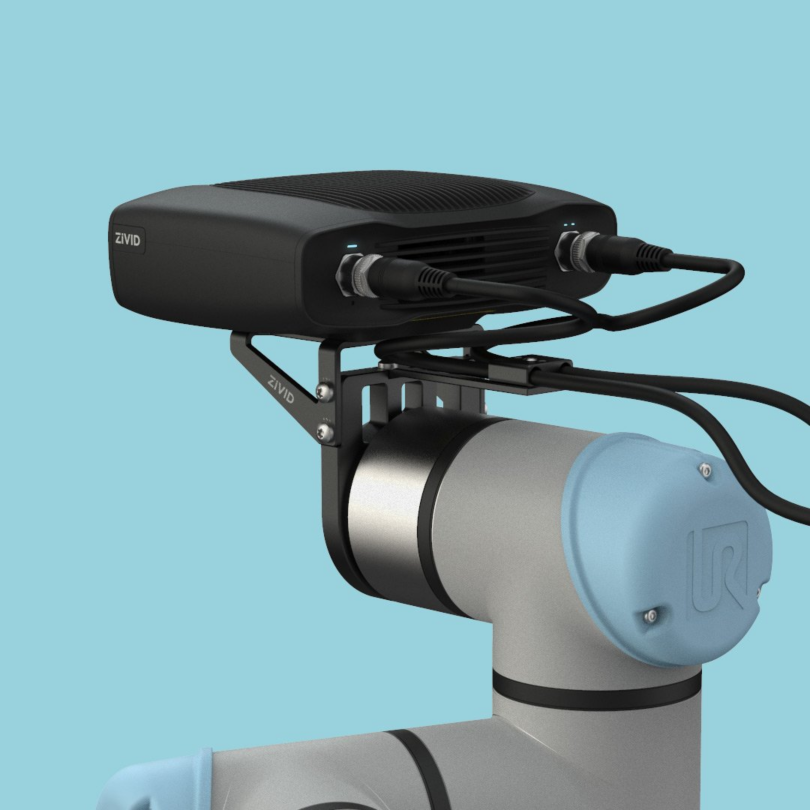
Zivid 手臂安装支架的变体
Zivid 手臂安装支架有四种变体:
- ZVDA-MNT-OA111
直型相机座
法兰适配器兼容 ISO 9409-1-50-4-M6(UR, Omron, Doosan, ++)
- ZVDA-MNT-OA121
15 度倾斜安装发热相机座(建议在使用会造成遮挡的夹具时使用)
法兰适配器兼容 ISO 9409-1-50-4-M6(UR, Omron, Doosan, ++)。
- ZVDA-MNT-OA211
直型相机座
的法兰适配器兼容 ISO 9409-1-63-4-M6(Yaskawa, Kawasaki, ++)
- ZVDA-MNT-OA221
15 度倾斜安装发热相机座(建议在使用会造成遮挡的夹具时使用)
的法兰适配器兼容 ISO 9409-1-63-4-M6(Yaskawa, Kawasaki, ++)
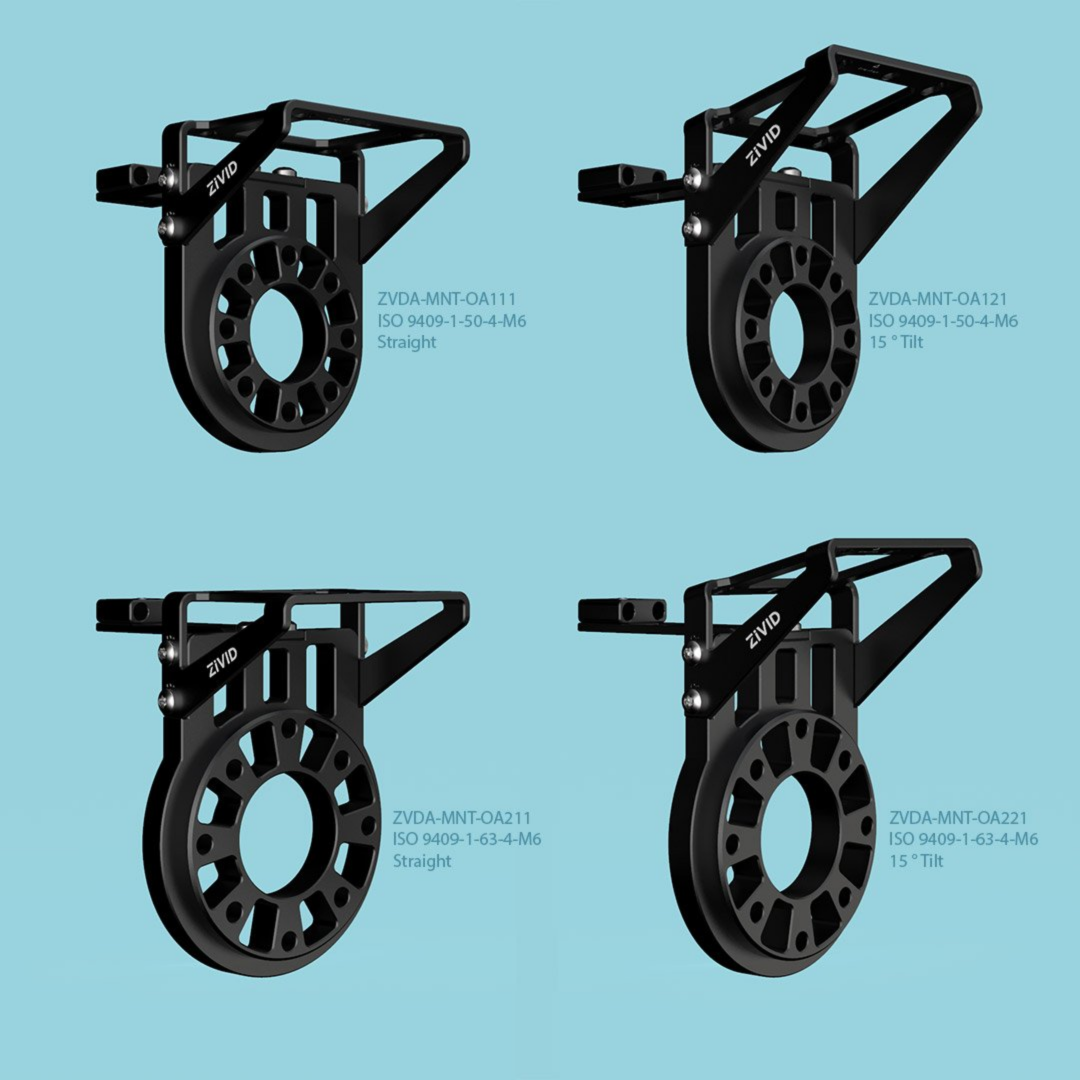
规格书和用户指南的 PDF 文档及 CAD 文件可 从 Accessories Downloads 下载。
Zivid 手臂安装支架延长器
Zivid On-Arm Mount Extender 是增加安装灵活性的单独(选件)产品。
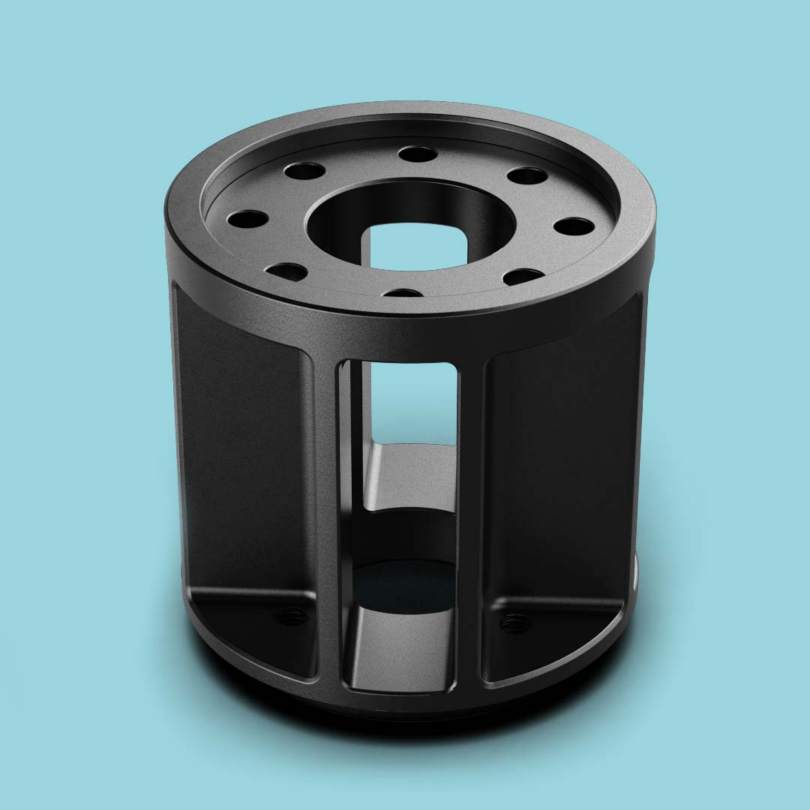
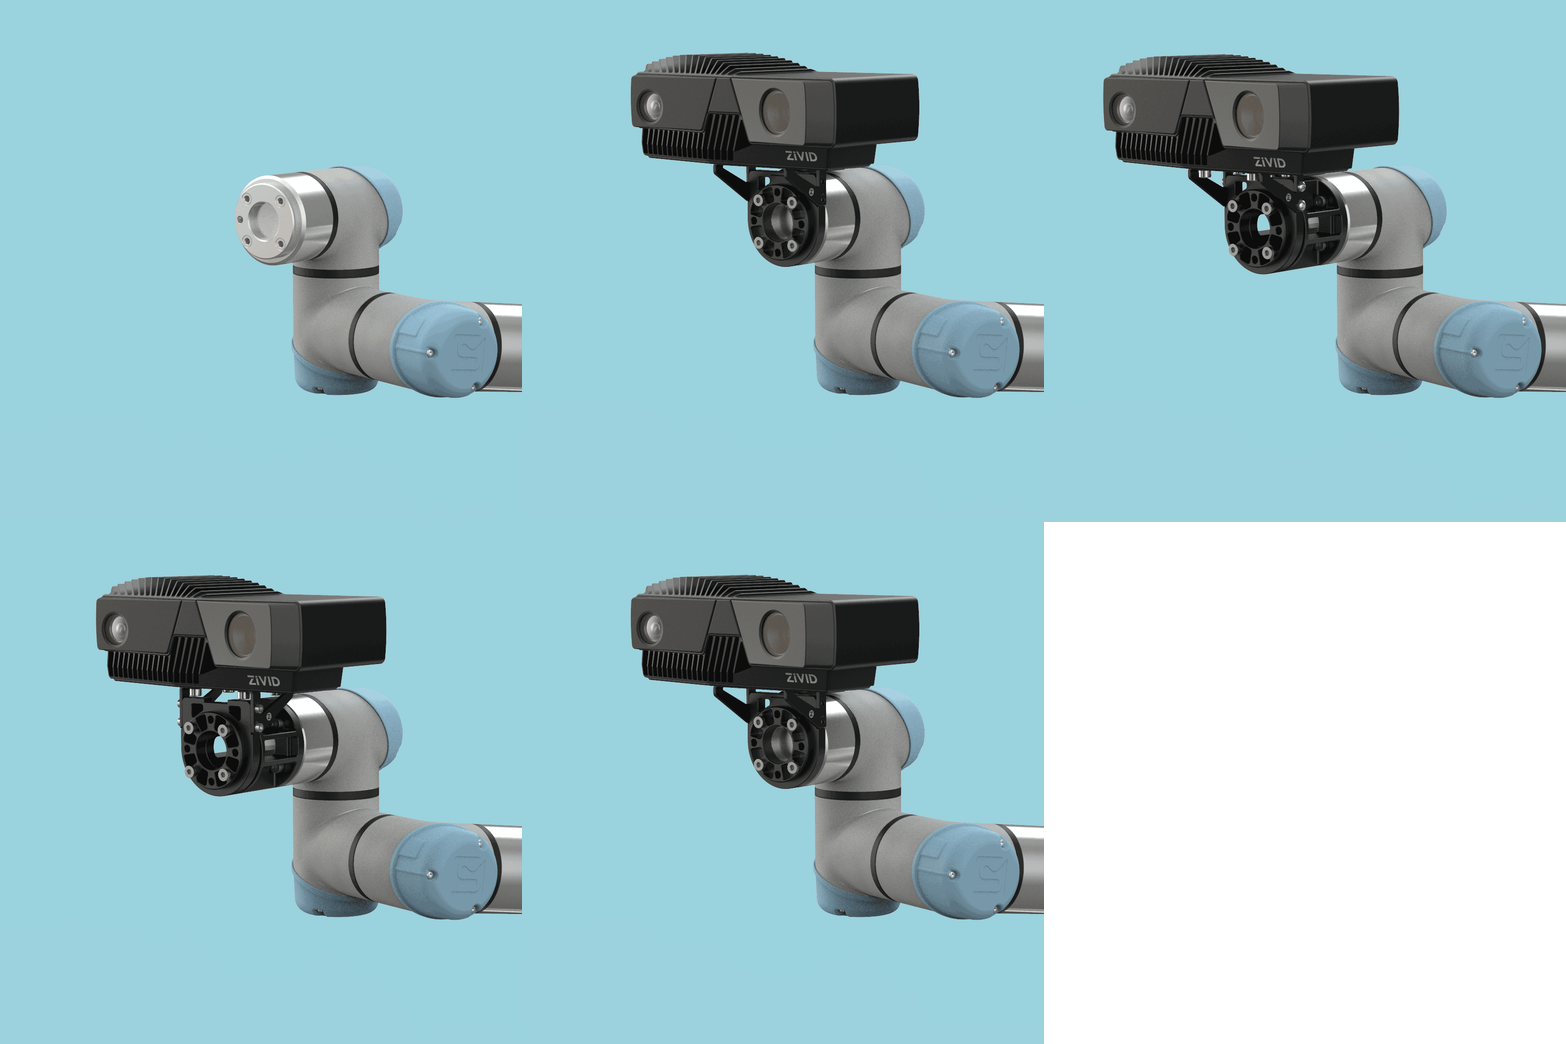
Zivid 臂安装支架延长器的变体
延长器有两种变体:
- ZVDA-MNT-OA01E
与 ISO9409-1-50-4-M6 法兰兼容(UR, Omron, Doosan, ++)
- ZVDA-MNT-OA02E
与 ISO9409-1-63-4-M6 法兰兼容(Yaskawa, Kawasaki, ++)
规格书可 从 Accessories Downloads 下载。
安装说明
在包装盒中,您会找到一个相机座、用于电缆管理的应力消除装置、一个机器人法兰适配器和安装螺钉。
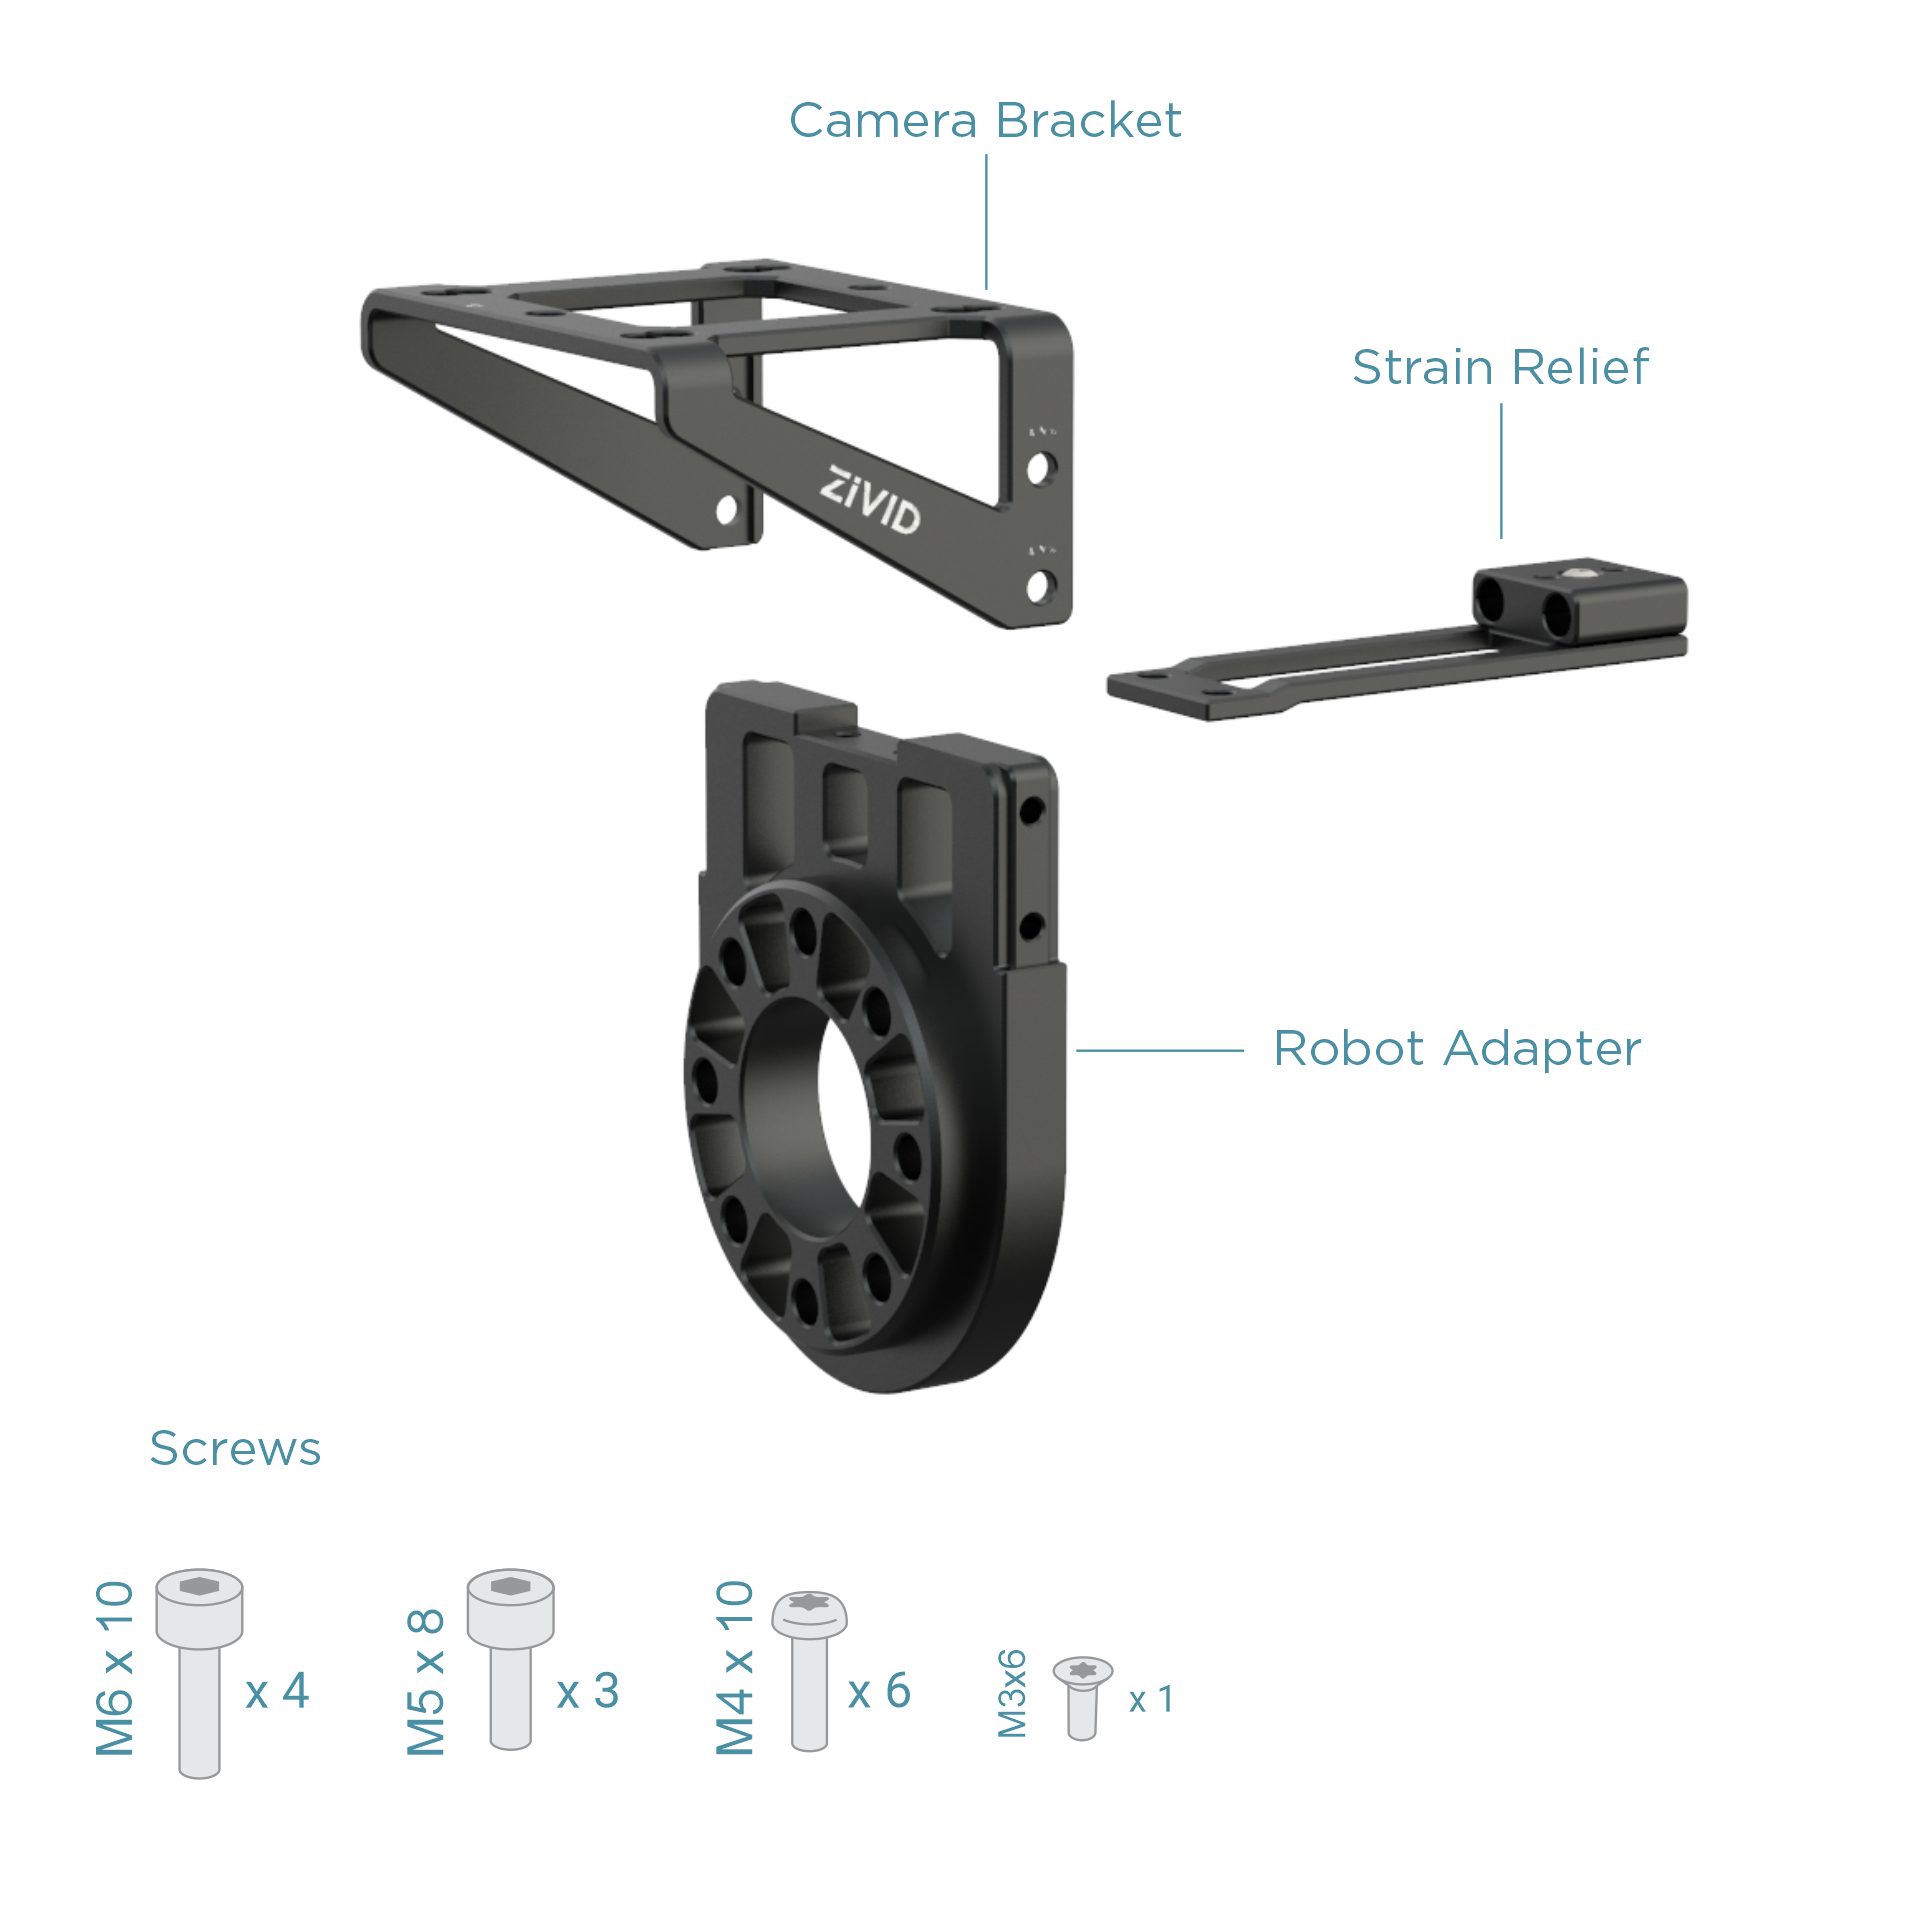
安装需要以下工具:
20、25 和 30 尺寸的星型螺丝刀

机器人适配器和延长器
可选的延长器可以安装在机器人适配器的后面或前面。将其安装在前面,可使相机与夹具保持更长的距离,从而最大限度地减少在拾取过程中与例如料箱边缘发生碰撞的风险。在机器人适配器后面安装延长器适用于降低某些机器人发生机器人自碰撞的风险,并且还提供了良好的电缆管理选项。
以下螺钉和定位销深度均为 Zivid 的建议值。由于不同机器人可能有所不同,安装前请务必查阅您所用机器人自身的文档,了解其推荐的螺钉类型、扭矩值和孔深。
无论您将哪个安装组件固定到机器人法兰上,都应使用四颗螺钉进行安装。我们建议使用不锈钢螺钉(A2 或 A4)。延长器随附不锈钢安装螺钉,但手臂安装支架不附带安装螺钉。
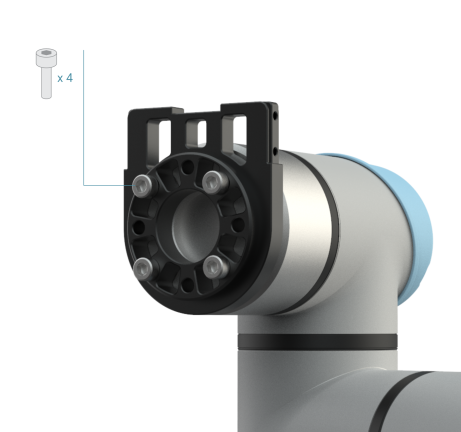
机器人适配器增加了螺钉所需的 12.5 毫米长度。螺钉深度约为 5 毫米通常是合适的。
为了增加灵活性,可以添加更多延长器。但是,请注意机器人的承载能力,不要低估偏离中心的有效载荷产生的惯性力。
定位销
我们建议使用具有 h 公差的定位销将手臂安装支架与机器人法兰固定在一起。
警告
不要使用 m 公差定位销,他们会被卡住。
如果将延长器安装在机器人适配器后面,请使用Ø6 毫米定位销将延长器与机器人法兰连接。请确保定位销插入延长器的深度为 6 毫米;通常 10 毫米长的定位销适合插入机器人法兰。
如果在机器人适配器前面安装延长器,定位销必须长 20-22cm,因为它需要穿过延长器。
如果不使用延长器,请确保定位销插入机器人适配器的深度为 5 毫米。
小技巧
锁紧定位销可确保重新组装底座时具有良好的重复精度,即使在较大振动或机械应力下,相邻组件也不会随时间发生位移。
应力消除
如下图所示安装应力消除装置。
备注
应力消除器也可以向前安装,电缆夹指向夹具。
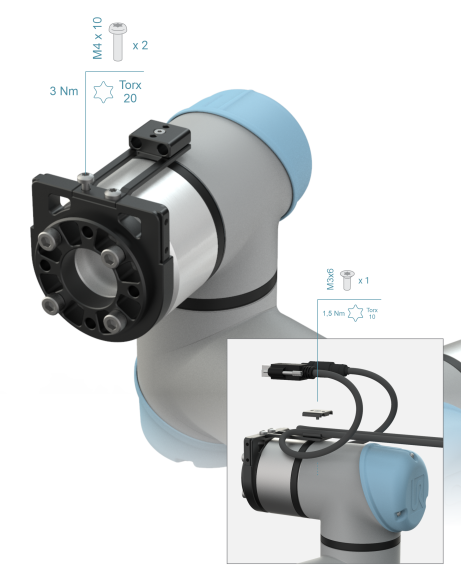
小技巧
如果电缆被缠结,应力消除装置可保护相机连接器,最大限度地减少由于直接施加在电缆连接器上的力导致的物理损坏的风险。应力消除组件将有助于将来自缠绕电缆的不需要的力引导到机器人手臂,使其有机会停止运动。除了应力消除外,还应使用适当的电缆管理系统,例如, Igus Cable Management Solutions。
相机座
安装相机座。
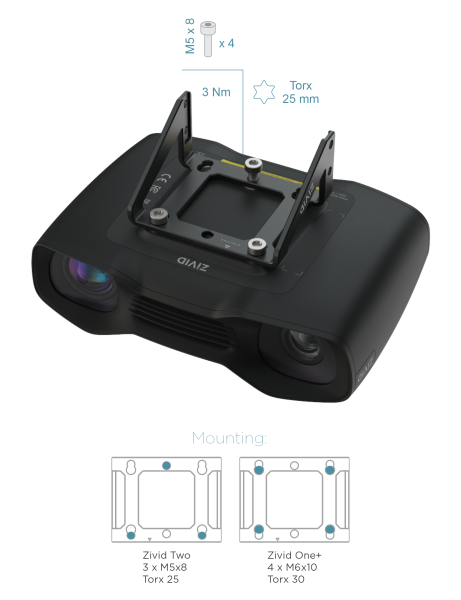
备注
由于相机安装支架是对称的,因此可以向后安装(相机支架上的箭头指向后方)。这会在夹具和相机之间留下更多空间。
通过将相机座滑到机器人适配器的导轨上来安装相机。
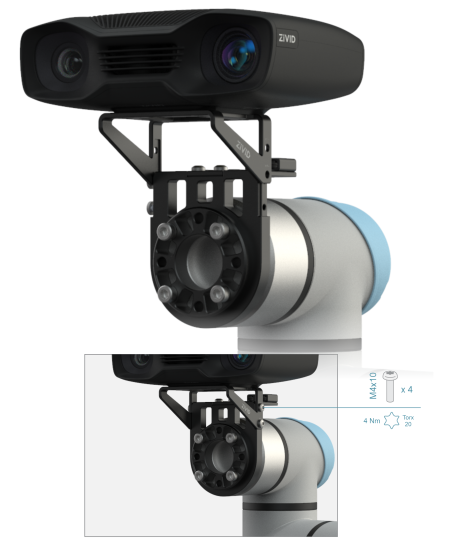
小技巧
为了增加安全性以防止螺丝松动,我们建议使用 Loctite(紫色或蓝色)胶水和 Nordlock 垫圈。常规平垫圈无法应对振动,但有助于确保螺钉进入特定组件的正确深度。
电缆布线与长度
相机和应力消除装置之间的电缆应保持相对松弛,以避免连接器持续受到静态弯曲和扭转力的影响,这些力会随时间损坏连接器。从相机引出的电缆在进入应力消除组件之前应形成一个小的弯曲环。
当电缆直接穿过应力消除装置布线时,我们建议在相机和应力消除组件之间留出 20-30 厘米长度的电缆。
另一种方式是通过 Zivid 安装支架延长器的侧面开口来整理电缆。在这种情况下,请在相机和应力消除组件之间留出 30-40cm 长度的电缆。
连接电缆
连接电缆并引导它们穿过应力消除装置。电缆夹被设计为用于 5-7 毫米直径的电缆。

备注
Zivid 手臂安装支架上的应力消除装置被设计为适合 Zivid 电源和数据电缆一起使用。我们的底座也可以使用较粗的第三方或定制电缆,但是无法使用电缆夹,而只能使用电缆扎带将电缆固定到我们的应力消除装置上。
警告
请记住,我们不建议使用 Zivid 提供的电缆以外的任何电缆。
连接器建议
小技巧
使用 90 度角连接器 的 Power and Ethernet cables 非常适合配合 Zivid 手臂安装支架使用。由于电缆朝下伸出且占用空间很小,因此使用 90 度连接器比使用直型连接器更安全,因为它降低了电缆缠结的风险。
备注
可以在 Zivid 手臂安装座上使用应力消除装置,并向前或向后安装直的或成角度的相机支架。然而,如果相机支架向后安装,您将无法使用电缆夹上的螺钉。或者,您可以将应力消除组件安装在 Zivid On-Arm 安装座的侧面。
我们建议在 PC 端也采用某种形式的应力消除装置,以防止连接器或端口损坏。
为了获得额外的碰撞防护,防护罩 可降低相机和电缆因碰撞而损坏的风险。
请参阅 手臂安装方案的机械注意事项,了解如何避免手臂安装相机系统中常见的问题,例如碰撞、电缆应力和振动。
继续阅读有关 三脚架安装 的文章。