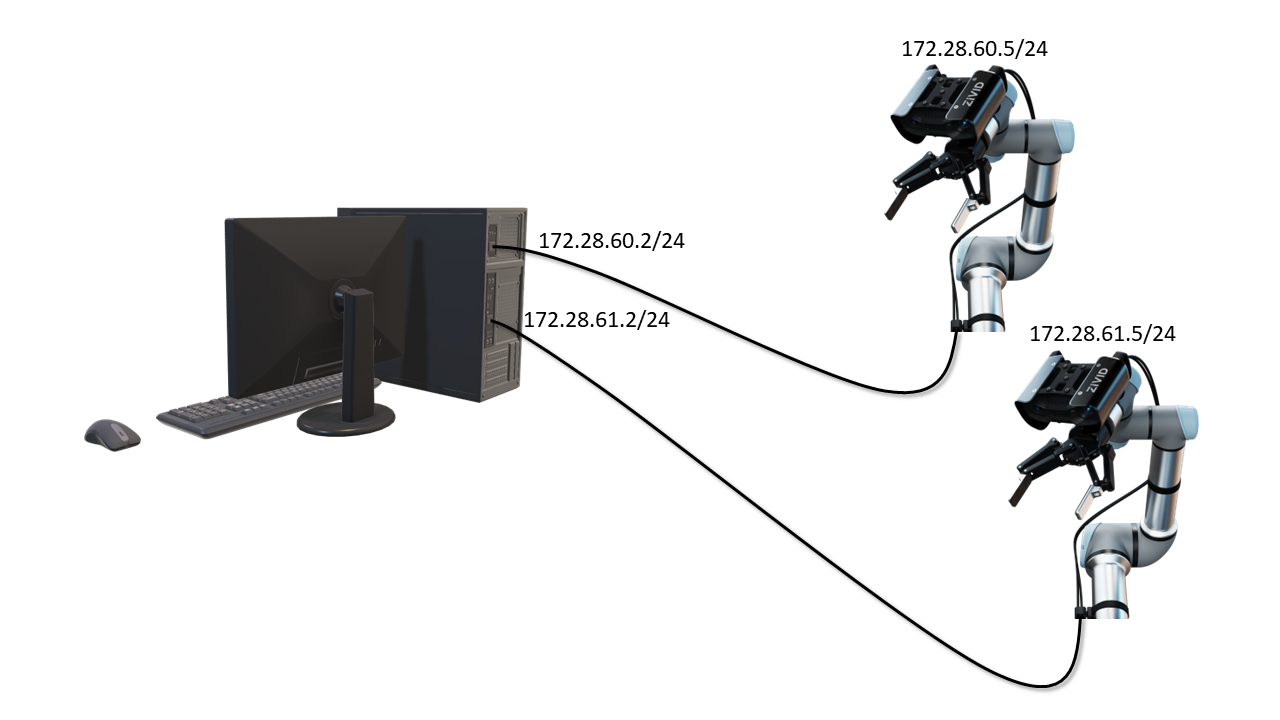
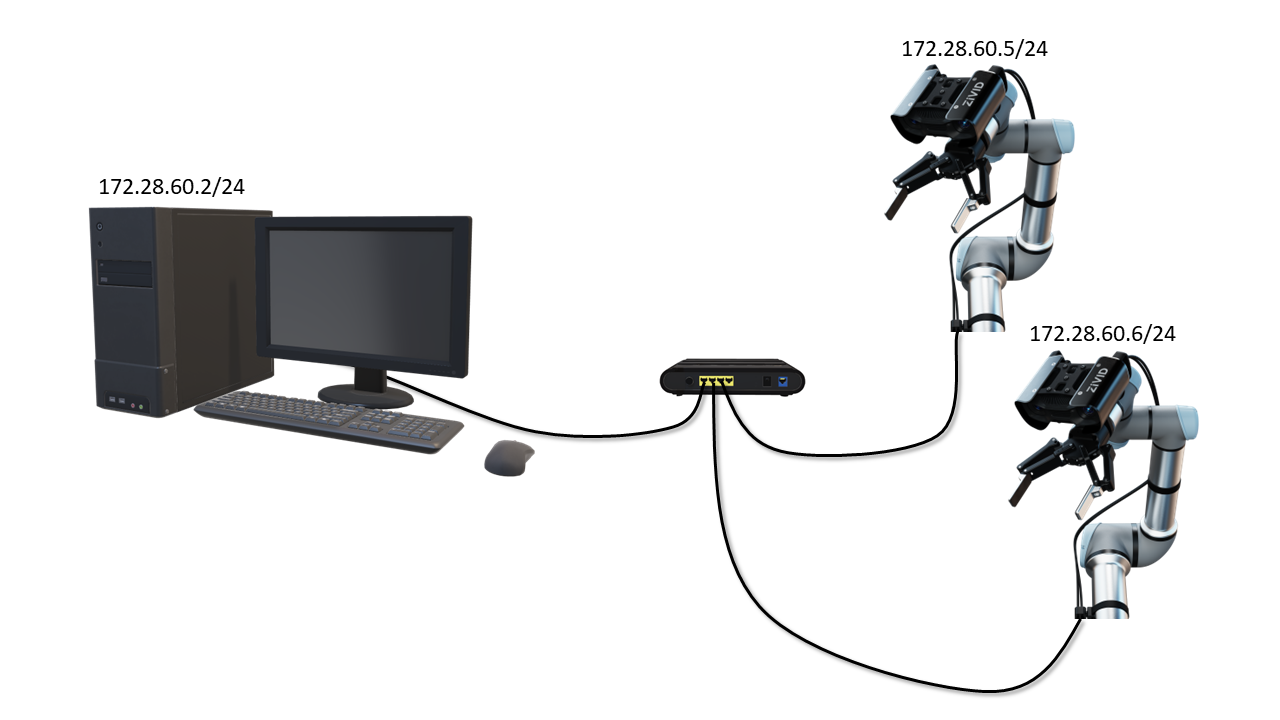
Static IP Network Configuration - Camera
조심
네트워크 구성에 대한 올바른 지침은 SDK 버전에 따라 다릅니다. 왼쪽 상단 드롭다운에서 SDK 버전을 선택합니다.
Zivid Studio 를 열고 Cameras → All Cameras 를 클릭하여 카메라 메뉴를 엽니다.
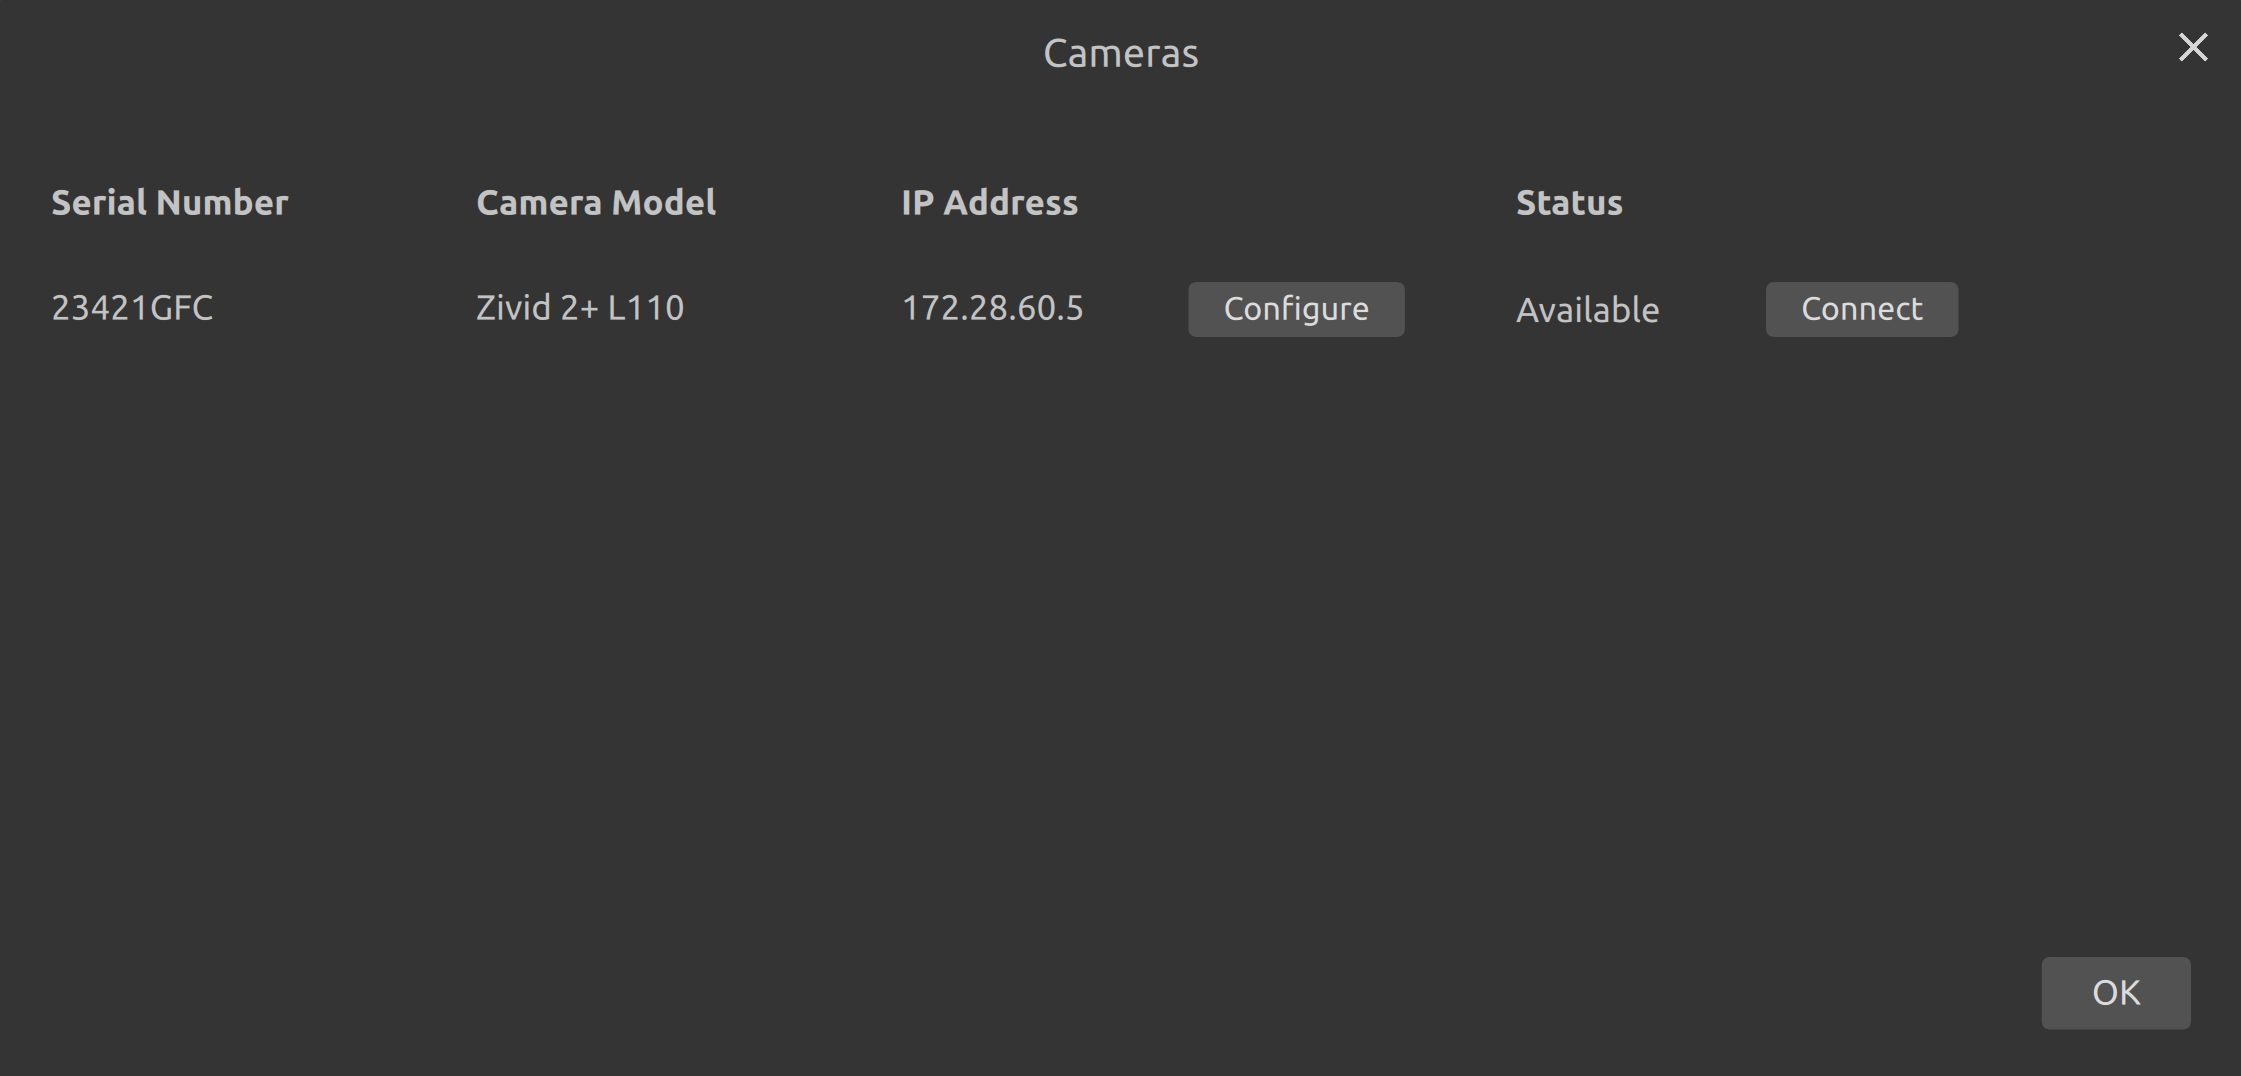
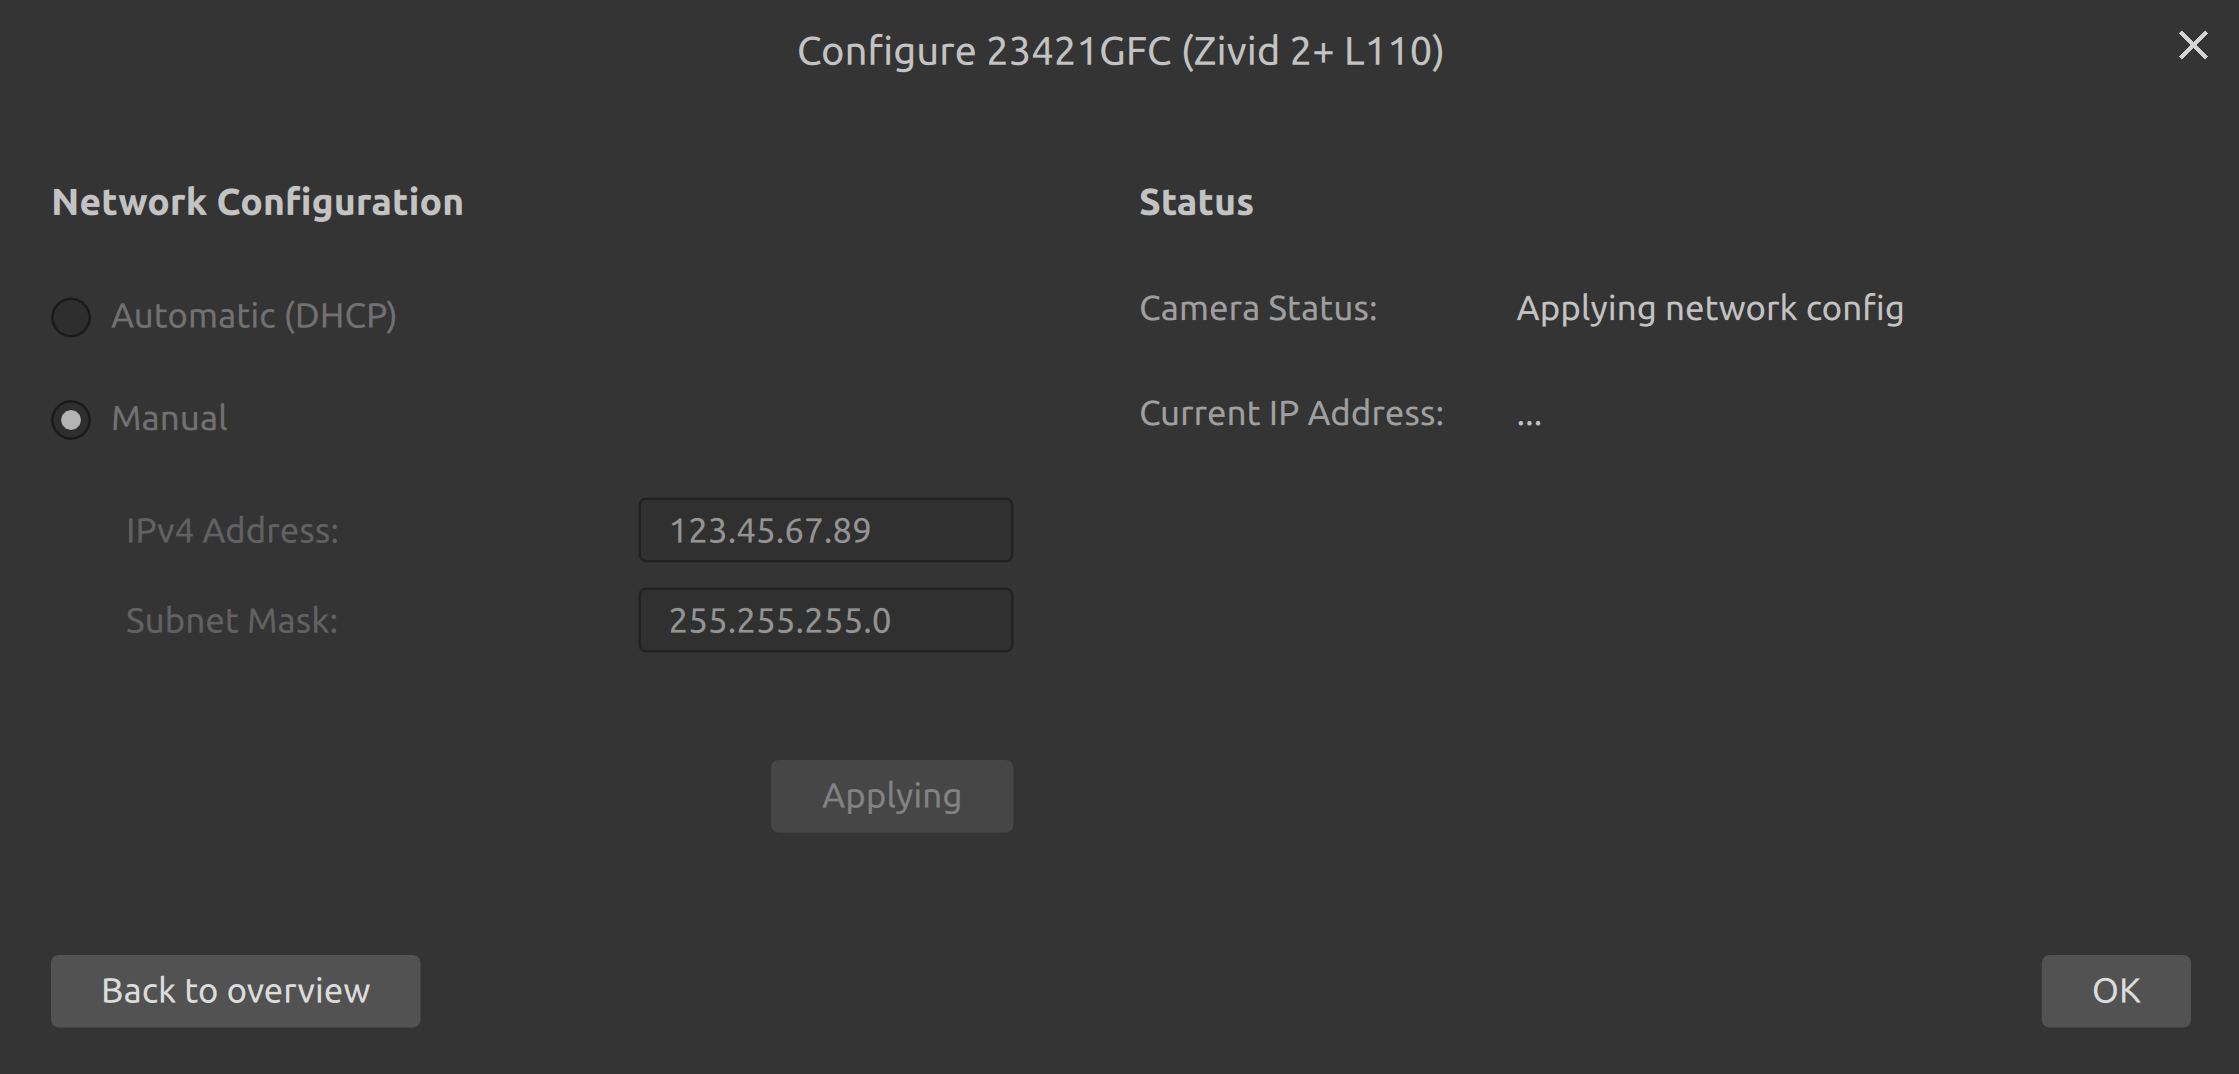
구성하려는 카메라에서 Configure 를 클릭합니다.
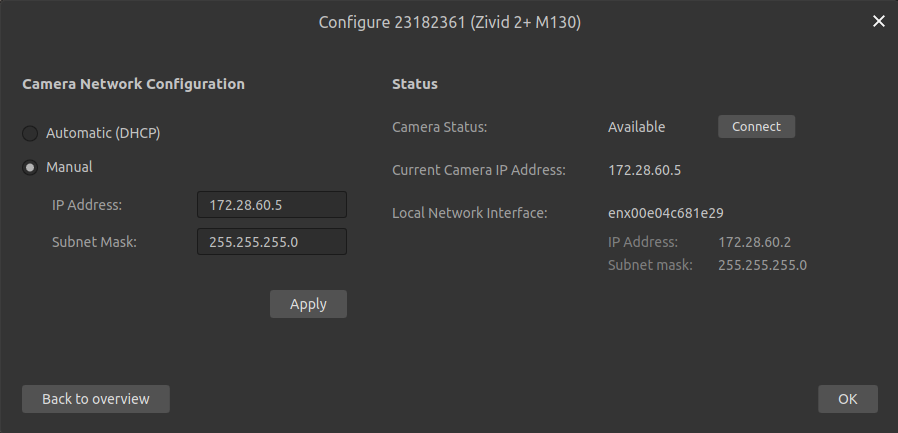
수동 네트워크 구성 모드를 선택하고 원하는 IP 주소와 서브넷 마스크를 입력하세요. IP 주소가 네트워크의 다른 주소와 충돌하지 않는지 확인하세요. 카메라에 구성을 적용하려면 Apply 를 클릭하세요.
CLI 도구 ZividNetworkCameraConfigurator 사용하면 한 번에 한 대의 카메라 네트워크 구성을 변경할 수 있습니다. 이 도구는 Windows에서는 Zivid SDK와 함께, Ubuntu에서는 Zivid Tools 패키지와 함께 설치됩니다.
terminal/Command Prompt를 엽니다.
카메라를 연결합니다.
다음을 실행하여 카메라를 찾았는지 확인합니다.
ZividListCameras.exe
ZividListCameras
카메라를 현재 IP
<host>와 고정 IP 모드로 설정하고, 특정 IP 주소<ip>, 서브넷 마스크<mask>, 게이트웨이gateway설정하세요. IP 주소가 네트워크의 다른 IP 주소와 충돌하지 않는지 확인하세요.ZividNetworkCameraConfigurator.exe set-config <host> --static --ip <ip> --subnet-mask <mask> --gateway <gateway>
ZividNetworkCameraConfigurator set-config <host> --static --ip <ip> --subnet-mask <mask> --gateway <gateway>
예를 들어, 고정 IP를
172.28.60.5에서172.28.60.6으로 변경하는 경우:ZividNetworkCameraConfigurator.exe set-config 172.28.60.5 --static --ip 172.28.60.6 --subnet-mask 255.255.255.0 --gateway 172.28.60.1
ZividNetworkCameraConfigurator set-config 172.28.60.5 --static --ip 172.28.60.6 --subnet-mask 255.255.255.0 --gateway 172.28.60.1
SDK는 카메라 네트워크 구성을 구성하는 기능을 제공합니다.
카메라에 연결하세요.
모드를 수동으로 설정하세요.
IP 주소와 서브넷 마스크를 정의합니다.
네트워크 구성 객체를 생성합니다.
새로운 네트워크 구성을 카메라에 적용합니다.
여러 대의 카메라에 IP 주소를 설정하는 경우, 각 카메라마다 다른 IP 주소로 위 단계를 반복하세요. 각 카메라마다 인터페이스 네트워크 카드의 동일한 서브넷 범위 내의 IP 주소를 사용해야 합니다.
팁
하나 이상의 카메라를 PC에 물리적으로 연결하고 코드를 사용하여 IP 주소를 자동으로 설정할 수 있습니다. 각 IP 주소는 감지된 해당 로컬 네트워크 인터페이스의 서브넷과 일치합니다.
이제 특정 정적 IP 주소로 카메라를 구성했습니다.
카메라 IP가 PC와 다른 서브넷 범위에 있는 경우, 카메라에 접근할 수 없어 연결이 불가능할 수 있습니다. 이 경우, Static IP Network Configuration - PC 페이지로 이동하여 PC의 IP를 구성하세요. 그렇지 않은 경우, Connecting to the camera 페이지로 바로 이동하세요.
Version History
SDK |
Changes |
|---|---|
2.15.0 |
자동 네트워크 구성 샘플에 대한 섹션을 추가했습니다. |
