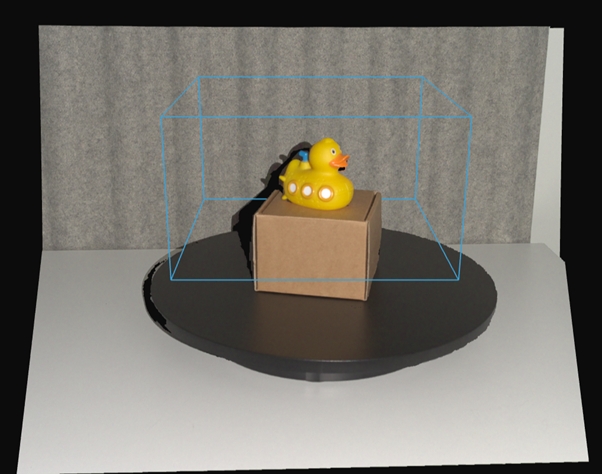
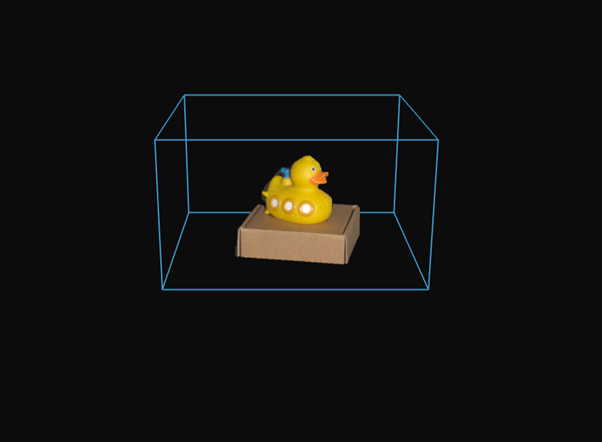
拼接
重要
下载示例拼接 Sample Data(示例数据) 数据集和参考文件,以便跟随操作或运行示例代码。
介绍
本文是关于如何拼接 Zivid 的无序点云的深入教程。
为了理解真正的问题,我们先来简单了解一下这个应用。与任何相机或人眼一样,Zivid 相机无法透视或绕过物体,它一次只能观察一侧。因此,要获得物体的完整 3D 模型,必须通过旋转物体或重新定位相机来从多个视角捕获它。
问题
Zivid SDK 返回的点云以 相机坐标系 表示,其中原点位于相机内部。从多个视角捕获时,每个点云都相对于捕获时相机的坐标系进行定义。如果只是简单地组合这些点云而不进行坐标系变换,它们将无法在空间上对齐,在 3D 空间中会显得脱节且不连贯。换句话说,这些点云并不共享与被扫描对象关联的通用坐标系。
解决方案
要将多个点云合并为对象的单个、空间对齐的 3D 表征,您需要:
将所有点云转换为附加在被扫描物体上的通用坐标系。
优化对齐以补偿位姿估计中的任何噪音或小错误。
从每个相机坐标系到公共坐标系的转换可以来自各种来源:机器人运动学、运动跟踪系统或手动测量。然而,这些转换很少是完美的,通常会引入微小的对齐误差。要纠正这些错误,您可以使用 Zivid::Experimental::Toolbox::localPointCloudRegistration() 。此 API 工具通过计算一个最佳地将一个点云配准到另一个点云的变换矩阵来优化两个重叠点云之间的对齐。
在开始拼接点云之前,务必确保捕获的点云具有足够多的重叠特征点。此外,我们还必须丢弃可能导致拼接错误的数据,例如距离相机太远的点,或者不属于我们正在拼接的物体/场景的点。我们建议在拼接前使用 Zivid 的 Region of Interest(感兴趣区域) 。对于相机静止的捕获,可以定义一个感兴趣区域,并将其用于所有捕获。当使用机械臂围绕物体移动相机时,可能需要为每个点云配置不同的感兴趣区域。
备注
Zivid 样本数据中所有需要拼接的点云均已经过 ROI 过滤。
无需预对准即可拼接点云
本节演示了如何在没有预对准的情况下拼接点云。关键要求是,物体与相机之间的相对运动在各个点云之间足够小,以确保每次捕获之间有明显的重叠。在本例中,物体保持静止,而相机在每次捕获之间略微移动,并通过 Zivid::Experimental::Toolbox::localPointCloudRegistration() 来对齐点云。我们先从一个简单的示例开始,该示例在没有先验位姿信息的情况下拼接两个点云,然后介绍一个更高级的案例,使用旋转台扫描整个物体。
拼接两个点云
这个简单示例演示了如何在没有预对齐的情况下拼接两个点云。要使用此方法进行拼接,我们需要:
加载两个 ZDF 文件。
将点云转换为无序格式。
应用体素下采样。
估计对齐的变换。
将点云拼接到一起。
对最终的拼接结果进行下采样。
下面演示了如何加载 ZDF 文件,并使用 Zivid::PointCloud::toUnorganizedPointCloud() 将点云转换为无序格式。多个无序点云使用 Zivid::UnorganizedPointCloud::extend() 来组合成一个 Zivid::UnorganizedPointCloud 对象,并显示出来。
// Ensure the dataset is extracted to the correct location depending on the operating system:
//   - Windows:   %ProgramData%/Zivid/StitchingPointClouds/
//   - Linux:     /usr/share/Zivid/data/StitchingPointClouds/
//  StitchingPointClouds/
//      └── BlueObject/
std::cout << "Reading point clouds from ZDF files" << std::endl;
const auto directory = std::filesystem::path(ZIVID_SAMPLE_DATA_DIR) / "StitchingPointClouds" / "BlueObject";

if(!std::filesystem::exists(directory))
{
    std::ostringstream oss;
    oss << "Missing dataset folders.\n"
        << "Make sure 'StitchingPointClouds/BlueObject/' exist at " << ZIVID_SAMPLE_DATA_DIR << ".\n\n"
        << "You can download the dataset (StitchingPointClouds.zip) from:\n"
        << "https://support.zivid.com/en/latest/api-reference/samples/sample-data.html";

    throw std::runtime_error(oss.str());
}

const auto frame1 = Zivid::Frame((directory / "BlueObject.zdf").string());
const auto frame2 = Zivid::Frame((directory / "BlueObjectSlightlyMoved.zdf").string());

std::cout << "Converting organized point clouds to unorganized point clouds and voxel downsampling"
          << std::endl;
const auto unorganizedPointCloud1 = frame1.pointCloud().toUnorganizedPointCloud();
const auto unorganizedPointCloud2 = frame2.pointCloud().toUnorganizedPointCloud();

std::cout << "Displaying point clouds before stitching" << std::endl;
Zivid::UnorganizedPointCloud unorganizedNotStitchedPointCloud;
unorganizedNotStitchedPointCloud.extend(unorganizedPointCloud1);
unorganizedNotStitchedPointCloud.extend(unorganizedPointCloud2);
visualizePointCloud(unorganizedNotStitchedPointCloud);
// Ensure the dataset is extracted to the correct location depending on the operating system:
//   - Windows:   %ProgramData%/Zivid/StitchingPointClouds/
//   - Linux:     /usr/share/Zivid/data/StitchingPointClouds/
//  StitchingPointClouds/
//      └── BlueObject/

var sampleDataDir = Environment.GetFolderPath(Environment.SpecialFolder.CommonApplicationData) + "/Zivid";
var directory = Path.Combine(sampleDataDir, "StitchingPointClouds", "BlueObject");

Console.WriteLine("Reading point clouds from ZDF files");
if (!Directory.Exists(directory))
{
    Console.WriteLine("Missing dataset folders.");
    Console.WriteLine("Make sure 'StitchingPointClouds/BlueObject/' exists at " + sampleDataDir);
    Console.WriteLine("You can download the dataset (StitchingPointClouds.zip) from:");
    Console.WriteLine("https://support.zivid.com/en/latest/api-reference/samples/sample-data.html");
    return 1;
}

var frame1 = new Zivid.NET.Frame(Path.Combine(directory, "BlueObject.zdf"));
var frame2 = new Zivid.NET.Frame(Path.Combine(directory, "BlueObjectSlightlyMoved.zdf"));

Console.WriteLine("Converting organized point clouds to unorganized point clouds and voxel downsampling");
var unorganizedPointCloud1 = frame1.PointCloud.ToUnorganizedPointCloud();
var unorganizedPointCloud2 = frame2.PointCloud.ToUnorganizedPointCloud();

Console.WriteLine("Displaying point clouds before stitching");
var unorganizedNotStitchedPointCloud = new Zivid.NET.UnorganizedPointCloud();
unorganizedNotStitchedPointCloud.Extend(unorganizedPointCloud1);
unorganizedNotStitchedPointCloud.Extend(unorganizedPointCloud2);
VisualizePointCloud(unorganizedNotStitchedPointCloud);
# Ensure the dataset is extracted to the correct location depending on the operating system:
#   • Windows:   %ProgramData%\\Zivid\\StitchingPointClouds\\
#   • Linux:     /usr/share/Zivid/data/StitchingPointClouds/
# The folder must contain:
#   StitchingPointClouds/
#     └── BlueObject/
print("Reading point clouds from files")
directory = get_sample_data_path() / "StitchingPointClouds" / "BlueObject"

if not directory.exists() or not directory.exists():
    raise FileNotFoundError(
        f"Missing dataset folders.\n"
        f"Make sure 'StitchingPointClouds/BlueObject' exist at {get_sample_data_path()}.\n\n"
        f"You can download the dataset (StitchingPointClouds.zip) from:\n"
        f"https://support.zivid.com/en/latest/api-reference/samples/sample-data.html"
    )

frame_1 = zivid.Frame(directory / "BlueObject.zdf")
frame_2 = zivid.Frame(directory / "BlueObjectSlightlyMoved.zdf")

print("Converting organized point clouds to unorganized point clouds and voxel downsampling")
unorganized_point_cloud_1 = frame_1.point_cloud().to_unorganized_point_cloud()
unorganized_point_cloud_2 = frame_2.point_cloud().to_unorganized_point_cloud()

print("Displaying point clouds before stitching")
unorganized_not_stitched_point_cloud = zivid.UnorganizedPointCloud()
unorganized_not_stitched_point_cloud.extend(unorganized_point_cloud_1)
unorganized_not_stitched_point_cloud.extend(unorganized_point_cloud_2)
display_pointcloud(unorganized_not_stitched_point_cloud)

应用体素下采样来减少点数,从而加快配准速度。然后,我们使用 Zivid::Experimental::Toolbox::localPointCloudRegistration() 计算两个点云之间的变换矩阵。使用得到的变换对第二个点云进行变换,并将其添加到最终点云(包含第一个点云的 Zivid::UnorganizedPointCloud 对象)。为了完成拼接,我们对拼接后的点云应用体素下采样,并显示结果。
std::cout << "Estimating transformation between point clouds" << std::endl;
const auto unorganizedPointCloud1LPCR = unorganizedPointCloud1.voxelDownsampled(1.0, 3);
const auto unorganizedPointCloud2LPCR = unorganizedPointCloud2.voxelDownsampled(1.0, 3);
const auto registrationParams = Zivid::Experimental::LocalPointCloudRegistrationParameters{};
const auto localPointCloudRegistrationResult = Zivid::Experimental::Toolbox::localPointCloudRegistration(
    unorganizedPointCloud1LPCR, unorganizedPointCloud2LPCR, registrationParams);

if(!localPointCloudRegistrationResult.converged())
{
    throw std::runtime_error("Registration did not converge...");
}

const auto pointCloud1ToPointCloud2Transform = localPointCloudRegistrationResult.transform();
const auto unorganizedPointCloud2Transformed =
    unorganizedPointCloud2.transformed(pointCloud1ToPointCloud2Transform.toMatrix());

std::cout << "Stitching and displaying painted point clouds to evaluate stitching quality" << std::endl;
Zivid::UnorganizedPointCloud finalPointCloud;
finalPointCloud.extend(unorganizedPointCloud1);
finalPointCloud.extend(unorganizedPointCloud2Transformed);

Zivid::UnorganizedPointCloud paintedFinalPointCloud;
paintedFinalPointCloud.extend(unorganizedPointCloud1.paintedUniformColor(Zivid::ColorRGBA{ 255, 0, 0, 255 }));
paintedFinalPointCloud.extend(
    unorganizedPointCloud2Transformed.paintedUniformColor(Zivid::ColorRGBA{ 0, 255, 0, 255 }));
visualizePointCloud(paintedFinalPointCloud);

std::cout << "Voxel-downsampling the stitched point cloud" << std::endl;
finalPointCloud = finalPointCloud.voxelDownsampled(2.0, 1);
std::cout << "Visualize the overlapped point clouds" << std::endl;
visualizePointCloud(finalPointCloud);
Console.WriteLine("Estimating transformation between point clouds");
var unorganizedPointCloud1LPCR = unorganizedPointCloud1.VoxelDownsampled(1.0f, 3);
var unorganizedPointCloud2LPCR = unorganizedPointCloud2.VoxelDownsampled(1.0f, 3);
var registrationParams = new Zivid.NET.Experimental.LocalPointCloudRegistrationParameters();

var identityPose = new Pose(Zivid.NET.Matrix4x4.Identity());
var localPointCloudRegistrationResult = PointCloudRegistration.LocalPointCloudRegistration(
    unorganizedPointCloud1LPCR,
    unorganizedPointCloud2LPCR,
    registrationParams,
    identityPose);

if (!localPointCloudRegistrationResult.Converged)
{
    throw new Exception("Registration did not converge...");
}

var pointCloud1ToPointCloud2Transform = localPointCloudRegistrationResult.Transform;
var unorganizedPointCloud2Transformed =
    unorganizedPointCloud2.Transform(pointCloud1ToPointCloud2Transform.ToMatrix());

Console.WriteLine("Stitching and displaying painted point clouds to evaluate stitching quality");
var finalPointCloud = new Zivid.NET.UnorganizedPointCloud();
finalPointCloud.Extend(unorganizedPointCloud1);
finalPointCloud.Extend(unorganizedPointCloud2Transformed);

var paintedFinalPointCloud = new Zivid.NET.UnorganizedPointCloud();
paintedFinalPointCloud.Extend(unorganizedPointCloud1.PaintedUniformColor(new Zivid.NET.ColorRGBA { r = 255, g = 0, b = 0, a = 255 }));
paintedFinalPointCloud.Extend(unorganizedPointCloud2Transformed.PaintedUniformColor(new Zivid.NET.ColorRGBA { r = 0, g = 255, b = 0, a = 255 }));
VisualizePointCloud(paintedFinalPointCloud);

Console.WriteLine("Voxel-downsampling the stitched point cloud");
finalPointCloud = finalPointCloud.VoxelDownsampled(2.0f, 1);
Console.WriteLine("Visualize the overlapped point clouds");
VisualizePointCloud(finalPointCloud);
print("Estimating transformation between point clouds")
unorganized_point_cloud_1_lpcr = unorganized_point_cloud_1.voxel_downsampled(voxel_size=1.0, min_points_per_voxel=3)
unorganized_point_cloud_2_lpcr = unorganized_point_cloud_2.voxel_downsampled(voxel_size=1.0, min_points_per_voxel=3)
registration_params = LocalPointCloudRegistrationParameters()
local_point_cloud_registration_result = local_point_cloud_registration(
    target=unorganized_point_cloud_1_lpcr, source=unorganized_point_cloud_2_lpcr, parameters=registration_params
)
assert local_point_cloud_registration_result.converged(), "Registration did not converge..."

point_cloud_1_to_point_cloud_2_transform = local_point_cloud_registration_result.transform()
unorganized_point_cloud_2_transformed = unorganized_point_cloud_2.transformed(
    point_cloud_1_to_point_cloud_2_transform.to_matrix()
)

print("Stitching and displaying painted point clouds to evaluate stitching quality")
final_point_cloud = zivid.UnorganizedPointCloud()
final_point_cloud.extend(unorganized_point_cloud_1)
final_point_cloud.extend(unorganized_point_cloud_2_transformed)

painted_final_point_cloud = zivid.UnorganizedPointCloud()
painted_final_point_cloud.extend(unorganized_point_cloud_1.painted_uniform_color([255, 0, 0, 255]))
painted_final_point_cloud.extend(unorganized_point_cloud_2_transformed.painted_uniform_color([0, 255, 0, 255]))

display_pointcloud(painted_final_point_cloud)

print("Voxel-downsampling the stitched point cloud")
final_point_cloud = final_point_cloud.voxel_downsampled(voxel_size=2.0, min_points_per_voxel=1)
display_pointcloud(final_point_cloud)

可以在拼接前为各个点云赋予统一的颜色,以直观地可视化对齐质量。
使用旋转台进行拼接
此示例演示了如何拼接放置在旋转台上的物体的点云。要使用此方法进行拼接,我们需要:
连接到 Zivid 相机。
加载使用了感兴趣区域 (ROI) 的相机设置。
当物体旋转时捕获多个点云。
将每次捕获转换为无序的点云并进行下采样。
将新的 frame 注册到不断增长的模型中。
将不断增长的模型拼接到新的 frame 中。
进行下采样、显示结果并将最终结果导出为多边形文件格式 (.ply)。
备注
在此示例中,旋转台在约 25 秒内完成 360 度旋转。由于每个周期耗时超过 250 毫秒(包括捕获、传输、处理和拼接),我们在每次捕获之间添加了 1 秒的延迟。这样一来,我们便可以从物体周围均匀分布的角度进行约 20 次捕获。
我们首先连接相机,并加载一个包含已定义 ROI 的捕获设置。如前所述,ROI 的定义应包含转台上的物体。理想情况下,最好避免捕获转台本身的点,但如果物体足够大,通常也可以包含一些转台上的点。
std::cout << "Connecting to camera" << std::endl;
auto camera = app.connectCamera();

std::cout << "Loading settings from file: " << settingsPath << std::endl;
const auto settings = Zivid::Settings(settingsPath);
接下来,我们需要捕获旋转物体的点云,并应用局部点云配准技术进行对齐。每个新捕捉到的点云都将成为参考 frame,之前拼接的模型将转换到该 frame 中。
为什么要转换拼接模型而不是最后一次捕获呢?因为将最后一次捕获的模型转换为固定的世界坐标系需要应用所有之前的转换,从而导致误差累积。通过始终将现有模型转换为最新的 frame,误差可以保持在局部范围内,更易于控制。
Zivid::UnorganizedPointCloud unorganizedStitchedPointCloud;
auto registrationParams = Zivid::Experimental::LocalPointCloudRegistrationParameters{};
auto previousToCurrentPointCloudTransform = Zivid::Matrix4x4::identity();

for(int numberOfCaptures = 0; numberOfCaptures < 20; ++numberOfCaptures)
{
    std::this_thread::sleep_for(std::chrono::seconds(1));
    auto frame = camera.capture2D3D(settings);
    const auto unorganizedPointCloud = frame.pointCloud().toUnorganizedPointCloud().voxelDownsampled(1.0, 2);

    if(numberOfCaptures != 0)
    {
        if(unorganizedStitchedPointCloud.size() < 4 || unorganizedPointCloud.size() < 4)
        {
            std::cout << "Not enough points for registration, skipping stitching..." << std::endl;
            continue;
        }

        const auto registrationResult = Zivid::Experimental::Toolbox::localPointCloudRegistration(
            unorganizedStitchedPointCloud,
            unorganizedPointCloud,
            registrationParams,
            previousToCurrentPointCloudTransform);

        if(!registrationResult.converged())
        {
            std::cout << "Registration did not converge..." << std::endl;
            continue;
        }

        previousToCurrentPointCloudTransform = registrationResult.transform().toMatrix();
        unorganizedStitchedPointCloud.transform(previousToCurrentPointCloudTransform.inverse());
    }

    unorganizedStitchedPointCloud.extend(unorganizedPointCloud);
    std::cout << "Captures done: " << numberOfCaptures << std::endl;
}

std::cout << "Voxel-downsampling the stitched point cloud" << std::endl;
unorganizedStitchedPointCloud = unorganizedStitchedPointCloud.voxelDownsampled(0.75, 2);

visualizePointCloud(unorganizedStitchedPointCloud);
var unorganizedStitchedPointCloud = new Zivid.NET.UnorganizedPointCloud();
var registrationParams = new Zivid.NET.Experimental.LocalPointCloudRegistrationParameters();
var previousToCurrentPointCloudTransform = new Pose(Zivid.NET.Matrix4x4.Identity());

var captureCount = 20;
for (int numberOfCaptures = 0; numberOfCaptures < captureCount; ++numberOfCaptures)
{
    Thread.Sleep(TimeSpan.FromSeconds(1));

    using (var frame = camera.Capture2D3D(settings))
    {
        var unorganizedPointCloud = frame.PointCloud.ToUnorganizedPointCloud().VoxelDownsampled(1.0f, 2);

        if (numberOfCaptures != 0)
        {
            if (unorganizedStitchedPointCloud.Size < 4 || unorganizedPointCloud.Size < 4)
            {
                Console.WriteLine("Not enough points for registration, skipping stitching...");
                continue;
            }

            var registrationResult = PointCloudRegistration.LocalPointCloudRegistration(
                unorganizedStitchedPointCloud,
                unorganizedPointCloud,
                registrationParams,
                previousToCurrentPointCloudTransform);

            if (!registrationResult.Converged)
            {
                Console.WriteLine("Registration did not converge, skipping this frame...");
                continue;
            }

            previousToCurrentPointCloudTransform = registrationResult.Transform;
            var previousToCurrentMatrix = new Zivid.NET.Matrix4x4(previousToCurrentPointCloudTransform.ToMatrix());
            unorganizedStitchedPointCloud.Transform(previousToCurrentMatrix.Inverse());
        }

        unorganizedStitchedPointCloud.Extend(unorganizedPointCloud);
        Console.WriteLine("Captures done: " + (numberOfCaptures + 1));
    }
}

Console.WriteLine("Voxel-downsampling the stitched point cloud");
unorganizedStitchedPointCloud = unorganizedStitchedPointCloud.VoxelDownsampled(0.75f, 2);

VisualizePointCloud(unorganizedStitchedPointCloud);
previous_to_current_point_cloud_transform = np.eye(4)
unorganized_stitched_point_cloud = zivid.UnorganizedPointCloud()
registration_params = LocalPointCloudRegistrationParameters()

for number_of_captures in range(20):
    time.sleep(1)
    frame = camera.capture_2d_3d(settings)
    unorganized_point_cloud = (
        frame.point_cloud().to_unorganized_point_cloud().voxel_downsampled(voxel_size=1.0, min_points_per_voxel=2)
    )

    if number_of_captures != 0:
        local_point_cloud_registration_result = local_point_cloud_registration(
            target=unorganized_stitched_point_cloud,
            source=unorganized_point_cloud,
            parameters=registration_params,
            initial_transform=previous_to_current_point_cloud_transform,
        )
        if not local_point_cloud_registration_result.converged():
            print("Registration did not converge...")
            continue
        previous_to_current_point_cloud_transform = local_point_cloud_registration_result.transform().to_matrix()

        unorganized_stitched_point_cloud.transform(np.linalg.inv(previous_to_current_point_cloud_transform))
    unorganized_stitched_point_cloud.extend(unorganized_point_cloud)

    print(f"Captures done: {number_of_captures}")

print("Voxel-downsampling the stitched point cloud")
unorganized_stitched_point_cloud = unorganized_stitched_point_cloud.voxel_downsampled(
    voxel_size=0.75, min_points_per_voxel=2
)

display_pointcloud(unorganized_stitched_point_cloud)
备注
由于旋转台以恒定的角速度旋转,连续点云之间的变换应该相似。因此,可以将前一次的变换作为下一次配准的初始猜测。
最终,拼接结果会进一步进行体素下采样(voxel-downsampled)并显示。请参见下方的拼接点云结果。
使用机械臂进行预对齐的点云拼接
本文描述了使用手眼标定数据和局部点云配准,对从多个手臂安装的相机点位获取的点云进行拼接的过程。
概述和要求
这种拼接方法可通过机械臂搭载相机围绕物体移动,从而生成该物体完整的三维点云。它特别适用于以下场景:
物体比相机的视野范围更大。
需要从多个角度对物体进行捕获,以用于检测、建模或操作。
要使用此方法,您需要一个有效的 手眼标定 结果。该结果通常以 hand_eye_transform.yaml 文件形式提供,该文件定义了机器人末端执行器坐标系与相机坐标系之间的转换关系。利用这一变换,可以将不同相机位姿下捕获的点云转换到同一公共坐标系中,从而实现多视角点云的精确对齐。
您需要:
一组已捕获的 Zivid 点云(
capture_*.zdf)一组对应的机器人位姿文件(
robot_pose_*.yaml)——每次捕获对应一个位姿文件从成功的手眼标定过程中获得的
hand_eye_transform.yaml
这些元素结合起来,可以让您将各个捕获的数据在统一的坐标系中进行预对齐。
拼接工作流程
拼接过程主要包括以下几个步骤:
加载从不同机器人位姿捕获的多个点云。
加载每个位姿(
robot_pose_*.yaml)和手眼标定结果(hand_eye_transform.yaml)。使用手眼变换将每个机器人位姿转换到相机位姿。
将点云从相机坐标系转换到机器人基坐标系,对点云进行预对齐。
对每个点云(体素网格)进行下采样,以加快处理速度并减少噪声。
使用局部点云配准(Local Point Cloud Registration)来优化不断增加数据的已拼接点云与每个新加入点云之间的对齐精度。
(可选)重新加载原始的全分辨率点云,并应用估计的转换关系,以全分辨率进行拼接。
将最终结果导出为拼接后的 .ply 点云文件。
[Robot Arm (Pose A)] -> capture_1.zdf
[Robot Arm (Pose B)] -> capture_2.zdf
...
[Robot Arm (Pose N)] -> capture_N.zdf

Each capture is paired with:
    - robot_pose_*.yaml
    - hand_eye_transform.yaml

Apply:
    - Pre-alignment using robot pose and hand-eye calibration
    - Local point cloud registration for refinement

Output:
    - Combined and visualized point cloud
    - Optionally reload original captures for full-resolution stitching

Export:
    - Final stitched point cloud as a PLY file
局部配准(Local Registration)的工作原理
在利用机器人位姿和手眼标定结果完成初始预对齐后,仍需进一步优化,以补偿微小的位姿误差。局部点云配准通过将每个下采样后的点云与不断增长的拼接点云(即先前已拼接的点云)进行对齐,从而提高整体精度。
在进行配准之前,所有点云都会进行体素下采样。这一步骤对于拼接过程至关重要,因为它:
降低传感器噪声,从而实现更可靠的对齐
有助于移除离群点,避免其对配准过程造成干扰
通过在不损失结构细节的前提下减少点的数量,来提升处理速度
用户在流程开始前选择拼接策略,但实际的拼接操作仅在所有转换关系估计完成之后才执行:
低分辨率拼接:使用在对齐过程中准备好的下采样点云。
高分辨率拼接:重新加载原始的全分辨率点云,并应用已估计的变换,以生成细节更丰富的最终点云。
备注
不使用体素下采样( --full-resolution )的拼接可生成更好细节的点云,但需要更多的内存和计算时间。
备注
在进行局部配准时,点云必须已在预对齐步骤中达到相对较好的初始对齐状态。如果初始错位过大,算法可能无法收敛,或产生不准确的结果。
参数 max_correspondence_distance 定义了在源点云和目标点云之间搜索对应点的匹配半径。该参数应满足以下要求:
大于典型的点间距(以确保能够找到正确的匹配点)
但也不能过大,以免包含错误的对应点,从而降低对齐质量
auto registrationParameters = Zivid::Experimental::LocalPointCloudRegistrationParameters{
    Zivid::Experimental::LocalPointCloudRegistrationParameters::MaxCorrespondenceDistance{ 2 }
};
下图展示了某个因尺寸超出相机视场而需要多次捕获的物体的拼接点云结果。
Zivid SDK 示例
探索使用机器人搭载相机进行点云拼接的完整示例代码:
Version History
SDK |
Changes |
|---|---|
2.17.0 |
Added support for local point cloud registration in C#. |

