Connectivity and Power Supply
Zivid 카메라는 전원 커넥터와 이더넷 커넥터라는 두 개의 M12 커넥터를 통해 전원 및 컴퓨터에 연결됩니다.
Connectors
Zivid 3
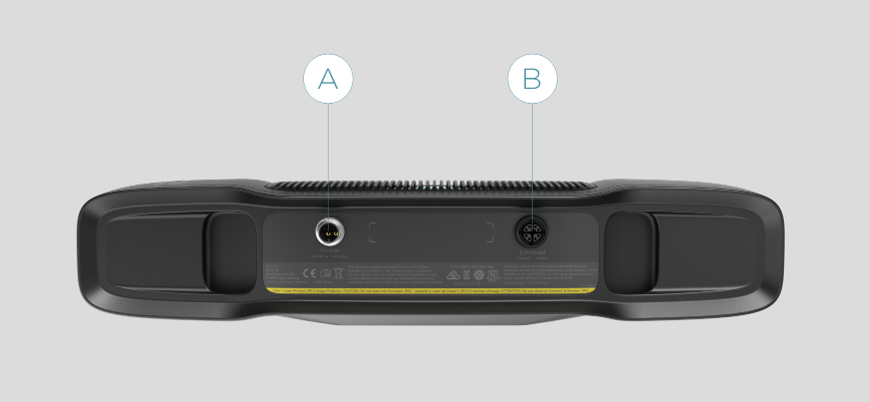
Zivid 2+
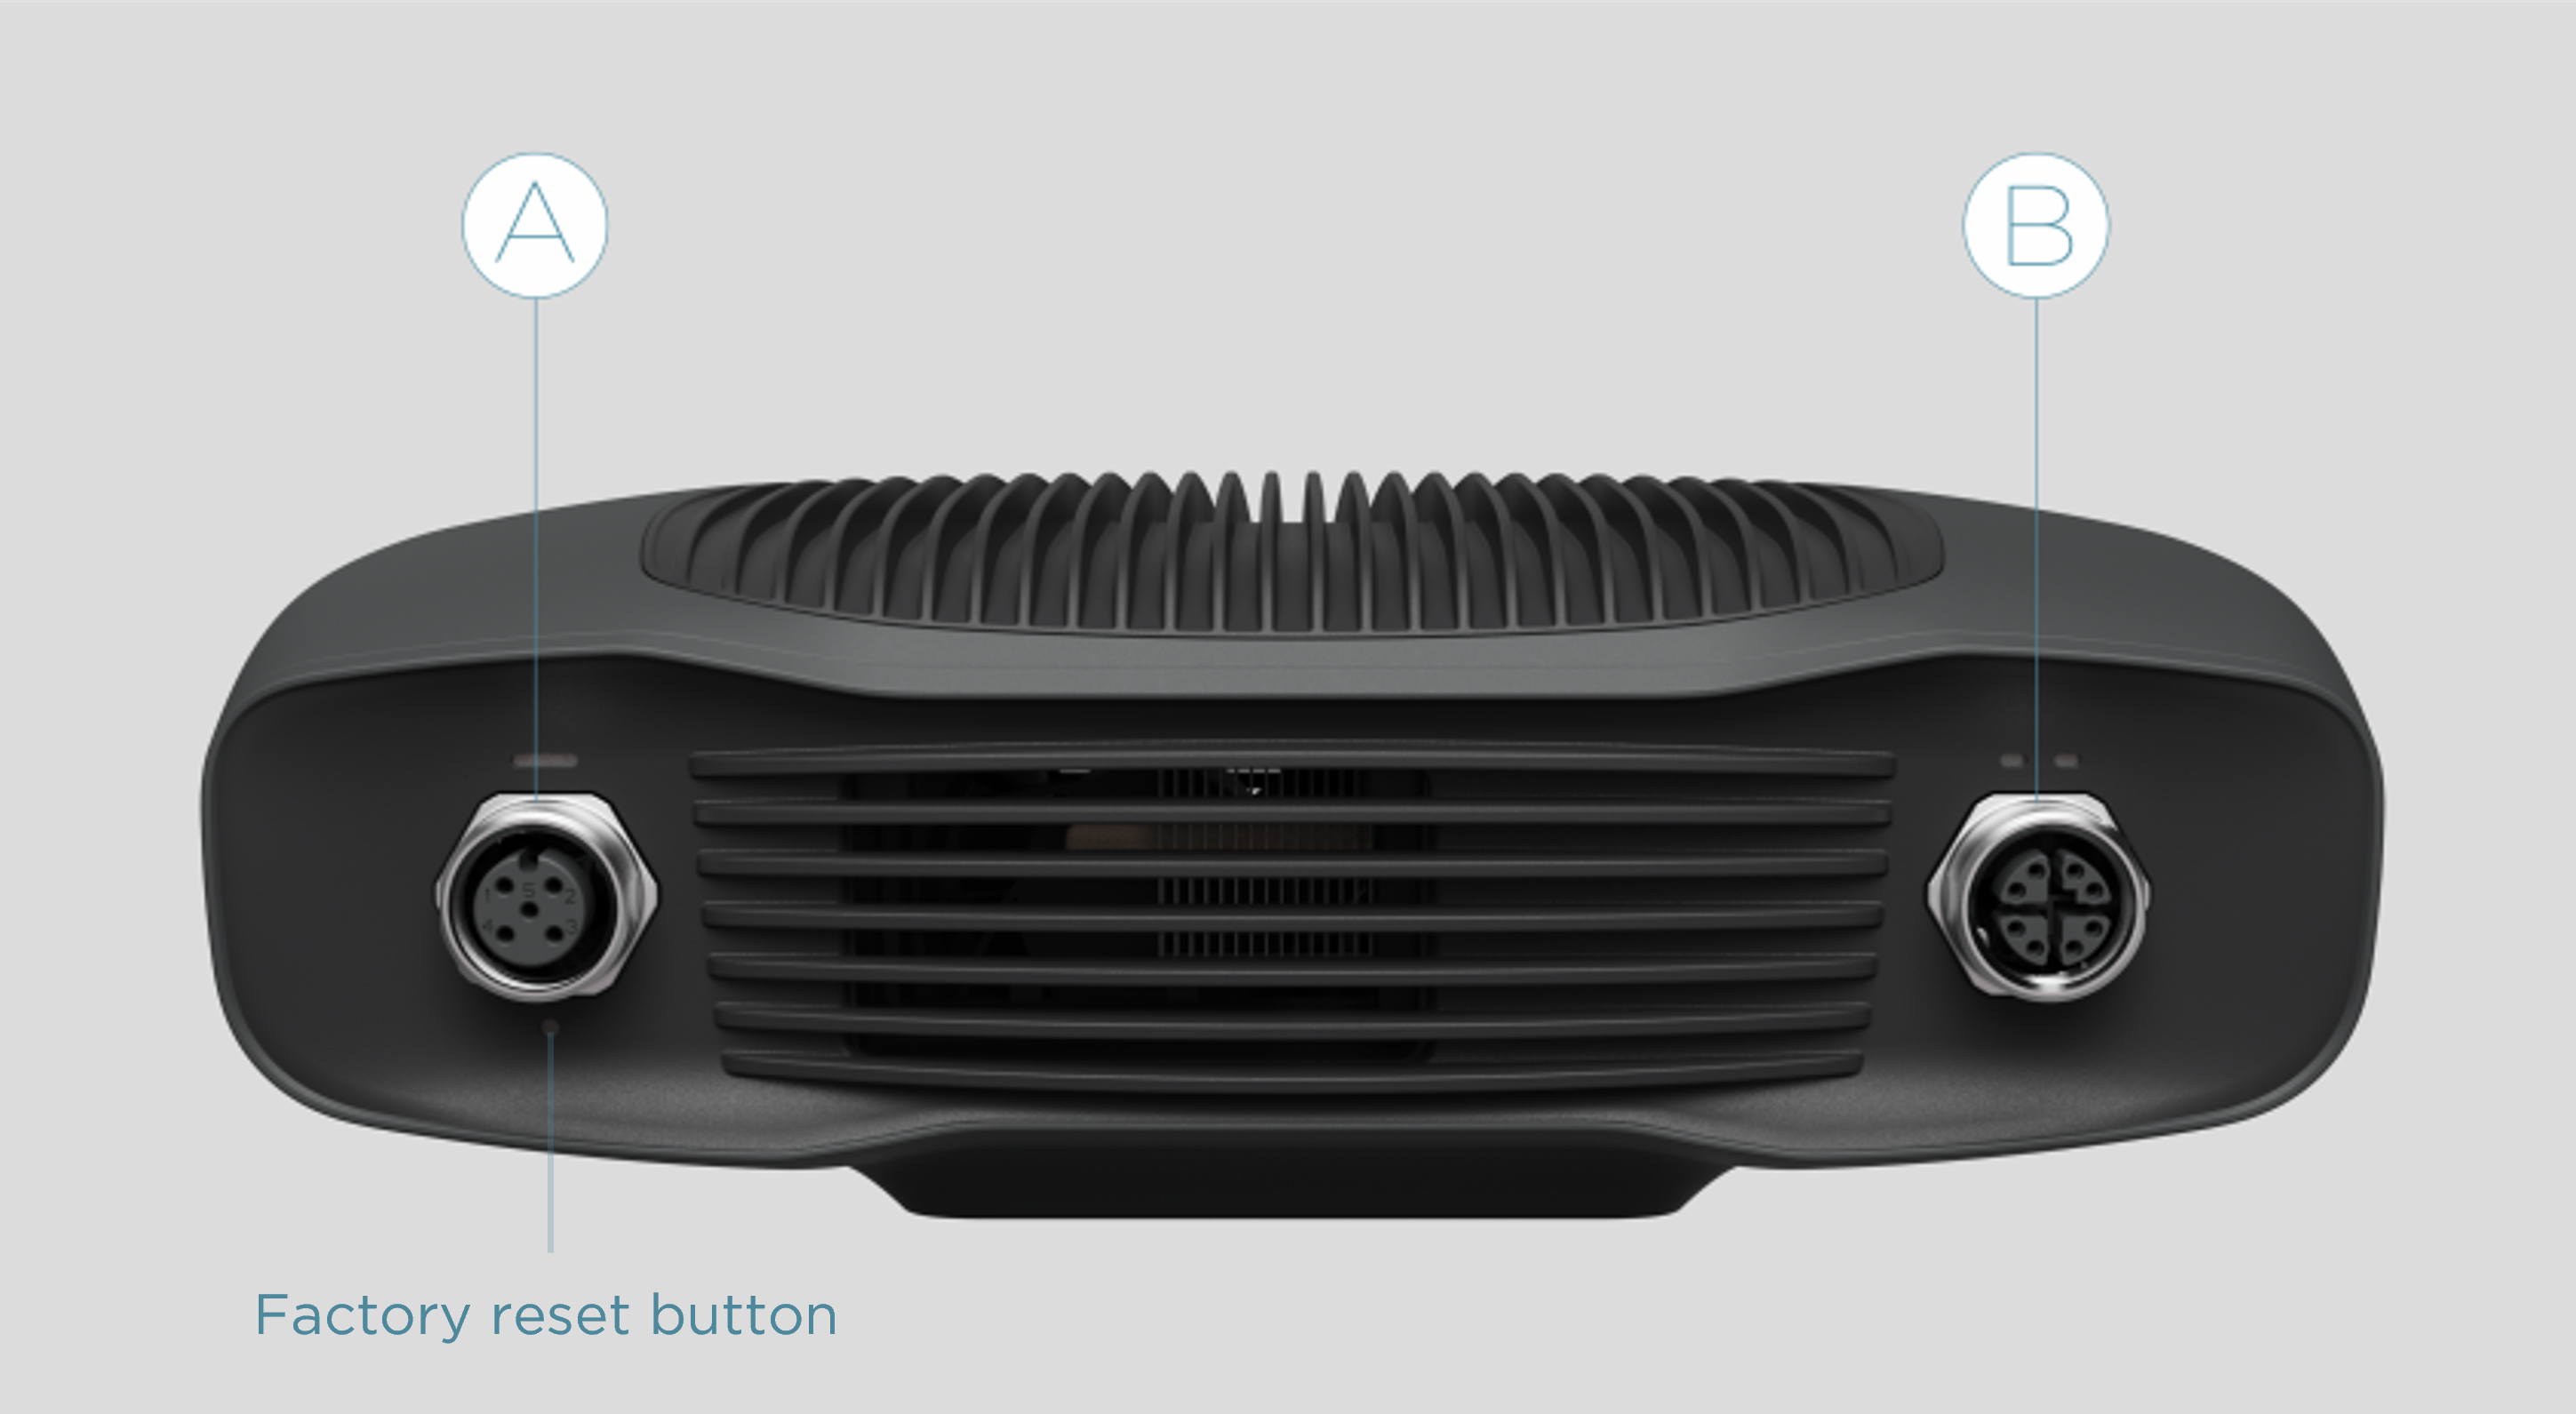
M12-5: 전원 커넥터 24V, 5A DC
M12X: Ethernet 커넥터 CAT 6A
자세한 내용은 Zivid Data Cables 을 참조하십시오.
공장 초기화 버튼에 대해서는 Factory Reset Button 를 참조하십시오.
Zivid 2
M12-5: 전원 커넥터 24V, 5A DC
M12X: Ethernet 커넥터 CAT 6A
자세한 내용은 Zivid Data Cables 을 참조하십시오.
공장 초기화 버튼에 대해서는 Factory Reset Button 를 참조하십시오.
Power supply interface
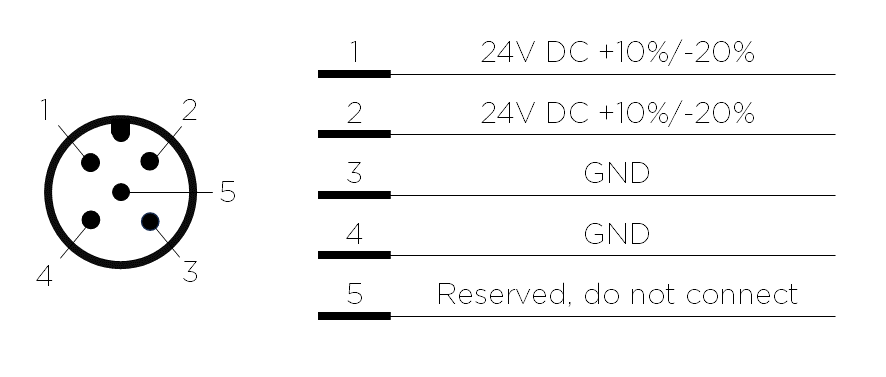
24V용과 GND용 두 핀을 모두 사용해야 합니다.
Zivid 3: 옵션 결합 커넥터 TE Connectivity AMP, 1838274-3(Digikey: A97642-ND).
Zivid 2+ 및 Zivid 2: 옵션 결합 커넥터 TE Connectivity AMP, 1838275-3(Digikey: A97645-ND).
경고
지정된 요구 사항을 충족하지 않는 전원 공급 장치나 케이블을 사용하면 카메라가 손상되고 보증이 무효화될 수 있으며, 특히 타사 제품이나 사용자 지정 솔루션을 사용하는 경우 더욱 그렇습니다. 자세한 내용은 Power Supply and Cables 를 참조하십시오.
Data cable
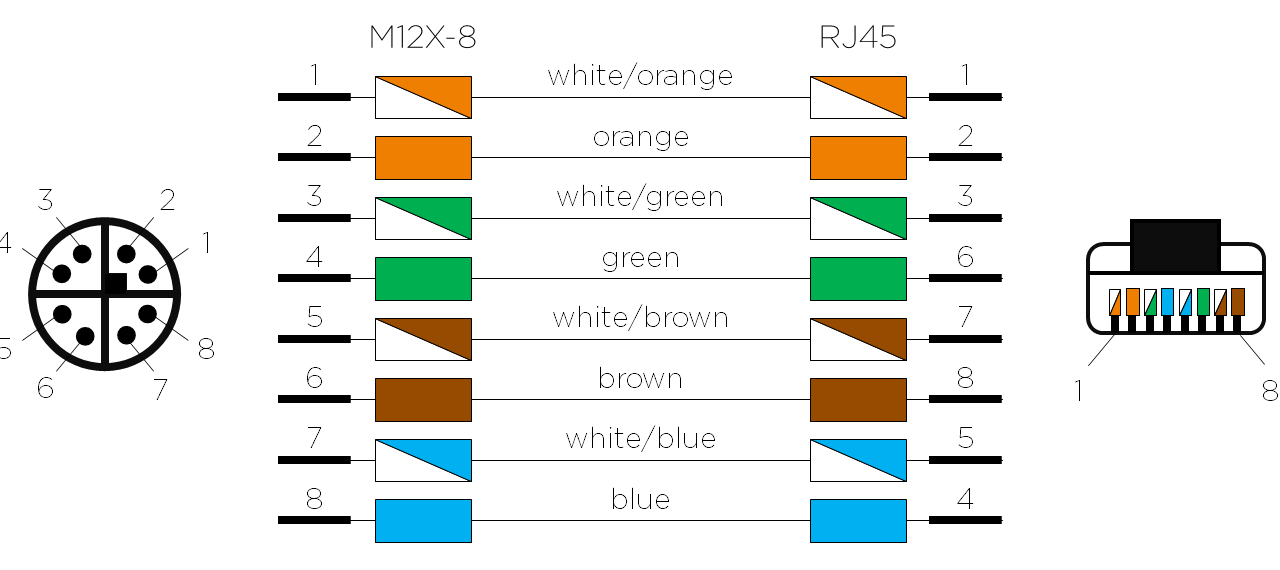
Zivid 카메라는 데이터 전송을 위해 전용 이더넷 케이블을 사용합니다. 자세한 내용은 Zivid Data Cables 참조하세요.
아래 표는 Zivid 이더넷 케이블 핀아웃을 제공합니다.
Connecting to the computer
카메라를 연결하려면 먼저 전원을 연결한 다음 이더넷 케이블을 컴퓨터에 연결하십시오.
전원 공급 장치를 카메라의 전원 커넥터(“24V”)에 연결합니다.
이더넷 케이블을 카메라에 연결하고 컴퓨터에 연결합니다.
전원 공급 장치를 전원 콘센트에 꽂습니다.
참고
방출 및 내성 표준을 준수하려면 장치와 함께 제공된 AC/DC 어댑터를 사용하십시오.
Zivid 카메라는 물리적으로 전원을 차단하는 써미스터에 의해 역극성과 과열로부터 보호됩니다.
Zivid 카메라는 이더넷 통신을 사용하며 최상의 성능을 위해 10Gbps가 필요합니다. 모든 컴퓨터에 10기가비트 이더넷 포트가 있는 것은 아닙니다. 이 경우 10GBASE-T(10Gbps 구리 이더넷)용 어댑터를 사용하여 Thunderbolt 3에 연결할 수 있습니다. 성능은 낮아지지만 1000BASE-T 및 NBASE-T(구리선을 통한 1Gbps, 2.5Gbps, 5Gbps)용 USB 어댑터도 사용할 수 있습니다.
Recommended network cards and adapters
다음 하드웨어를 성공적으로 테스트했으며 권장합니다.
조심
USB 기반 네트워크 어댑터는 캡처 속도가 감소하고 가변적이어서 카메라를 사용할 때 가끔 오류가 발생할 수 있습니다. 최적의 성능을 위해 10Gb PCI Express 카드를 사용하는 것이 좋습니다.
경고
Zivid approved Ethernet cables 만 사용하십시오.
Network Topology
Zivid 카메라는 다음과 같은 네트워크 토폴로지를 지원합니다:
직접 연결 |
스위치를 통한 연결 |
|---|---|
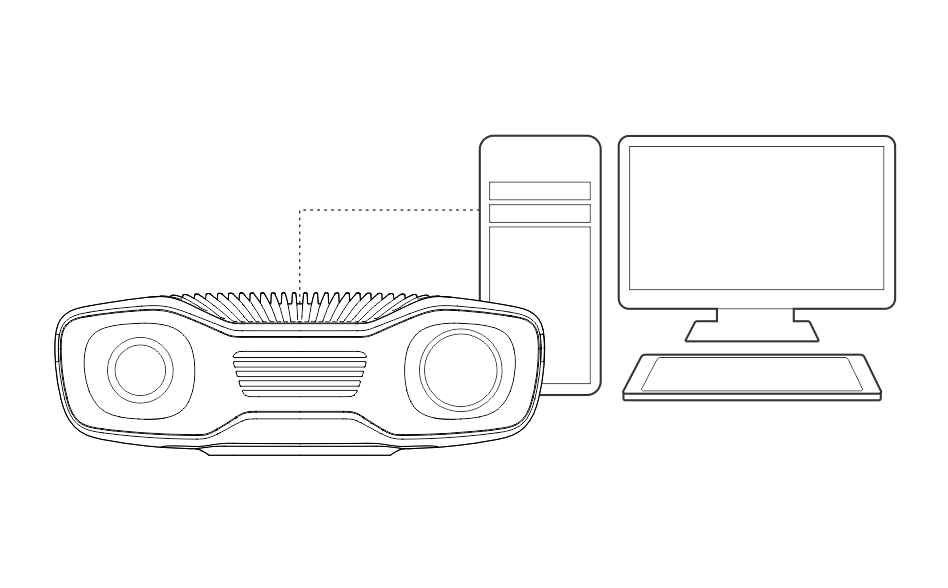
|
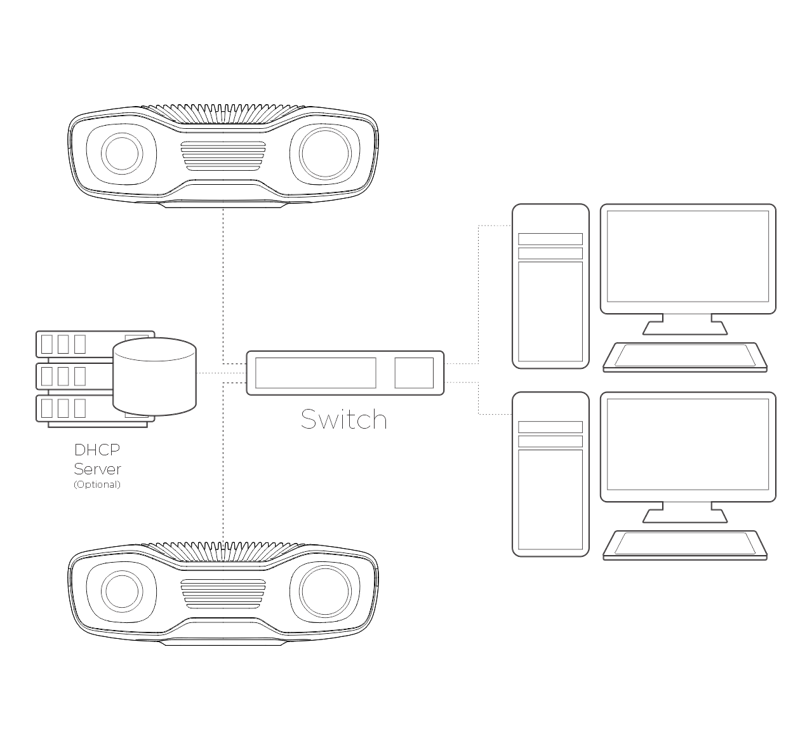
|
계속해서 Software Installation 을 진행하면 Network Configuration 도 확인할 수 있습니다.
Version History
SDK |
Changes |
|---|---|
2.17.0 |
Zivid 3 XL250에 대한 지원이 추가되었습니다. |
2.14.0 |
Zivid 2+ MR130, LR110, MR60에 대한 지원이 추가되었습니다. |
2.12.0 |
Zivid One+는 제품 생산이 종료되어 더 이상 지원되지 않습니다. |
2.4.0 |
여러대의의 Zivid 2 카메라 지원이 추가되었습니다. |