固定マウント
Zivid の全 3D カメラモデルは固定設置が可能です。Zivid マウントのご使用をお勧めします。
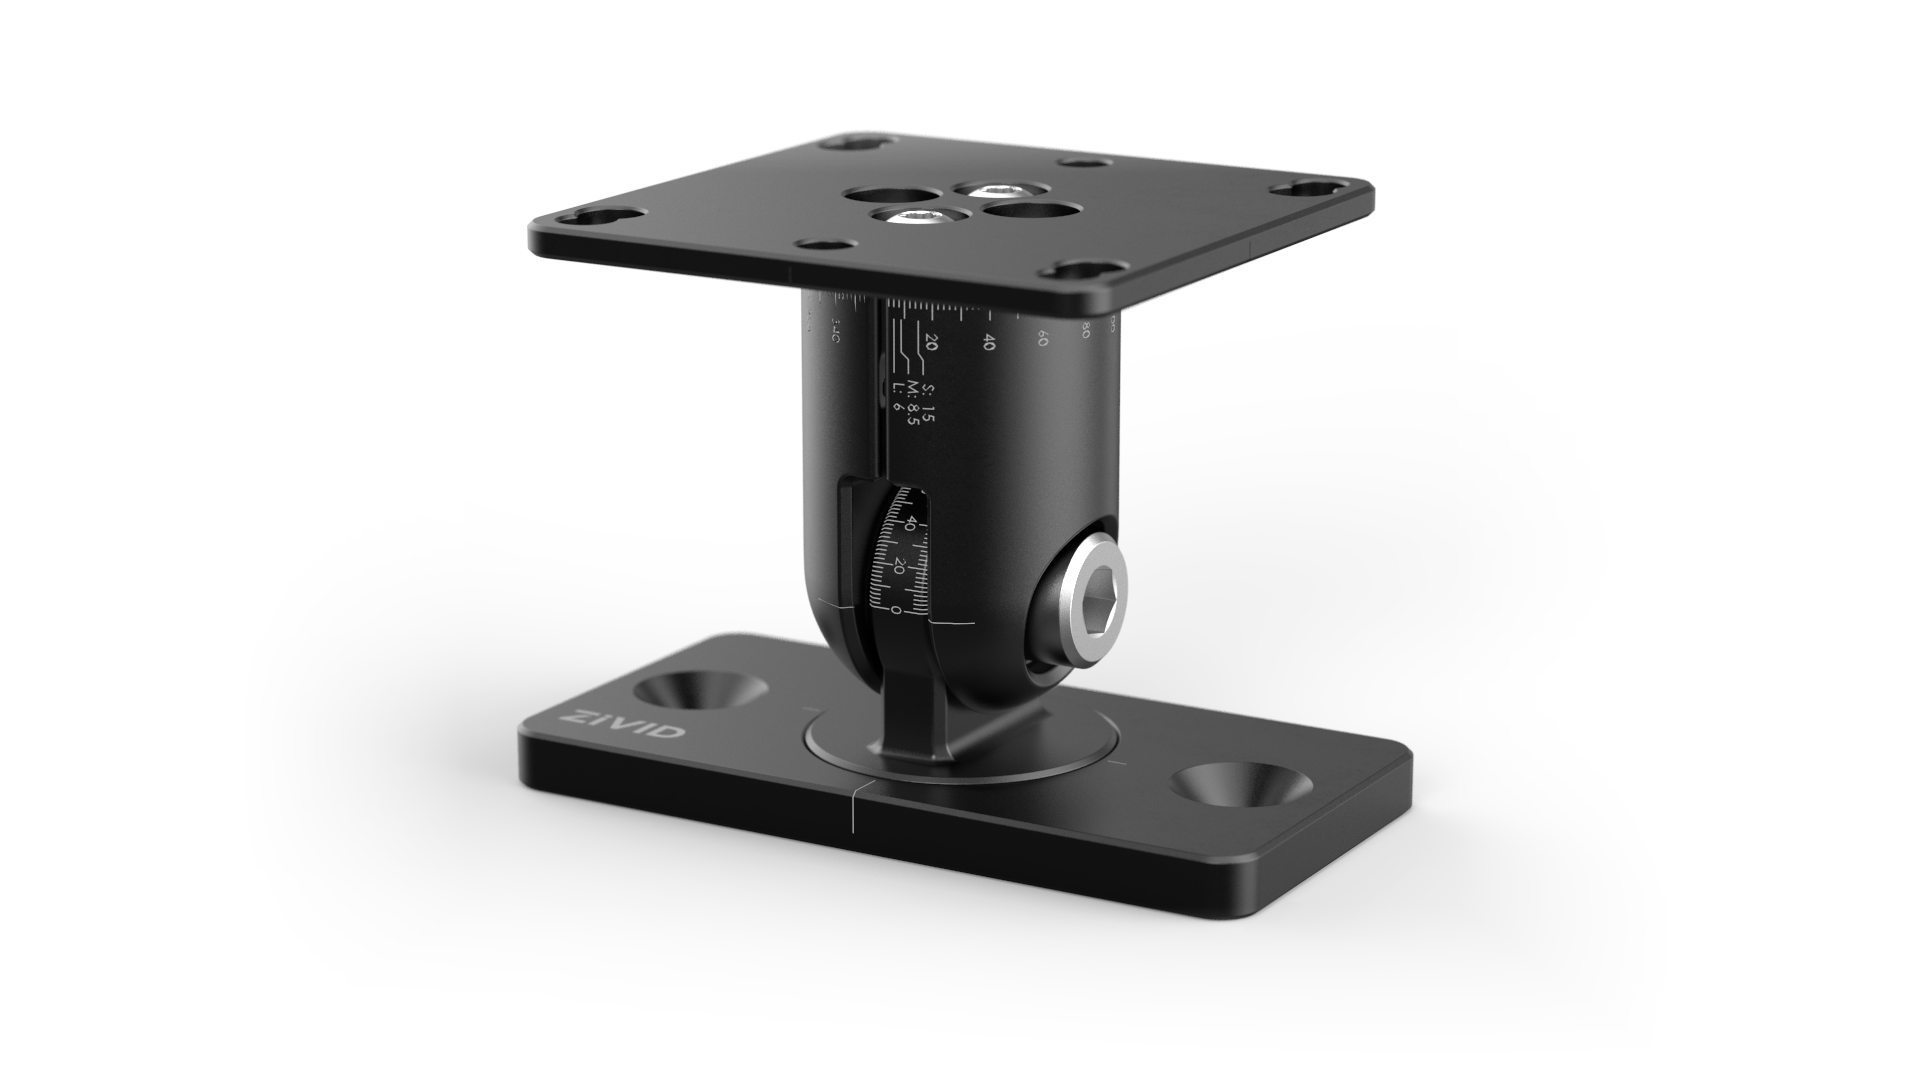
Zivid Stationary Mount は薄型で柔軟性の高いカメラ用マウントです。独自の1本ネジ締め機構により、素早く正確な調整が可能です。
Zivid Stationary Mount を使用する理由とは?
モジュール性
1つのマウントで全モデルに対応し、ネジ1本のみで取り外しが可能です。刻印を活用することで、同じ向きで再組み立てする際の角度調整を正確に行えます。
柔軟性
2種類の構成と2自由度により、複数のカメラ向きを実現できます。
堅牢性
剛性の高い設計により、振動下でも各ジョイント部が動かず安定を保ちます。
PDFのデータシート/ユーザーガイドやCADファイルは Accessories Downloads に掲載しています。
取り付け手順
箱の中身 |
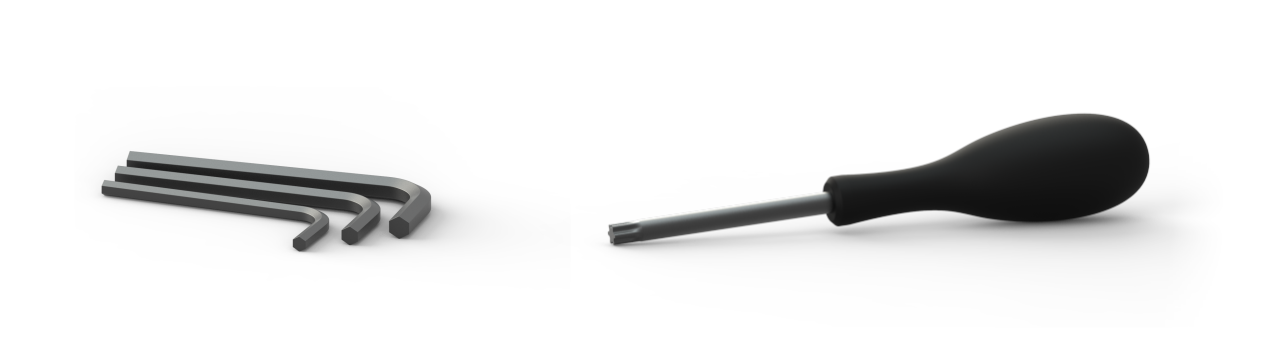
必要なツール |
|---|---|
Zivid 固定マウント |
六角レンチ 4 mm/6 mm |
取り付けネジ |
トルクス T20/T25/T30 |
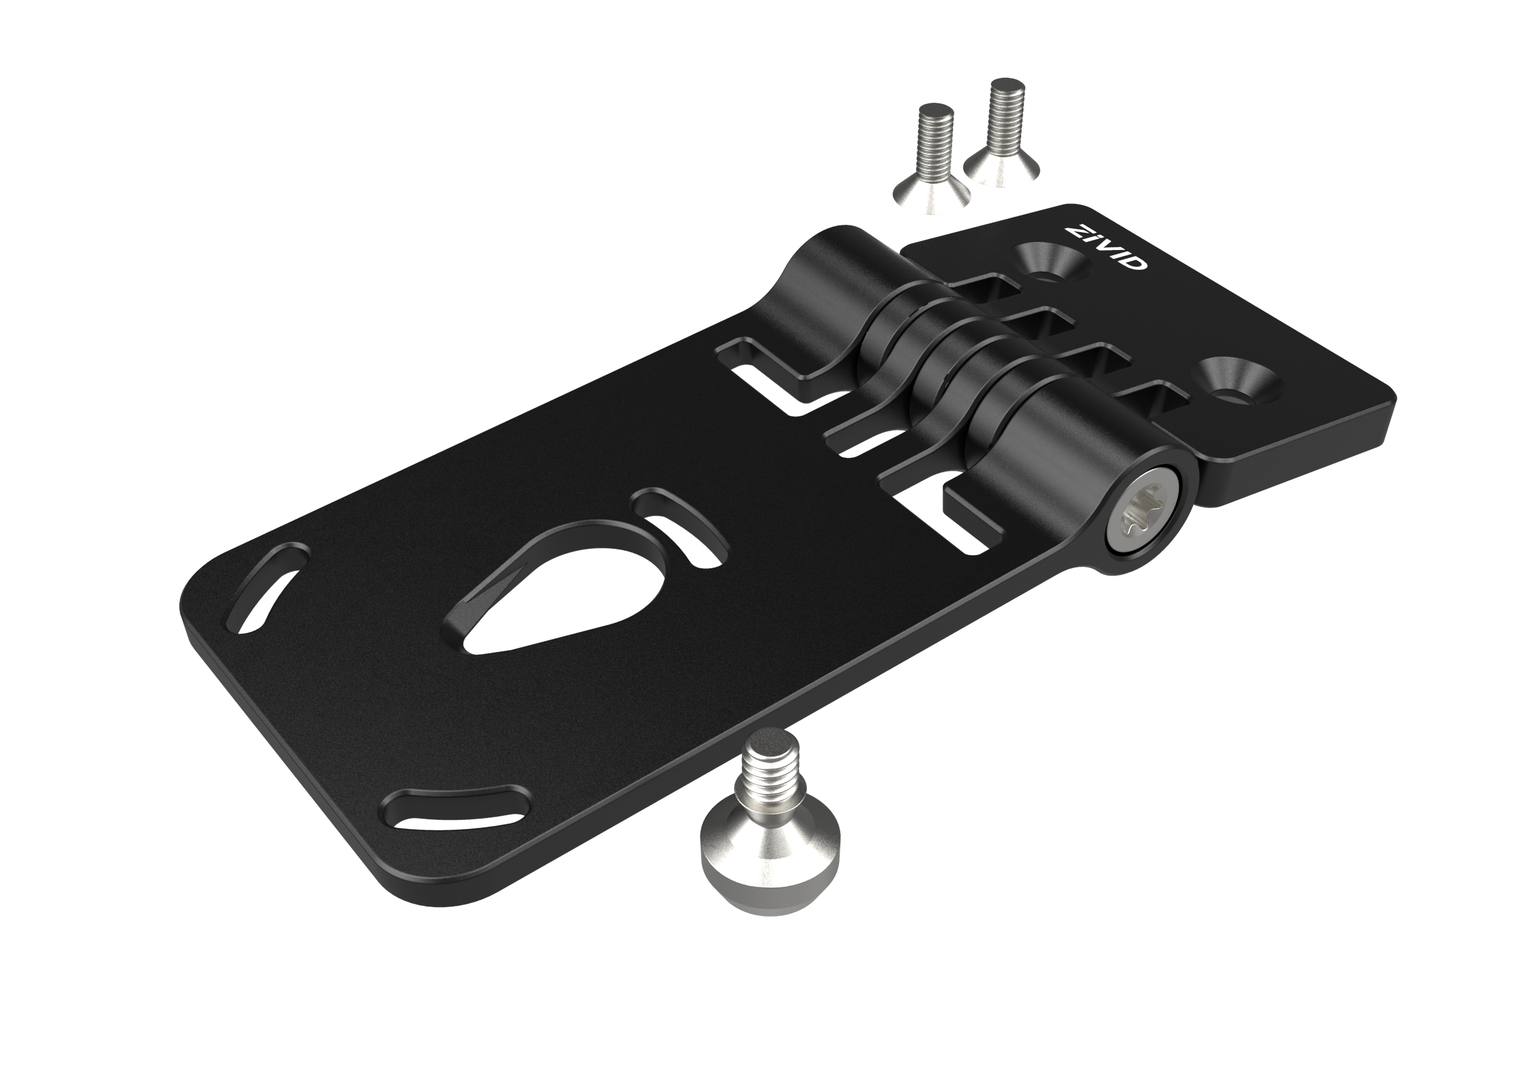
マウントの設定
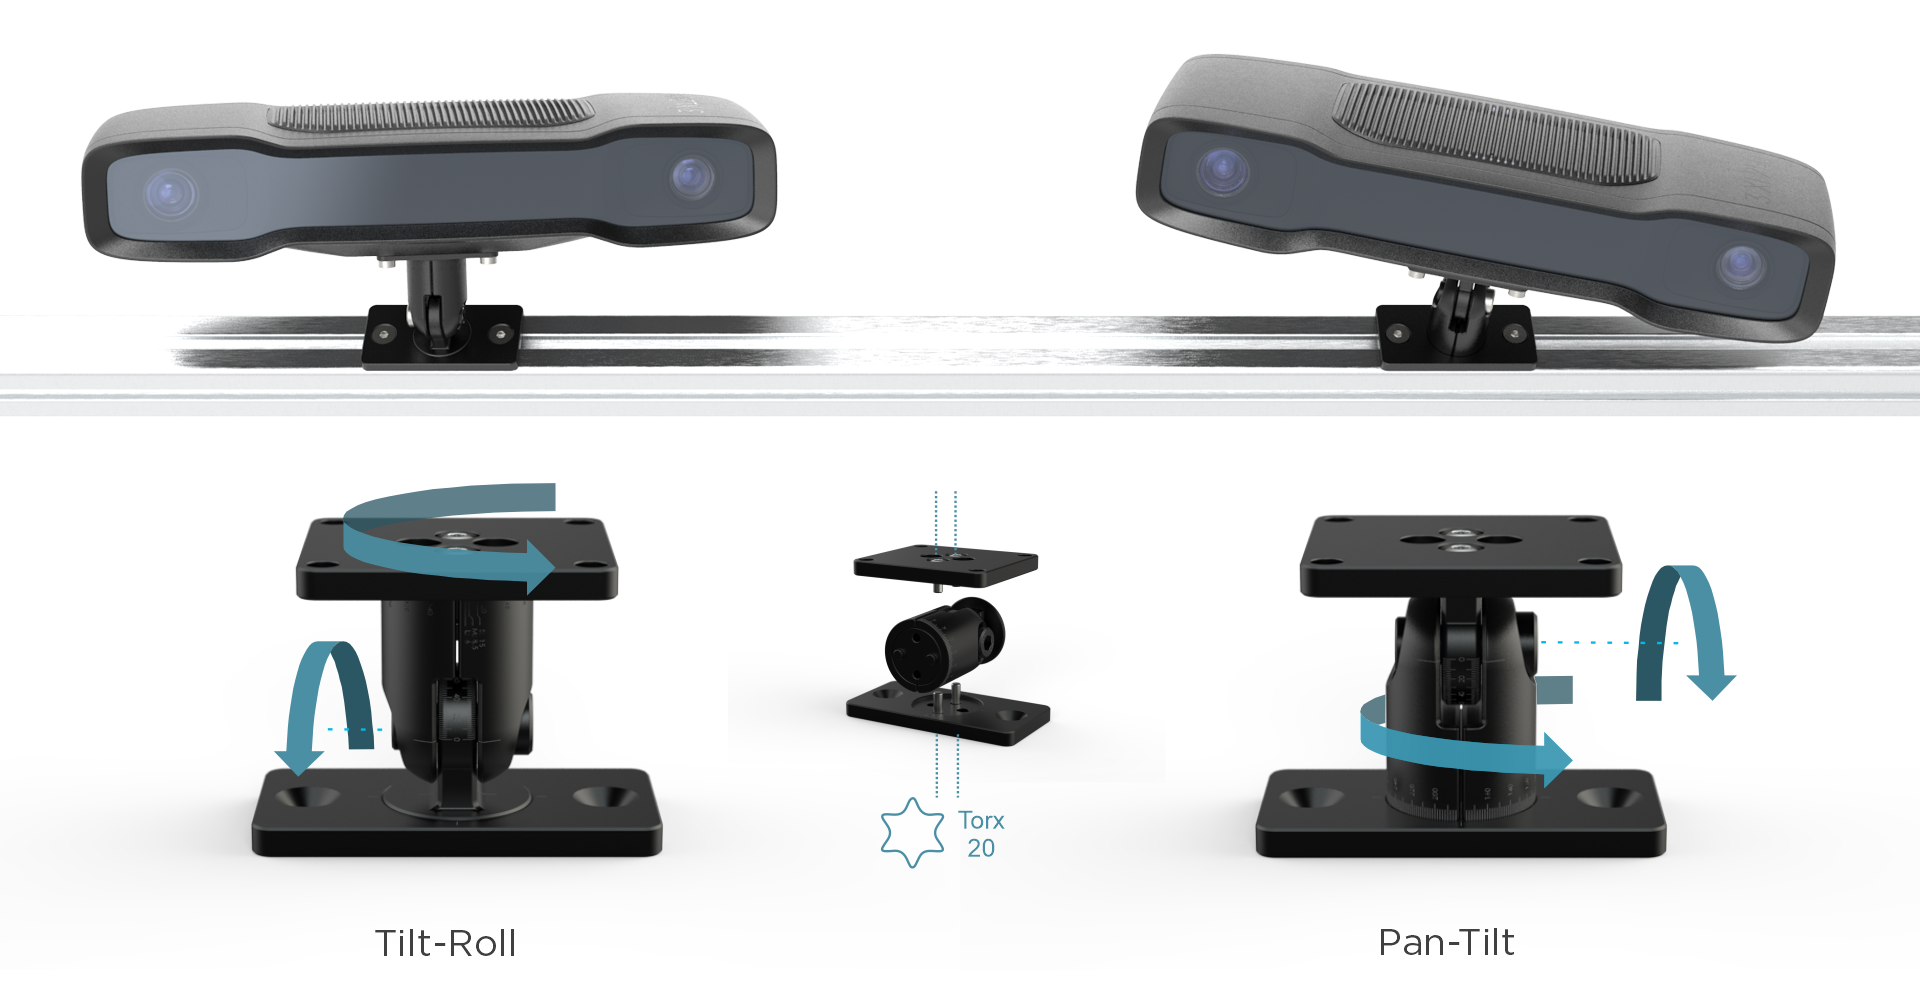
マウントはパン・チルト構成またはチルト・ロール構成に再設定できます。設置前に、用途に最適な構成を検討してください。
Tip
水平プロファイルの側面にマウントをチルトロール構成で取り付けると、2 つの利点があります。ロールジョイントによりカメラをシーンに対して垂直に位置合わせでき、チルトジョイントによりカメラを傾けて背景からの反射や干渉を回避できます。詳細については 正しい位置決め を参照してください。
再設定する場合は、上下プレートのM4ねじ4本を緩め、新しい構成に組み替えたうえで4 Nmのトルクで締結してください。
マウントを V スロットプロファイルに取り付ける
M6 ネジと T ナットを使用して、マウントを V スロットプロファイルに固定し、六角レンチ(4 mm)で締め付けます。
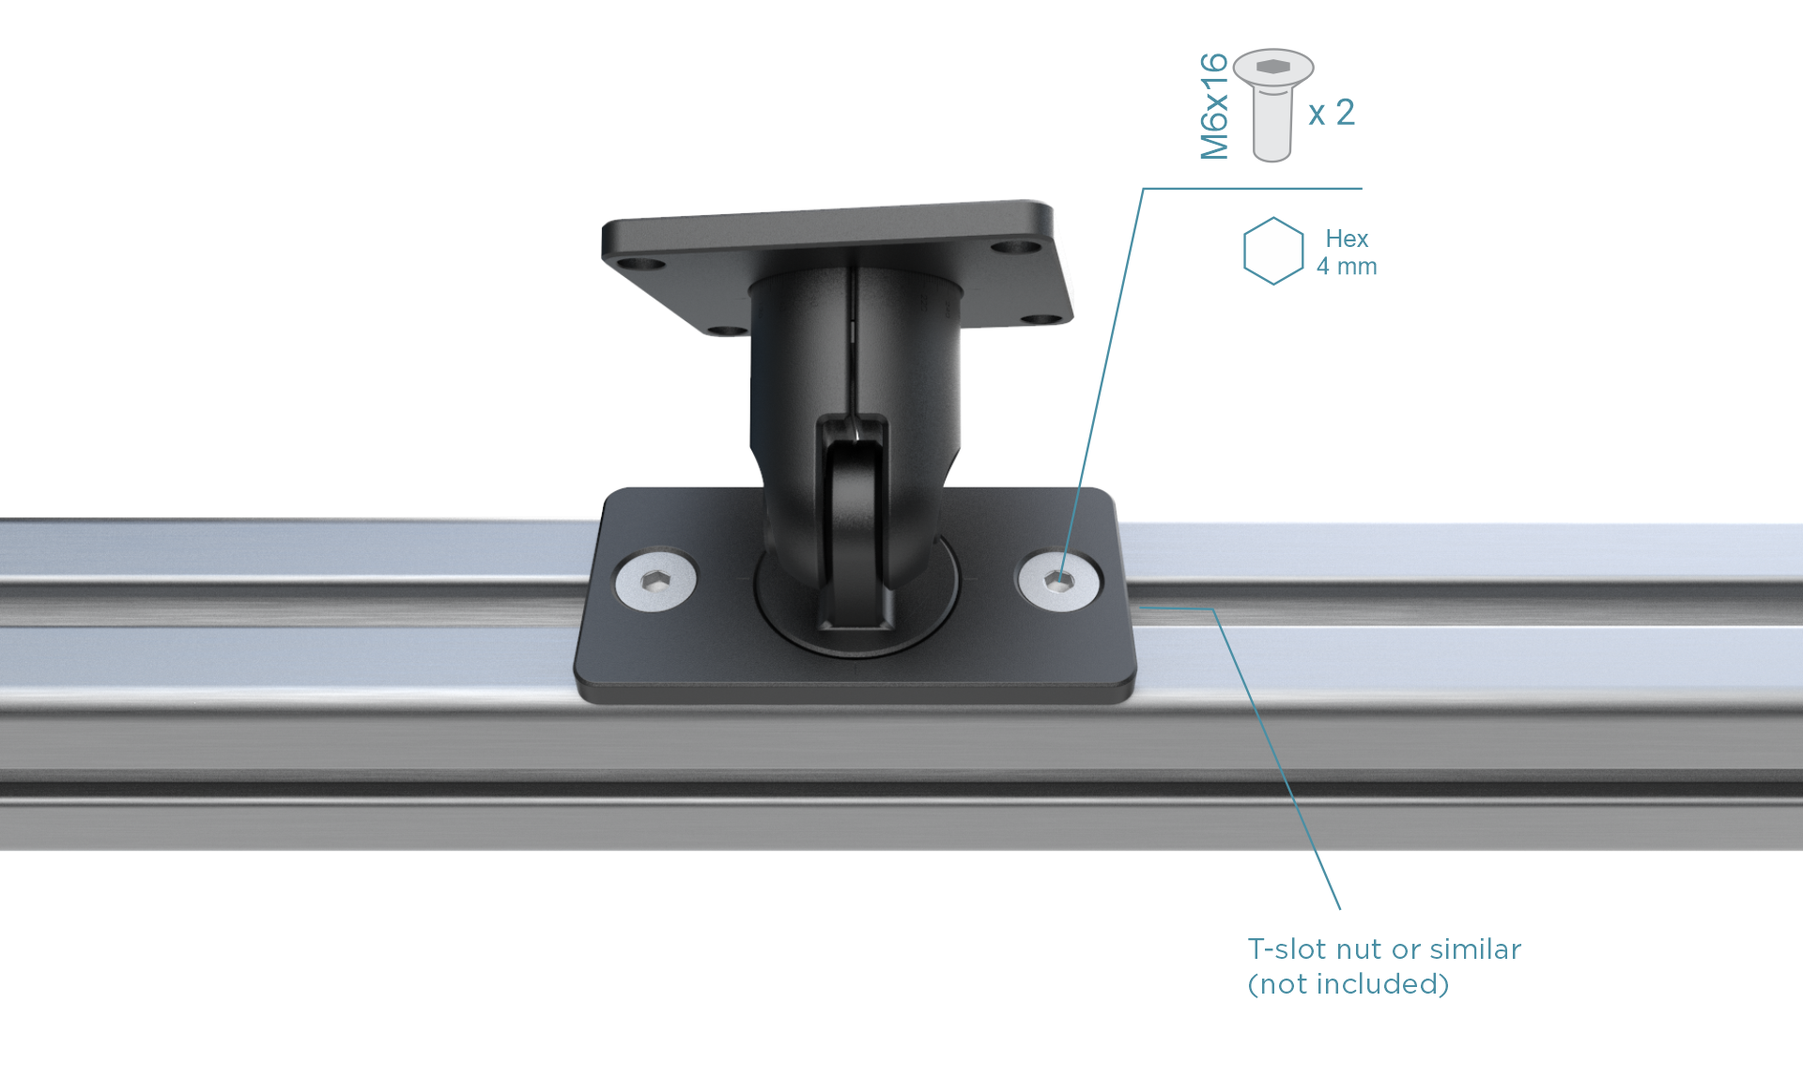
カメラの向き(水平/垂直、上向き/下向き/横向き)に関わらず、プロファイルの任意の面に取り付け可能です。推奨ねじの詳細は 取り付け仕様 を参照してください。
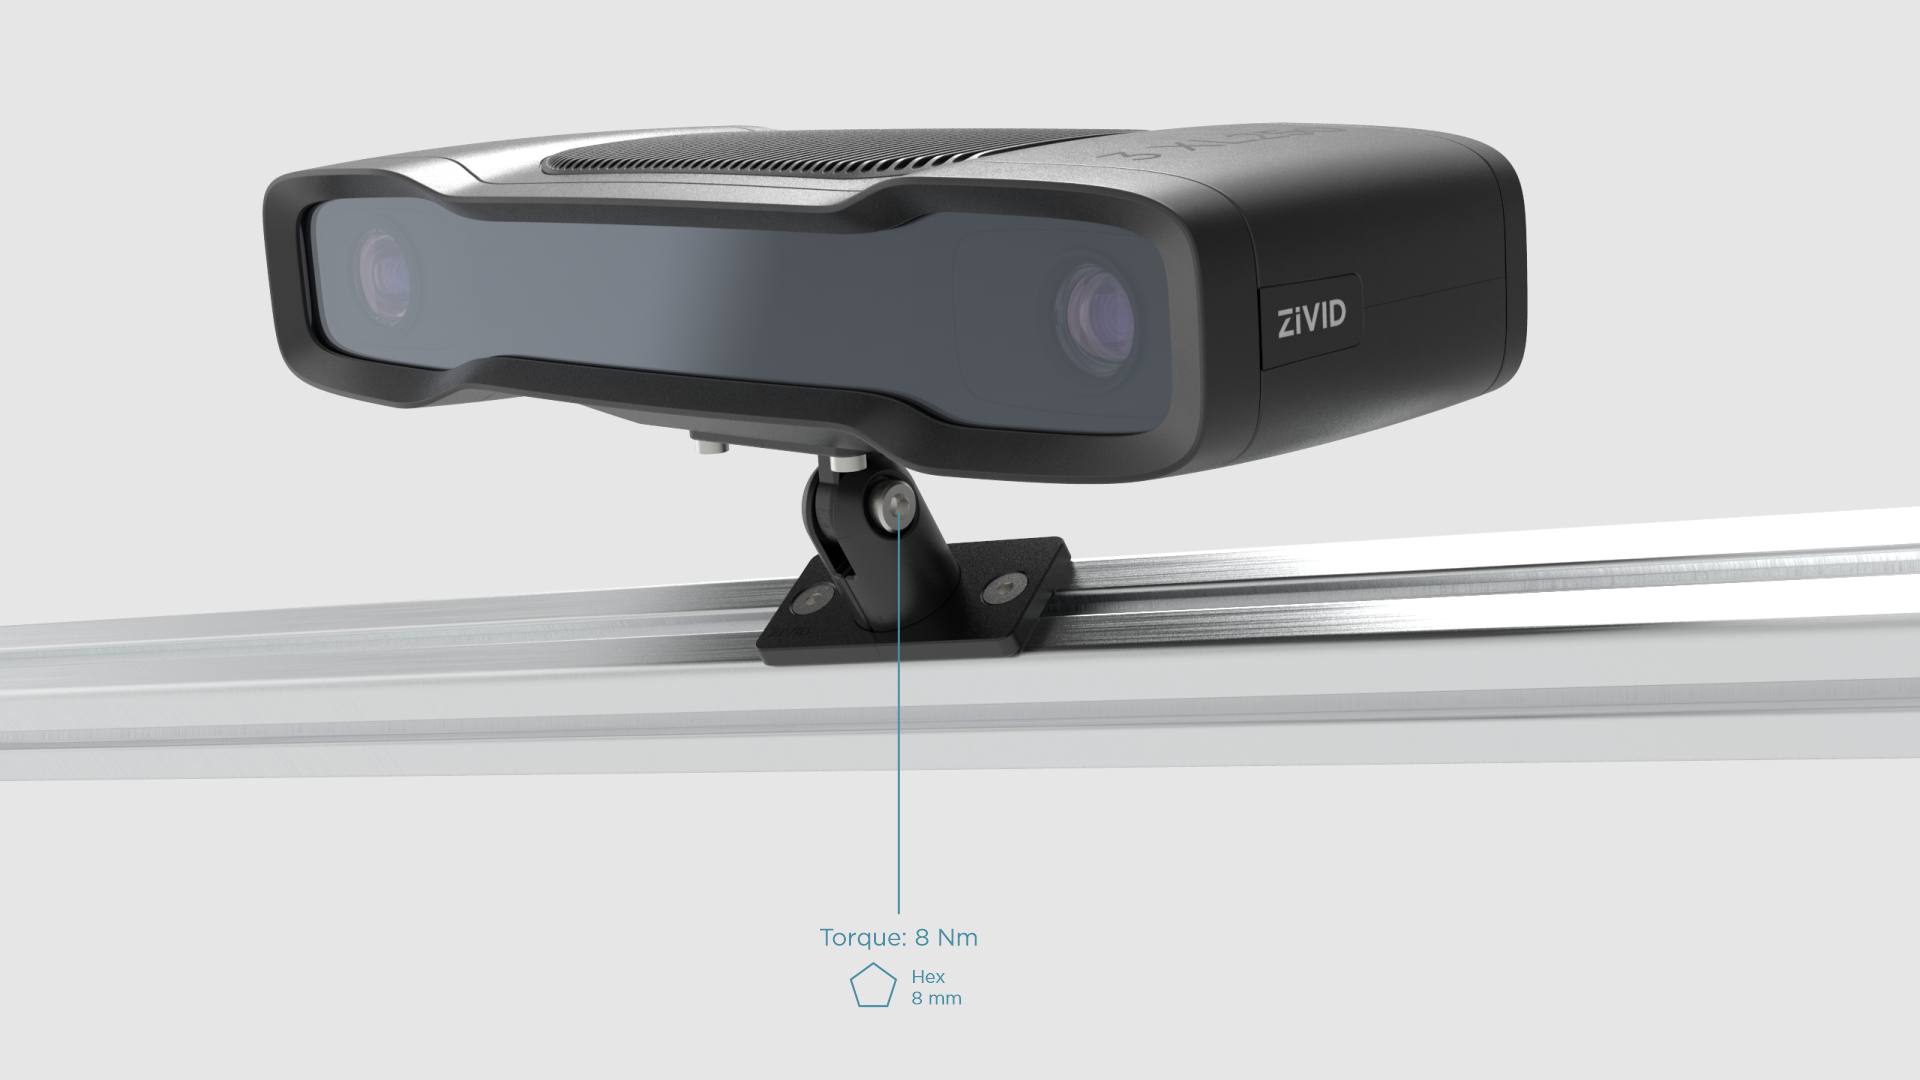
調整して固定する
カメラの角度を調整するには、中央のボルトを緩めます。振動にさらされる場合は、しっかりと固定するために、6 mm の六角レンチを使用して中央のボルトを 8〜9 Nm のトルク(通常の手締めよりもしっかりとした感触)で締めます。安定した面でのラボ使用には、5 Nm のトルクで十分です。
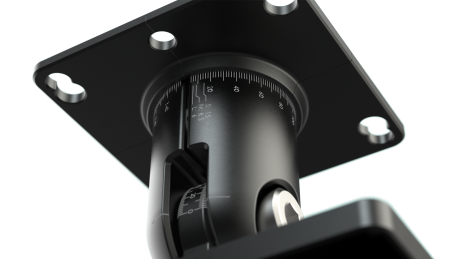
360度のレーザー刻印を目安に角度を正確に調整できます。取り外し後に再取り付けが必要な場合でも、刻印により既存システムのカメラ向きを再現しやすくなります。
Zivid Quick Mount は、簡単に取り付けられるように設計された、ユーザーフレンドリーなチルト&ロール式カメラマウントです。
Zivid Quick Mount を使用する理由とは?
簡単設置
独自の吊り下げ機構により、ネジを締める前にカメラをマウントに吊り下げることができます。つまり、取り付け中にカメラの重量を支える必要がありません。これは Zivid 3 カメラの場合に当てはまります。他のモデルでは、ネジを締める際にカメラの重量を支える必要があります。
堅牢性
堅牢な設計により、振動のある環境下でも優れた安定性を確保します。
PDFのデータシート/ユーザーガイドやCADファイルは Accessories Downloads に掲載しています。
取り付け手順
箱の中身 |
必要なツール |
|---|---|
Zivid Quick Mount |
六角レンチ 4 mm |
取り付けネジ |
トルクス T45 |
カメラの準備
Zivid 3 カメラの場合は、すべての手順に従ってください。その他のモデルの場合は、 固定して調整する セクションに進んでください。
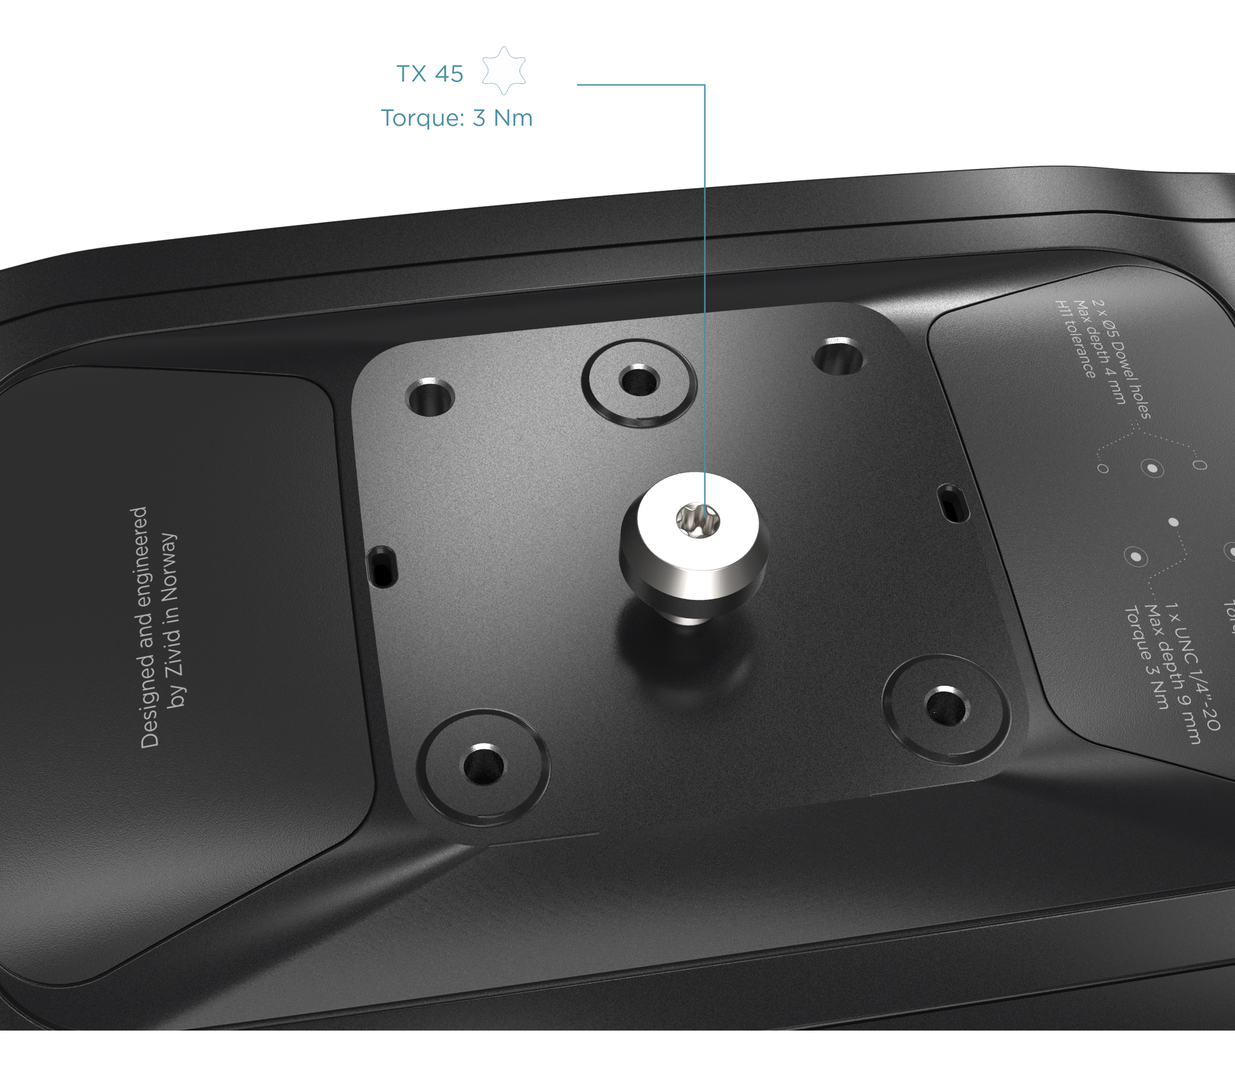
カメラ底面中央にある UNC 1/4"-20 メスネジに、吊り下げ機構のネジを取り付けます。指で軽く締めるか、トルクス T45 レンチを使用して 3 Nm のトルクで締め付けてください。
マウントを V スロットプロファイルに取り付ける
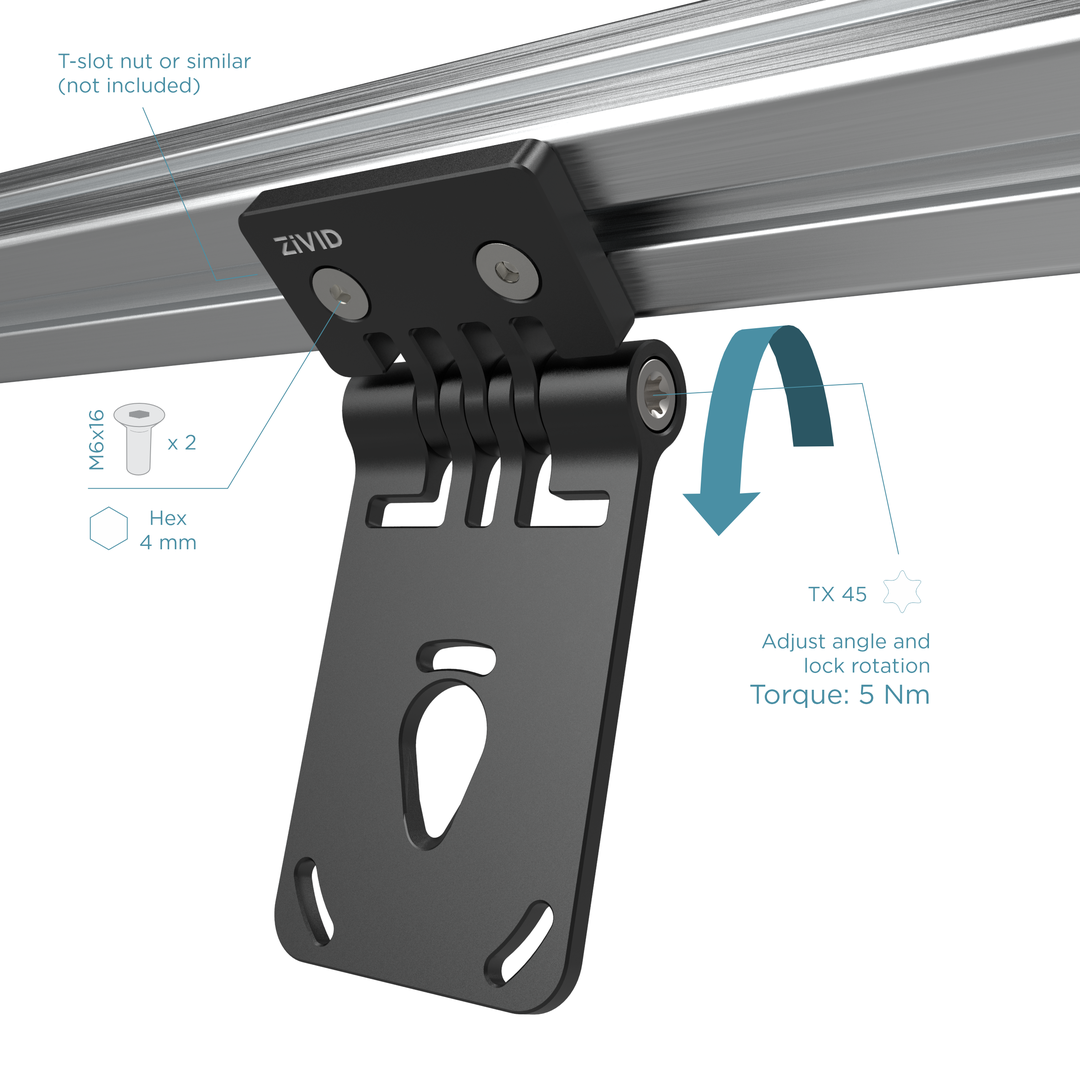
M6 ネジと T ナットを使用し、六角レンチ(4 mm)で締め付けて、マウントを V スロットプロファイルに固定します。マウントはプロファイルのどの面にも取り付け可能で、カメラの向きを水平、垂直、上向き、下向き、横向きなど、柔軟に調整できます。
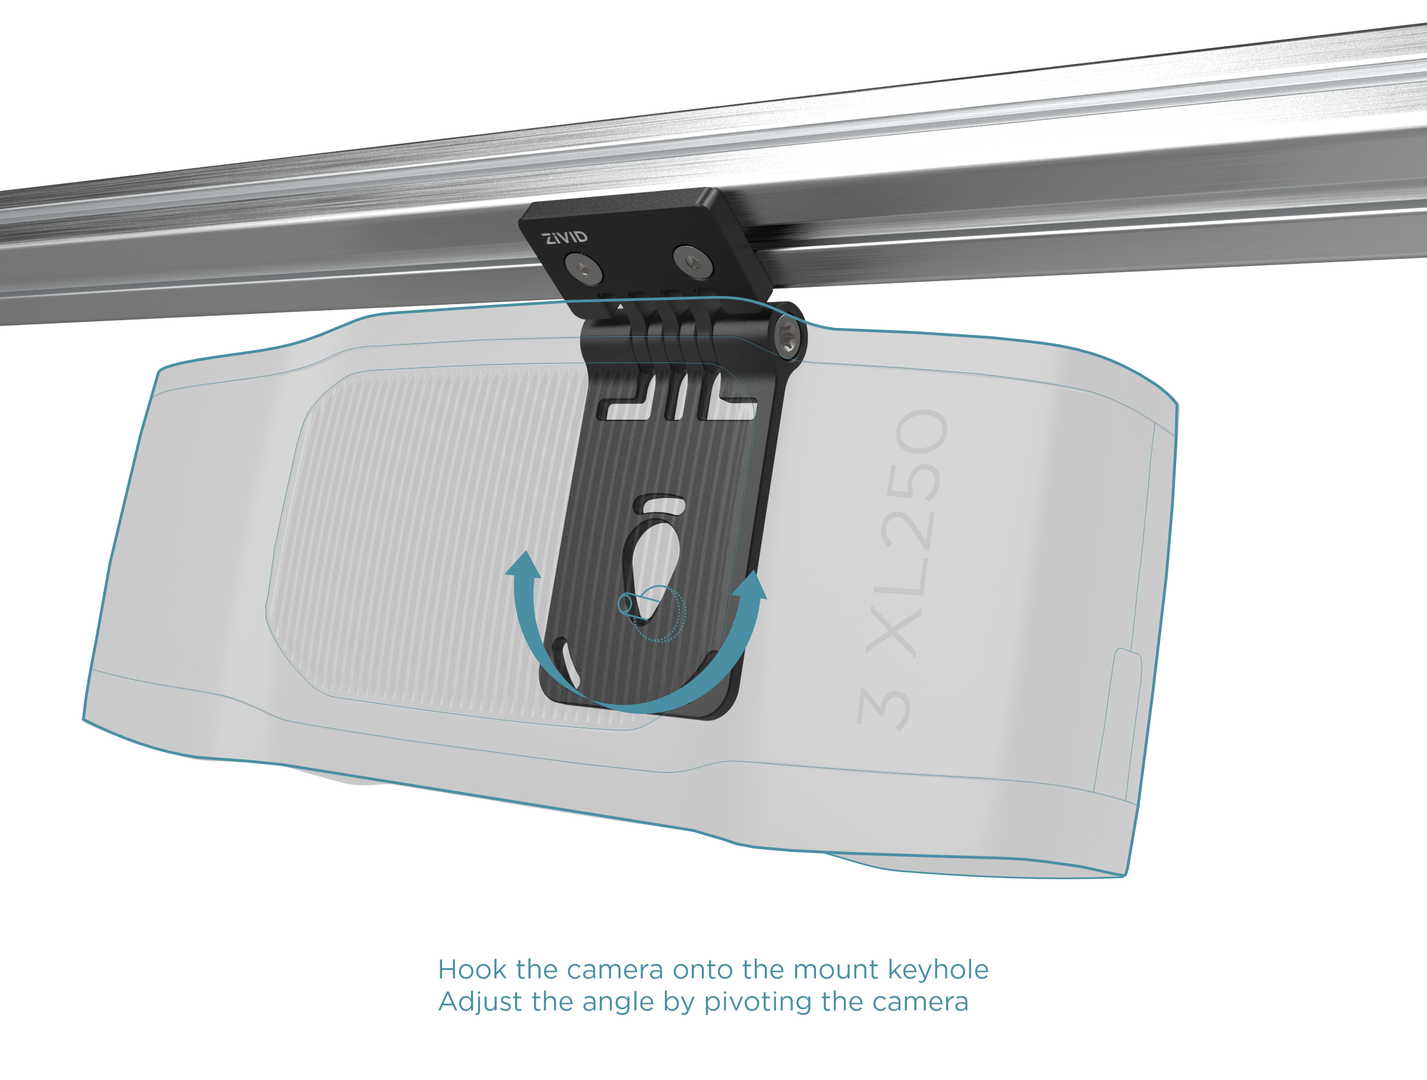
カメラを掛ける
ネジを所定の位置に固定したら、カメラをマウントに引っ掛けて吊り下げてください。
固定して調整する
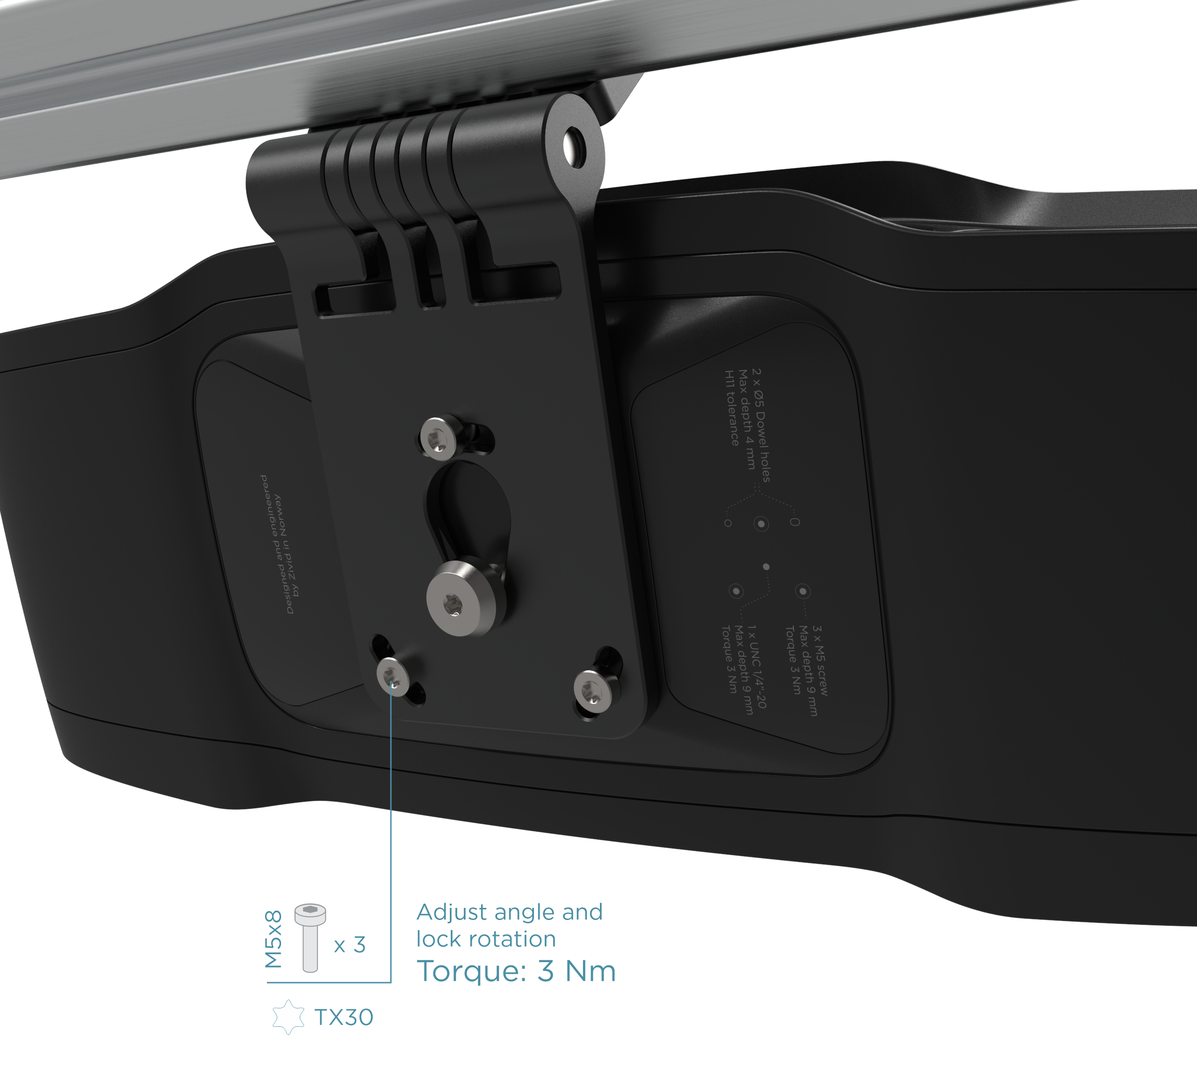
湾曲したスロットを使用してロール角度を調整し、カメラをマウントに 3 Nm のトルクで締め付けます。Zivid カメラに対応するネジの詳細については 取り付け仕様 を参照してください。
最後に傾斜角度を調整し、トルクス T45 キーを使用して中央のボルトを 5 Nm のトルクで締め付けます。この figure を参照してください。
Tip
チルトジョイントとロールジョイントを使用すると、カメラをシーンに対して垂直に配置し、反射や背景の干渉を最小限に抑えることができます。詳細については 正しい位置決め を参照してください。
ロボットへの取り付け について引き続きお読みください。
バージョン履歴
SDK |
変更点 |
|---|---|
2.17.0 |
Zivid 3 XL250 のサポートを追加しました。 |
2.14.0 |
Zivid 2+ MR130、LR110、および MR60 のサポートを追加しました。 |
2.12.0 |
Zivid One+ はサポート終了(End-of-Life)となり、サポートは終了しました。 |