接続性と電源供給
Zivid cameras connect to power and to your computer via two M12 connectors: a power connector and an Ethernet connector.
コネクタ
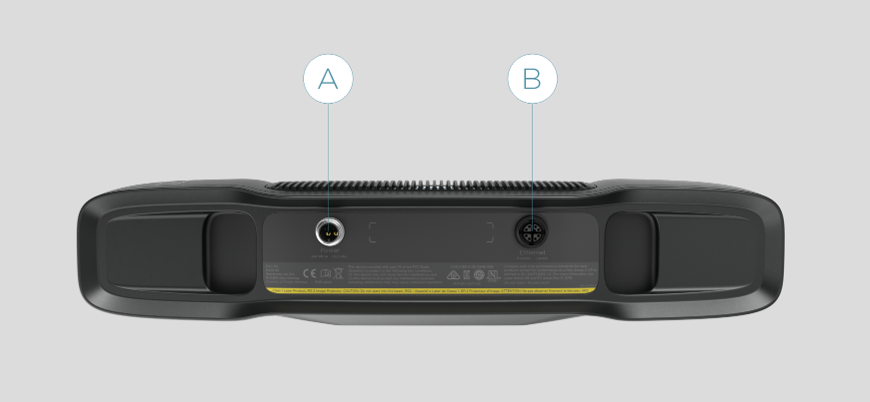
Zivid 3
Zivid 2+
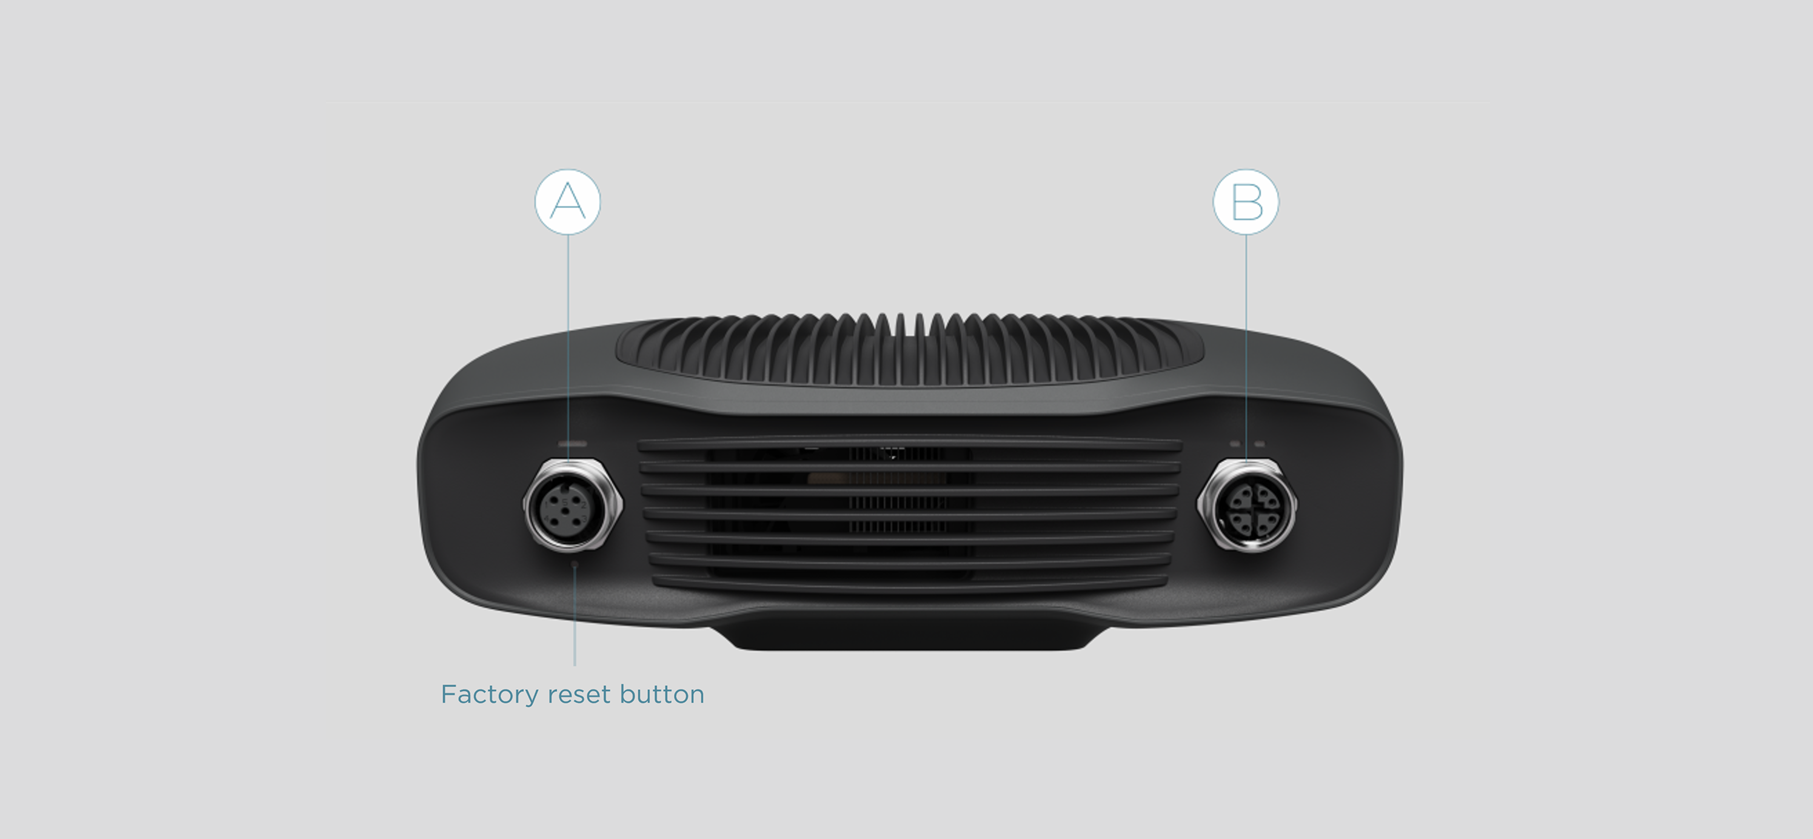
M12-5: 電源コネクタ 24V、5A DC
M12X: イーサネットコネクタ CAT 6A
詳細については、Zivid データケーブル をご確認ください。
For the factory reset button, see 工場出荷時設定にリセットするボタン.
Zivid 2
M12-5: 電源コネクタ 24V、5A DC
M12X: イーサネットコネクタ CAT 6A
詳細については、Zivid データケーブル をご確認ください。
For the factory reset button, see 工場出荷時設定にリセットするボタン.
電源インターフェース
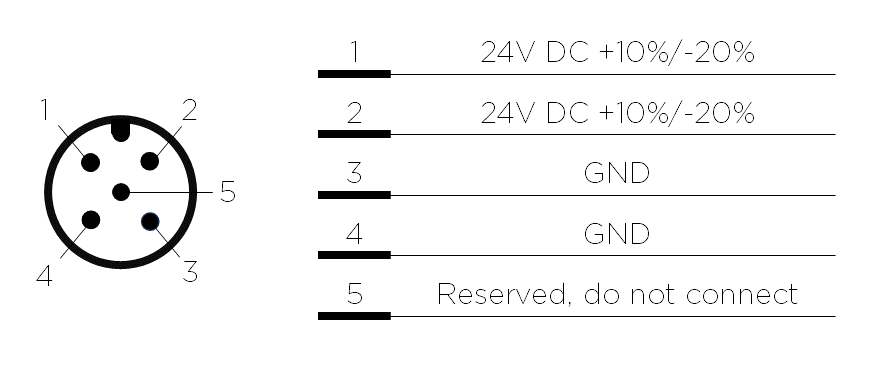
24V 用と GND 用の両方のピンを使用する必要があります。
Zivid 3: optional mating connector TE Connectivity AMP, 1838274-3 (Digikey: A97642-ND).
Zivid 2+ and Zivid 2: optional mating connector TE Connectivity AMP, 1838275-3 (Digikey: A97645-ND).
警告
Power supplies or cables that do not meet the specified requirements can damage the camera and void the warranty, particularly when using third-party or custom solutions. See 電源とケーブル for more information.
データケーブル
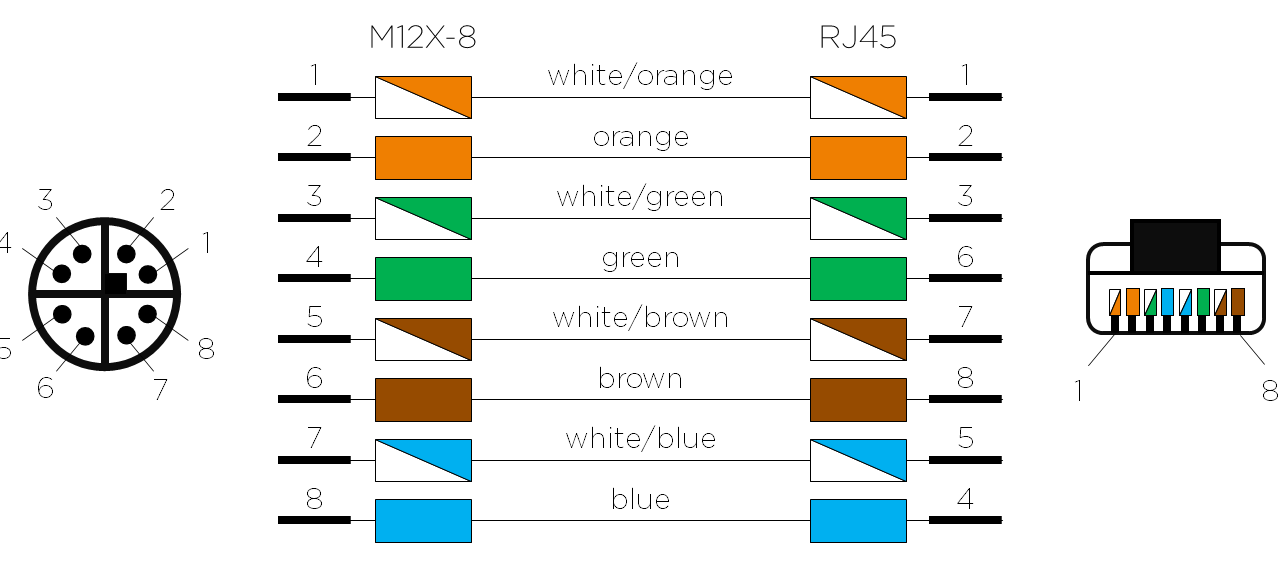
Zivid カメラは、データ転送に専用のイーサネットケーブルを使用します。詳細については、Zivid データケーブル をご参照ください。
以下の表は、Zivid イーサネットケーブルのピン配置を示しています。
コンピューターに接続
To connect the camera, plug in power first, then the Ethernet cable to your computer.
Plug the power supply into the camera's power connector ("24V").
イーサネットケーブルをカメラに差し込み、コンピュータに接続します。
電源をコンセントに差し込みます。
注釈
放射およびイミュニティ規格への準拠を確保するには、ユニットに付属の AC/DC アダプタを使用してください。
Zivid カメラは、物理的に電力を遮断するサーミスターによって、逆極性や過熱から保護されています。
The Zivid camera uses Ethernet communication and needs 10 Gbps for best performance. Not all computers have a port for 10 Gigabit Ethernet. In that case, you can connect to it using an adaptor for 10GBASE-T (10 Gbps copper Ethernet) to Thunderbolt 3. At a reduced performance you can also use 1000BASE-T and NBASE-T (1 Gbps, 2.5 Gbps, and 5 Gbps over copper) to USB adapters.
推奨ネットワークカードとアダプタ
動作確認済みで、以下のハードウェアを推奨します。
注意
USB ベースのネットワークアダプタでは、キャプチャ速度が遅くなり、変動が大きくなるため、カメラの使用時にエラーが発生する場合があります。最適なパフォーマンスを得るには、10Gb PCI Express カードを使用することをお勧めします。
警告
Zivid が承認したイーサネットケーブル のみを使用してください。
ネットワークトポロジ
Zivid カメラは次のネットワーク トポロジをサポートしています。
直接接続 |
スイッチ経由の接続 |
|---|---|
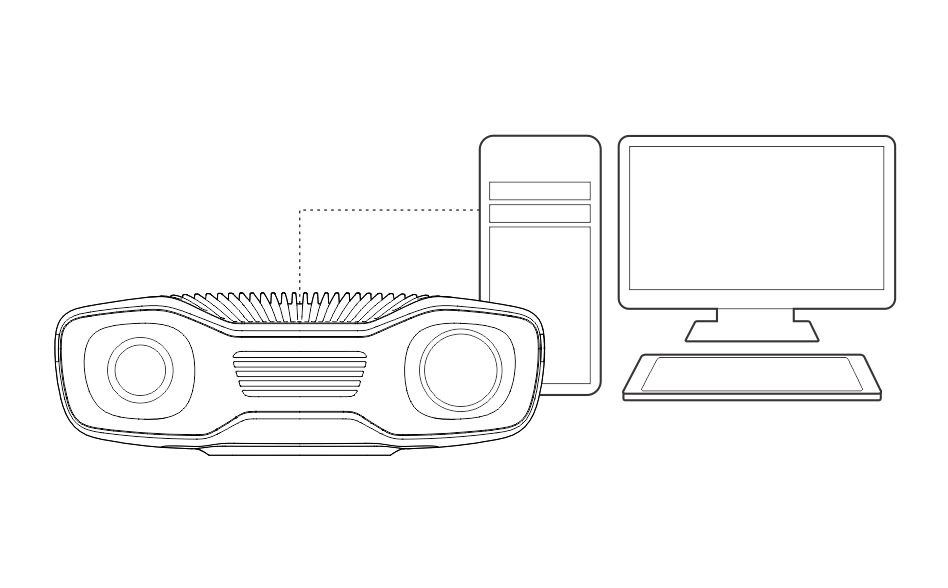
|
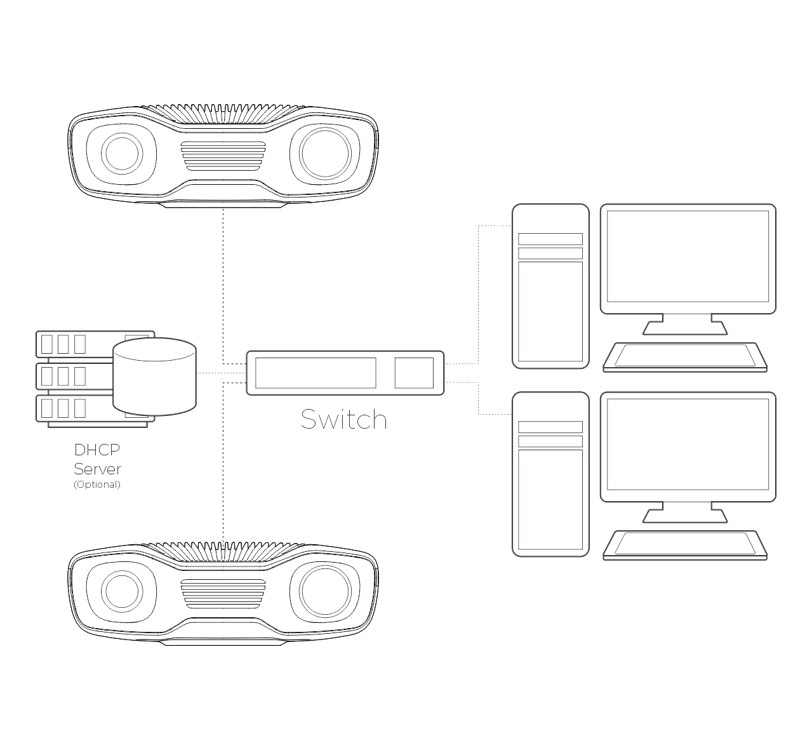
|
Continue to Software Installation where you will also find Network Configuration.
Version History
SDK |
変更点 |
|---|---|
2.17.0 |
Zivid 3 XL250 のサポートが追加されました。 |
2.14.0 |
Zivid 2+ MR130、LR110、MR60 のサポートが追加されました。 |
2.12.0 |
Zivid One+ はサポート終了となり、サポートされなくなりました。 |
2.4.0 |
複数の Zivid 2 カメラのサポートが追加されました。 |