Toolbar
The toolbar is located at the top of Zivid Studio. It consists of drop-down menus to handle files, control the GUI, configure cameras, use maintenance tools, and get information about the Zivid software.
File
Zivid Studio では、点群・カラー画像・設定をディスクへ保存するための複数のオプションを利用できます。
Save/Export Point Cloud
点群を ZDF 形式で保存する手順:
Click on File → Save.
Navigate to the location where you want to save the point cloud.
Write down the file name.
Click Save.
注釈
ZDF is the native Zivid file format that includes point cloud, color image, and depth image data. It's the preferred format when reporting an issue to the Zivid Customer Success Team.
サポートされている点群形式 (順不同 / 順序付き PLY、ASCII (XYZ)、PCD) へエクスポートする手順:
Click on File → Export.
Navigate to the location where you want to save the point cloud.
Write down the file name.
Select the file format type.
Click Save.
Choose Export options.
Click Export.
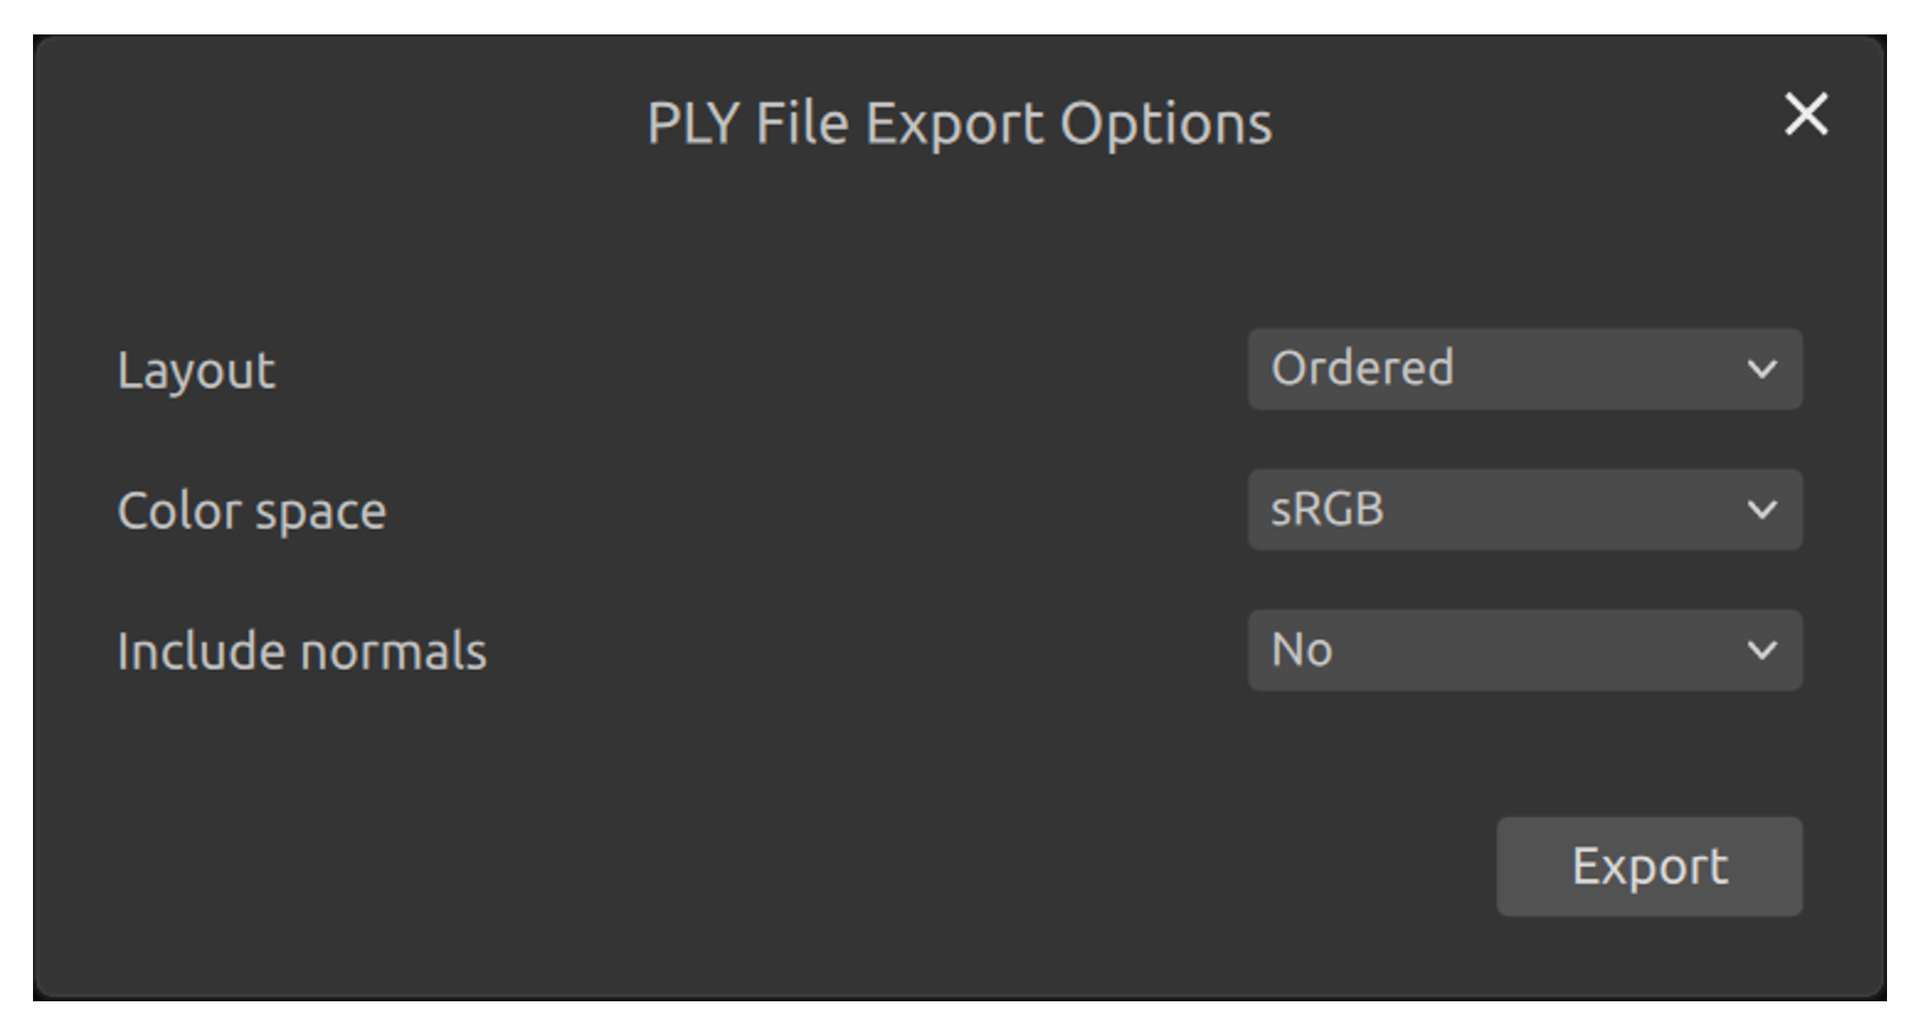
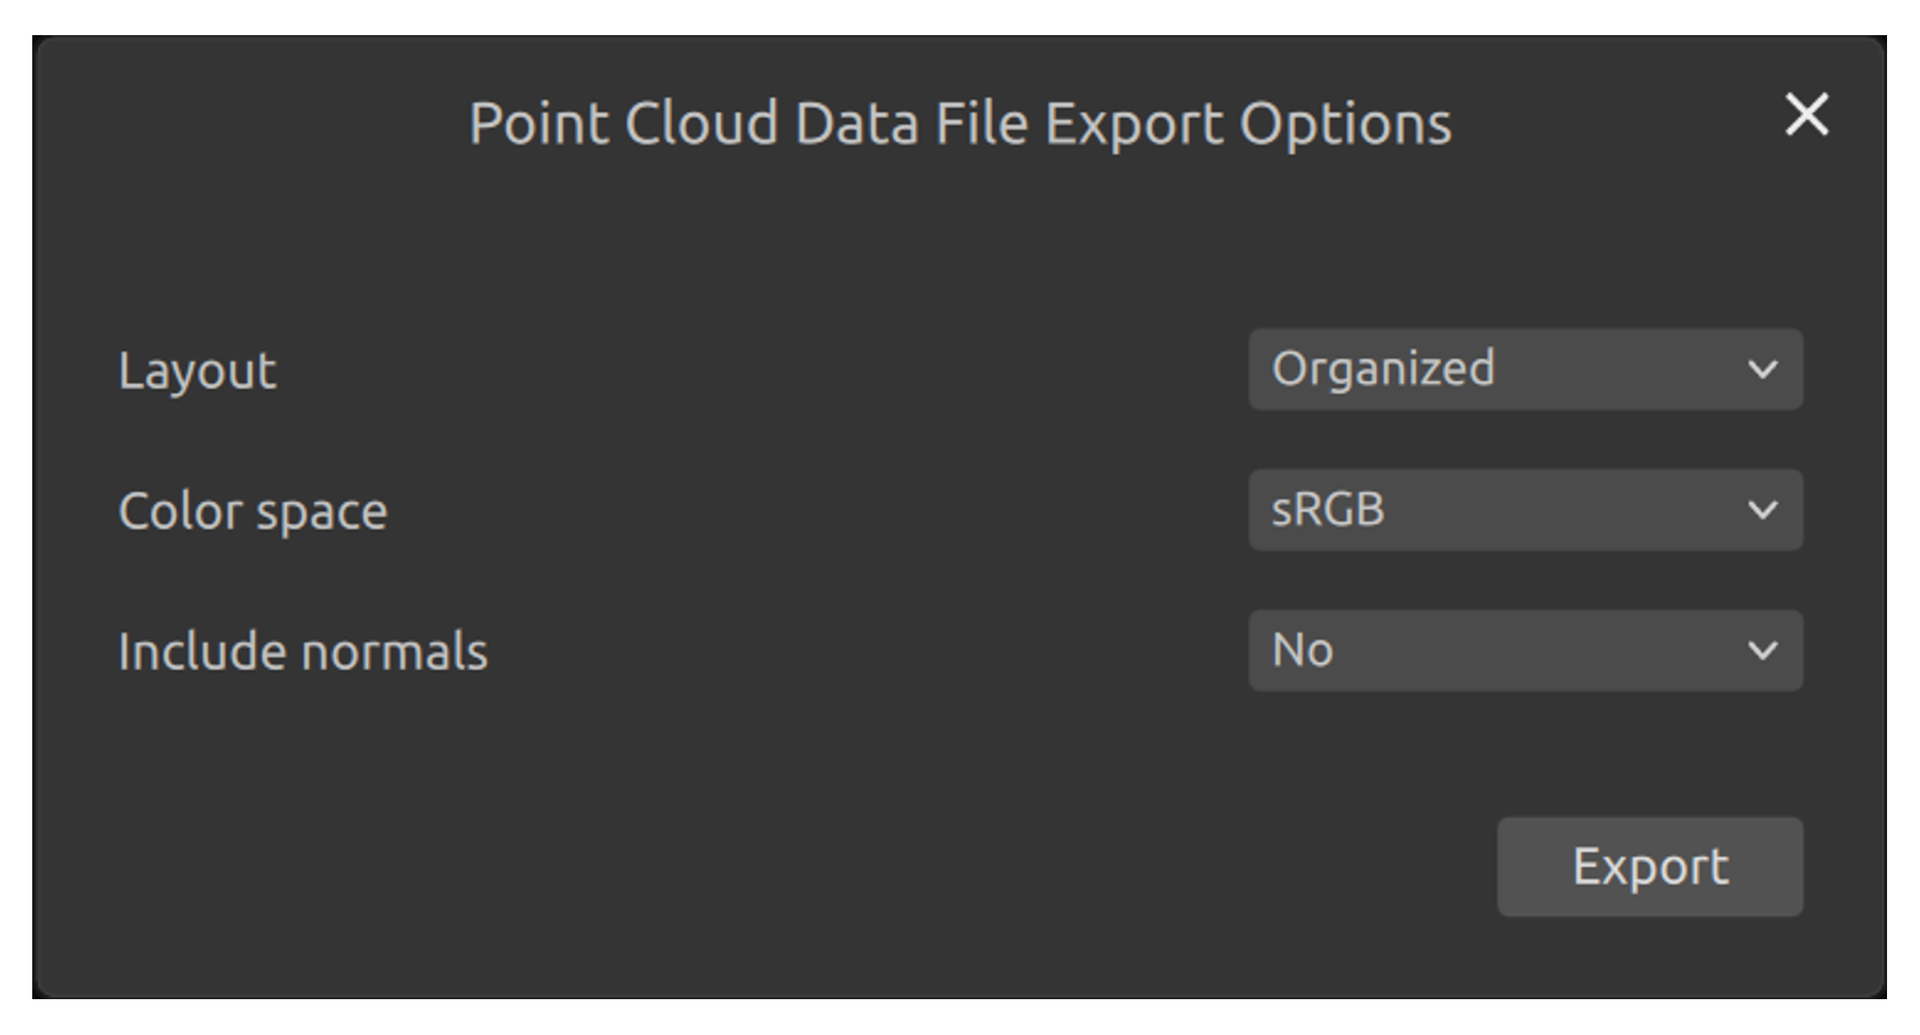
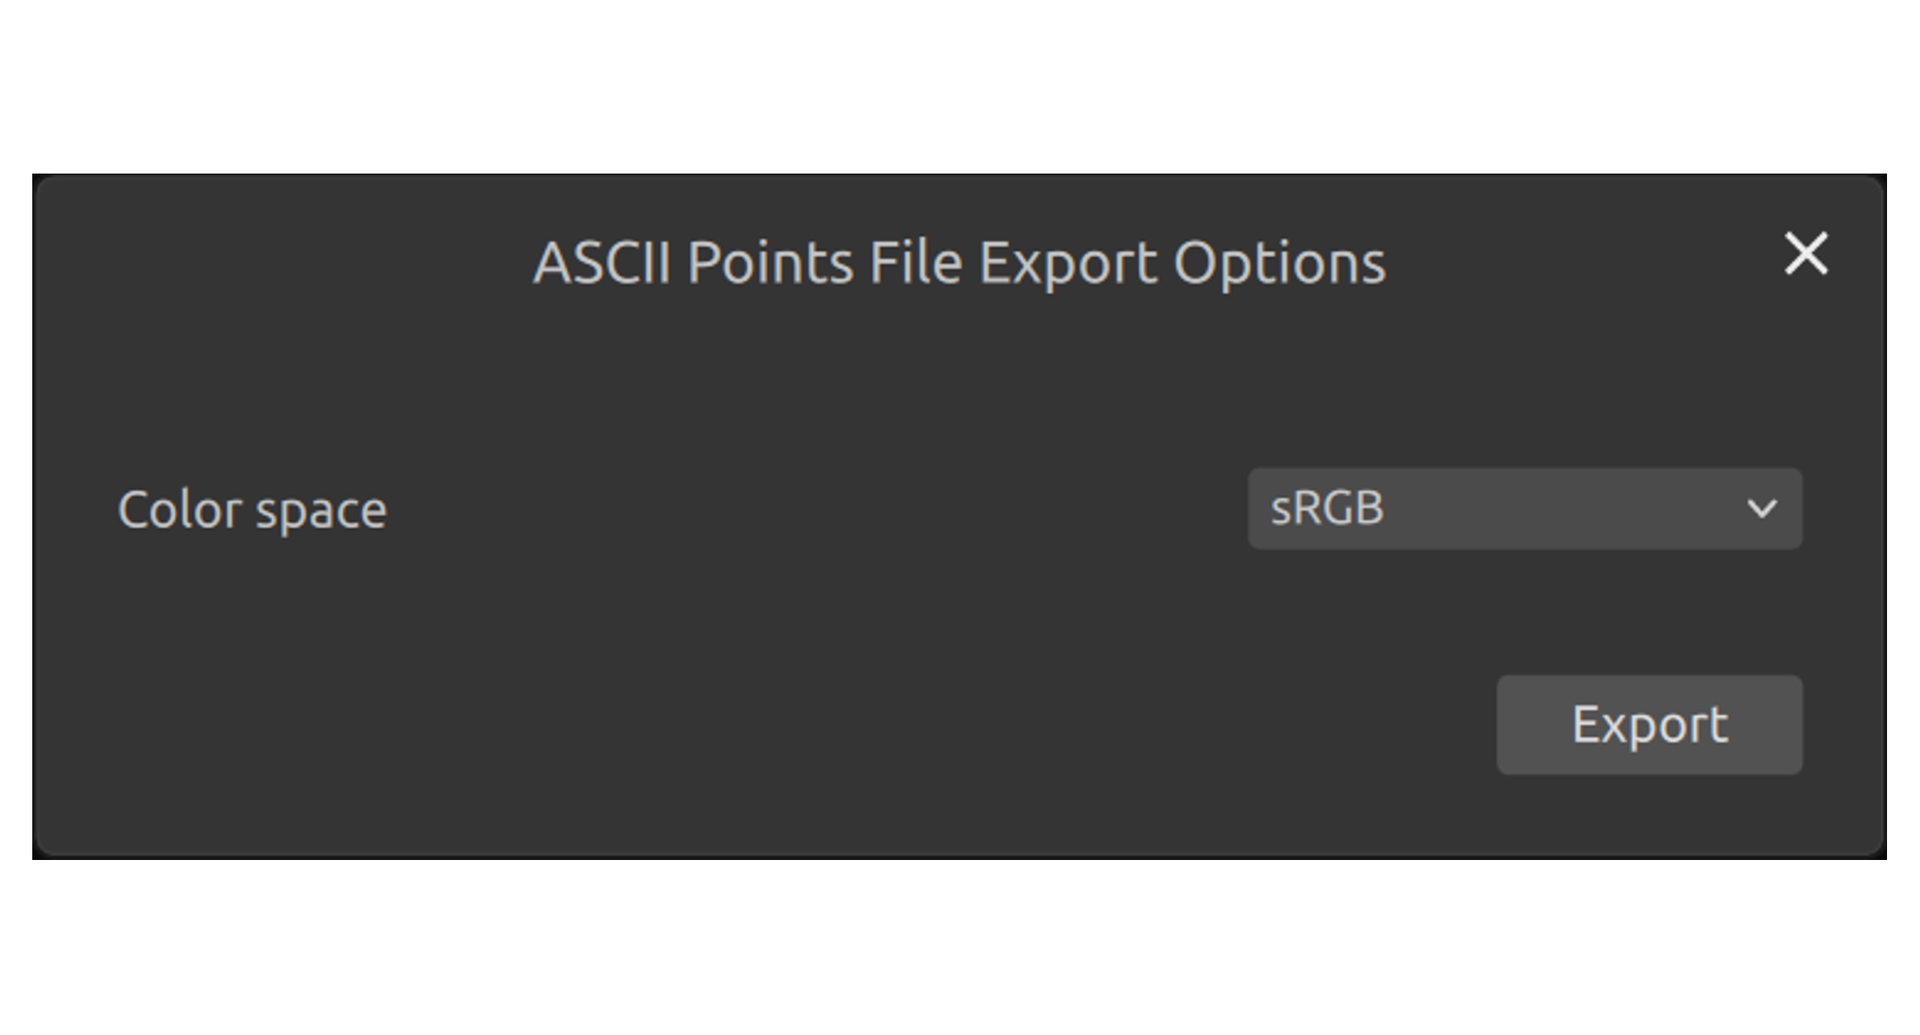
PLY / PCD / XYZ ファイル形式のエクスポートオプション。
Open Point Cloud / File Camera
Zivid Studio で点群を開けるのは ZDF 形式のみです。ファイルカメラは ZFC 形式で開くことができます。
Click on File → Open.
Navigate to the location of your ZDF / ZFC file.
Click Open.
ZDF / ZFC ファイルを Zivid Studio へドラッグ&ドロップ、またはダブルクリックして開くこともできます。
To open or create a file camera from the Cameras panel, click the ⋯ menu and select one of:
Open ZDF file as file camera - loads a ZDF file as a file camera. The file must have been captured with diagnostics enabled.
Use captured frame as file camera - creates a file camera from the frame currently displayed in the viewer. The frame must have been captured with diagnostics enabled.
See ファイルカメラ for details.
Save Color Image / Depth Map / SNR Map / Normal Map
2D カラー画像は サポートされている画像形式 の PNG / BMP / JPG で保存できます。全形式で sRGB または線形 RGB 色空間を選択可能です。深度マップ・SN 比マップ・法線マップは PNG のみ対応です。
Click on File → Save Color Image / Save Depth Map / Save SNR Map / Save Normal Map.
Navigate to the location where you want to save the image.
Write down the file name.
Click Save.
Export Settings
現在の全設定をディスクへ保存できます。
Click on File → Export Capture Settings.
Navigate to the location where you want to save the settings.
Write down the file name.
Click Save.
Import Settings
設定を Zivid Studio にインポートする手順:
Click on File → Import Capture Settings.
Navigate to the location of your settings file.
Click Open.
YML ファイルを Zivid Studio にドラッグ&ドロップしてインポートすることもできます。
Preferences
Zivid Studio の環境設定を開いて変更する手順:
Click on File → Preferences.
Check the boxes to enable the desired preferences.
詳細は 設定ファイル を参照してください。
View
2D Color Image Histogram
2D 画像のヒストグラムを表示する手順:
Click on View → 2D Color Image Histogram.
Swap between Linear and Logarithmic to change scales.

Information
情報パネルを開く手順:
Click View → Information or Information in the bottom right corner.
ZDF ファイルから点群を読み込むか、点群またはカラー画像をキャプチャした後に利用可能になります。
上部には取得時間・キャプチャ時間・点群 / カラー画像サイズが表示されます。
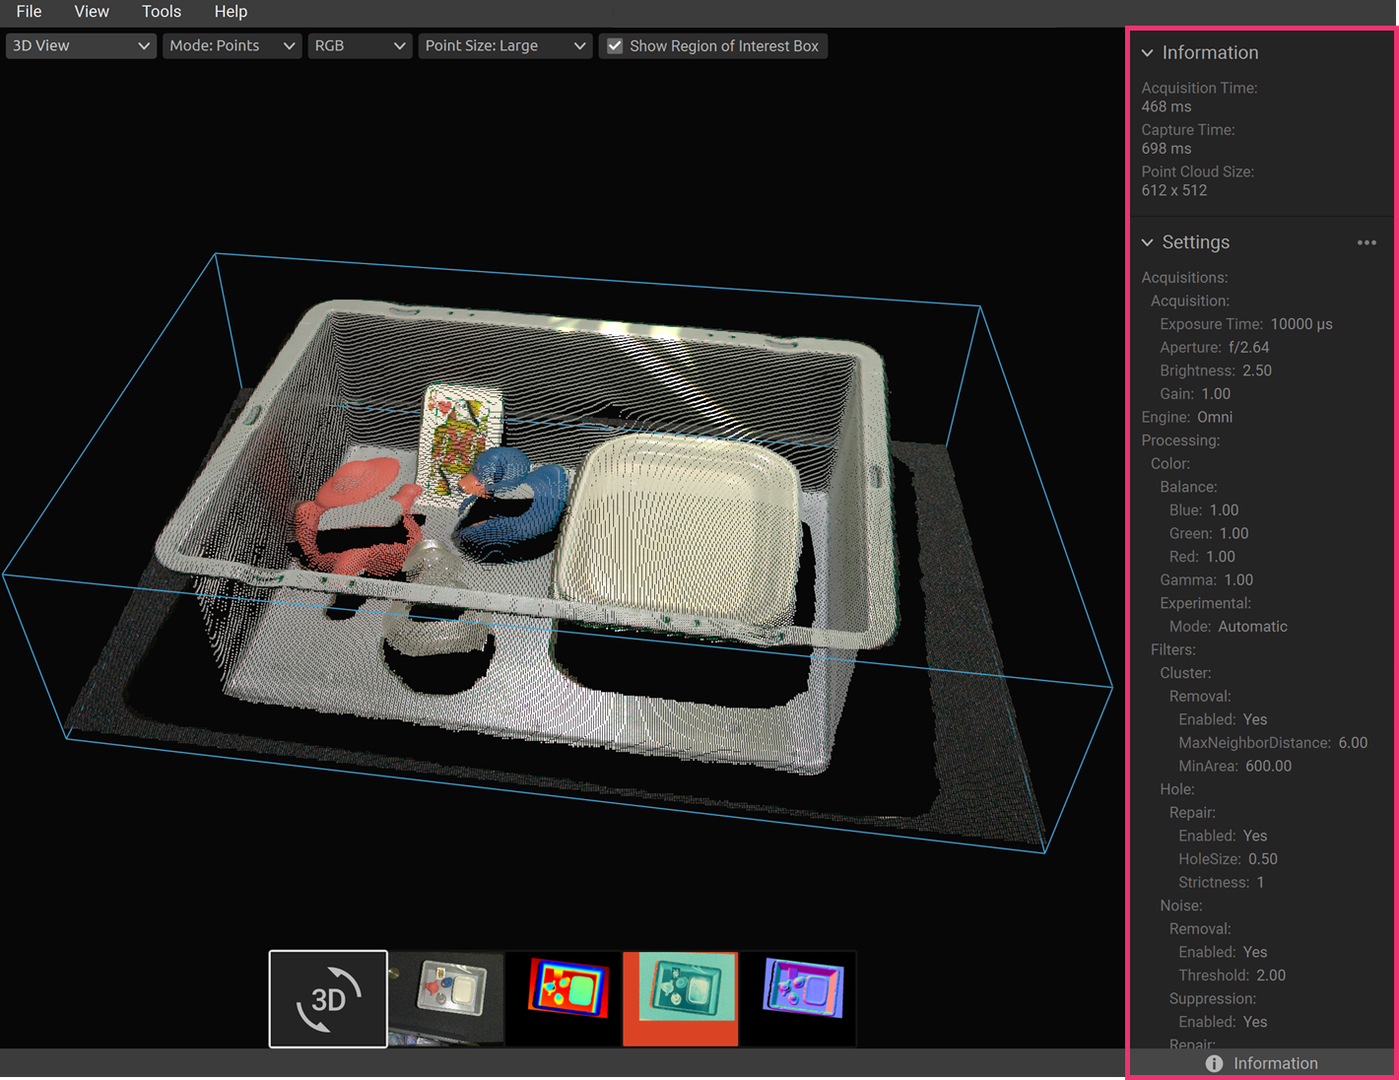
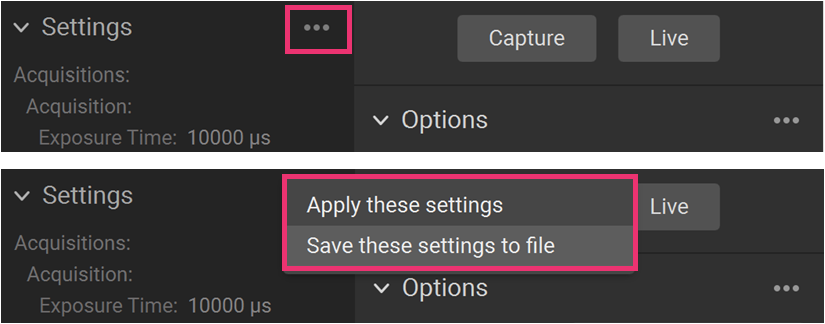
下部には使用したキャプチャ設定が表示され、ファイル保存や次回キャプチャへの適用が可能です。
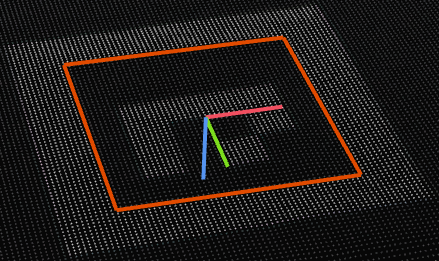
3D Axis Indicator
A 3D axis indicator is displayed in the bottom left corner of the point cloud view. To disable/enable it, click on View → 3D Axis Indicator.
Show 4x4 Aruco Markers
To highlight any 4x4 Aruco markers in the point cloud, click on View → Show 4x4 Aruco Markers.
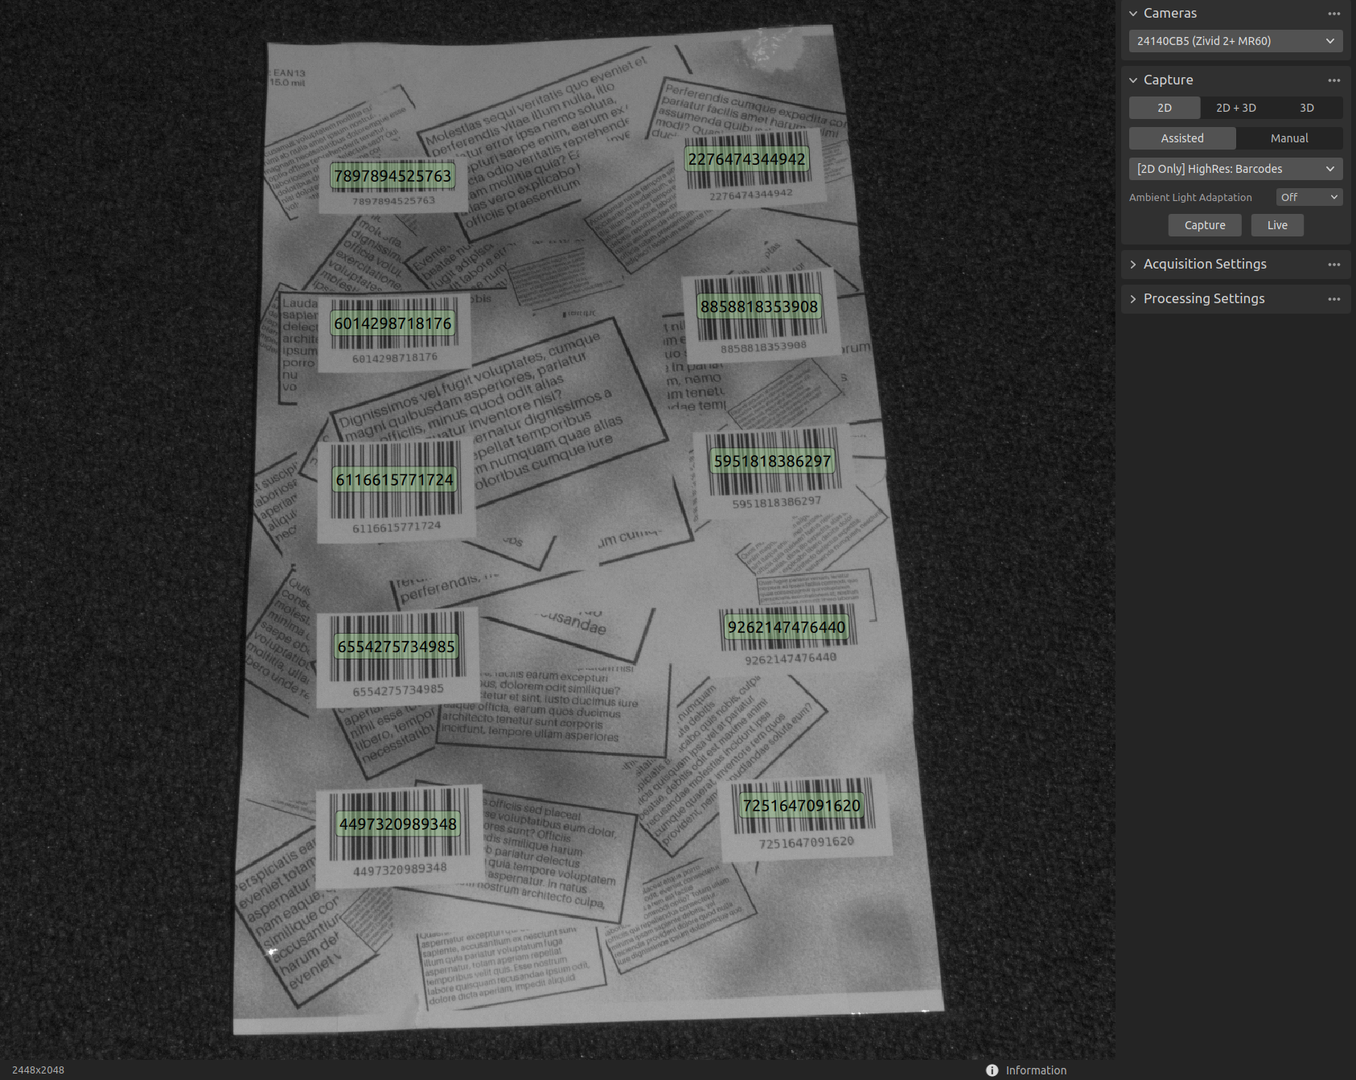
Show barcodes
To show barcodes detected in the 2D image, click on View → Show barcodes.
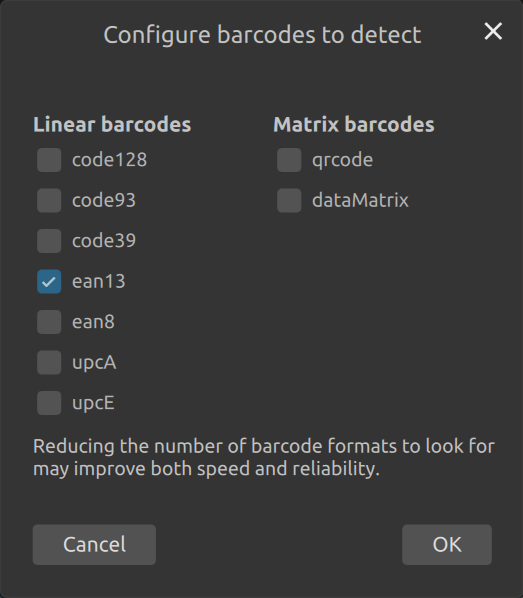
Configure barcodes to detect
To configure which barcodes to detect in the 2D image, click on View → Configure barcodes to detect.
Reset 3D View When Opening Files
To control whether the 3D view is reset to the default view each time you open a file, click View → Reset 3D View When Opening Files.
Reset View
To reset the point cloud, color image, and depth image view back to the default view, click View → Reset View, or press Backspace.
Reset UI Layout
To restore the Zivid Studio window to its default layout, click View → Reset UI Layout.
Full Screen Mode
To toggle between full screen and regular screen mode, click View → Enter Full Screen Mode / Exit Full Screen Mode, or press F11.
Cameras
All Cameras
カメラメニューを開く手順:
Click on Cameras → All Cameras.
検出されたすべてのカメラのシリアル番号・モデル・IP アドレス・ステータスが一覧表示されます。
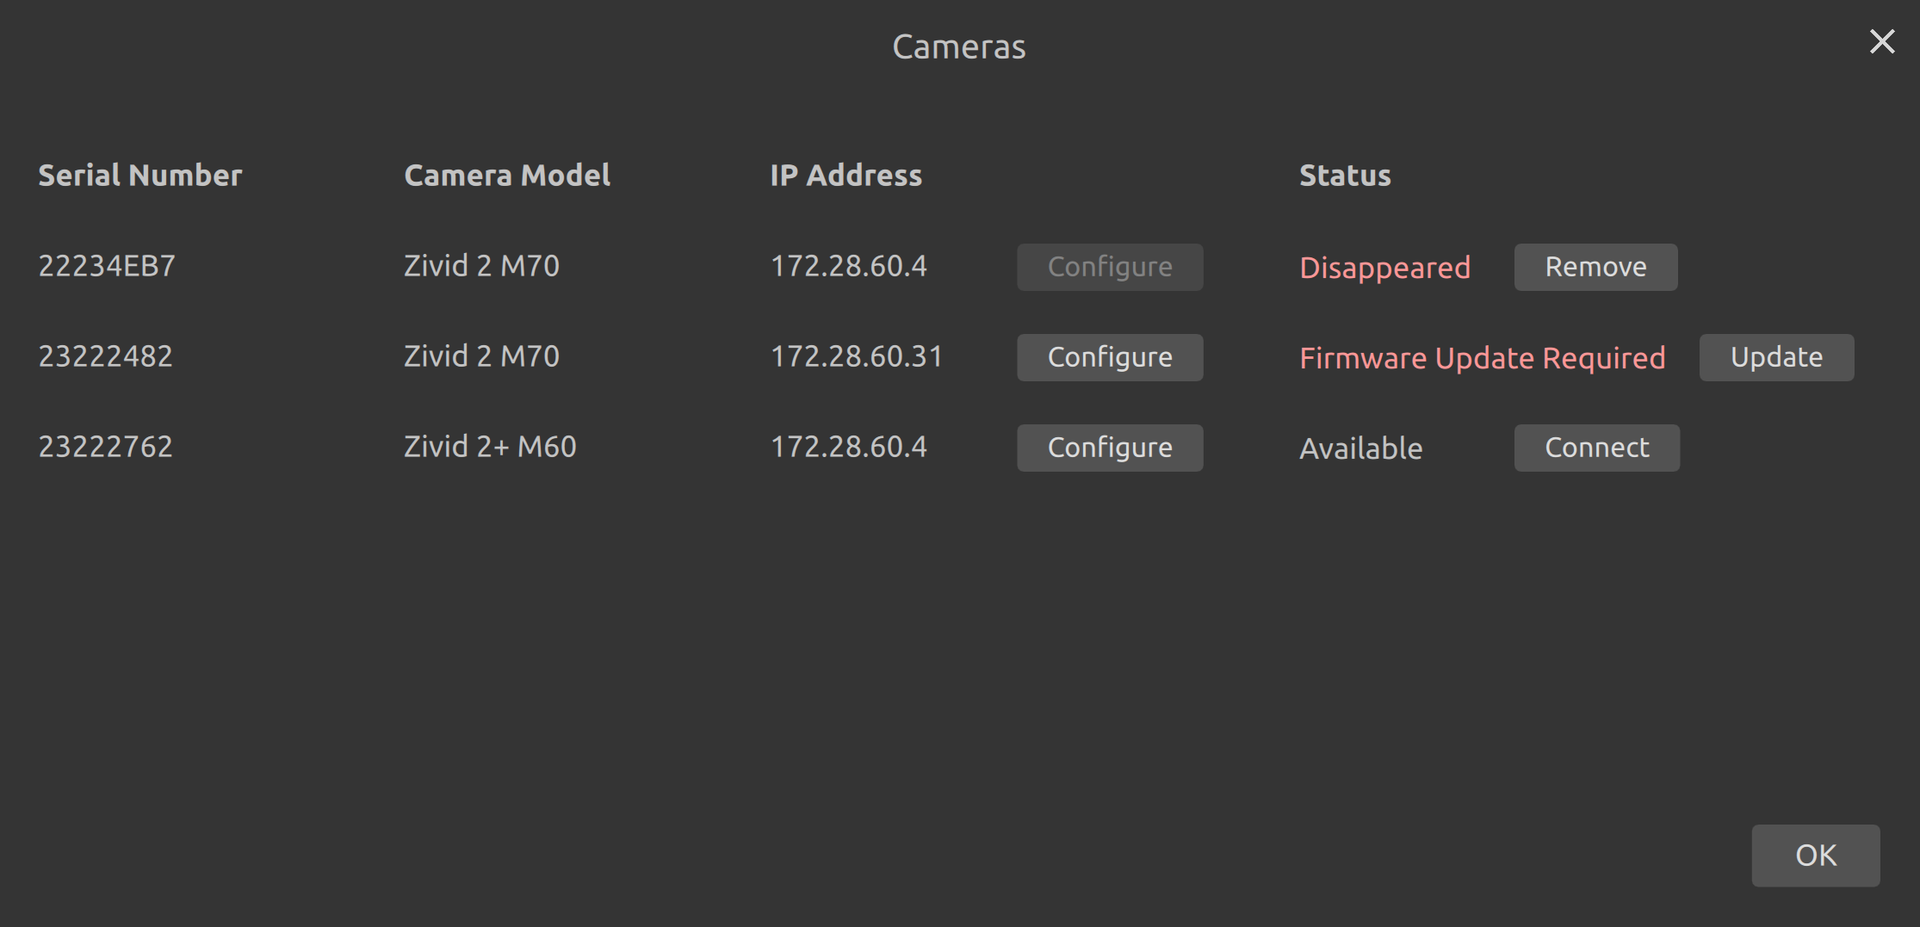
ステータス欄では以下の操作が可能です:
Connect to connect to the camera if it is available.
Disconnect to disconnect from the camera if it is connected.
Update to update the firmware of the camera if it is available but needs a firmware update.
Remove to remove the camera from the list if it is no longer found.
You can change the network configuration of any discovered camera by clicking Configure. This will open the camera network configuration.
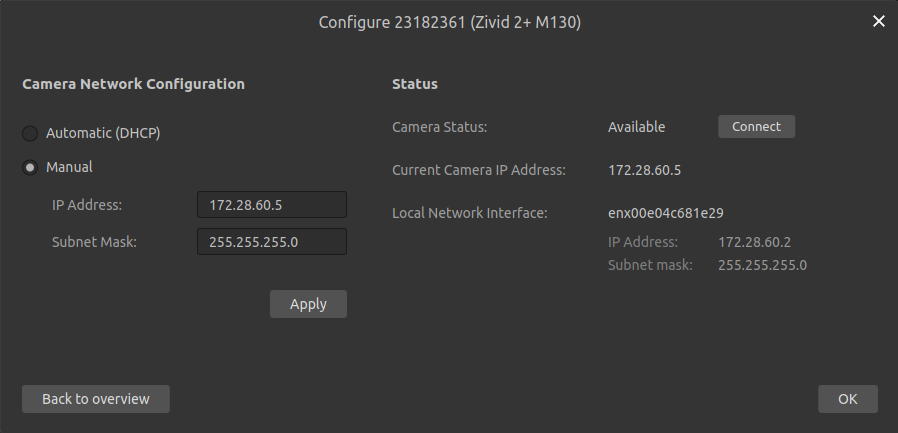
Here you can set the camera to use DHCP or a specific static IP address, and apply the configuration to the camera by clicking Apply. The status of the camera can change after applying the network configuration.
Health Check
The Health Check reports the status of a connected camera, aggregating several individual checks (such as temperatures, fan, memory, and transfer speed) into an overall status. This gives a quick overview of whether the camera is operating within its specified range.
To run a health check, open the Cameras menu (Cameras → All Cameras) and click Check on the row of a connected camera. The Check button becomes active once the camera is connected.
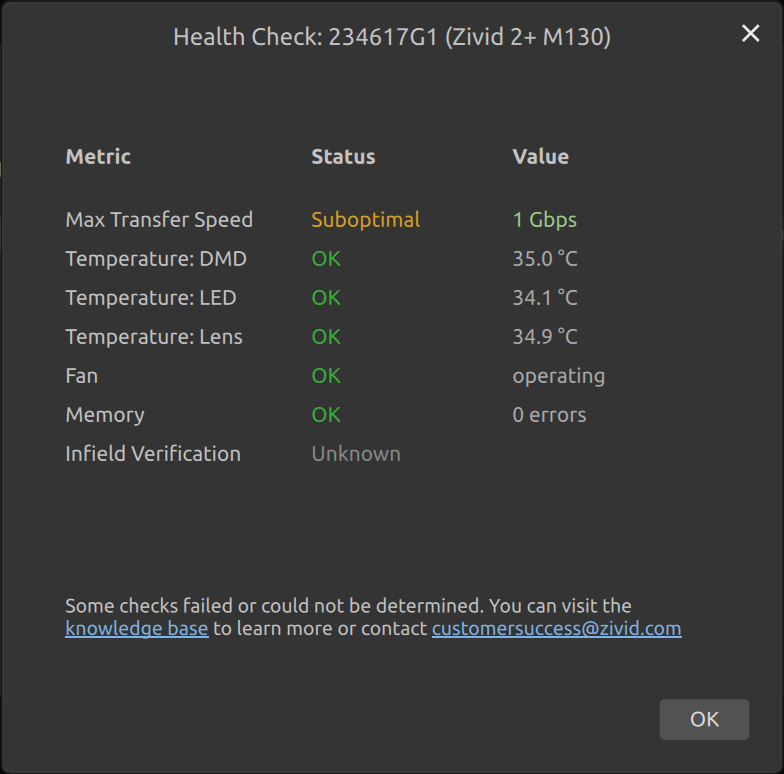
To read the same health check status programmatically, see Camera Health Check.
Tools
Infield Correction
Infield Correction ツールを開く手順:
Click on Tools → Infield Correction.
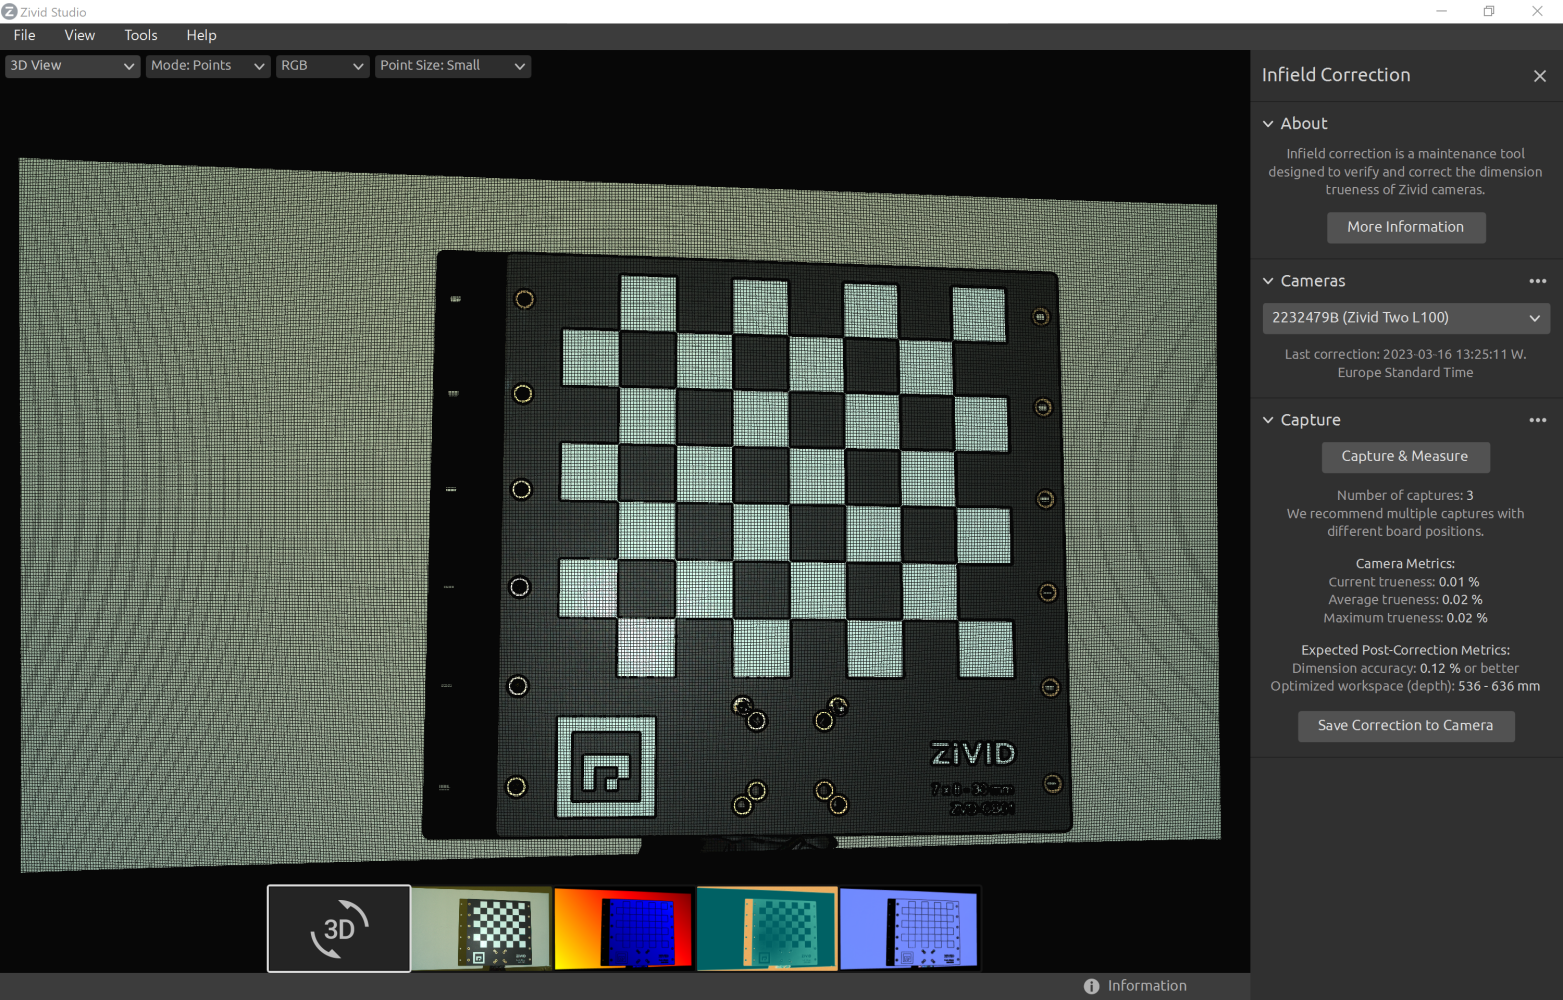
Infield Correction 機能概要
Last correction は最後に補正がカメラへ書き込まれた日時を示します。
Capture & Measure は Zivid キャリブレーションボードを撮影し、その周辺領域の local dimension trueness error を測定します。
Current Camera Metrics Capture & Measure で取得した最後のキャプチャの local dimension trueness error、およびすべてのキャプチャの平均と最大を示します。
Current trueness Capture & Measure で取得された最後のキャプチャの local dimension trueness error を示します。
Average trueness これまでに Capture & Measure で取得されたすべてのキャプチャの local dimension trueness error の平均を示します。
Maximum trueness これまでに Capture & Measure で取得したすべてのキャプチャの local dimension trueness error の最大値を示します。
Expected Post-Correction Metrics 画像がキャプチャされた作動距離にわたって 1σ以内の統計的不確実性の範囲内で推定される補正後の誤差を示します。
Save Correction to Camera writes to the camera the parameters for improving the dimension trueness of the point cloud determined from the captures of the Zivid calibration board taken with Capture & Measure.
Reset Camera Correction 以前の正しいインスタンスで適用された内野補正を削除します。新しい内野補正を行う前にリセットする必要はありません。
Infield Correction の詳細をご覧ください。
Help
View Help Online
To open the Zivid Knowledge Base in your browser, click Help → View Help Online.
About Zivid Studio
To view detailed information about Zivid, third-party software licenses, and system info, click Help → About Zivid Studio.