Toolbar
도구 모음은 Zivid Studio 상단에 있으며, 파일 을 처리하고, GUI 를 제어하고, 카메라 를 구성하고, 유지 관리 도구 를 사용하고, Zivid 소프트웨어에 대한 정보 를 확인하기 위한 드롭다운 메뉴로 구성됩니다.
File
Zivid Studio는 포인트 클라우드, 컬러 이미지 및 디스크 설정에 대한 다양한 저장 옵션을 제공합니다.
Save/Export Point Cloud
ZDF 형식으로 포인트 클라우드를 저장하려면:
File → Save 을 클릭합니다.
포인트 클라우드를 저장할 위치로 이동합니다.
파일 이름을 적습니다.
Save를 클릭합니다.
참고
ZDF는 포인트 클라우드, 컬러 이미지, 깊이 이미지 데이터를 포함하는 Zivid 고유의 파일 형식입니다. Zivid 고객 성공팀에 문제를 보고할 때 선호되는 형식입니다.
supported point cloud formats 중 하나로 내보내려면 정렬되지 않았거나 정렬된 폴리곤(PLY), ASCII(XYZ) 또는 포인트 클라우드 데이터(PCD) 파일 형식을 사용하세요.
File → Export 를 클릭합니다.
포인트 클라우드를 저장할 위치로 이동합니다.
파일 이름을 적습니다.
파일 형식 유형을 선택합니다.
Save를 클릭합니다.
Export 옵션을 선택합니다.
Export를 클릭합니다.
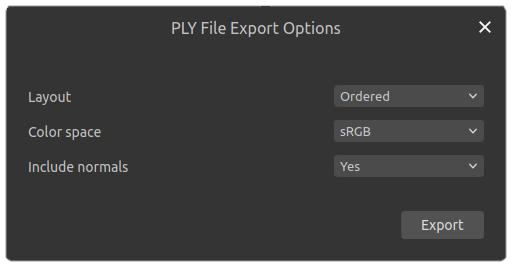
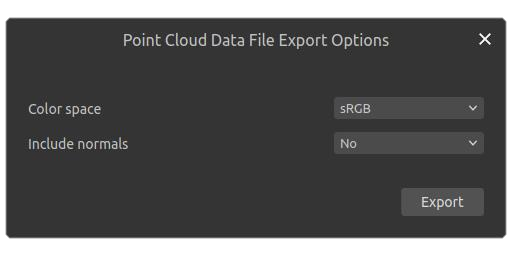
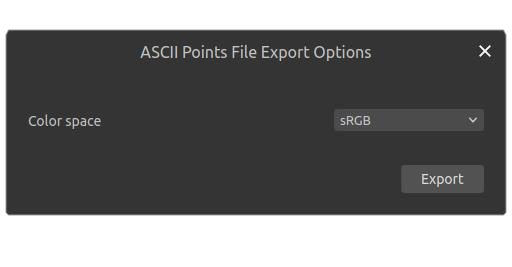
PLY, PCD, XYZ 파일 형식에 대한 Export 옵션.
Open Point Cloud / File Camera
Zivid Studio에서 포인트 클라우드를 여는 것은 ZDF 파일 형식에서만 지원됩니다. 파일 카메라는 Zivid Studio에서 ZFC 파일 형식으로 열 수 있습니다.
File → Open 을 클릭합니다.
ZDF/ZFC 파일의 위치로 이동합니다.
Open을 클릭합니다.
ZDF/ZFC 파일을 Zivid Studio로 끌어서 놓거나, 두 번 클릭을 통해 열수도 있습니다.
Cameras 패널에서 파일 카메라를 열거나 생성하려면 ⋯ 메뉴를 클릭하고 다음 중 하나를 선택합니다:
Open ZDF file as file camera - ZDF 파일을 파일 카메라로 로드합니다. 이 파일은 Diagnostics가 활성화된 상태에서 캡처된 것이어야 합니다.
Use captured frame as file camera - 뷰어에 현재 표시된 프레임으로부터 파일 카메라를 생성합니다. 이 프레임은 Diagnostics가 활성화된 상태에서 캡처된 것이어야 합니다.
자세한 내용은 File Camera 를 참조하세요.
Save Color Image / Depth Map / SNR Map / Normal Map
2D 컬러 이미지는 supported image formats 중 하나인 PNG, BMP 및 JPG로 저장할 수 있습니다. 모든 형식에서 sRGB와 선형 RGB 색상 공간 중에서 선택할 수 있습니다. Depth Map, SNR Map 및 Normal Map은 PNG 형식으로만 저장할 수 있습니다.
File → Save Color Image / Save Depth Map / Save SNR Map / Save Normal Map 을 클릭합니다.
이미지를 저장할 위치로 이동합니다.
파일 이름을 적습니다.
Save를 클릭합니다.
Export Settings
모든 설정을 디스크에 저장할 수 있습니다.
File → Export Capture Settings 를 클릭합니다.
설정을 저장할 위치로 이동합니다.
파일 이름을 적습니다.
Save를 클릭합니다.
Import Settings
Zivid Studio에서 설정을 가져오려면:
File → Import Capture Settings 를 클릭합니다.
설정 파일의 위치로 이동합니다.
Open을 클릭합니다.
YML 파일을 Zivid Studio로 끌어서 놓아 설정을 가져올 수도 있습니다.
Preferences
Zivid Studio 환경 설정을 열고 수정하려면:
File → Preferences 를 클릭합니다.
원하는 환경 설정을 활성화하려면 상자를 체크합니다.
Configuration files 에서 기본 설정에 대한 자세한 내용을 읽을 수 있습니다.
View
2D Color Image Histogram
2D 이미지 히스토그램을 표시하려면:
View → 2D Color Image Histogram 을 클릭합니다.
스케일을 변경하려면 Linear 와 Logarithmic 을 전환합니다.

Information
정보 패널을 열려면:
오른쪽 하단의 Information 또는 View → Information 을 클릭합니다.
ZDF 파일에서 포인트 클라우드를 로드하거나 포인트 클라우드 또는 컬러 이미지를 캡처한 후에만 사용할 수 있습니다.
정보 패널의 상단에는 획득 시간, 캡처 시간, 포인트 클라우드/컬러 이미지 크기가 표시됩니다.
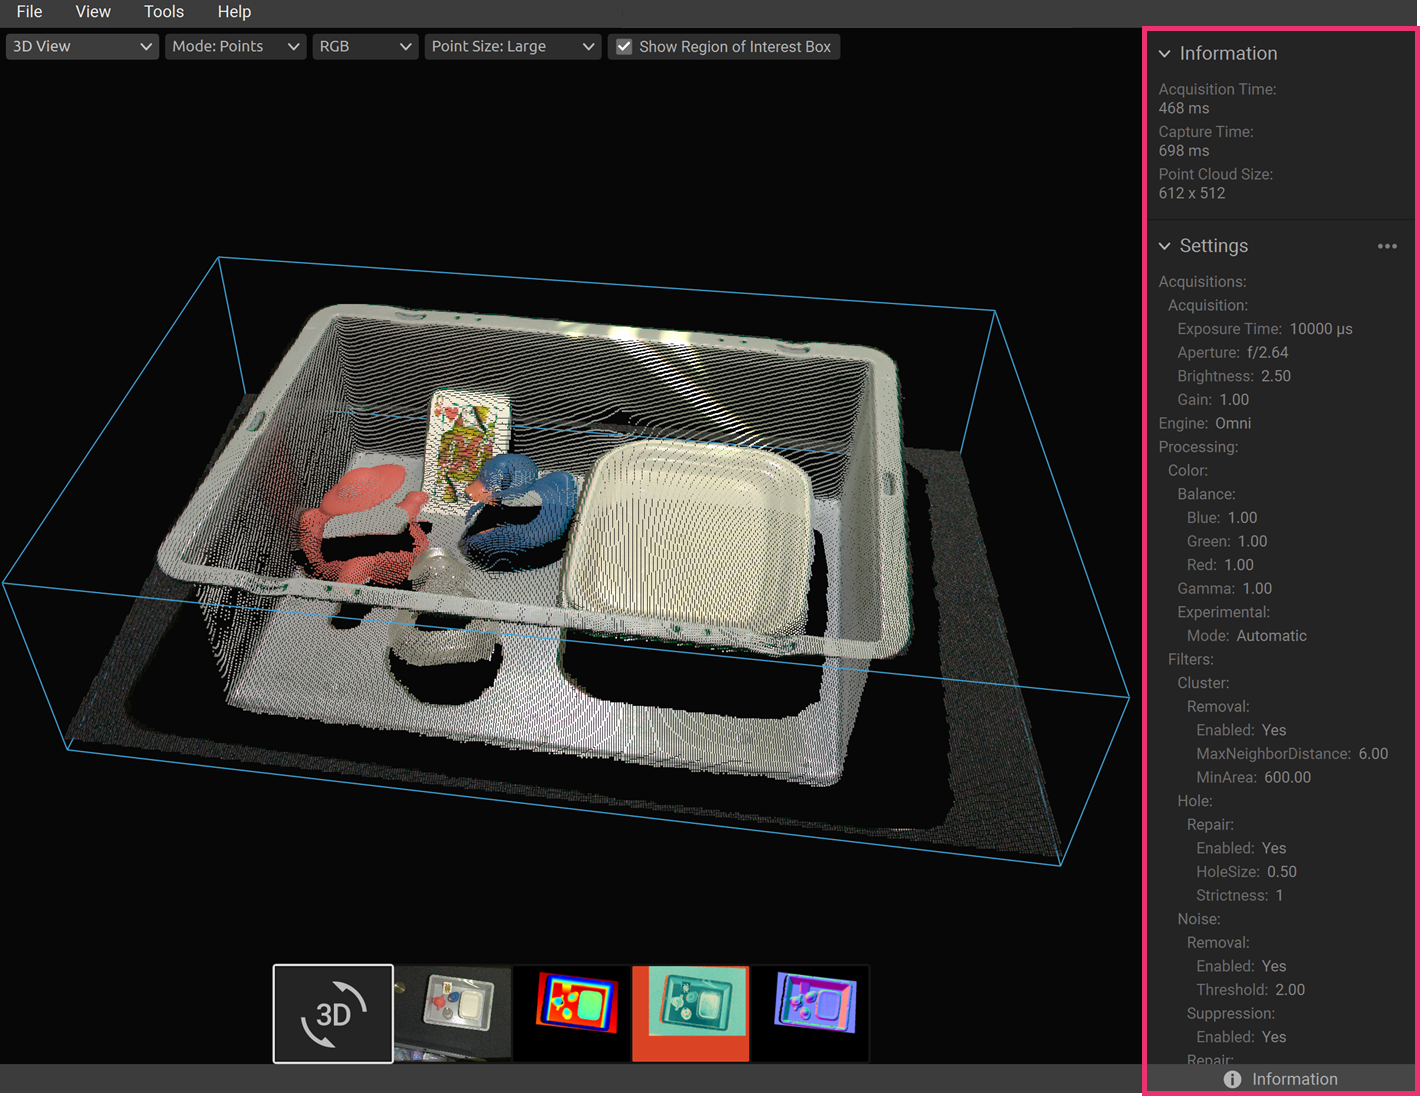
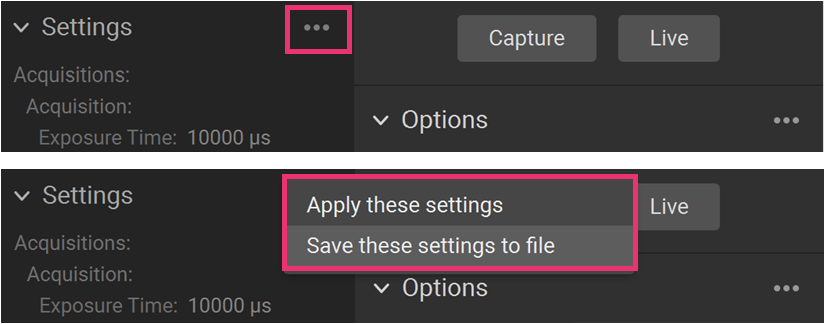
하단 부분에는 캡처에 사용된 설정이 표시됩니다. 이러한 설정을 파일에 저장하거나 다음 캡처에 사용하기 위해 적용할 수 있습니다.
3D Axis Indicator
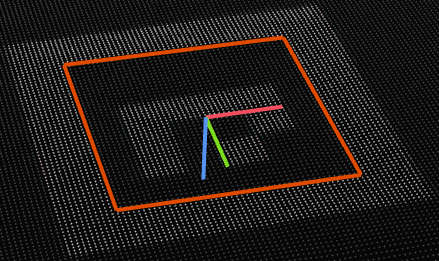
3D Axis Indicator가 포인트 클라우드 뷰의 왼쪽 하단 모서리에 표시됩니다. 이를 비활성화/활성화하려면 View → 3D Axis Indicator 를 클릭합니다.
Show 4x4 Aruco Markers
포인트 클라우드에서 4x4 Aruco 마커를 강조 표시하려면 View → Show 4x4 Aruco Markers 를 클릭합니다.
Show barcodes
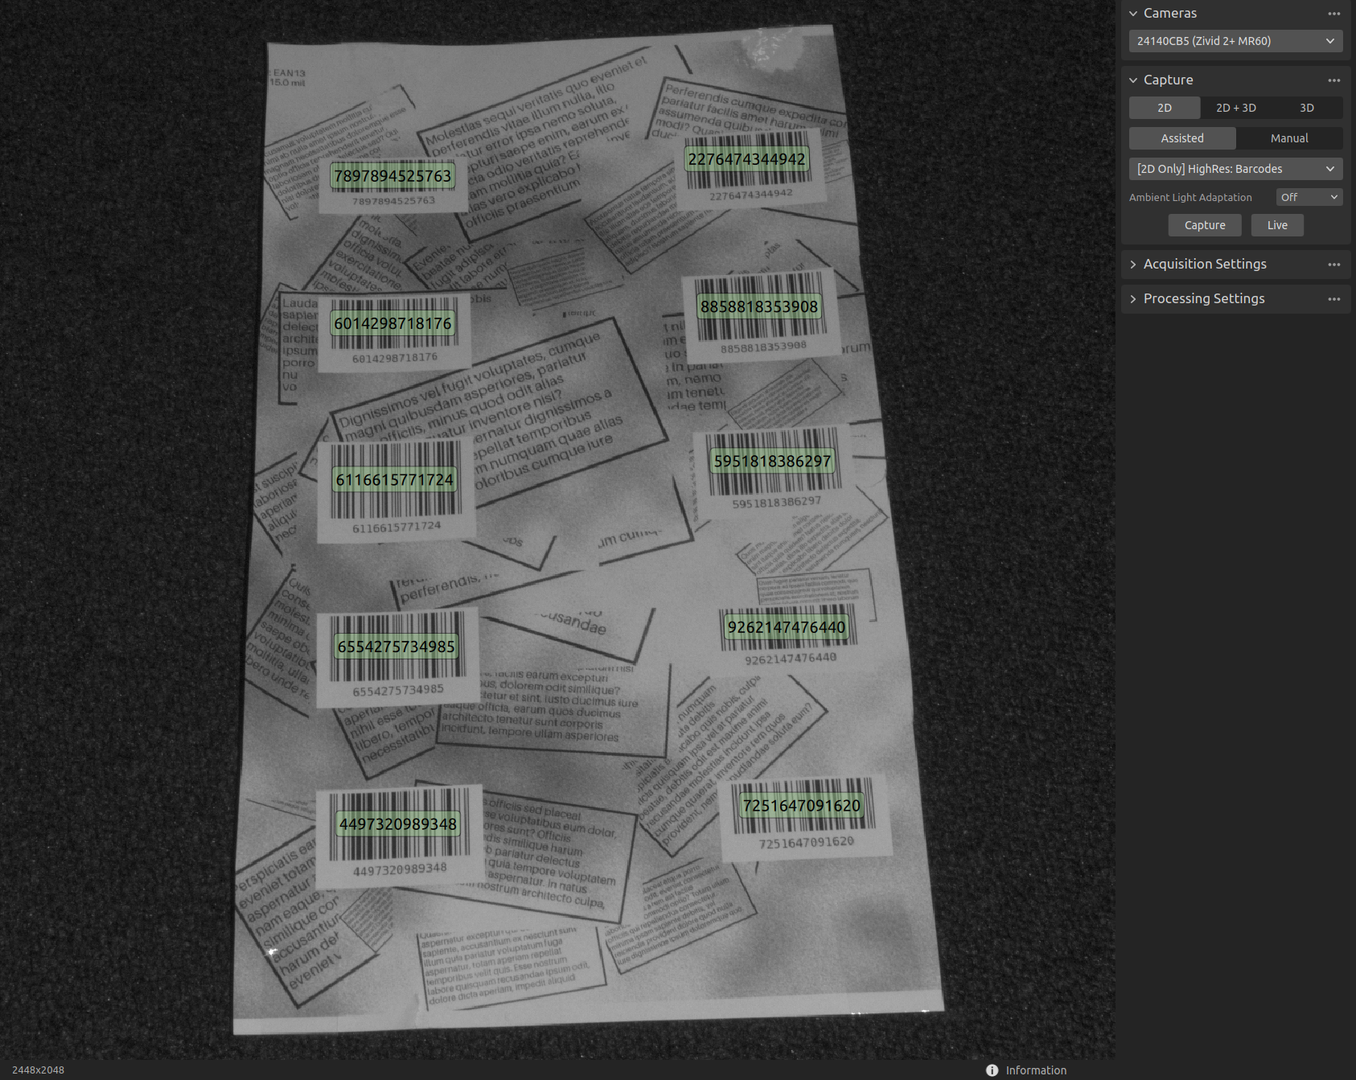
2D 이미지에서 감지된 바코드를 표시하려면 View → Show barcodes 를 클릭합니다.
Configure barcodes to detect
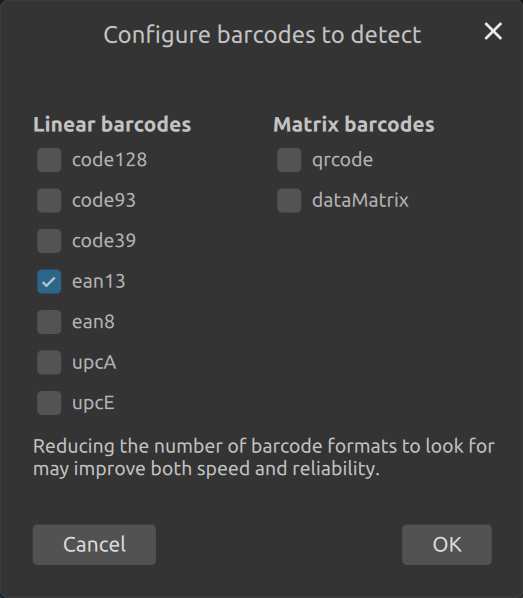
2D 이미지에서 감지할 바코드를 구성하려면 View → Configure barcodes to detect 를 클릭합니다.
Reset 3D View When Opening Files
파일을 열 때마다 3D 보기를 기본 보기로 재설정할지 여부를 제어하려면 View → Reset 3D View When Opening Files 를 클릭합니다.
Reset View
포인트 클라우드, 컬러 이미지 및 깊이 이미지 보기를 기본 보기로 재설정하려면 View → Reset View 를 클릭하거나 Backspace 를 누릅니다.
Reset UI Layout
Zivid Studio 창을 기본 레이아웃으로 복원하려면 View → Reset UI Layout 을 클릭합니다.
Full Screen Mode
전체 화면 모드와 일반 화면 모드 사이를 전환하려면 View → Enter Full Screen Mode / Exit Full Screen Mode 를 클릭하거나 F11 을 누릅니다.
Cameras
All Cameras
카메라 메뉴를 열려면:
Cameras → All Cameras 를 클릭합니다.
검색된 모든 카메라와 해당 일련번호, 모델, IP 주소 및 상태가 나열됩니다.
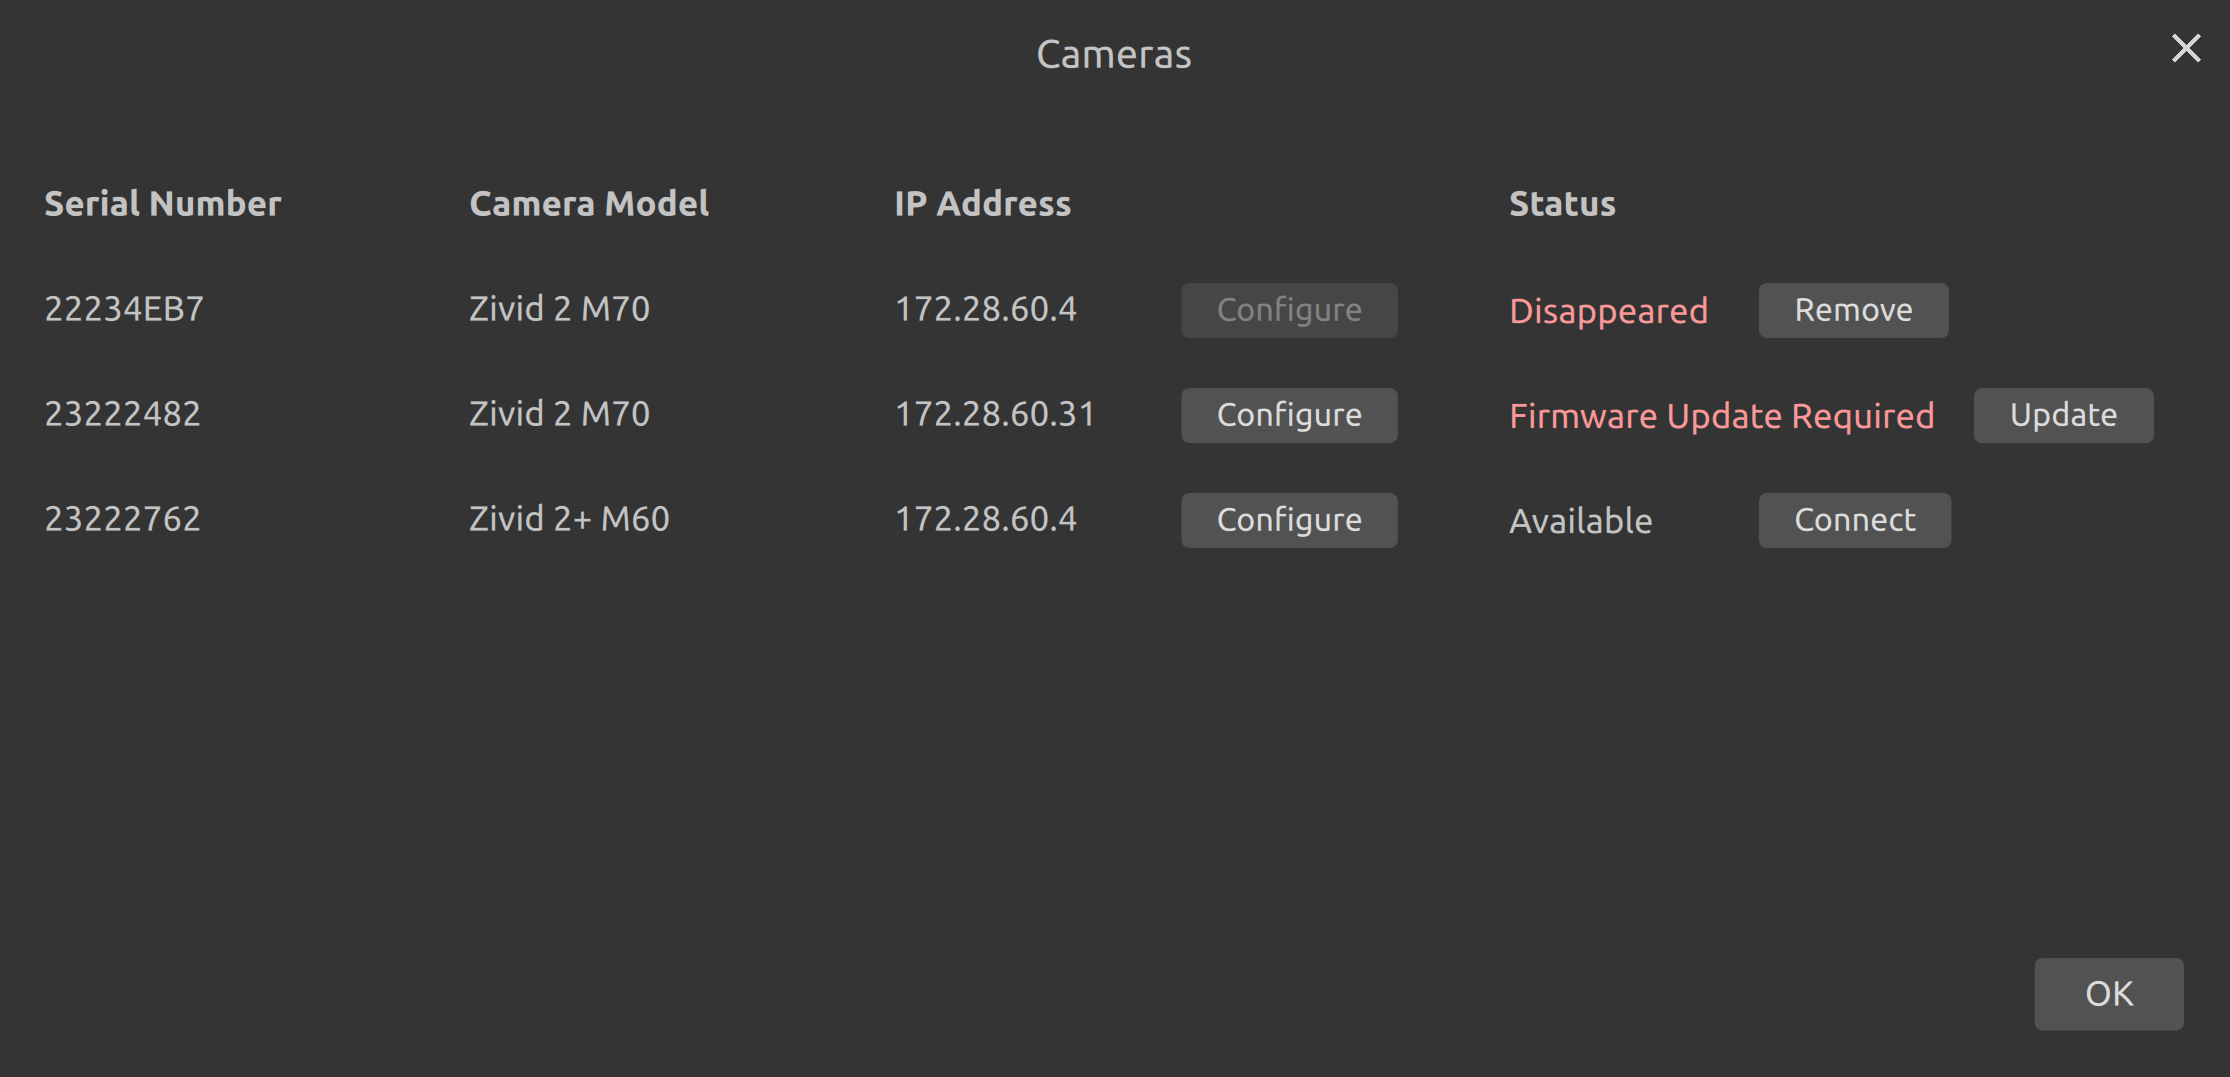
상태 필드에서는 다음 작업을 허용합니다.
Connect 는 카메라가 사용 가능한 경우 카메라에 연결합니다.
Disconnect 는 카메라가 연결되어 있는 경우 연결을 해제합니다.
Update 는 카메라를 사용할 수 있지만 펌웨어 업데이트가 필요한 경우 카메라의 펌웨어를 업데이트합니다.
Remove 는 더 이상 찾을 수 없는 카메라를 목록에서 제거합니다.
Configure 를 클릭하여 검색된 카메라의 네트워크 구성을 변경할 수 있습니다. 그러면 카메라 네트워크 구성이 열립니다.
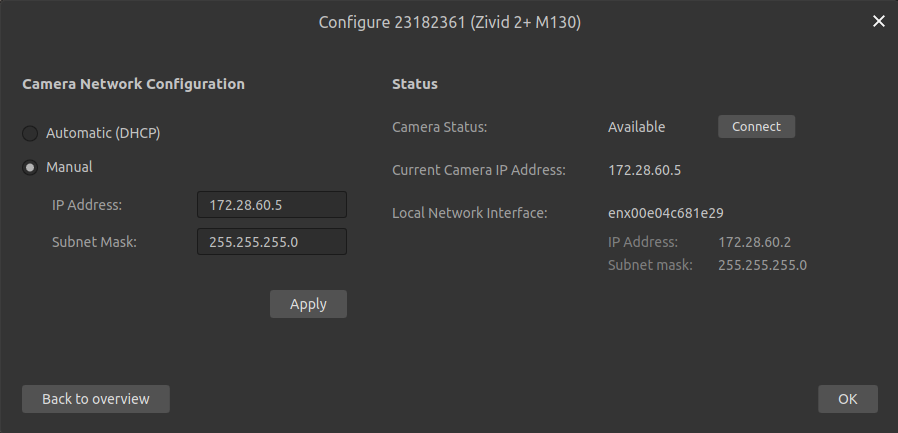
여기서 카메라가 DHCP 또는 특정 고정 IP 주소를 사용하도록 설정하고, Apply 를 클릭하여 카메라에 구성을 적용할 수 있습니다. 네트워크 구성을 적용한 후 카메라 상태가 변경될 수 있습니다.
Health Check
Health Check는 연결된 카메라의 상태를 보고하며, 여러 개별 점검 항목(온도, 팬, 메모리, 전송 속도 등)을 종합하여 전체 상태로 나타냅니다. 이를 통해 카메라가 지정된 범위 내에서 작동하고 있는지 빠르게 확인할 수 있습니다.
Health Check를 실행하려면 Cameras 메뉴(Cameras → All Cameras)를 열고 연결된 카메라 행에서 Check 를 클릭합니다. Check 버튼은 카메라가 연결되면 활성화됩니다.
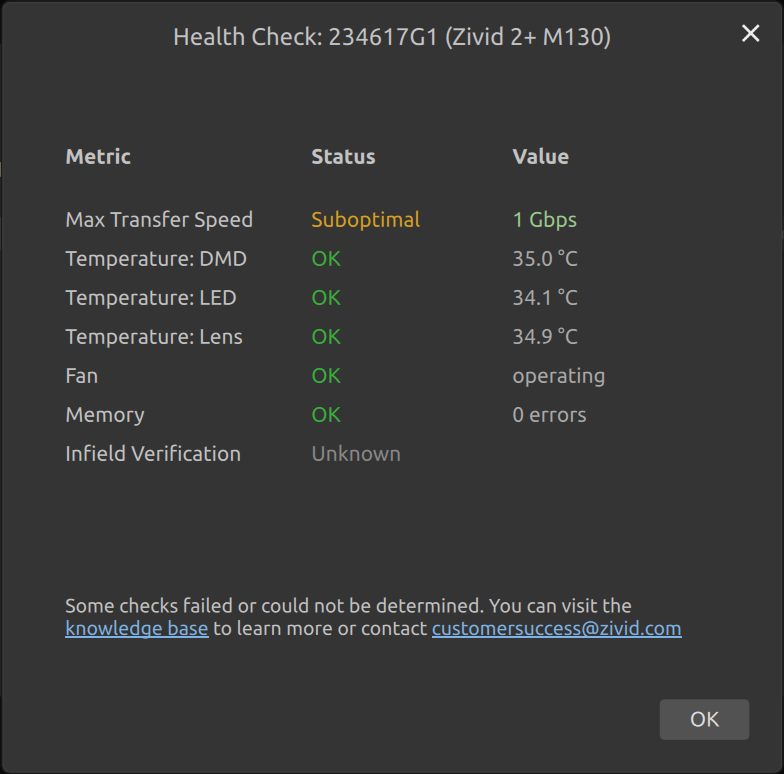
동일한 Health Check 상태를 프로그래밍 방식으로 읽으려면 Camera Health Check 를 참조하세요.
Tools
Infield Correction
Infield Correction 도구를 열려면:
Tools → Infield Correction 을 클릭합니다.
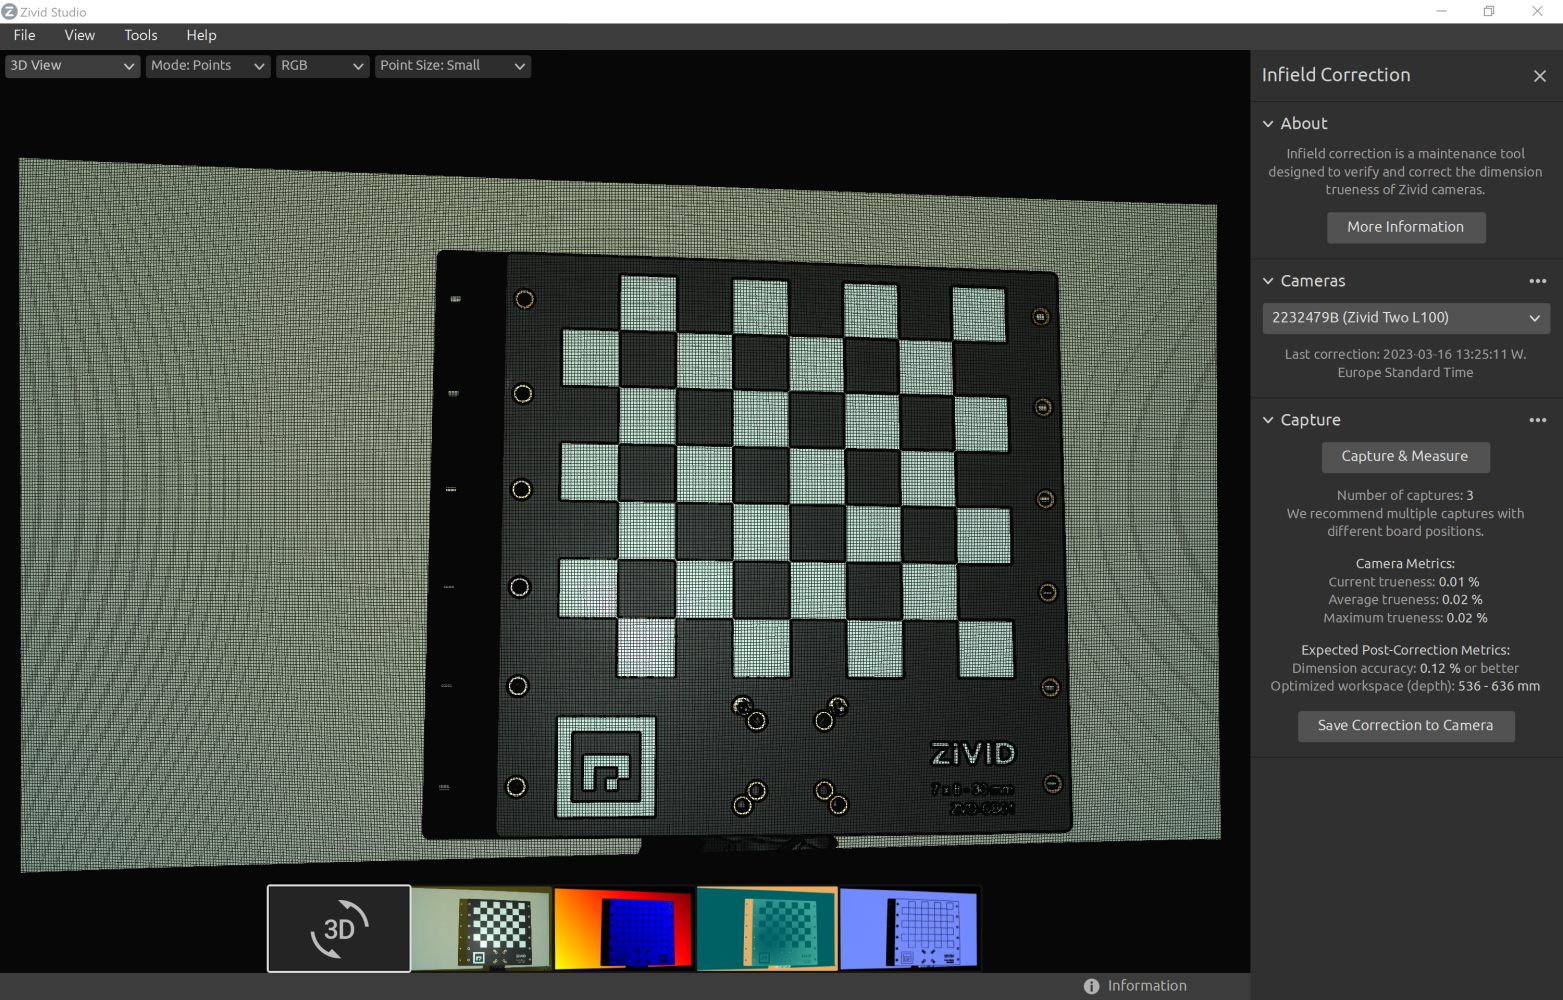
Infield Correction functionality overview
Last correction Infield Correction이 카메라에 기록된 마지막 날짜와 시간을 보여줍니다.
Capture & Measure 는 Zivid 캘리브레이션 보드가 배치된 포인트 클라우드의 Local Dimension trueness 오류를 결정하기 위해 캡처합니다.
Current Camera Metrics 는 Capture & Measure 로 촬영한 마지막 캡처에 대한 Local Dimension trueness 오류와 모든 캡처의 평균 및 최대값을 보여줍니다.
Current trueness 는 Capture & Measure 로 수행한 마지막 캡처에 대한 Local Dimension trueness 오류를 보여줍니다.
Average trueness 는 지금까지 Capture & Measure 로 수행된 모든 캡처에 대한 Local Dimension Trueness 오류의 평균을 보여줍니다.
Maximum trueness 는 지금까지 Capture & Measure 로 수행된 모든 캡처에 대한 Local Dimension Trueness 오류의 최대값을 보여줍니다.
Expected Post-Correction Metrics 는 이미지가 캡처된 작동 거리에 대한 1σ 통계적 불확실성 내에서 추정된 보정 후 오류를 보여줍니다.
Save Correction to Camera 는 Capture & Measure 로 찍은 Zivid 캘리브레이션 보드의 캡처에서 결정된 포인트 클라우드의 치수 진실도를 개선하기 위한 매개변수를 카메라에 기록합니다.
Reset Camera Correction 은 이전 올바른 인스턴스에 적용된 모든 Infield Correction을 제거합니다. 새로운 Infield Correction을 하기 전에 재설정을 할 필요는 없습니다.
Infield Correction 에 대해 자세히 알아보세요.
Help
View Help Online
브라우저에서 Zivid Knowledge Base를 열려면 Help → View Help Online 을 클릭합니다.
About Zivid Studio
Zivid, 타사 소프트웨어 라이선스 및 시스템 정보에 대한 자세한 내용을 보려면 Help → About Zivid Studio 를 클릭합니다.