Build a C# “Zivid Hello World” Application in Visual Studio on Windows
이 튜토리얼에서는 Visual Studio 2022에서 Zivid를 사용하여 C# 애플리케이션을 만들고 개발하는 방법을 보여줍니다. 다른 버전의 Visual Studio에서는 단계가 약간 다를 수 있습니다.
Requirements
참고
Zivid는 .NET framework 버전 4.5.2를 사용합니다. 자세한 내용은 .NET framework version 을 참조하세요.
Instructions
Create a new project
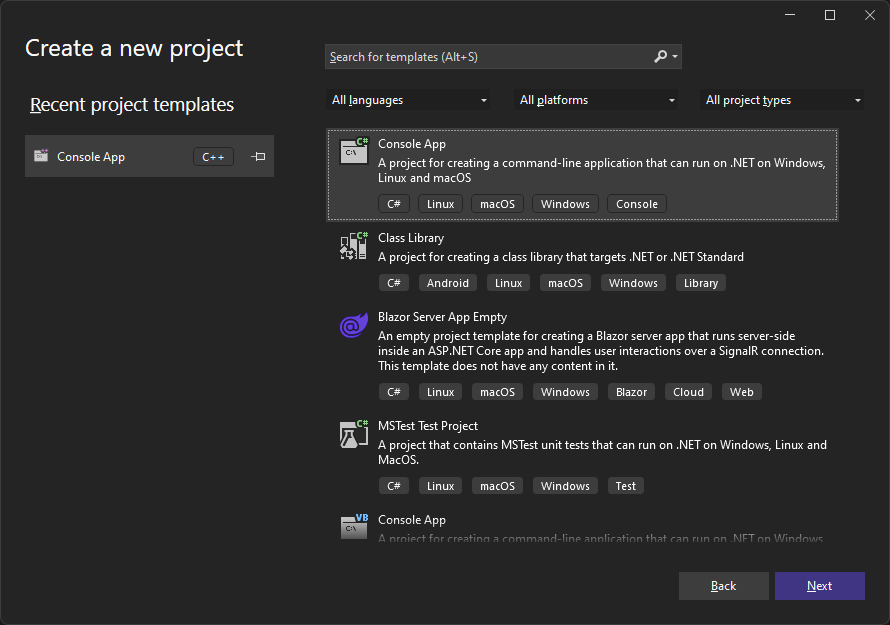
Visual Studio를 실행한 다음 Create new project 클릭하거나 File → New → Project… 클릭합니다. Visual C#용 콘솔 앱을 선택합니다.
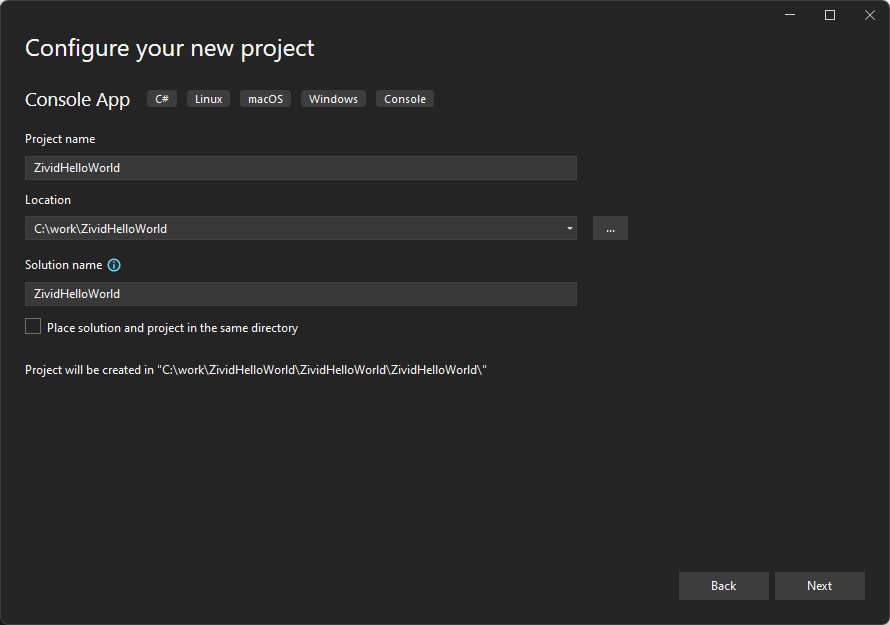
그런 다음 프로젝트 이름, 위치, .NET 버전을 추가합니다. 이 튜토리얼에서는 다음 파일 이름과 위치를 사용합니다.
Location |
|
C# file name |
|
.NET version |
|
Add the main C# code
ZividHelloWorld.cs 의 코드를 다음 코드 조각으로 바꾸세요.
using System;

namespace ZividHelloWorld
{
    class ZividHelloWorld
    {
        static int Main()
        {
            try
            {
                var zivid = new Zivid.NET.Application();
                Console.WriteLine("Hello World!");
            }
            catch (Exception ex)
            {
                Console.WriteLine("Error: " + ex.Message);
                return 1;
            }
            return 0;
        }
    }
}
Add reference to Zivid .NET API
We must add a reference to the Zivid .NET API to run the code sample.
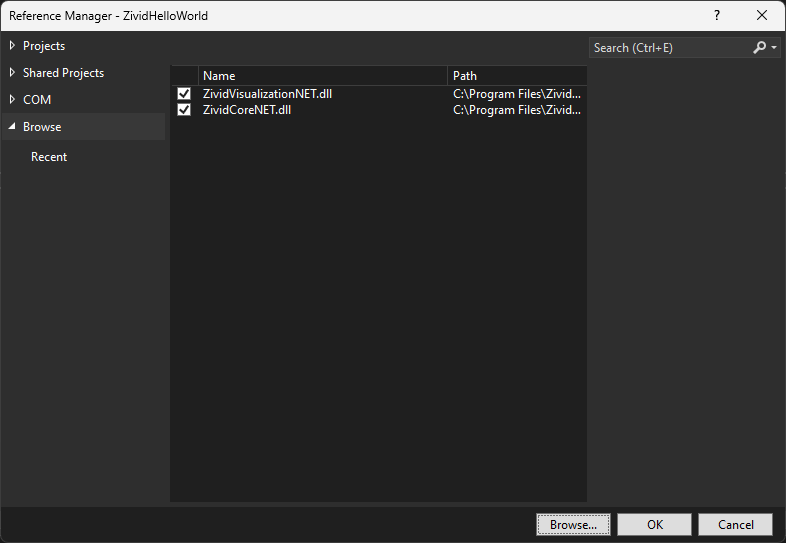
Right-click on your project in Solution Explorer, then click Add → Project Reference… → Browse.
Navigate to C:\Program Files\Zivid\bin and add ZividCoreNET.dll and ZividVisualizationNET.dll.
Select the correct platform target
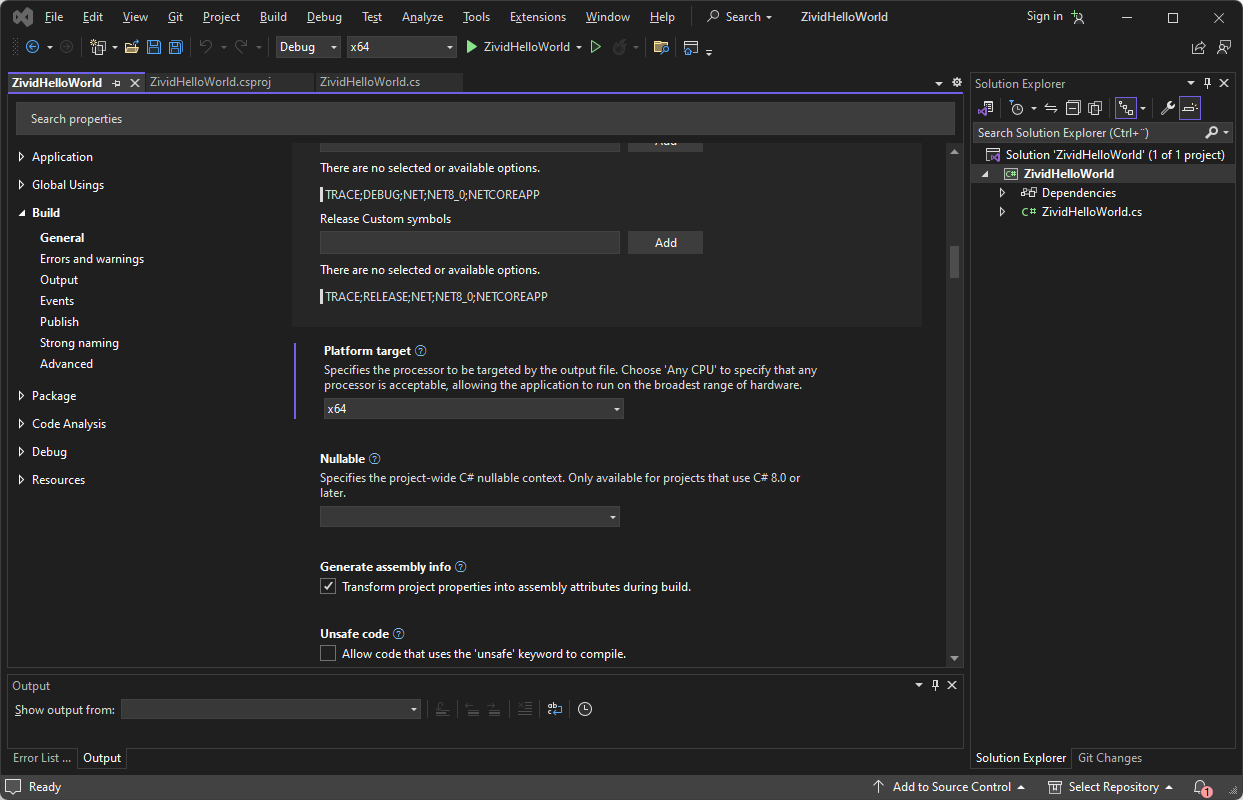
프로젝트를 다시 마우스 오른쪽 버튼으로 클릭한 다음, Properties 클릭합니다. Build → General 에서 Platform target 를 x64 로 변경합니다.
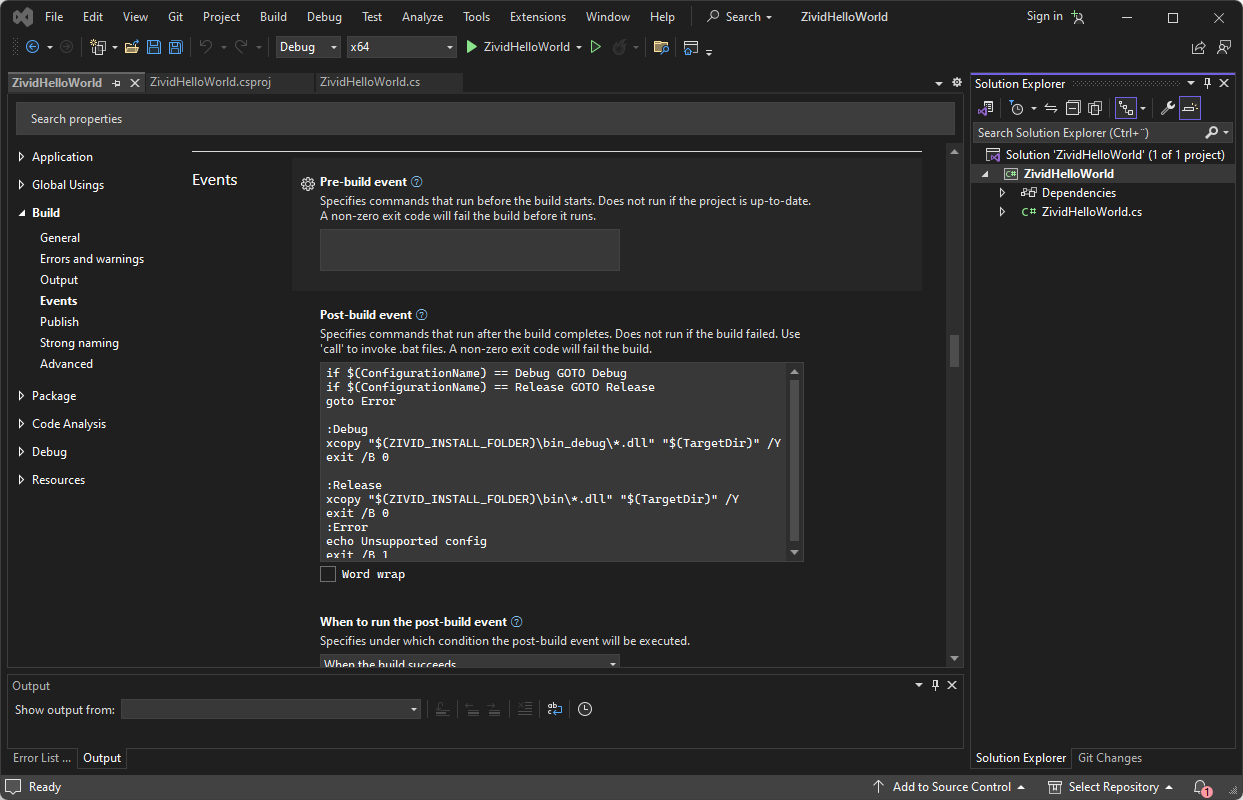
Add post-build event command line code
같은 Build 페이지에서 Events 아래에 다음 코드 블록을 Post-build event 이벤트 명령줄에 추가합니다.
if $(ConfigurationName) == Debug GOTO Debug
if $(ConfigurationName) == Release GOTO Release
goto Error

:Debug
xcopy "$(ZIVID_INSTALL_FOLDER)\bin_debug\*.dll" "$(TargetDir)" /Y
exit /B 0

:Release
xcopy "$(ZIVID_INSTALL_FOLDER)\bin\*.dll" "$(TargetDir)" /Y
exit /B 0
:Error
echo Unsupported config
exit /B 1
프로그램을 실행하세요
이제 모든 설정과 구성이 완료되었습니다. F5 키를 눌러 프로그램을 실행하세요.

Zivid 및 C#에서 개발을 계속하려면 다음 페이지의 Zivid .NET API reference 및 Build C# Samples using Visual Studio 튜토리얼을 확인하십시오.
Version History
SDK |
Changes |
|---|---|
2.12.0 |
Visual Studio 2017에 대한 지원을 종료합니다. |