静态IP网络配置 - 相机

小心

网络配置的正确说明取决于您的SDK版本。在左上角的下拉菜单中选择您的SDK版本。

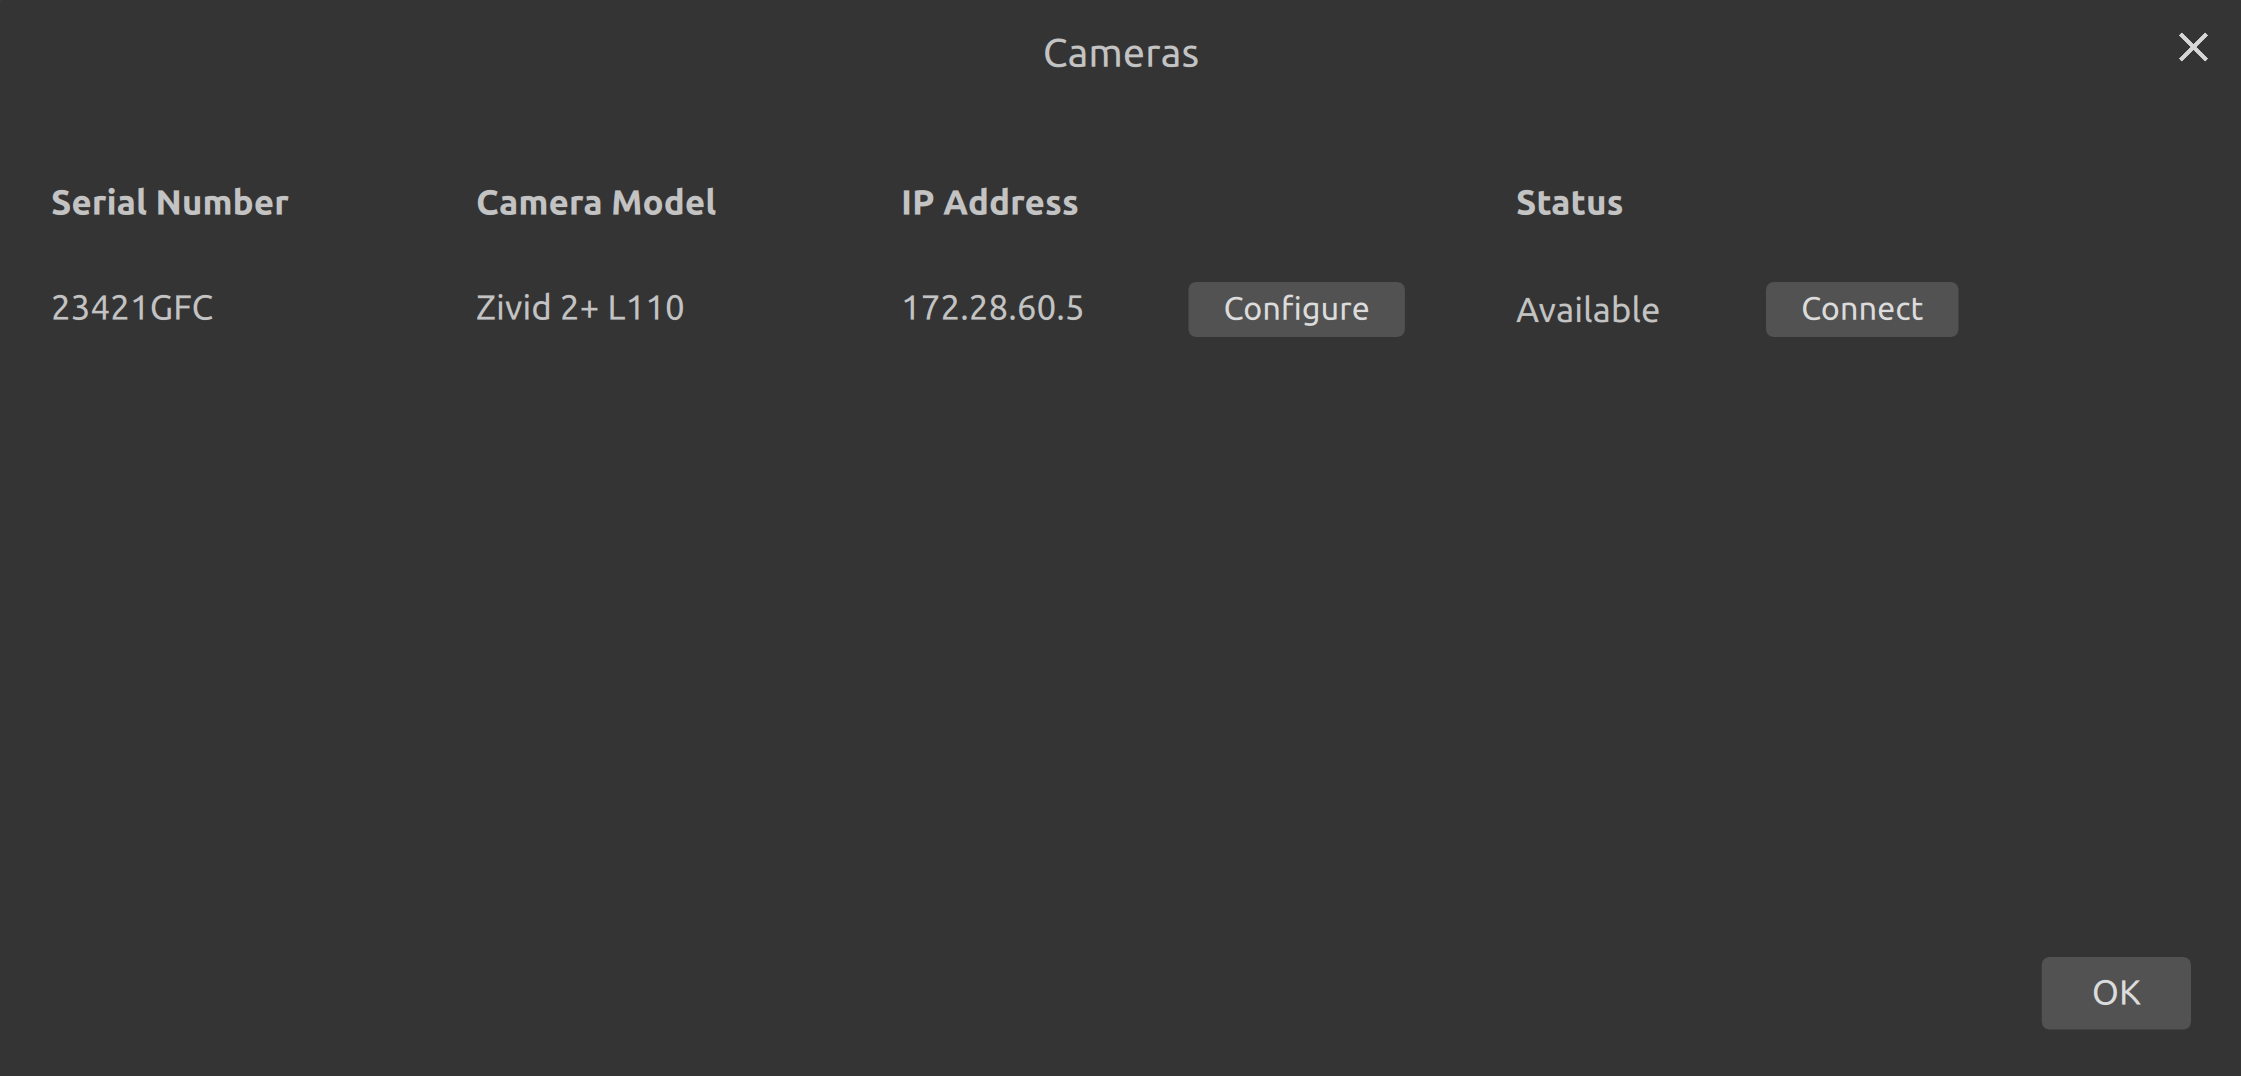
打开 Zivid Studio 并点击 CamerasAll Cameras 打开相机菜单。

../../../_images/studio-cameras-menu.png

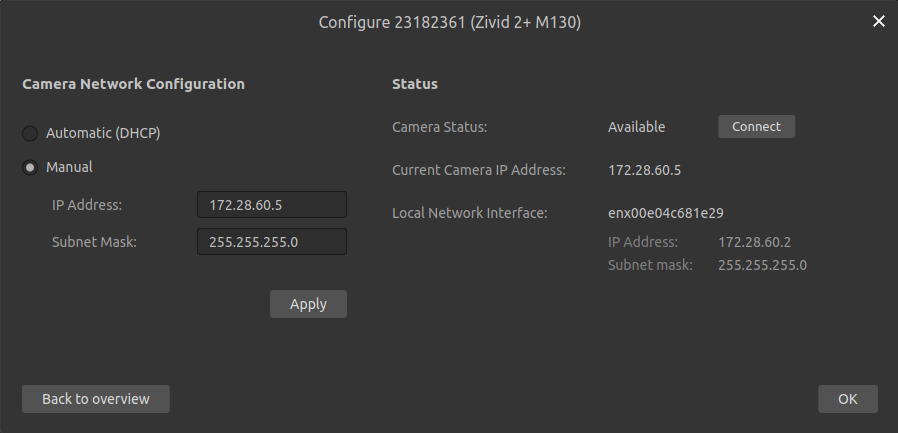
单击要配置的相机上的 Configure

../../../_images/studio-cameras-configure.png

选择手动网络配置模式,然后输入所需的 IP 地址和子网掩码。确保 IP 地址不会与网络上的其他任何地址冲突。单击 Apply 将配置应用于相机。
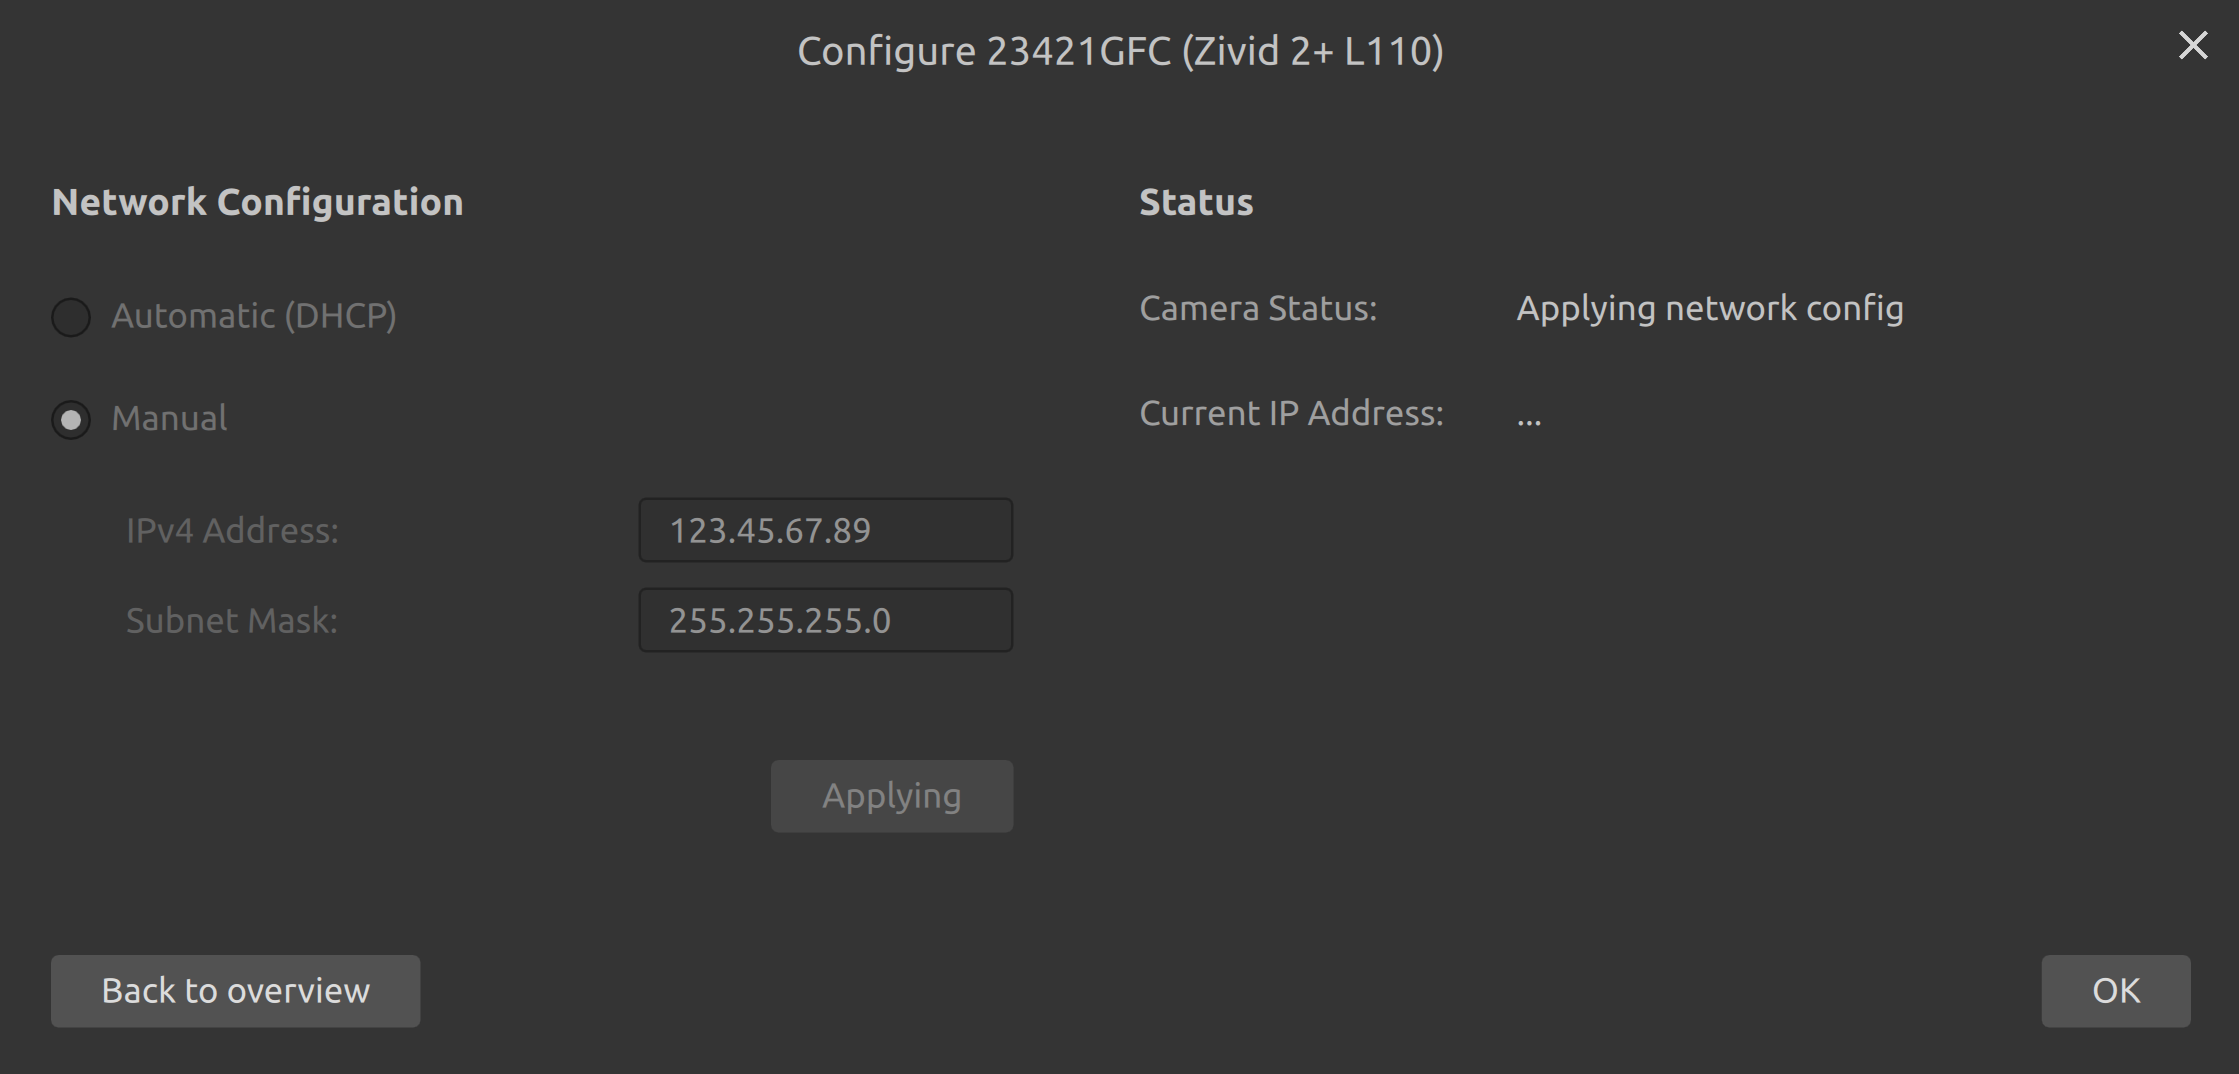
../../../_images/studio-cameras-configure-applying.png

CLI 工具 ZividNetworkCameraConfigurator 允许您一次更改一台相机的网络配置。该工具在 Windows 上与 Zivid SDK 一起安装,在 Ubuntu 上与 Zivid Tools 包一起安装。

  1. 打开终端/命令提示符。

  2. 连接相机。

  3. 通过运行验证是否找到了您的相机:

    ZividListCameras.exe
    
    ZividListCameras
    
  4. 静态 IP 模式下使用当前 IP <host> 设置相机,并使用特定 IP 地址 <ip> 、子网掩码 <mask> 和网关 gateway 。确保 IP 地址不会与网络上的任何其他内容冲突。

    ZividNetworkCameraConfigurator.exe set-config <host> --static --ip <ip> --subnet-mask <mask> --gateway <gateway>
    
    ZividNetworkCameraConfigurator set-config <host> --static --ip <ip> --subnet-mask <mask> --gateway <gateway>
    

    例如,将静态IP从 172.28.60.5 更改 为 172.28.60.6

    ZividNetworkCameraConfigurator.exe set-config 172.28.60.5 --static --ip 172.28.60.6 --subnet-mask 255.255.255.0 --gateway 172.28.60.1
    
    ZividNetworkCameraConfigurator set-config 172.28.60.5 --static --ip 172.28.60.6 --subnet-mask 255.255.255.0 --gateway 172.28.60.1
    

The SDK provides the functions to configure the camera network configuration.

  1. Connect to your camera.

    Go to source

    source

    auto camera = zivid.connectCamera();
    
    Go to source

    source

    var camera = zivid.ConnectCamera();
    
    Go to source

    source

    camera = app.connect_camera()
    

  2. Set the mode to manual.

    Go to source

    source

    auto mode = Zivid::NetworkConfiguration::IPV4::Mode::manual;
    
    Go to source

    source

    var mode = Zivid.NET.NetworkConfiguration.IPV4Group.ModeOption.Manual;
    
    Go to source

    source

    mode = zivid.NetworkConfiguration.IPV4.Mode.manual
    

  3. Define the IP address and the Subnet Mask.

    Go to source

    source

    address = Zivid::NetworkConfiguration::IPV4::Address{ inputAddress };
    subnetMask = Zivid::NetworkConfiguration::IPV4::SubnetMask{ inputSubnetMask };
    
    Go to source

    source

    address = inputAddress;
    subnetMask = inputSubnetMask;
    
    Go to source

    source

    address = input_address
    subnet_mask = input_subnet_mask
    

  4. Create a network configuration object.

    Go to source

    source

    Zivid::NetworkConfiguration newConfig(Zivid::NetworkConfiguration::IPV4(mode, address, subnetMask));
    
    Go to source

    source

    var newConfig = new Zivid.NET.NetworkConfiguration()
    {
        IPV4 = {
            Mode = mode,
            Address = address,
            SubnetMask = subnetMask,
        }
    };
    
    Go to source

    source

    new_config = zivid.NetworkConfiguration(
        ipv4=zivid.NetworkConfiguration.IPV4(
            mode=mode,
            address=address,
            subnet_mask=subnet_mask,
        )
    )
    

  5. Apply the new network configuration to the camera.

    Go to source

    source

    camera.applyNetworkConfiguration(newConfig);
    
    Go to source

    source

    camera.ApplyNetworkConfiguration(newConfig);
    
    Go to source

    source

    camera.apply_network_configuration(new_config)
    

如果您要配置多个相机的 IP 地址,请为每个相机重复上述步骤并使用不同的 IP 地址。对于每个相机,请记住使用与其接口网卡处于同一子网范围内的 IP 地址。

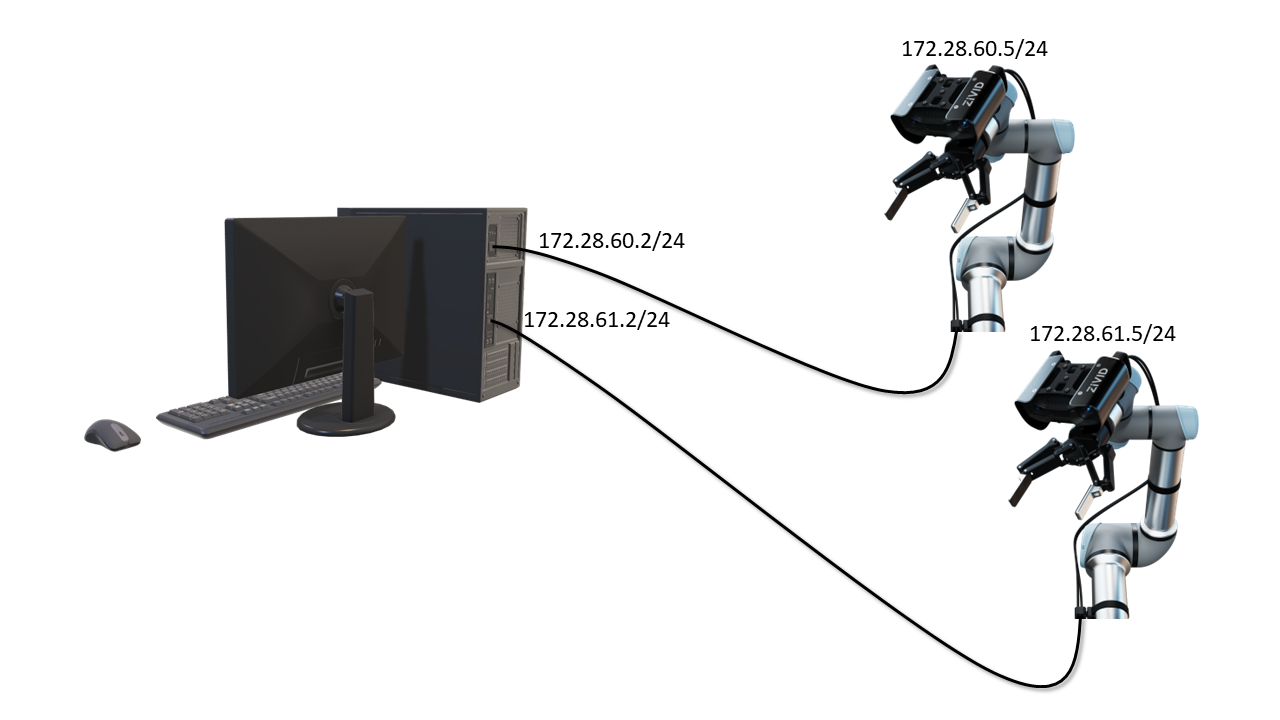
连接到两个独立网络接口卡的两个 Zivid 相机的网络配置。

对于使用单独网卡的两台相机,请使用诸如 172.28.60.5172.28.61.5 的IP。

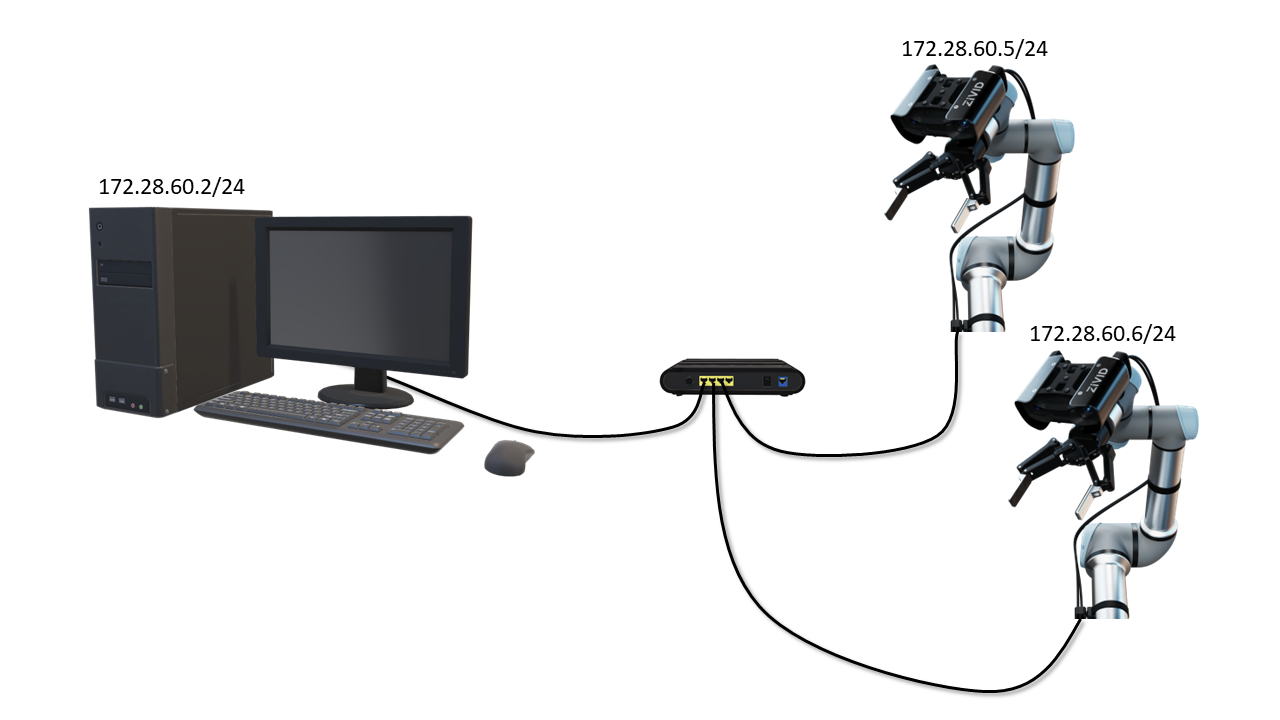
通过交换机连接到单个网络接口卡的两个 Zivid 相机的网络配置。

对于使用交换机连接到同一网卡的两台相机,请使用诸如 172.28.60.5172.28.60.6 的IP。

您现在已为相机配置了特定的静态 IP 地址。

如果相机 IP 与 PC 位于不同的子网范围,,则无法访问,并且您可能无法连接到它。如果是这样,请先转至 静态IP网络配置 - PC 来配置 PC 的 IP。否则,请直接转到 连接到相机