Isaac Sim
Zivid provides an official extension to import our cameras into NVIDIA Isaac Sim.
警告
This extension is experimental. API and GUI are subject to changes.
The extension can be found in the following GitHub repository: zivid-isaac-sim
To install the extension, follow the official Isaac Sim documentation on how to add and update extensions.
小技巧
Make sure the path inputted to the extension window points to the source directory of the zivid-isaac-sim repository.
Getting started with the Zivid camera
Once the extension is installed the next step is to create a Zivid camera.
Create a Zivid camera in your scene
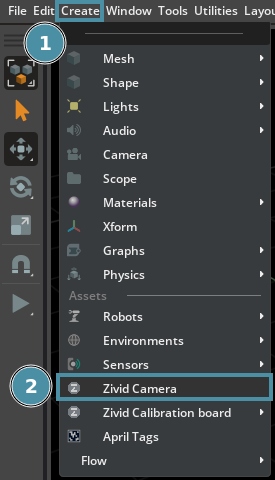
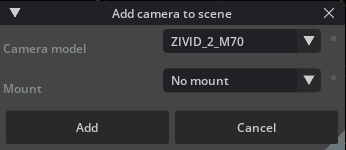
To create a Zivid camera, click Create followed by Zivid Camera. Choose the camera model you would like to load from the dropdown menu (and optional mount, more relevant for robot mounting). Click Add to add the camera to the scene.
Create a Zivid camera on a robot arm
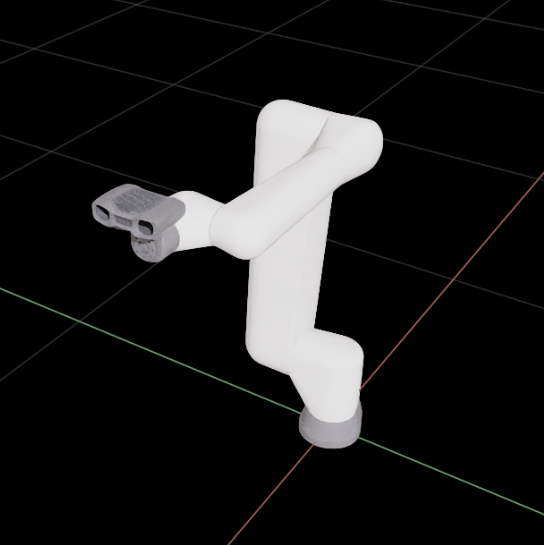
To add a Zivid camera to a robot, the robot must first be loaded into Isaac Sim. There are already many robots readily available in the Isaac Sim Assets tab at the bottom of the Isaac Sim window. Once a robot is loaded, right click the flange of the robot and choose Create followed by Zivid Camera. Choose the correct camera model and robot mount, then click Add to add the camera to the robot.

小技巧
You can find more information about the different mounts in our webshop.
Interacting with the Zivid Camera
Once a camera has been created there are several ways to interact with it.
Capturing with the Zivid camera
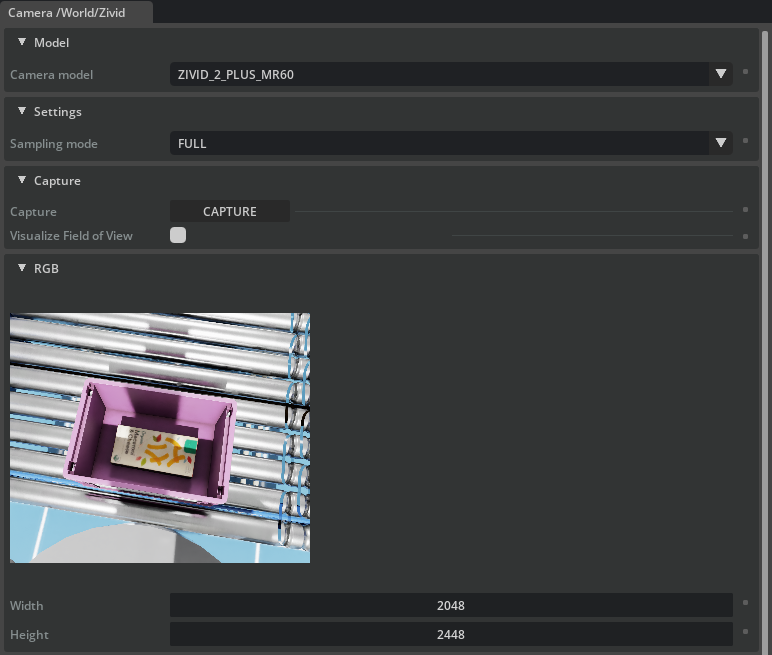
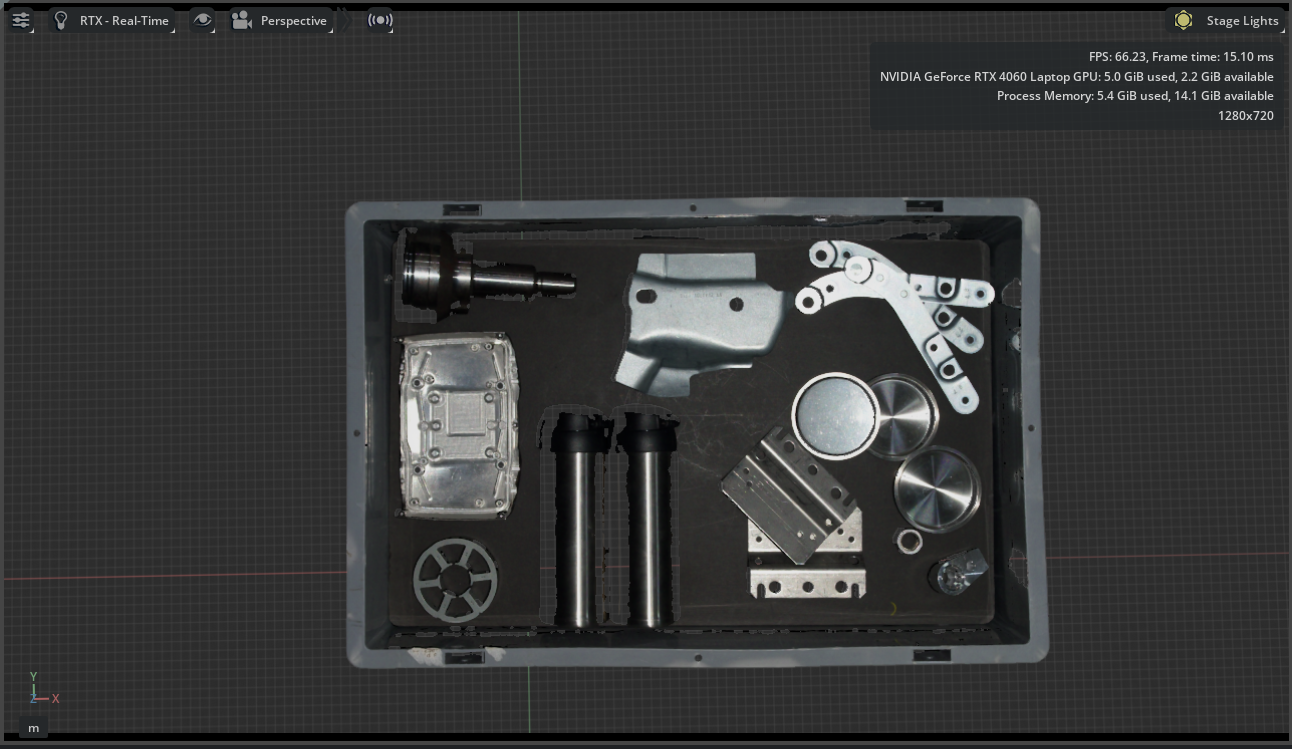
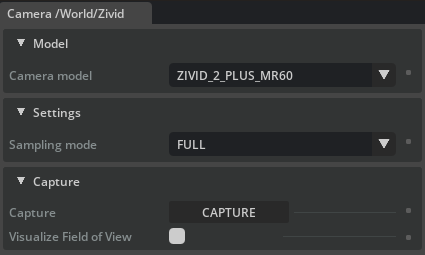
To capture a virtual image with the Zivid camera you need to be running a simulation by clicking the Play button in the leftmost column inside Isaac Sim. Then, click the Capture button inside the Zivid Camera window to capture a 2D image.

小技巧
You can also change the Sampling Mode of the camera to affect the resolution of the image and the point cloud.
Visualizing the point cloud
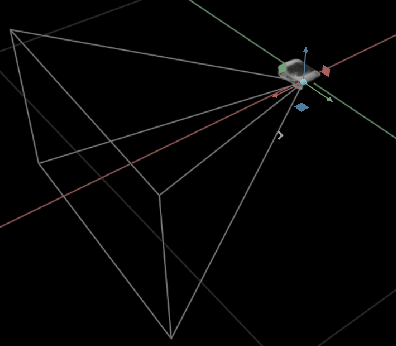
To visualize a point cloud, toggle the Visualize Field of View button inside the Zivid Camera window. As with the Capture feature, make sure to first press the Play button. The point cloud is visualized by red points in the scene.
Exploring the field-of-view
To explore the FOV of the camera and/or projector of the camera, find the Zivid object in the Stage pane and click the + icon to expand it. Then, clicking either of the camera_sensor or projector options will display their FOV.

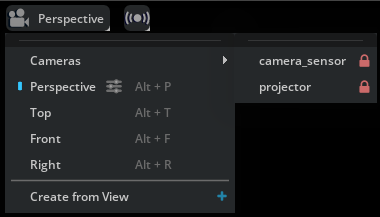
If you want to see the world from the camera's perspective, click the Perspective button at the top of the rendering window and change it to Cameras followed by either camera_sensor or projector.

Running demos
Inside the zivid-isaac-sim repository there is a directory called demos. This directory holds several Python scripts that showcase different ways to interact with the camera.
小技巧
Interacting with Isaac Sim through their Python API allows even more control and is encouraged by the Zivid developers!
To run a demo, make sure to use the built-in Isaac Sim Python environment. This environment can be launched by running the python.sh file in Ubuntu, or the python.bat file in Windows. The script is located inside your Isaac Sim directory, and accepts Python scripts as input arguments.
To run a demo, do the following:
cd /path/to/isaac-sim/ && ./python.sh /path/to/zivid-isaac-sim/demos/demo.py
cd path\to\isaac-sim
python.bat "path\to\zivid-isaac-sim\demos\demo.py"
More information about the Isaac Sim Python environment can be found in the official documentation.
Rendering a Zivid point cloud
You can also render point clouds captured by a Zivid camera directly inside your Isaac Sim environment.
The extension omni.kit.pointclouds is made to render point clouds stored in the E57 format inside Isaac Sim. Although not a requirement by the extension itself, you also need to have omni.flowusd installed. We recommend installing the omni.flowusd.bundle extension, which installs and activates the necessary flow extensions you need to render point clouds.
With the above extensions installed and enabled, the last thing we need to do is to find the point cloud that we want to import into Isaac Sim. The point cloud must be in the E57 file format, which you can get from exporting your Zivid point cloud in the PLY format and then converting it to E57 through e.g. CloudCompare.
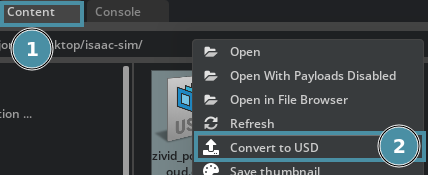
Once you have the E57 version of your point cloud find it in the Content tab of Isaac Sim where you can browse your computer. Then, right-click the file and choose the option Convert to USD.

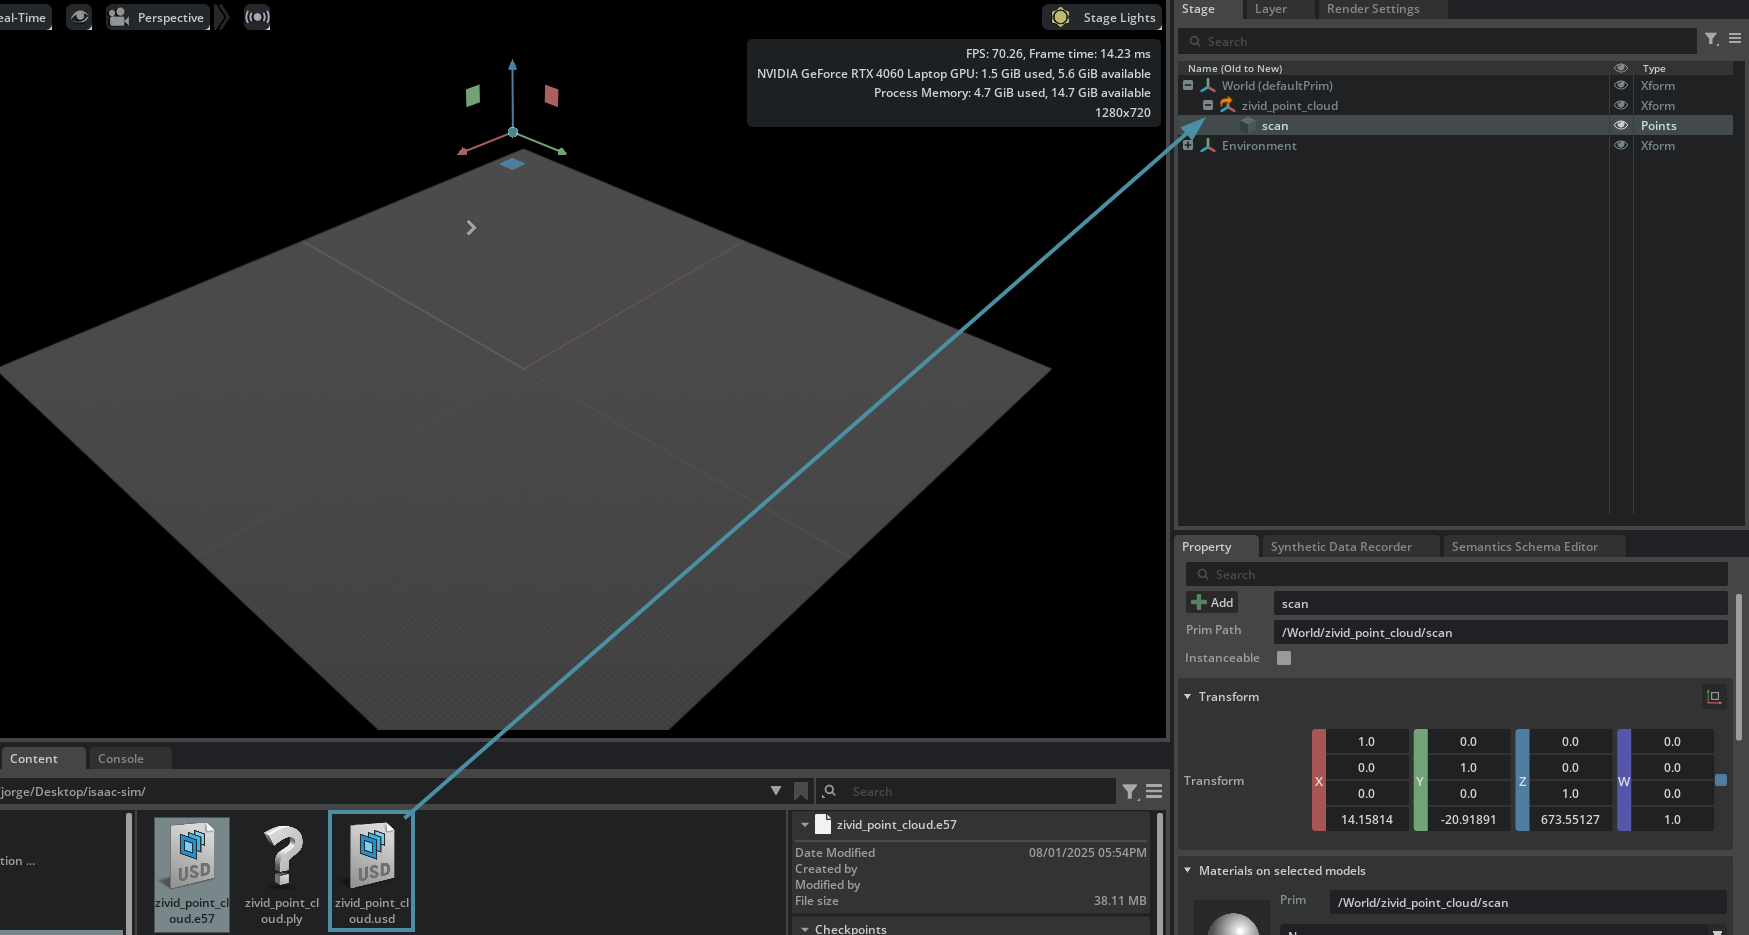
We will use the default conversion options and simply click Convert. This will create a usd file in the same directory as our E57 file, and automatically import it to our Isaac Sim environment. We find it loaded in our the Stage tab.
A new USDpoints prim object is now present in the Stage tab, make sure to choose this scan USDpoints object before proceeding by clicking it.
小技巧
If you are unable to see the origin of the USDpoints object, try zooming out.

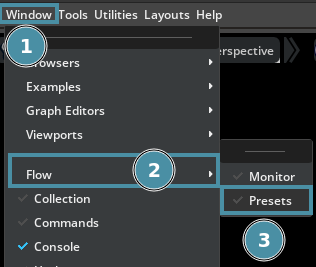
Now, click Window, Flow and then Presets to load a new tab at the bottom of your Isaac Sim window called Flow.

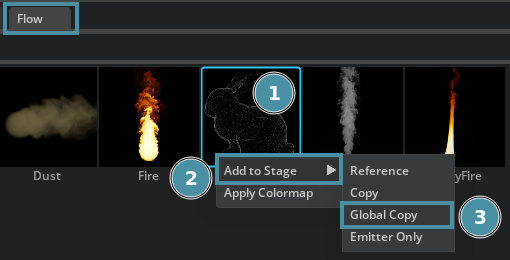
Inside this tab, right-click the PointCloud option and choose Add to Stage followed by Global Copy.

Your Zivid point cloud will now be rendered in the scene, but beware that you might need to reposition it to be able to see it properly.