Contrast Distortion Artifact
Problem
Distortions appear in the point cloud at object borders or between dark and bright regions.

Cause
Contrast distortion is an artifact in the point cloud that looks like wavy surfaces or ripples that do not exist in the actual scene. This effect occurs due to abrupt intensity changes in the 2D image, such as:
Black-to-white transitions (e.g., checkerboards).
Specular reflections on shiny surfaces (e.g., metallic cylinders).
These distortions appear as surface deformations in the point cloud. See the image above for an example.
Note
Contrast distortion only occurs perpendicular to the camera baseline.
Potential Solutions
There are two main strategies to deal with contrast distortion:
- Optimize camera setup
Maximize the camera’s dynamic range and strategically position the camera to minimize distortion.
- Adjust camera settings
Apply the Contrast Distortion Filter to correct or remove affected points and adjusting aperture.
Rotate and align objects in the scene
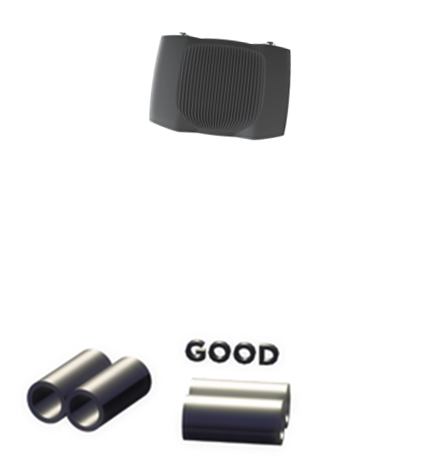
The first thing to remember is that this is an effect that occurs in the 3D sensor’s x-axis. The Contrast distortion effect can be greatly mitigated if your application allows for rotating troublesome regions in the camera’s y-axis to its x-axis. By rotating, for instance, a shiny cylinder 90°, the overexposed region along the cylinder follows the camera’s baseline, as illustrated in the figure below.
Match the background’s reflectivity to the specific object’s reflectivity
A good rule of thumb is to try to use similar brightness or color for the background of the scene as the objects that you’re imaging:
For a bright object, use a bright background (ideally white Lambertian).
For a dark object, use a dark background (e.g., black rubber as used by most conveyor belts).
For most colored, non-glossy objects, use a background of similar reflectivity (e.g., for bananas, use a grey or yellow background).
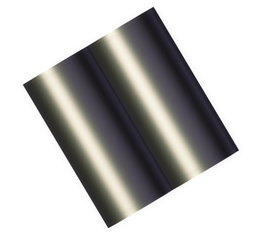
For shiny metallic objects, especially cylindrical, conical and spherical objects, use a dark absorptive background such as black rubber. This is because the target light is typically reflected away from the object near its visible edges, making them appear very dark (see image below). At the same time, light from surrounding regions may be reflected onto the cylinder edge.
Use Contrast Distortion filter
The filter corrects and/or removes these surface elevation artifacts caused by Contrast Distortion - defocusing and blur in high contrast regions. This results in a more realistic geometry of objects, specifically observable on planes and cylinders.
Example
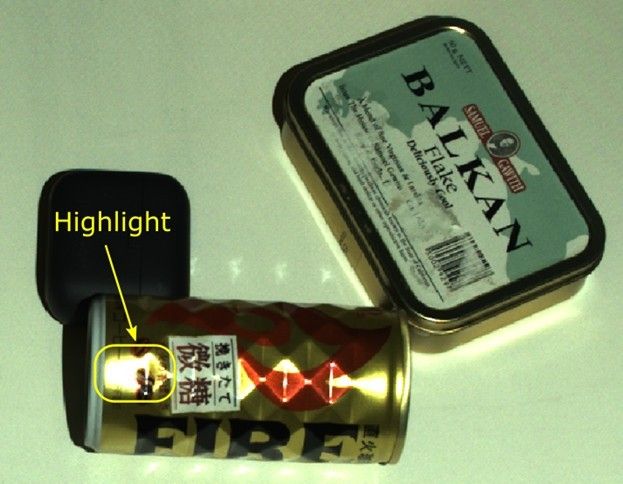
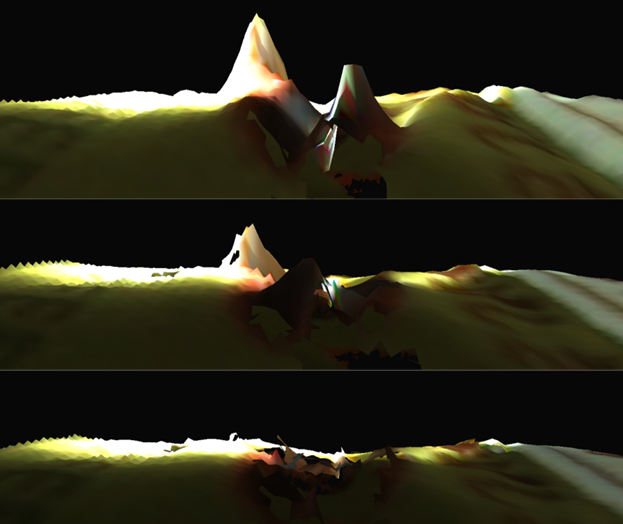
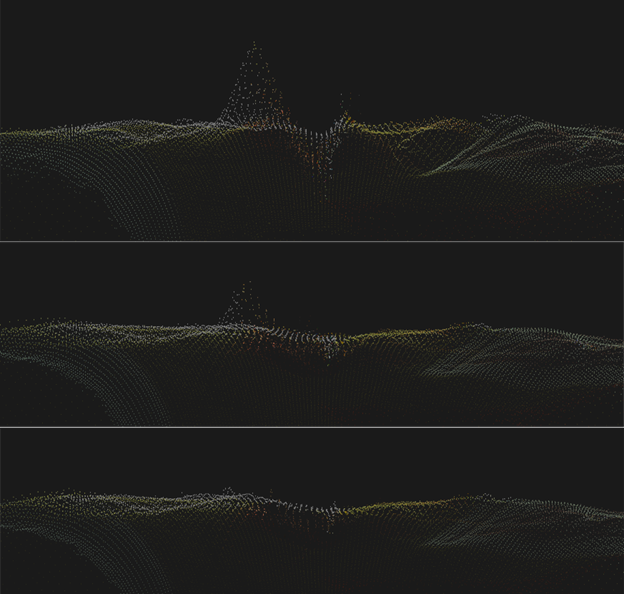
We will now demonstrate the method of dealing with highlights using the Contrast Distortion filter on the scene below.
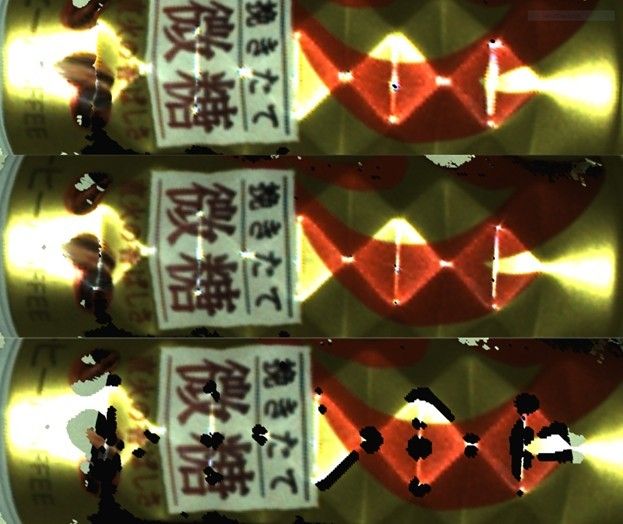
The topmost, of the three images below, represent the point cloud mesh without using the Contrast Distortion filter. The middle one uses the filter in correction mode only, and the bottom one uses it in removal and correction mode together. The correction alone reduces the size of the artifact. The removal feature of the filter removes the artifact completely, but it also removes some other points in the scene where there are strong intensity transitions in the image.
Adjust Aperture
Note
Zivid 3 does not have an adjustable aperture. The following information about aperture tuning applies only to Zivid 2 and Zivid 2+ cameras.
Tuning the Contrast Distortion filter is sometimes not sufficient to remove contrast distortion artifacts. The artifacts get worse with blurry color images. Therefore, it is important to ensure the color image is in focus by tuning the Aperture before tuning the filter.
We will demonstrate the process of removing contrast distortion artifacts by tuning the Aperture with an example.
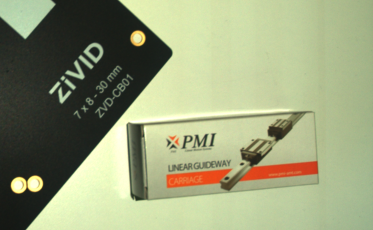
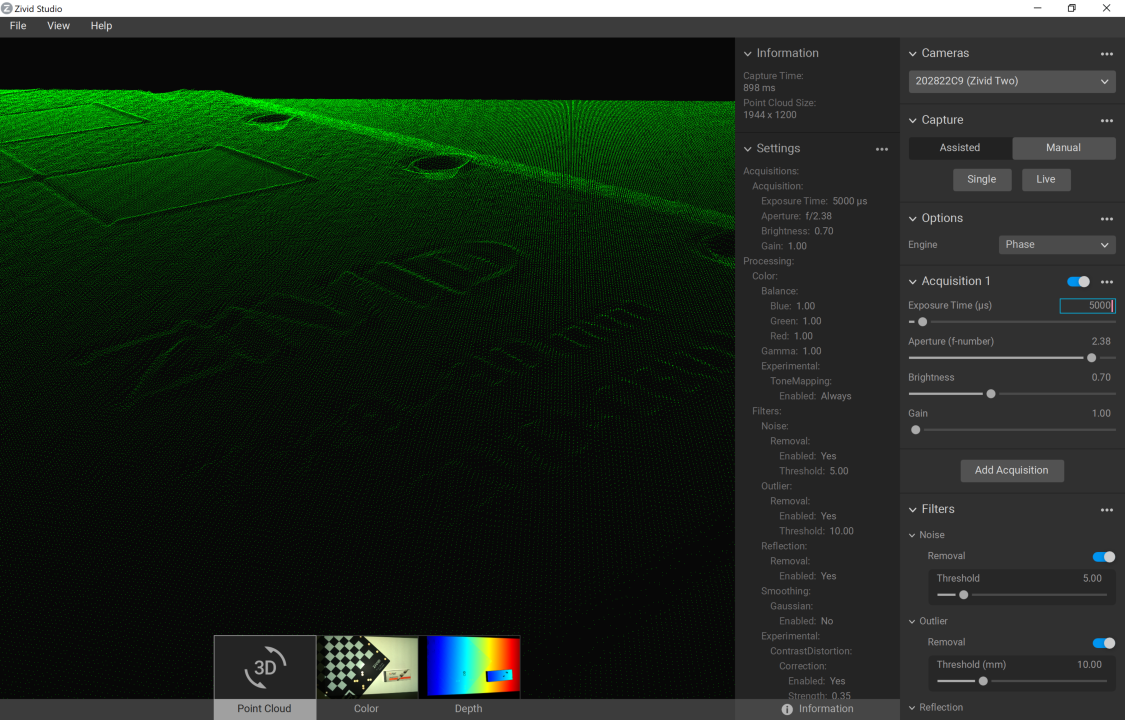
The figure below shows a color image out of focus and a resulting point cloud with visible contrast distortion artifacts. The color image is blurry because a low f-number (2.38) is used for the Aperture. The Contrast Distortion strength used is 0.35.
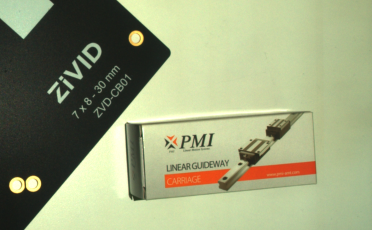
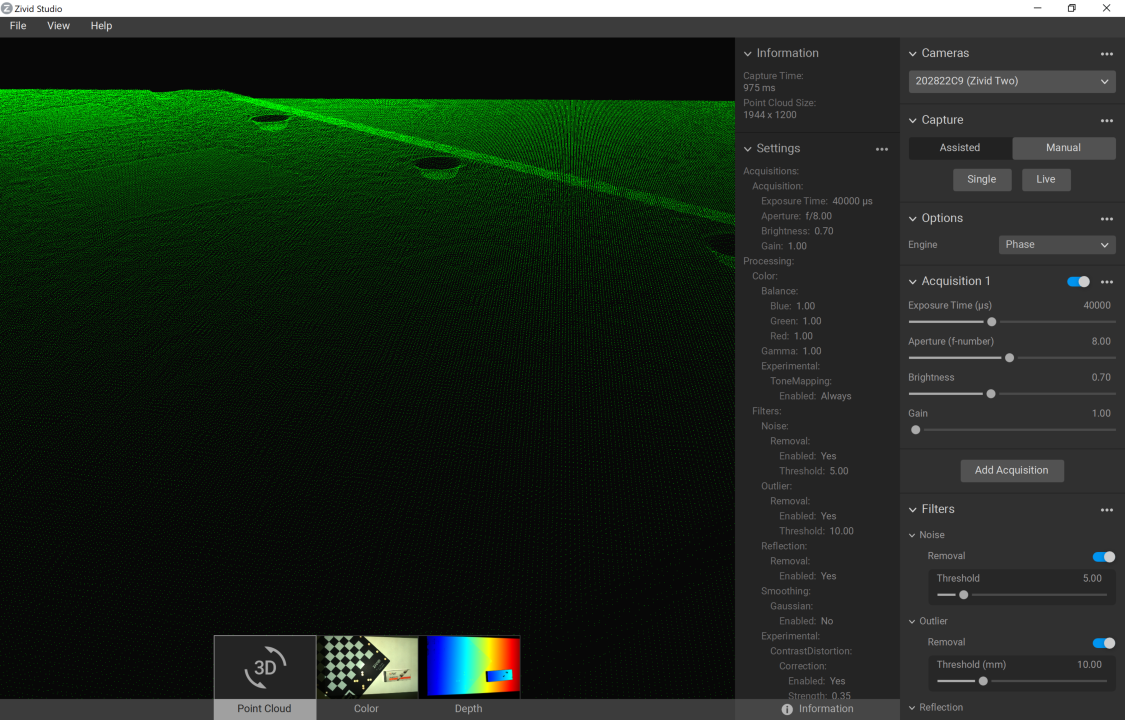
The Aperture is changed from 2.0 to 8.0 to remove the contrast distortion artifact, and this change is compensated with a longer Exposure Time. The result is a color image in focus and a point cloud without any contrast distortion artifacts, which can be seen in the figure below.
The point clouds used for this example are available for download for further inspection:
