Using Zivid Inside Protective Housing With Glass Window
Introduction
Zivid 3D 카메라는 IP65 등급 이상으로 먼지와 물에 손상 없이 견딜 수 있습니다. 그러나 카메라는 매우 가혹한 환경에서 사용할 수 있습니다. 예를 들어 다음 중 하나 이상에 노출될 수 있습니다.
용접 연기
페인트
과도한 열
기타 요소
그러면 자연스러운 질문이 생깁니다. 카메라를 일종의 보호 하우징 안에 넣어야 합니까?
팁
예상치 못한 사고로부터 보호하기 위해 Zivid 2+와 Zivid 2 카메라에 Protective Housing 을 제공합니다.
Zivid 카메라를 보호 상자에 장착하는 경우 고려해야 할 몇 가지 측면을 살펴보겠습니다. 광학 조건, 온도, 결로 현상, 일반적인 유지 관리 및 견고성과 관련된 고려 사항을 살펴보겠습니다.
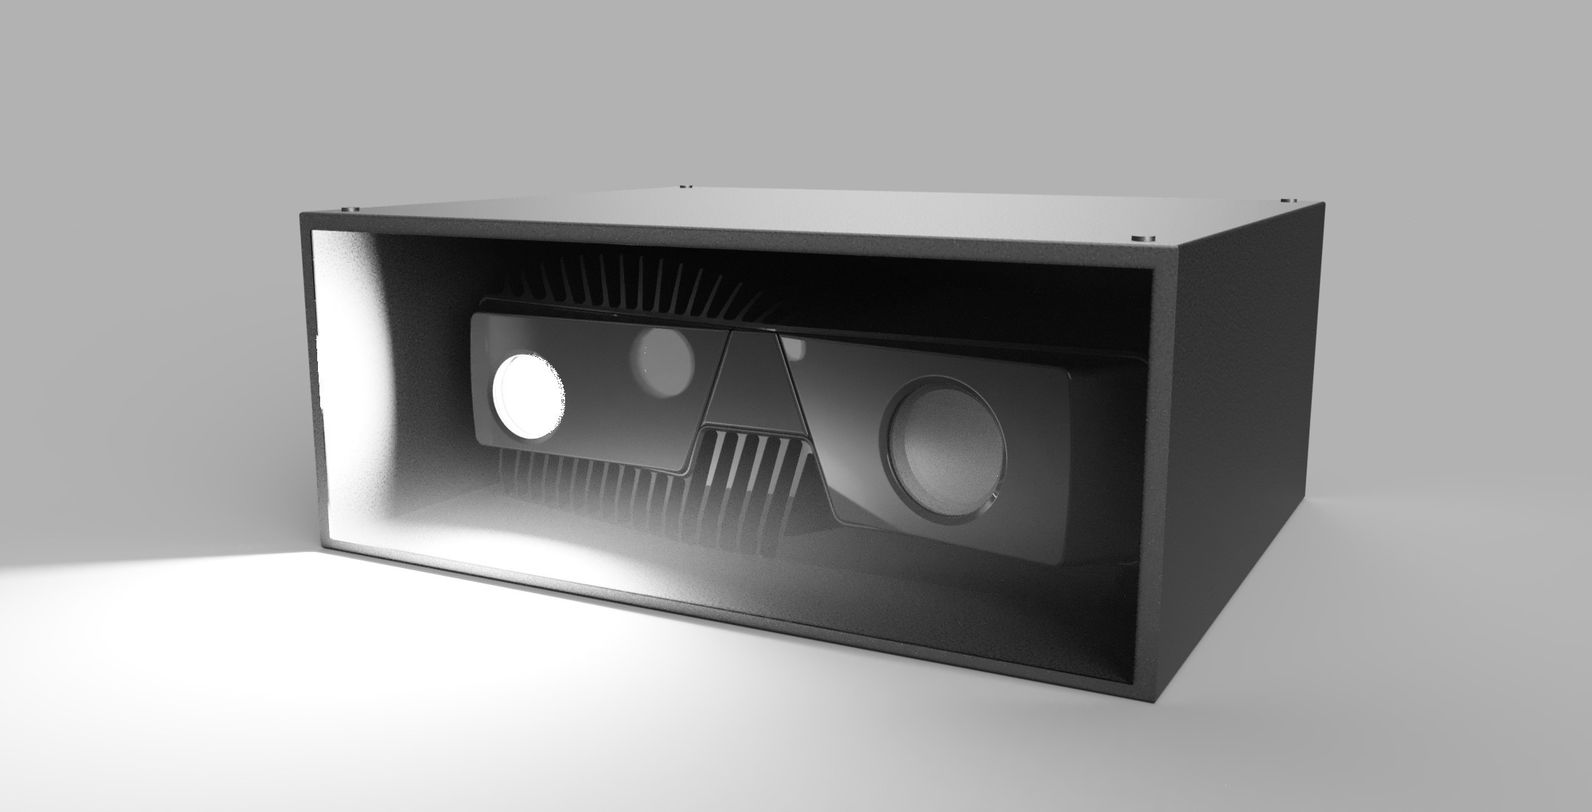
Designing a protective housing
아래에서는 카메라 하우징에 카메라가 투시할 수 있는 보호 유리가 포함되어 있다고 가정합니다. 일부 환경에서는 전면을 열어둘 수도 있습니다. 이 경우, 하우징 내부에 고압 공기를 주입하여 먼지나 기타 이물질이 구멍을 통해 유입되는 것을 방지할 수 있습니다. 우선, Zivid 3D 카메라용 기능성 보호 하우징을 제작한다고 가정하겠습니다. 이 하우징에는 다음과 같은 필수 구성 요소가 포함됩니다.
- Windows or looking glass
Zivid 카메라가 밖을 볼 수 있도록 합니다. 이 창의 크기가 작을수록 역광 반사가 더 잘 발생합니다. 카메라나 프로젝터의 시야에 그림자가 생기지 않기 때문입니다.
- Protective walls
예를 들어, 알루미늄이나 플렉시글라스로 만들어집니다.
- An opening
필요한 케이블 및 커넥터를 공급합니다.
- A mounting solution
보호 하우징은 일반적으로 Zivid 카메라와 카메라가 위치할 장착 위치 사이에 끼워집니다.
참고! 보호 창을 기준으로 한 카메라 위치는 광학 성능을 변경할 수 있습니다. 이것은 차례로 Zivid 포인트 클라우드의 정확도에 영향을 줄 수 있습니다. 이러한 위험을 줄이려면 카메라를 상자에 단단히 부착된 상태로 유지하십시오.
- Temperature and humidity control
카메라 하우징 내부의 온도와 습도를 제어합니다. 외부 환경과 카메라 작업 부하의 영향으로 하우징 내부 온도가 과열되지 않는 경우에는 수동적으로 제어할 수 있습니다. 카메라 작업 공간의 주변 온도가 Zivid 카메라 데이터시트에 정의된 한계를 초과하는 경우에는 능동적으로 제어해야 합니다.
다음으로 우리는 해결해야 할 다양한 과제에 대해 조금 더 깊이 파고들 것입니다.
Temperature, humidity, and maintenance
Zivid 카메라를 하우징 안에 넣을 때 하우징 내부의 열 조건을 고려하는 것이 중요합니다. 몇 가지 고려 사항을 살펴보겠습니다.
하우징 내부 온도는 Zivid 3D 카메라의 데이터시트와 일치해야 합니다. 예를 들어, Zivid 2/2+의 경우, 카메라는 0°C에서 40°C 사이에서 작동하도록 정격화되어 있습니다. 카메라는 이 온도 범위에서 최대 성능을 발휘하도록 설계되었습니다. 따라서 이 범위를 벗어나 사용할 경우 카메라 정확도가 떨어질 수 있습니다. 최악의 경우, 과열로 인해 카메라가 손상될 수 있습니다.
하우징(및 카메라) 내부의 공기는 건조해야 합니다. 이는 Zivid 카메라 렌즈나 창문 안쪽(또는 카메라의 거울)에 결로 현상이 생기는 것을 방지하기 위한 것입니다.
창문에 결로 현상이 생기는 것을 방지하기 위해 주택 내부 온도는 외부 온도와 비슷하거나 약간 높아야 합니다.
일반 카메라는 비 오는 날 카페 창밖으로 꺼내려고 하면 선명한 사진을 찍기 어려울 것입니다. 마찬가지로 Zivid 카메라의 시야를 방해하는 렌즈, 필터 및 창의 응결이나 먼지는 3D 포인트 클라우드 품질을 저하시킬 수 있습니다. 따라서 하우징, 창문, 카메라 렌즈를 청결하게 유지하는 것이 좋습니다.
조심
Zivid 카메라 렌즈와 하우징 창문을 청소할 때는 긴 섬유 천이나 종이와 같은 카메라용 세척 장비를 사용하세요. 렌즈를 직접 너무 세게 닦지 마세요. 스마트폰을 조작할 때와 같은 힘을 가하는 것이 좋습니다.
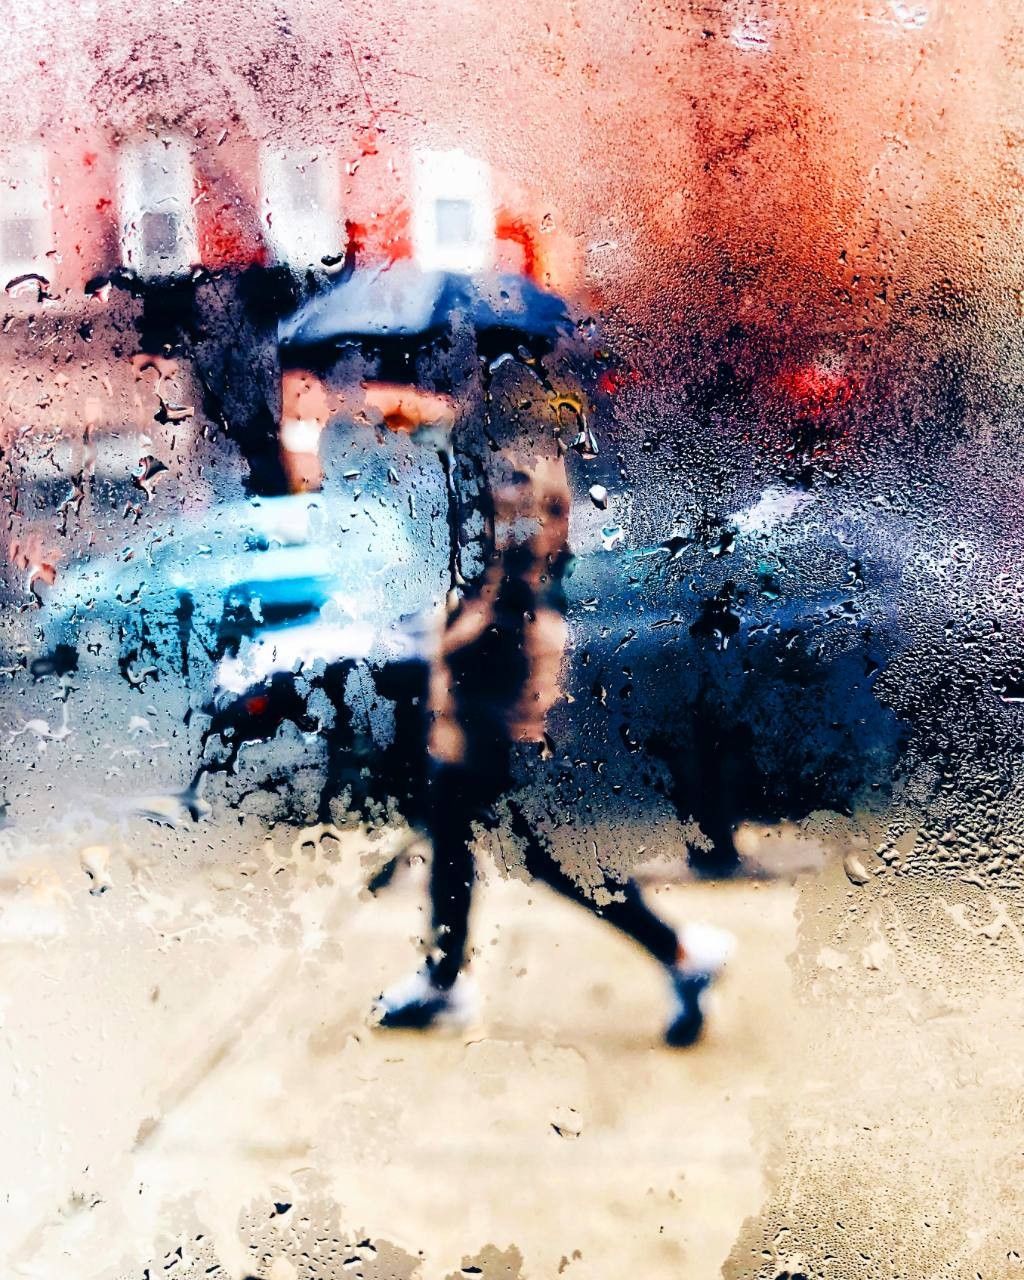
Image of a person seen through a condensed window. (photo by Matteo Catanese on Unsplash)
드물게 습한 공기가 카메라 하우스 내부에 들어온 경우 렌즈에 응결이 형성될 수 있습니다. 카메라를 습하고 추운 환경에 보관(플러그 분리)하면 이런 일이 발생할 수 있습니다. 결로 현상을 제거하려면 카메라를 춥고 건조한 환경에 놓고 전원을 켠 상태로 두되 USB를 분리한 상태(공기 구멍)를 이틀 동안 두십시오. 결로가 증발하여 사라집니다.
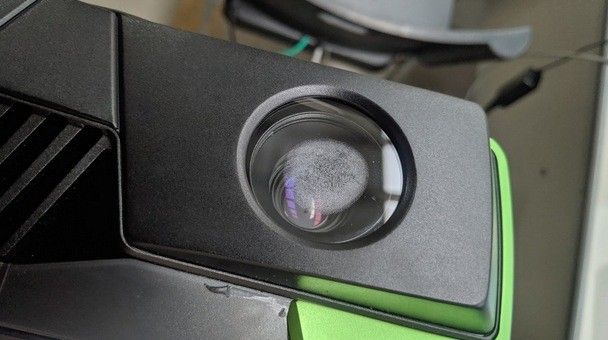
마지막으로 카메라를 기준으로 창이 움직이지 않도록 카메라 하우징을 설계하는 것이 좋습니다. 이것은 다음에 다룰 광학적 이유 때문입니다.
Choosing the right glass
빛은 유리를 통과할 때 경로를 변경하므로 카메라 정확도가 변경되지 않도록 창의 광학 품질이 중요합니다. 광학 유리는 일반적으로 굴절률, Abbe 수 및 흡수율로 정의됩니다. 창이 카메라를 보호하고 빛을 변경하지 않으려면 다음을 수행해야 합니다.
매우 평평하고 균일해야합니다.
굴절률이 낮아야합니다.
높은 Abbe를 가지고 있다
흡수율이 낮습니다.
앞쪽 유리 커버 제작 시 광학 유리 전문가와 상의하는 것이 좋습니다.
팁
유리는 굴절률이 낮고, 아베수가 높고, 흡수율이 낮으며, 균일성과 평탄성이 높아야 합니다.
조심
건물의 일반적인 유리창은 흡수율이 높아 3D 카메라를 보호하는 데 사용하면 신호 대 잡음비에 부정적인 영향을 미칩니다.
Zivid는 1-5mm 사이의 창 두께를 권장합니다. 더 높은 두께도 괜찮을 수 있지만 Zivid는 5mm를 초과하는 두께를 가진 창에 대한 실험을 수행하지 않았습니다.
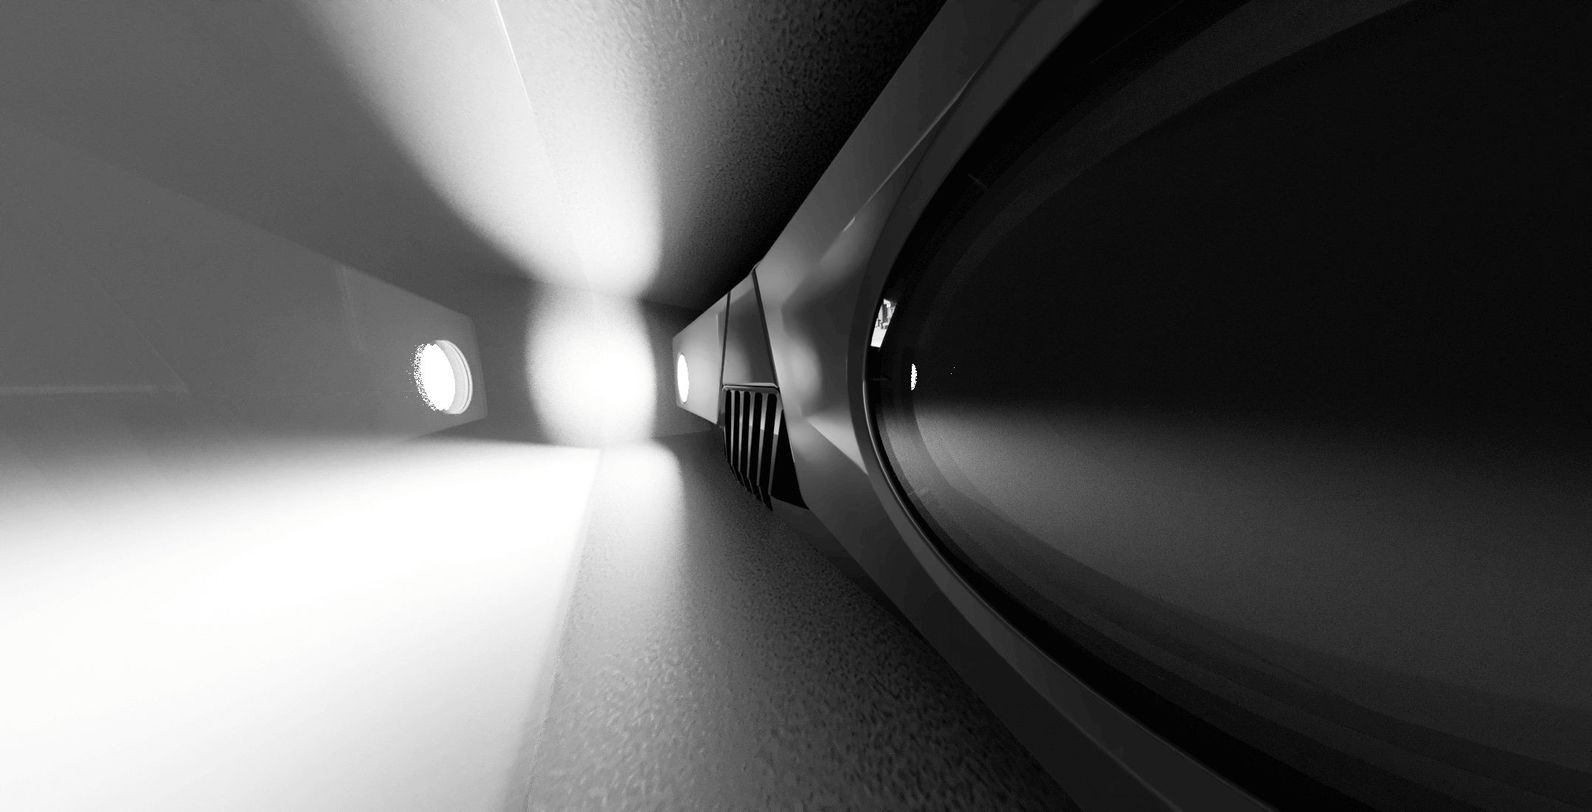
마지막으로 창은 카메라 렌즈에 가깝게 위치해야 하며 카메라와 거의 평행하게 정렬되어야 합니다.
How does the glass thickness affect camera performance?
위 지침에 따라 Zivid 카메라 앞에 유리창을 설치하더라도 대부분의 경우 카메라 성능에 미치는 영향은 미미합니다. 시스템을 생산에 투입하기 전에 포인트 클라우드 정확도의 안정적인 성능을 검증하고 보호 하우징을 장착했을 때와 장착하지 않았을 때의 성능을 비교해 보시기를 강력히 권장합니다.
팁
동일한 조건에서 동일한 기준 물체의 두 개 이상의 포인트 클라우드를 비교하여 보호 유리창의 품질을 확인합니다.
다음 그래프는 Zivid One+ 대형 카메라 앞에 다양한 두께의 유리를 사용했을 때의 영향을 보여줍니다. Zivid One+에 대한 서비스가 종료되었지만, Zivid One+로 수행한 테스트 결과와 결론은 다른 Zivid 카메라에도 동일하게 적용됩니다. 결과는 보호 유리를 사용하지 않았을 때와 비교하여 차이를 나타냅니다. 모든 그래프는 촬영 거리가 1.1m에서 2.9m까지 증가함에 따라 성능 매개변수가 어떻게 변하는지 보여줍니다. 이러한 매개변수는 Zivid One+ 데이터시트에 따라 정의됩니다.
참고
결과는 보호 유리창을 사용하지 않은 것과 비교하여 차이로 표시됩니다.
Point precision
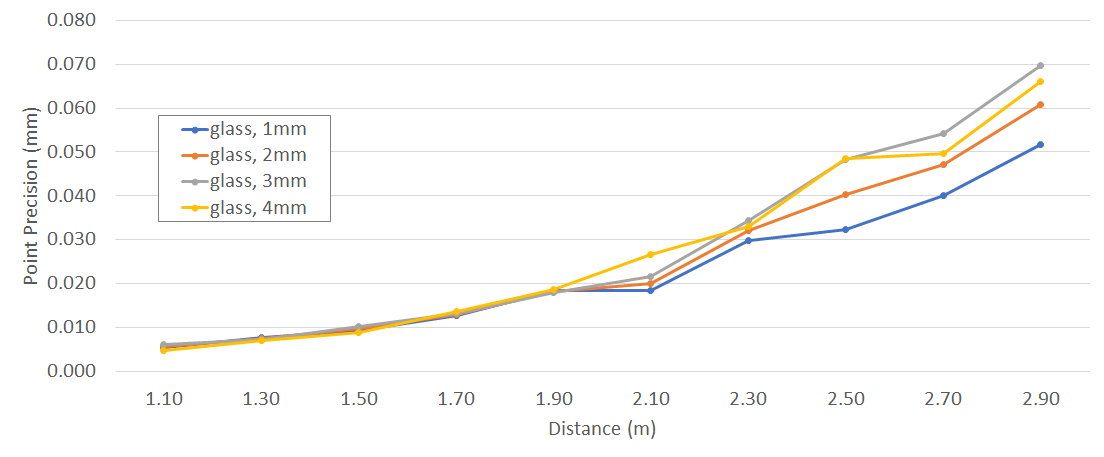
포인트 정밀도 오차는 거리에 따라 꾸준히 증가하는 것을 볼 수 있습니다(유리가 없는 경우에도 마찬가지입니다). 하지만 유리 두께와는 뚜렷한 상관관계가 없습니다. 대부분의 거리와 상황에서 이러한 변화는 본 응용 분야에서는 무시할 수 있을 것입니다.
Local planarity precision
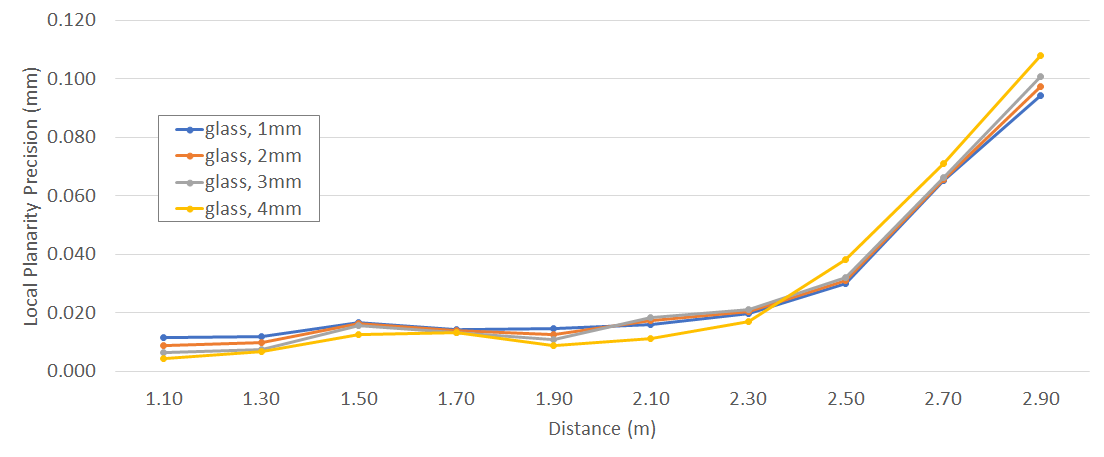
국소 평면도 정밀도 오차는 유리 두께에 대한 명확한 의존성을 나타내지 않습니다. 평면도 정밀도 변화는 점 정밀도와 유사하게 0.1mm 미만이며, 일반적인 응용 분야에서는 무시할 수 있는 수준의 영향을 미칩니다.
Global planarity trueness
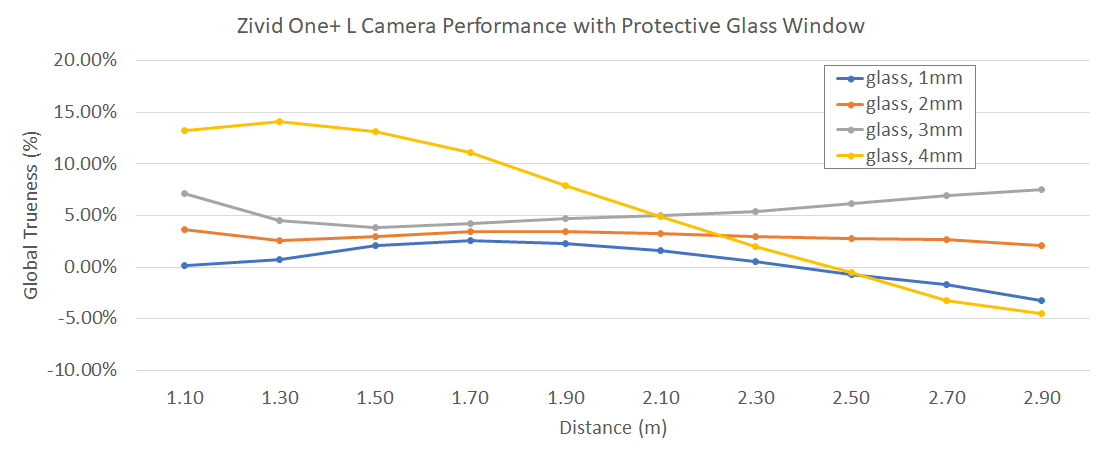
아래 그림은 보호창 두께에 따라 측정된 판의 평탄도가 어떻게 변하는지 보여줍니다. 보시다시피, 편차는 ±15% 이내이며, 이는 일반적으로 보호창 없이 측정된 0.4mm의 평탄도에 대해 ±0.075mm의 변화를 의미합니다. 이러한 편차는 평탄도 진도 오차를 약 0.5mm로 증가시킵니다. 따라서 적절한 보호창을 배치하면 대부분의 애플리케이션에서 카메라의 전체 평탄도 진도에 허용 가능한 영향을 미칩니다.
참고
모든 그래프는 기준(유리 없음)에 대한 차이를 보여줍니다.
Global planarity accuracy
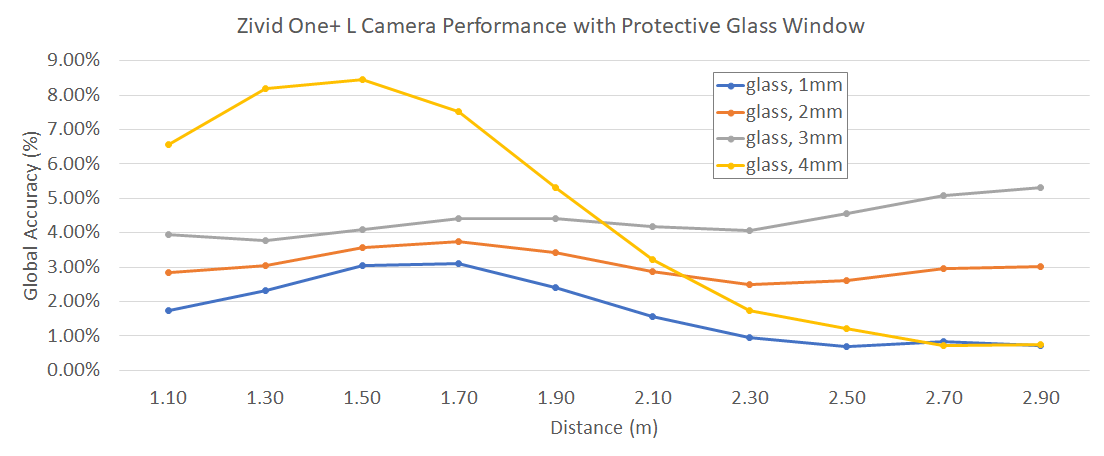
이러한 측정값은 보호 창이 있을 때 플레이트의 노이즈와 평탄도가 어떻게 달라지는지 보여줍니다. 측정값은 위에서 볼 수 있는 기본 진위 오차에 의해 지배되며, 그 위에 정밀 노이즈가 추가됩니다. 전반적인 변화는 보호 창이 없을 때 기존 오차의 ±10% 이내에 포함됩니다. 일반적인 Zivid One+ 대형 카메라의 경우 평면도 정확도 오차는 0.5mm 정도입니다. 따라서 이 정확도가 10% 변하면 전체 오차는 0.55mm로 증가할 수 있습니다. 이는 일반적으로 허용 가능한 영향입니다. 전역 평면도 정확도의 상대적 변동은 진위보다 낮다는 점에 유의하십시오. 이는 기본 절대 오차가 진위보다 정확도에 대해 본질적으로 더 크기 때문입니다. 따라서 둘 사이의 유사한 규모의 변동은 높은 값(정확도)보다 낮은 값(진위)에 더 큰 영향을 미칩니다.
Dimension precision
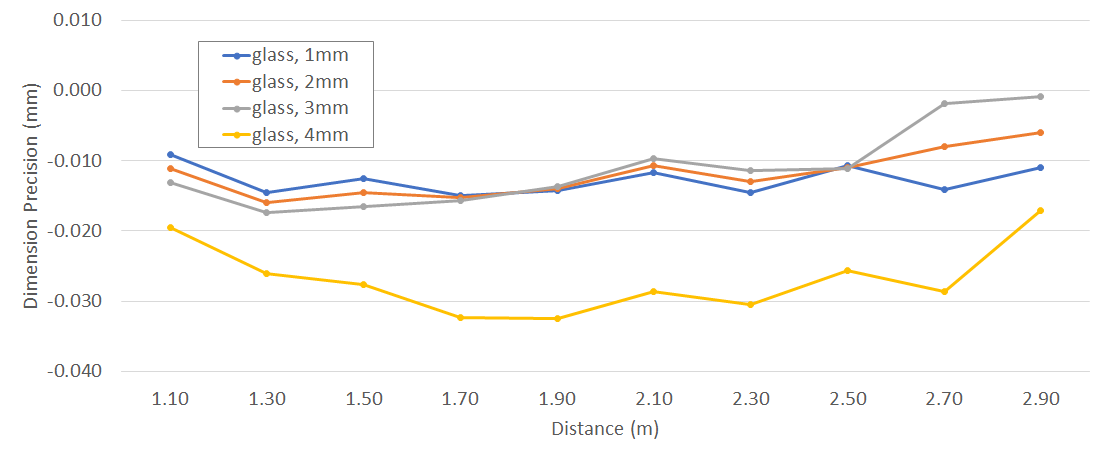
10cm의 주어진 치수에 대한 반복 측정은 이러한 측정 결과의 변동이 1σ 변동 변화를 산출한다는 것을 보여줍니다. 이는 보호 유리가 없는 기본 정밀도에 비해 35μm 미만에 해당합니다. 이 수치는 거리가 멀기 때문에 상대적으로 작으며 전체 포인트 클라우드 품질에 미치는 영향은 미미합니다.
Dimension trueness
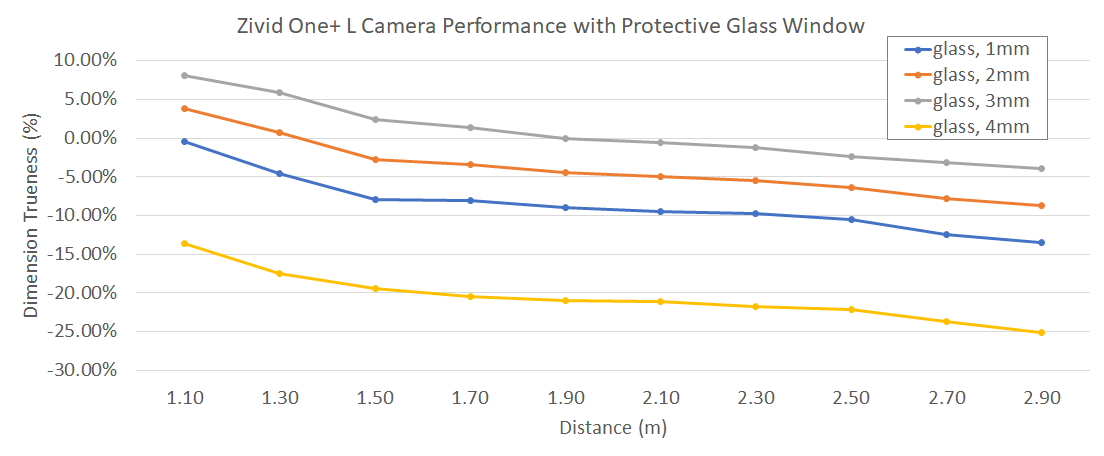
아래 그림은 전면 커버 유리가 있을 때 주어진 치수 측정값이 얼마나 변하는지 보여줍니다. 카메라의 작동 거리가 상당히 길 때 이러한 변화는 30% 미만이며, 두께 간에는 뚜렷한 상관관계가 없습니다. 따라서 하우징 없이 측정한 0.1% 치수 오차에 대해, 보호 유리를 적용하면 오차는 0.07%에서 0.13% 사이가 됩니다. 이러한 차이는 많은 적용 분야에서 여전히 허용 가능합니다.
Summary
측정값은 유리 두께와 카메라 성능 간의 의존성을 입증하기에 충분한 증거를 제공하지 않습니다. 제한된 평탄도와 같은 열악한 유리 품질의 영향은 정확도 변화에 지배적인 요인이 될 수 있습니다.
제시된 측정값은 예상 오차 변화가 ±50% 미만이어야 함을 나타냅니다. 높은 수준의 신뢰성에 의존하는 시스템에서는 측정 장치의 정확도보다 몇 배 높은 허용 오차 수준을 사용해야 합니다. 이러한 결과를 바탕으로 ±50% 정도의 오차 변화가 추가되더라도 전체 시스템에 미치는 영향은 무시할 수 있거나 허용 가능한 수준일 가능성이 높다는 것을 알 수 있습니다. 따라서 카메라의 새로운 예상 오차는 전체 시스템 허용 오차보다 작아야 합니다.
보호 유리를 설치한 후 카메라의 Trueness와 Accuracy가 허용 가능한 수준으로 유지되는지 확인하기 위해 유리 품질 비교 테스트를 수행하는 것이 좋습니다.