Control Panel
The control panel is located on the right side of Zivid Studio. It contains three main sections:
Cameras
Capture
Settings
Cameras
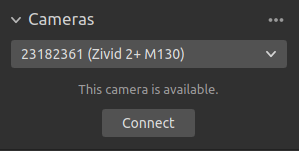
This section is used to scan for, configure, connect to, and disconnect from available cameras.
Cameras |
Function |
|---|---|
List all cameras |
Open the Cameras menu and list all cameras. |
Scan for connected cameras |
Show all cameras plugged into the PC and list them by model and serial number. |
Connect |
Connect to the camera selected in the drop-down menu. Zivid Studio can connect to a single camera at a time. |
Configure this camera |
Open the Cameras menu and configure the IP, subnet mask and mode of the selected camera. |
Disconnect from active camera |
Disconnect from the active camera. |
Note
If multiple cameras are physically connected, they will all appear in this section. However, Zivid Studio only supports establishing a connection with a single camera at a time. To capture with multiple cameras using Zivid Studio, start another instance of Zivid Studio.
Firmware Update
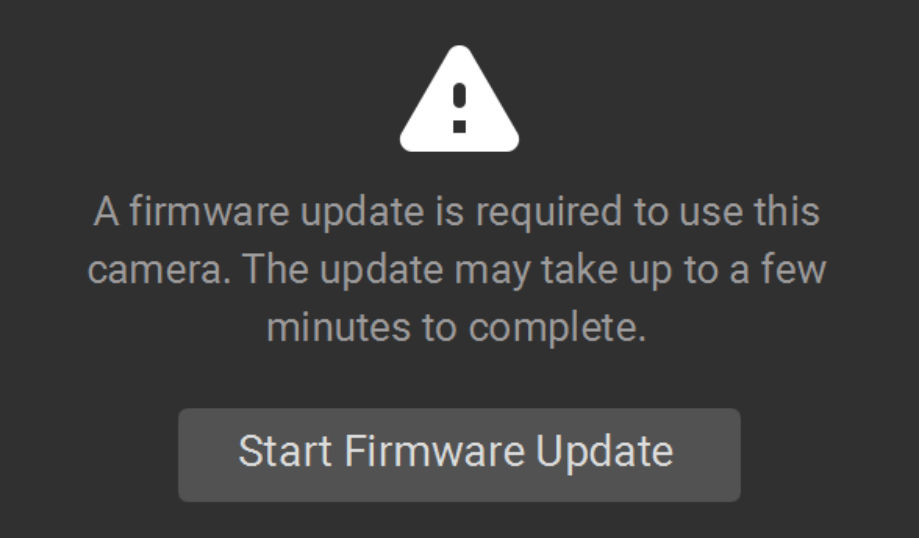
Each SDK version is matched with camera firmware, and the SDK will make sure that the camera runs compatible firmware. When Zivid Studio connects to a camera, it will check whether the camera has matching firmware. If the firmware does not match, you will get prompted to update the firmware on your camera.
Read more about Firmware Update.
Capture
This section is used to capture 3D and 2D images. Here you can control and configure the camera settings. This section has three modes:
2D capture
2D + 3D capture
3D capture
A 3D capture triggers the camera to capture a 3D point cloud without color information, while a 2D capture triggers the camera to capture a 2D image with or without color information. A 2D + 3D capture triggers the camera to capture both a 3D point cloud and a 2D image.
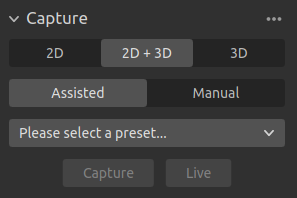
Each capture has two modes:
Assisted Mode
Manual Mode
Assisted Mode
In the assisted mode you can select from a list of predefined settings from the Presets. This is the recommended way to capture 2D and 3D images. The presets are specifically tuned for the following categories:
- Consumer Goods
For any SKU in fulfillment centers, e.g., glossy packaging, semi-transparent plastics, irregularly shaped items, where surface coverage is critical.
- Parcels
For matte and glossy plastic shipping bags, padded envelopes, and cardboard boxes, where speed and surface coverage are key.
- Manufacturing
For shiny, dark, or textured metallic, rubber, and plastic industrial components, where surface coverage and shape trueness are required.
- Inspection
For complex surfaces with fine details, weld seams, rubber gaskets, 3D printed parts, where minimal noise and high fidelity are required.
- Depalletization
For matte and glossy cardboard boxes, bottles, cans, and other groceries wrapped in plastic, where surface coverage is critical.
Choose the category that best applies to your usage. This will then configure the camera settings for you based on the selected preset. Note that not all categories are available for all camera models. You can view and modify the selected settings in the Manual Mode.
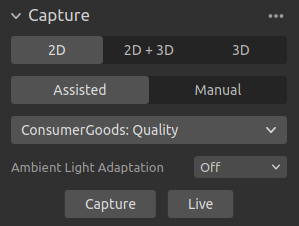
Once a preset is selected, the ambient light adaptation can be chosen.
Note
Ambient light adaptation can increase acquisition and capture time. Default presets do not adapt to any ambient light frequency.
Capture and Live
The Capture button triggers a single capture with the specified settings, which is then displayed.
The Live button triggers continuous captures, which enables you to view the scene in real-time.
Manual Mode
In the manual mode you must configure all settings manually. For more information about the settings panel, see Acquisition Settings and Processing Settings below.
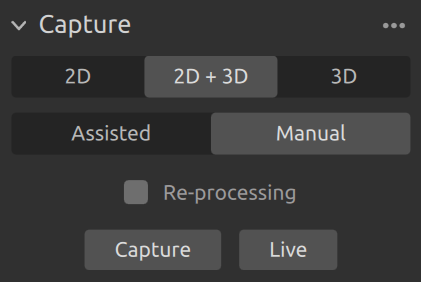
Enabling Re-processing allows one to reprocess a capture using different processing settings without needing to re-capture. When changing any setting under Processing Settings, the point cloud will be reprocessed and updated in real time. A blinking dot next to Processing Settings indicates that reprocessing is in progress.

Diagnostics needs to be enabled during capture to enable re-processing.
Acquisition Settings
2D Options
Sampling (2D)
Setting |
Function |
|---|---|
Choose how to sample colors for the 2D image. |
|
Choose the subsampling factor to downscale 2D image. |
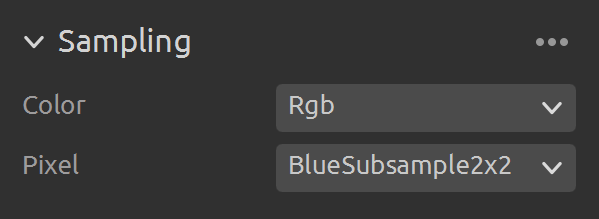
Check Sampling (2D) to learn more.
2D Acquisitions
Setting |
Function |
|---|---|
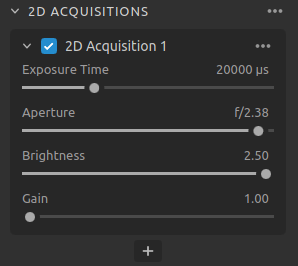
The duration a single camera image is exposed to light. |
|
The opening that controls the amount of light to the camera sensor through the lens. |
|
The output power (the amount of light) emitted by the LED projector. |
|
The amplification of the signal from the camera sensor. |
3D Options
Engine
The Vision Engine is the backbone of the point cloud computation. It controls the pattern projecting, imaging, and processing of the images of the projected pattern to generate the final 3D point cloud.
Setting |
Function |
|---|---|
Choose between different pattern projections. |

Check Vision Engine to learn more.
Sampling (3D)
Setting |
Function |
|---|---|
Choose the subsampling factor to downscale the point cloud. |

Check Sampling (3D) to learn more.
3D Acquisitions
Setting |
Function |
|---|---|
The duration a single camera image is exposed to light. |
|
The opening that controls the amount of light to the camera sensor through the lens. |
|
The output power (the amount of light) emitted by the LED projector. |
|
The amplification of the signal from the camera sensor. |
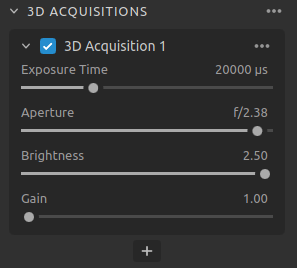
You can add multiple acquisitions within a capture by clicking the + button. This will allow you to capture the same scene with different exposure settings in an HDR capture, which can be useful for scenes with high dynamic range.
To learn how to tune exposure settings check Capturing High Quality Point Clouds.
Region Of Interest
Setting |
Function |
|---|---|
Create and configure a box in 3D and remove the points outside the box. |
|
Remove points outside a user-defined depth range. |
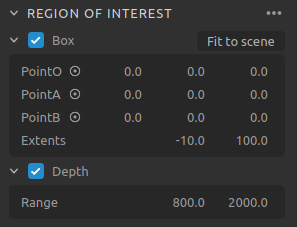
Check Region of Interest to learn more.
Diagnostics
The diagnostics setting collects extra diagnostic data from a capture that can be saved in the .zdf file. Enable it when reporting issues to Zivid’s support team.
Enabling diagnostics is required for reprocessing of a capture using different processing settings without needing to re-capture.

Caution
Diagnostics increases the capture time, the RAM usage, and the size of the .zdf file.
Processing Settings
2D Color Balance & Gamma
Setting |
Function |
|---|---|
The color temperature of ambient light affects the appearance of the color image. Adjust blue, green, and red color balance to make color images look natural. |
|
The output color image can appear too dark. Adjust the brightness of the color image. |
|
Control how the color image is computed. The options are Automatic and ToneMapping. |
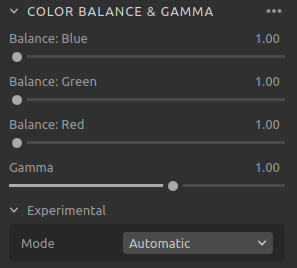
To learn how to tune color settings check Optimizing Color Image and Adjusting Color Balance.
3D Filters
Setting |
Function |
|---|---|
Remove floating points and isolated clusters from the point cloud. |
|
Fill in removed points, by interpolation between the remaining points. |
|
Remove or correct points where the projected pattern signal-to-noise-ratio is low. |
|
Remove points if the distance to their neighboring pixels within the small local region is larger than the threshold specified in mm. |
|
Remove points impacted by reflections and thus erroneous. |
|
Perform Gaussian smoothing on the point cloud. |
|
Correct and/or remove points affected by blurring in the camera lens. |
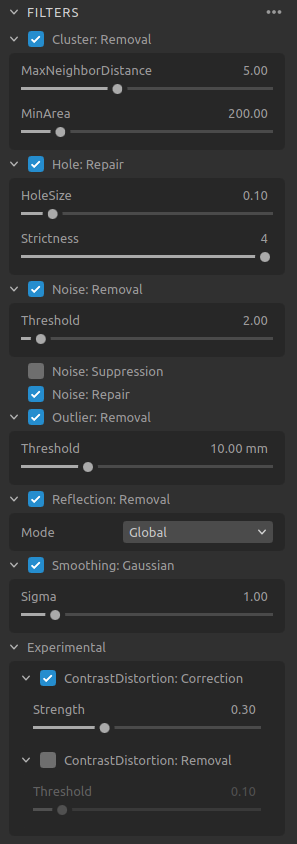
To learn how to tune filters check Capturing High Quality Point Clouds.
Resampling
Setting |
Function |
|---|---|
Reduce or increase the number of points in the point cloud. |

To learn more about resampling check Resampling.
Continue reading about Zivid Studio in Available Views.
Version History
SDK |
Changes |
|---|---|
2.16.0 |
Reorganized with Acquisition and Processing settings due to new re-processing feature. |
2.14.0 |
Reorganized with 2D, 3D and 2D+3D captures. |
2.12.0 |
Reorganized page to clarify that 2D settings are a subset of the 3D settings. |