Optimizing Color Image
Introduction
This tutorial aims to help you optimize the color image quality of the captures from your Zivid camera. We first cover using the essential tools for getting good color information: tuning acquisition and color settings. Then we address the most common challenges (blooming/over-saturation and color inconsistency from HDR) and provide our recommendations on how to overcome them.
Tip
Zivid 3 and Zivid 2+ cameras have higher resolution and improved color image algorithms compared to Zivid 2 cameras. As a result, Zivid 3 and Zivid 2+ cameras produce higher quality 2D color images.
Adjusting Acquisition Settings
The quality of the color image depend on the Acquisition Settings (2D). The acquisition settings should be adjusted to ensure the pixel values of interest are not close to the noise floor. It is also important to avoid pixel saturation in the image, especially in the regions of interest. A good rule of thumb is to ensure the pixel values of interest are as high as possible, while not being saturated. In other words, with RGB values close to, but not 255. This may leave some pixels saturated, but the pixels of interest will still be well exposed. In that case, make sure your image processing algorithm can handle some saturation. To learn how light intensity gets converted into pixel values, see Detectable Light Intensity in a Camera Capture.
To optimize acquisition settings for your color image, you can use the 2D view and histogram in Zivid Studio, as seen below. Hovering the mouse cursor above the region of interest (red cross in the image) will display the pixel RGB values in the bottom left corner.
The RGB values of this particular pixel will be binned together with other pixels that have similar RGB values in the histogram view. As it can be seen in the image above, pixel (783, 526) has:
Red value of 224
Green value of 238
Blue value of 215
These RGB values indicate that this pixel resides within the upper right half of the histogram, and is thus considered a good pixel. However, we can also see from the histogram that there are many saturated pixels (RGB values 255) in the image, which indicates that some pixels are over-exposed.
Caution
To use the histogram as a tool for adjusting acquisition settings, you must evaluate a single acquisition at a time with Color Mode set to UseFirstAcquisition or Automatic. Also, you must set Gamma and Color Balance gains to 1.0.
This is because the default Color Mode is Automatic, which is identical to ToneMapping for multi-acquisition HDR captures with differing acquisition settings. Tone mapping modifies pixel values. Gamma and Color Balance settings also modify pixel values.
While adjusting the acquisition settings to expose the image well, consider how different acquisition settings can impact the quality of the color image.
Exposure Time and Projector Brightness
Exposure time and projector brightness do not impact the color image quality. We recommend using the maximum projector brightness value, which allows for lower exposure times and thus faster 2D captures. This is assuming that your image is not saturated, as discussed above.
Aperture
Note
Zivid 3 does not have an adjustable aperture. The following information about aperture tuning applies only to Zivid 2 and Zivid 2+ cameras.
Correct aperture values are key to avoiding blurry color images; see the figure below. A good rule of thumb is to use low f-number values, up to 4.0, if the working distance is within the optimal range. If the camera is outside the optimal range, try using higher f-number values, such as 5.6 or 8.0. For a more detailed explanation and guidance, see Depth of Focus and Depth of Focus Calculator.
 Single acquisition capture with good aperture
 Single acquisition capture with bad aperture
Note
The images above are captured outside of optimal imaging distance to emphasize the out-of-focus effect for large aperture values; images are less blurry when captured in the optimal range.
Gain
We advise using low gain values, e.g., 1-2, because high gain values increase image noise (granularity) levels, thus decreasing the 2D image quality; see the figure below.
Single acquisition capture with gain 1
 Single acquisition capture with gain 16
Adjusting Color Settings
In addition to the acquisition settings, the color image quality depends on Gamma, Color Balance, and Color Mode settings. This section aims to give insights into optimizing these settings to get desired color quality in the color image.
Gamma
Cameras encode luminance differently than the human eye. While the human eye has an emphasis on the darker end of the spectrum, a camera encodes luminance on a linear scale. To compensate for this effect, gamma correction is applied to either darken or brighten the image and make it closer to human perception.
The lower the Gamma value, the lighter the scene will appear. If the Gamma value is increased, then the scene will appear darker.
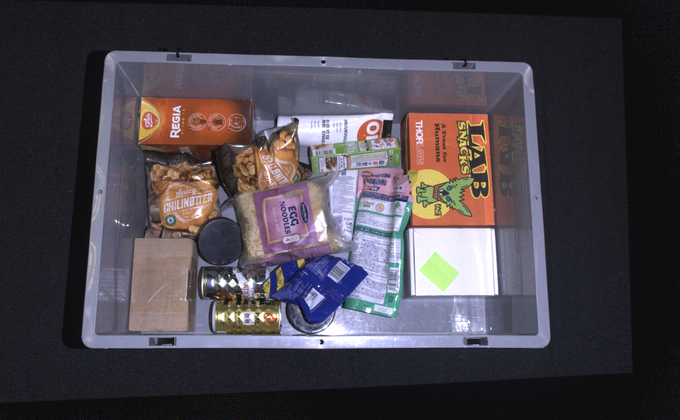 Image captured with Gamma set to 0.6
 Image captured with Gamma set to 1.3
It is questionable whether gamma correction is required for optimizing image quality for machine vision algorithms. Still, it helps us humans evaluate certain aspects of the color image quality, such as focus and grain/noise levels.
For an implementation example, check out Gamma Correction. This tutorial demonstrates how to capture a 2D image with a configurable gamma correction.
Color Balance
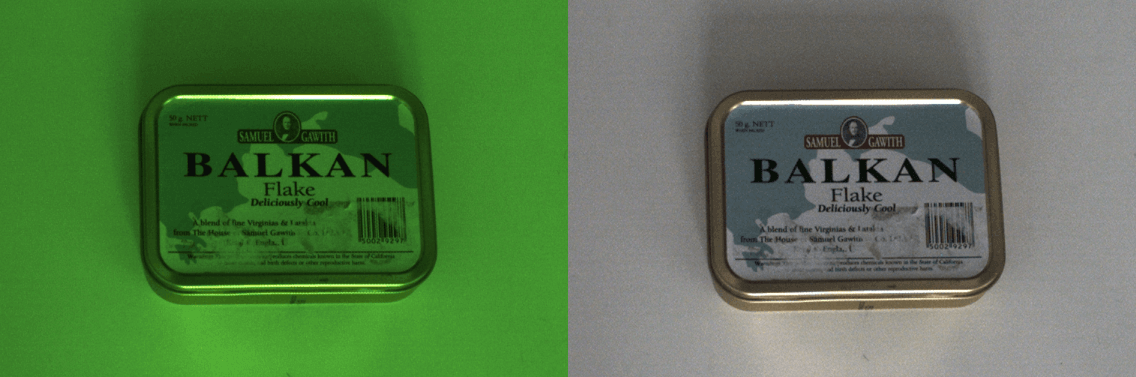
The Zivid 3 and Zivid 2+ MR130, MR60, and LR110 cameras have built-in color balance, so intense or non-white ambient light has little impact on the RGB values in the color image. This eliminates the need to run additional color balance algorithm on these camera models.
The image below shows details from the 2D color image taken with Zivid 2+ MR130 in different ambient light conditions.
300 LUX |
1000 LUX |
2000 LUX |
|
3200K |
|
||
5000K |
|||
6500K |
|||
If you have Zivid 3 or one of the Zivid 2+ MR130, MR60, or LR110 cameras, you can skip the rest of this section. The remainder of the section is only valid for other Zivid camera models.
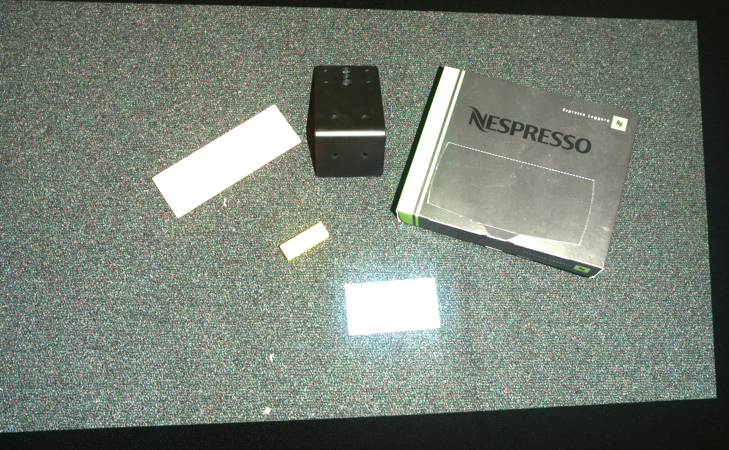
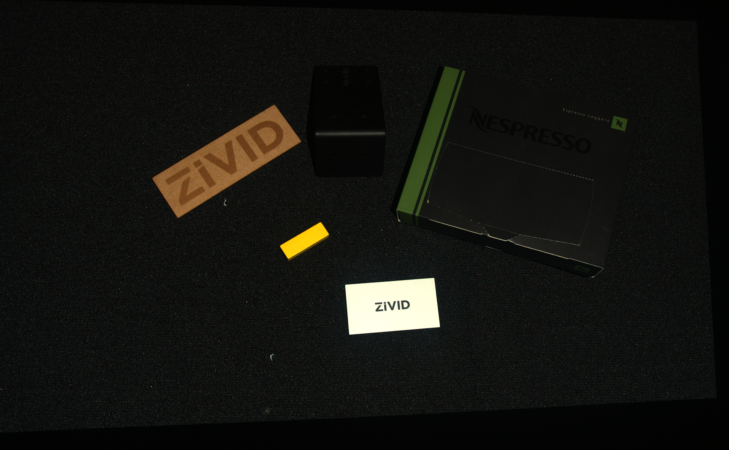
The color temperature of ambient light affects the appearance of the color image. There are two default color balance settings, with and without the projector. When projector brightness is set to 0 or off, the color balance is calibrated to 4500 K, typical in industrial environments. For projector brightness values above 0, the color balance is calibrated for the color temperature of the projector light. You can adjust the digital gain to red, green, and blue color channels to make the color image look natural. Below, you can see an image before and after balancing the color.
Note
The color balance gains range between 1.0 and 8.0 for Zivid cameras.
Performing color balance can be beneficial in strong and varying ambient light conditions. For an implementation example, see Adjusting Color Balance tutorial. This tutorial shows how to balance the color of a 2D image by taking images of a white surface (a piece of paper, wall, or similar) in a loop.
Color Mode
The Color Mode setting controls how the color image is computed. Color Mode setting has the following possible values:
ToneMappingAutomatic
ToneMapping uses all the acquisitions to create one merged and normalized color image.
For multi-acquisition HDR captures the dynamic range of the captured images is usually higher than the 8-bit color image range.
Tone mapping will map the HDR color data to the 8-bit color output range by applying a scaling factor.
Tone mapping can also be used for single-acquisition captures to normalize the captured color image to the full 8-bit output.
When using ToneMapping the color values can be inconsistent over repeated captures if you move, add or remove objects in the scene.
Automaticis the default option.Automaticis identical toToneMappingfor multi-acquisition HDR captures with differing acquisition settings.
For single-acquisition captures, tone mapping can be used to brighten dark images.
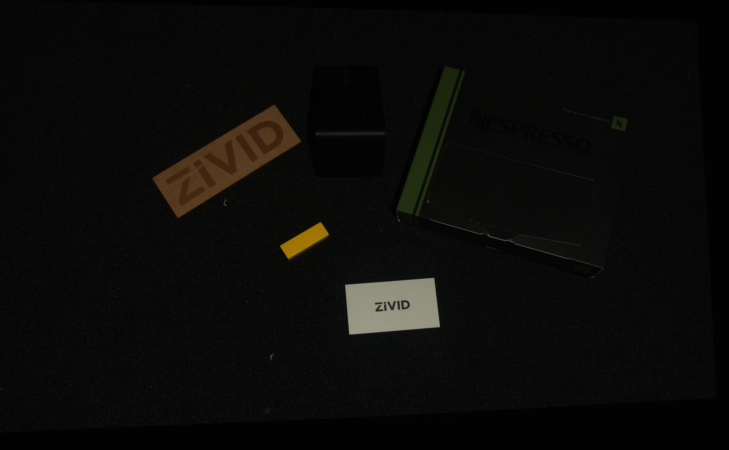
 Single acquisition capture with Color Mode set to Automatic (no tone mapping)
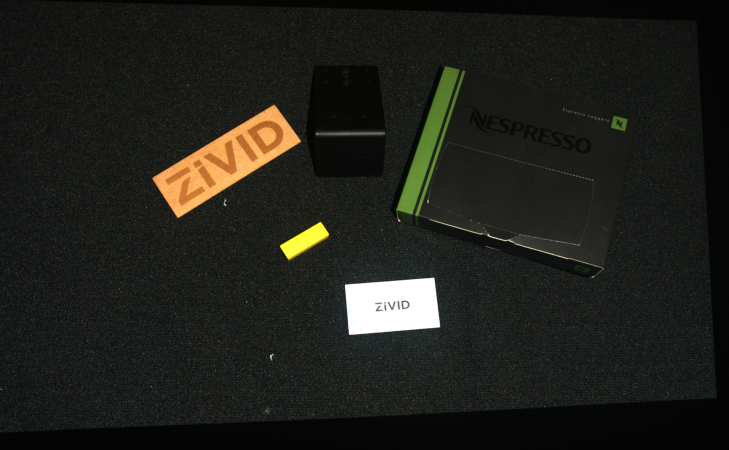
 Single acquisition capture with Color Mode set to ToneMapping
For multi-acquisition HDR tone mapping can be used to map high-dynamic-range colors to the more limited dynamic output range.
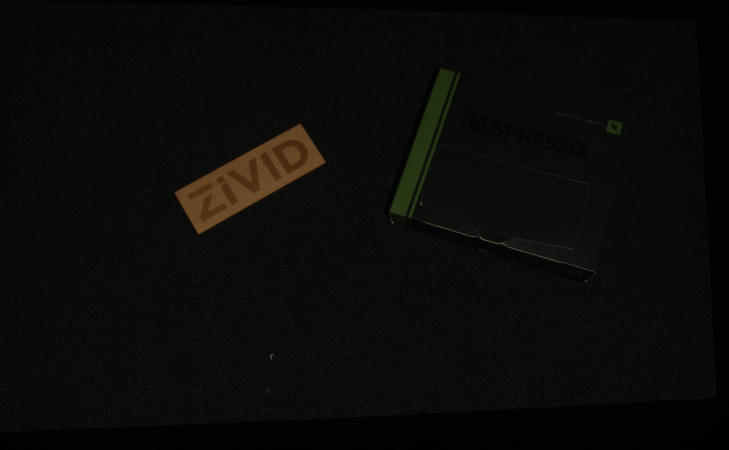
 Single acquisition capture of the first of three HDR acquisitions with Color Mode set to Automatic (no tone mapping)
 Single acquisition capture of the second of three HDR acquisitions with Color Mode set to Automatic (no tone mapping)
 Single acquisition capture of the third of three HDR acquisitions with Color Mode set to Automatic (no tone mapping)
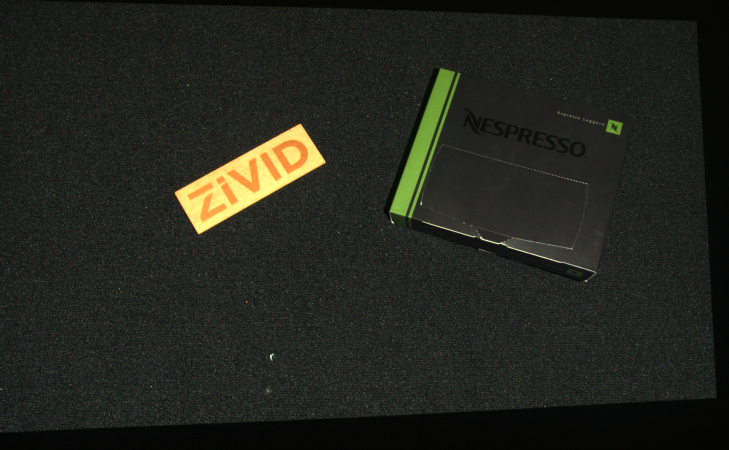
 HDR with three acquisitions with Color Mode set to ToneMapping or Automatic
Check out how to set processing settings with Zivid SDK, including Gamma, Color Balance, and Color Mode:

std::cout << "Configuring settings for capture:" << std::endl;
Zivid::Settings2D settings2D{
    Zivid::Settings2D::Sampling::Color::rgb,
    Zivid::Settings2D::Sampling::Pixel::all,
    Zivid::Settings2D::Sampling::Interval::Enabled::no,
    Zivid::Settings2D::Sampling::Interval::Duration{ microseconds{ 10000 } },

    Zivid::Settings2D::Processing::Color::Balance::Blue{ 1.0 },
    Zivid::Settings2D::Processing::Color::Balance::Green{ 1.0 },
    Zivid::Settings2D::Processing::Color::Balance::Red{ 1.0 },
    Zivid::Settings2D::Processing::Color::Gamma{ 1.0 },

    Zivid::Settings2D::Processing::Color::Experimental::Mode::automatic,
};
Console.WriteLine("Configuring settings for capture:");
var settings2D = new Zivid.NET.Settings2D()
{
    Sampling =
    {
        Color = Zivid.NET.Settings2D.SamplingGroup.ColorOption.Rgb,
        Pixel = Zivid.NET.Settings2D.SamplingGroup.PixelOption.All,
        Interval =
        {
            Enabled = false,
            Duration = Duration.FromMicroseconds(10000),
        },
    },
    Processing =
    {
        Color =
        {
            Balance =
            {
                Blue = 1.0,
                Green = 1.0,
                Red = 1.0,
            },
            Gamma = 1.0,
            Experimental = { Mode = Zivid.NET.Settings2D.ProcessingGroup.ColorGroup.ExperimentalGroup.ModeOption.Automatic },
        },
    },
};
print("Configuring settings for capture:")
settings_2d = zivid.Settings2D()

settings_2d.sampling.color = zivid.Settings2D.Sampling.Color.rgb
settings_2d.sampling.pixel = zivid.Settings2D.Sampling.Pixel.all
settings_2d.sampling.interval.enabled = False
settings_2d.sampling.interval.duration = timedelta(microseconds=10000)

settings_2d.processing.color.balance.red = 1.0
settings_2d.processing.color.balance.blue = 1.0
settings_2d.processing.color.balance.green = 1.0
settings_2d.processing.color.gamma = 1.0

settings_2d.processing.color.experimental.mode = zivid.Settings2D.Processing.Color.Experimental.Mode.automatic
Troubleshooting
If you encounter any issues with your color image, check Vision troubleshooting articles.
Further reading
Continue to Dealing with Highlights and Shiny Objects.
Version History
SDK |
Changes |
|---|---|
2.17.0 |
Added support for Zivid 3 XL250. |