Network Configuration
To connect to a Zivid camera, either use its default static IP, or configure a custom static or dynamic (DHCP/link-local) IP for the camera and PC.
Caution
The correct instructions for network configuration will depend on your SDK version. Choose your SDK version in the top left drop-down.
Default configuration
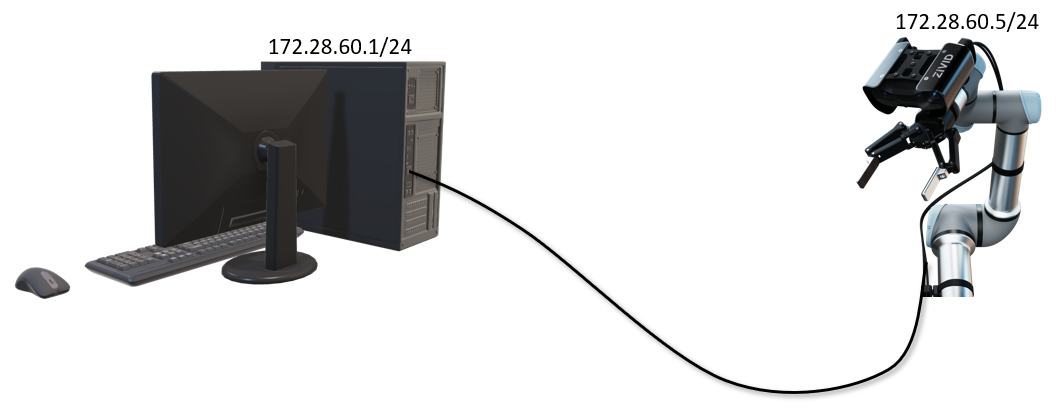
Ethernet-based Zivid cameras are shipped with the default static IP as listed in the table below. To connect to a camera, the interfacing network card must have an IP in the same subnet range as the camera.
Suppose you have not configured the camera in any way before this tutorial, or you know that the camera is still in its default configuration. In that case, you can connect to it after configuring the interfacing network card of your PC. Go to Static IP Network Configuration to do this.
IP |
Subnet mask |
Gateway |
Hostname |
|
|---|---|---|---|---|
Zivid camera |
|
|
|
|
Possible PC |
|
|
|
Note
Any IP address in the subnet range is valid for the PC, except the network address (172.28.60.0) and the broadcast address (172.28.60.255).
We also choose to avoid the gateway IP (172.28.60.1), even though we don’t currently require a gateway.
Custom configuration
A custom configuration is necessary if, for example:
You want to change the IP or hostname of the camera
The camera is not in its default configuration
You want to connect to multiple cameras
You want to restrict which cameras Zivid SDK can connect to
This can involve changing the static IP of the camera and PC, but also configuring them to dynamic modes. The custom configuration is divided into Static IP and Dynamic IP (DHCP or link-local).
Static IP
This is the default configuration for the camera, which comes with static IP 172.28.60.5.
The following guide describes how to change and configure static IP for both the camera and PC:
Dynamic IP (DHCP or link-local)
The camera also supports automatic IP configuration using either DHCP or link-local. When configured to use an automatic IP, the camera will first try to obtain an IP address using DHCP (within ~45 seconds). Getting an IP address from a DHCP server requires a DHCP server running either on a router on the network or locally on the PC. If no DHCP server responds, the camera falls back to link-local.
The following guides describe how to configure dynamic IP for both the camera and PC, either using DHCP or link-local:
Connecting to the camera
Assuming you have followed either Default configuration or Custom configuration, you should now be able to connect to the camera. Be aware that the first time a camera is connected to in a process, it can take 10-20 seconds before it connects. There are two recommended ways to discover and connect to the camera: Zivid Studio or the CLI Tool.
Zivid Studio
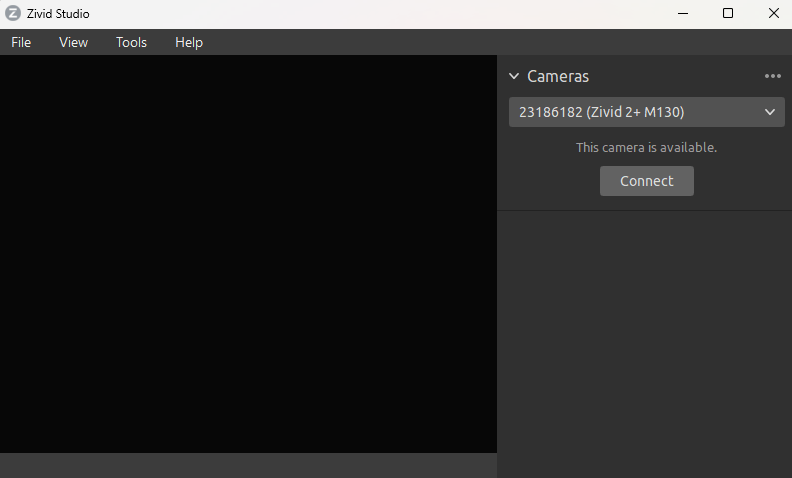
Open Zivid Studio and check that it can discover and connect to the camera.
CLI Tool
Use the ZividListCameras CLI tool to test the connection.
This tool is installed alongside the Zivid SDK on Windows, and with the Zivid Tools package on Ubuntu.
ZividListCameras --test-connect

If you are still not able to discover or connect to the camera, check out the troubleshooting article No cameras found in Zivid Studio.
To connect to the camera from your own application, see connecting by IP address or hostname in the Capture Tutorial, which does not rely on mDNS discovery.
Performance
The capture time will, among others, depend on the connection speed between the camera and the network interface and the capture settings used. For optimal performance, the camera needs 10 Gbps. If your computer does not have a port for 10 Gigabit Ethernet, you can connect to it using a Thunderbolt 3 to 10GbE Adapter. At a reduced performance you can also use 5GbE, 2.5GbE, or 1GbE.
To check the maximum bandwidth of a specific capture setting (including presets), go to the Capture Speed Calculator.
Hint
The status LEDs at the back of the camera show the current link capacity.
Performance |
Network |
Interface |
Connection |
|---|---|---|---|
Optimal (recommended) |
10GbE (10Gbps) |
PCIe card |
Direct |
Very good |
10GbE |
Thunderbolt Adapter |
Direct |
Good |
5GbE or 2.5GbE |
PCIe/USB/Thunderbolt Adapter |
Direct/Switch |
Minimum |
1GbE (1Gbps) |
PCIe/USB Adapter |
Direct/Switch |
Caution
USB-based network adapters have reduced and more variable capture speed, and can occasionally give errors when using the camera.
Restricting discoverable cameras
A configuration file Cameras.yml can be used to restrict which IP addresses and hostnames Zivid SDK can connect to.
The following guide describes how to restrict discoverable cameras with Cameras.yml:
Version History
SDK |
Changes |
|---|---|
2.13.0 |
Added support for network configuration in Zivid Studio and SDK. |
2.11.0 |
Improved network discovery for listing and configuring all cameras, both available and unavailable. |
2.8.0 |
Added support for auto-discovery using Multicast DNS, removing the requirement of |
2.7.0 |
Added support for name queries ending with the |