Link Local Network Configuration
To configure link-local, set the camera to DHCP mode with no DHCP server active, then connect the camera and configure the PC’s network interface to link-local.
Caution
The correct instructions for network configuration will depend on your SDK version. Choose your SDK version in the top left drop-down.
Camera
The camera automatically falls back to a link-local IP address when no DHCP server responds, so set the camera to DHCP mode using Zivid Studio, the CLI Tool, or the API.
Zivid Studio
Open Zivid Studio and click Cameras → All Cameras to open the camera menu.
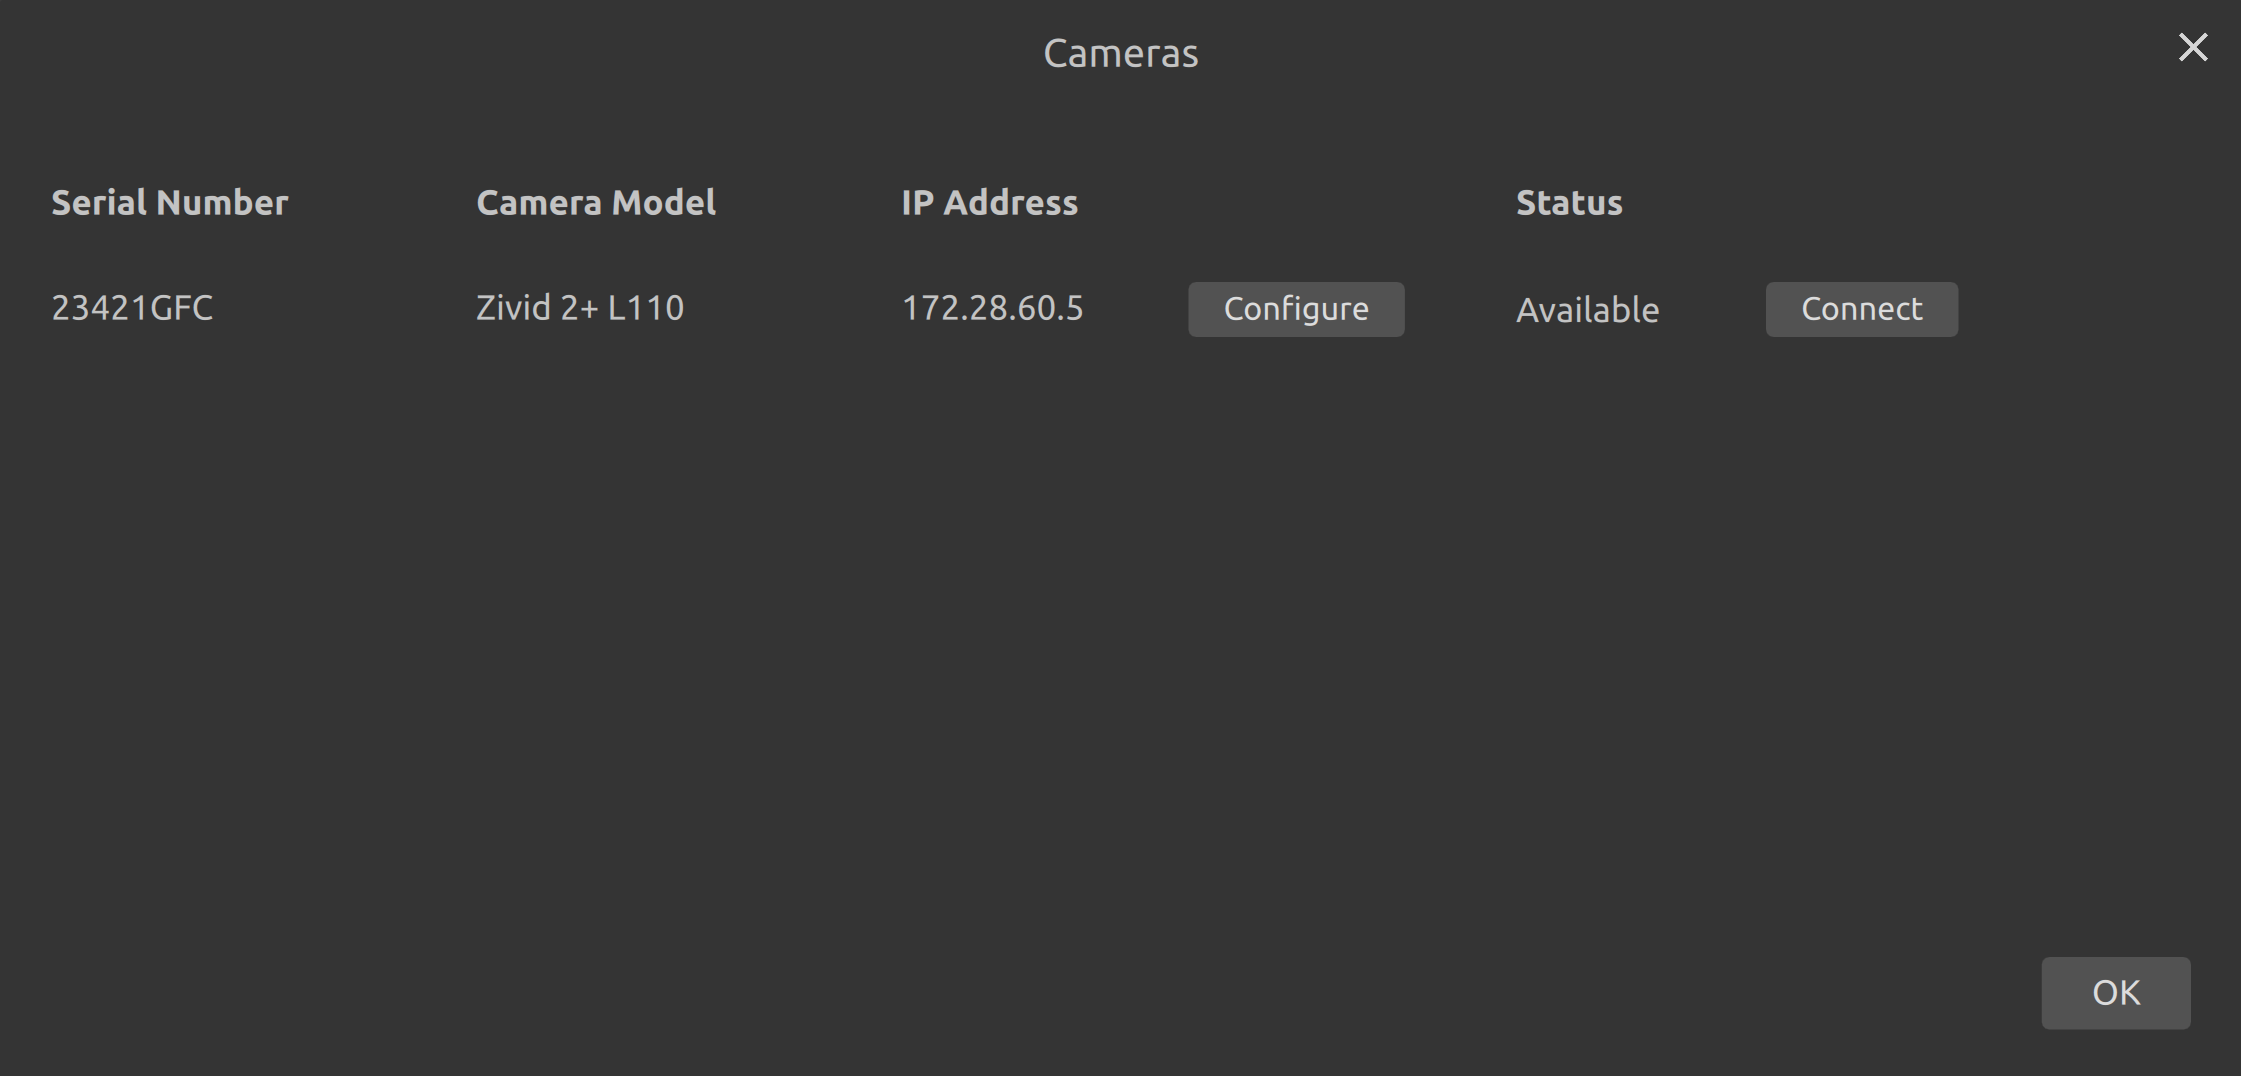
Click Configure on the camera that you want to configure.
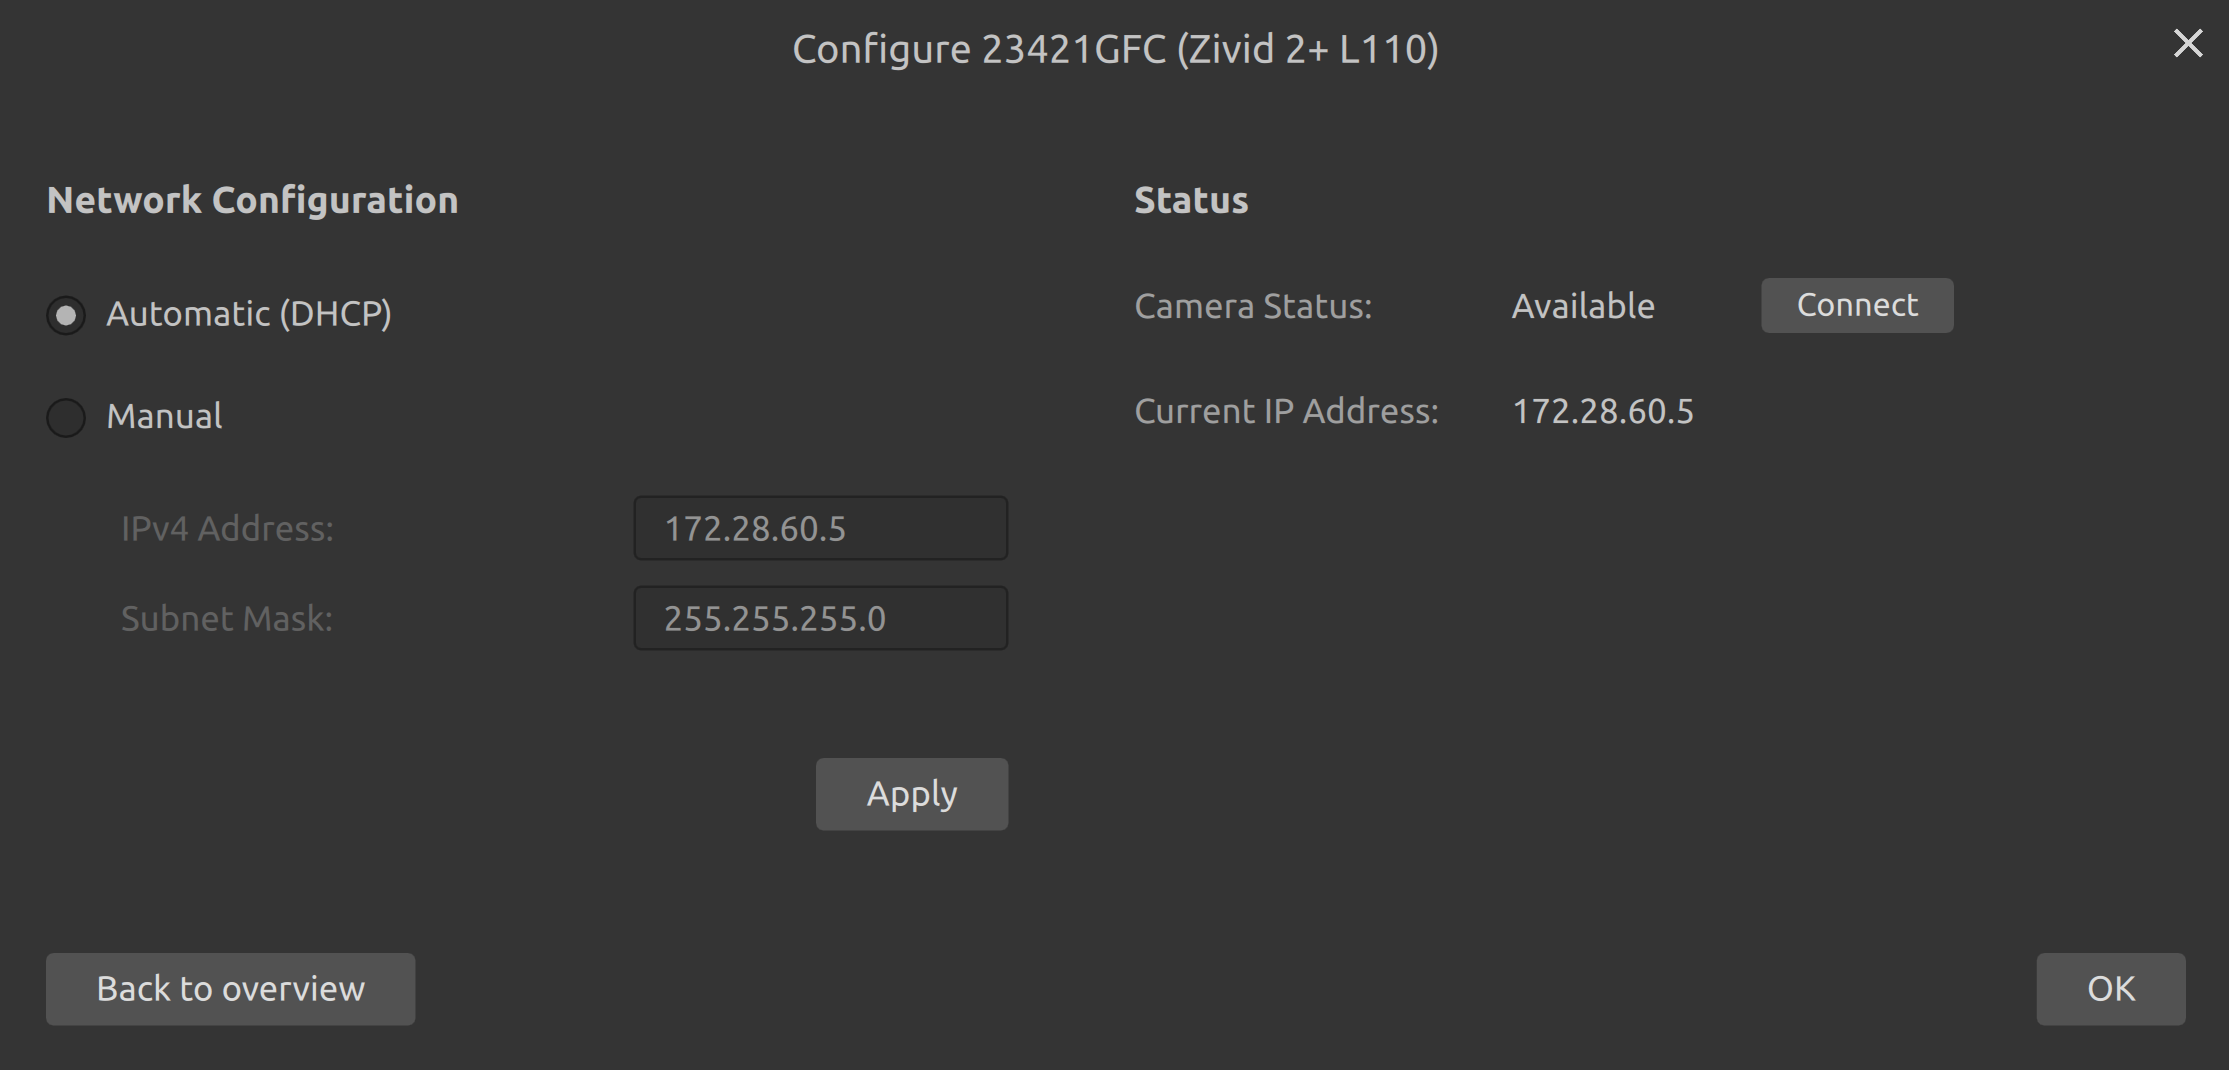
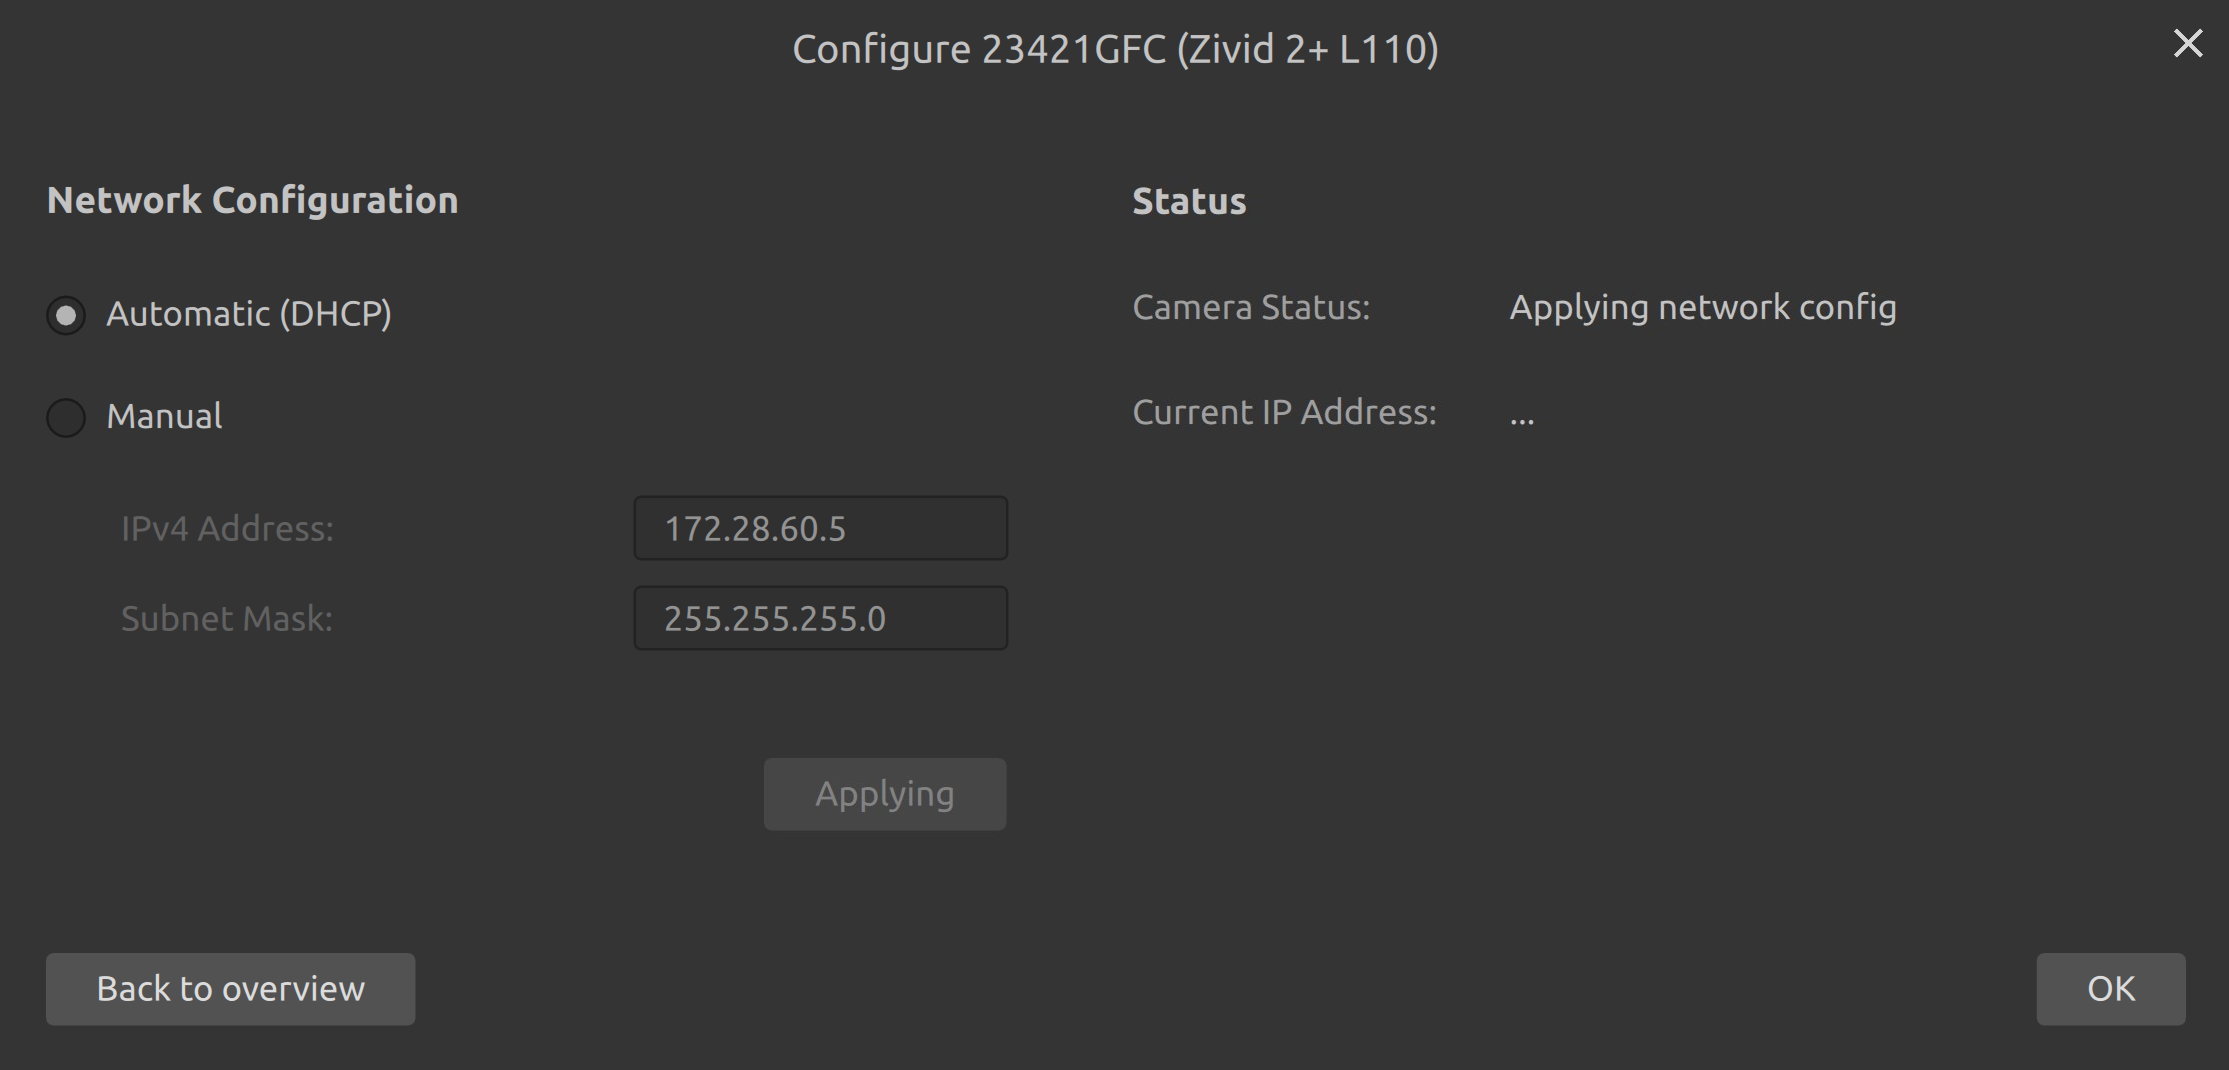
Select the automatic (DHCP) configuration mode. Click Apply to apply the configuration to the camera.
CLI Tool
You can use the CLI tool ZividNetworkCameraConfigurator to change the camera network configuration of one camera at a time.
This tool is installed alongside the Zivid SDK on Windows, and with the Zivid Tools package on Ubuntu.
Open a terminal/Command Prompt.
Connect the camera.
Verify that your camera is found by running:
Windows
ZividListCameras.exe
Ubuntu
ZividListCameras
Set the camera with current IP
<host>in DHCP mode by:Windows
ZividNetworkCameraConfigurator.exe set-config <host> --dhcp
For example, changing the mode from static to DHCP for a camera with IP
172.28.60.5:ZividNetworkCameraConfigurator.exe set-config 172.28.60.5 --dhcp
Ubuntu
ZividNetworkCameraConfigurator set-config <host> --dhcp
For example, changing the mode from static to DHCP for a camera with IP
172.28.60.5:ZividNetworkCameraConfigurator set-config 172.28.60.5 --dhcp
You can also set a hostname by using the optional argument
[--hostname <hostname>]. All ethernet-based Zivid cameras come with a pre-defined hostname with the following format zivid-serialnumber, e.g., zivid-2234AB12.
API
The SDK provides the functions to configure the camera network configuration.
Connect to your camera.
Set the mode to DHCP.
Create a network configuration object.

Zivid::NetworkConfiguration newConfig(Zivid::NetworkConfiguration::IPV4(mode, address, subnetMask));
var newConfig = new Zivid.NET.NetworkConfiguration()
{
    IPV4 = {
        Mode = mode,
        Address = address,
        SubnetMask = subnetMask,
    }
};
Apply the new network configuration to the camera.
Make sure a DHCP server is not active on the network.
Connect your camera(s), and then wait more than 45 seconds.
PC
This guides you through how to configure the network interface that interfaces your camera to link-local, on Windows or Ubuntu.
Windows
Identify the network interface name.
netsh interface ip show config
Configuration for interface "Ethernet 2"
   DHCP enabled:                         Yes
   InterfaceMetric:                      5
   DNS servers configured through DHCP:  None
   Register with which suffix:           Primary only
   WINS servers configured through DHCP: None

Configuration for interface "WiFi"
   DHCP enabled:                         Yes
   IP Address:                           192.168.0.4
   Subnet Prefix:                        192.168.0.0/24 (mask 255.255.255.0)
   Default Gateway:                      192.168.0.1
   Gateway Metric:                       0
   InterfaceMetric:                      35
   DNS servers configured through DHCP:  192.168.0.1
   Register with which suffix:           Primary only
   WINS servers configured through DHCP: None
Obtain link-local IP address.
Windows has an Automatic Private IP Addressing (APIPA) feature. This feature is enabled by default, and includes an implementation of NetBIOS Naming Service (WINS). To trigger this feature the network interface must be configured for DHCP.
netsh interface ip set address "<name>" dhcpIn this example it is:
netsh interface ip set address "Ethernet 2" dhcpThen make sure that you release any assigned IP addresses, just in case a DHCP server was available at one point.
ipconfig /release
Once the network settings are configured, connect the camera and wait more than 45 seconds. Then check if a link-local IP address has been assigned.
netsh interface ipv4 show ipaddresses "<name>"In this example it is:
netsh interface ipv4 show ipaddresses "Ethernet 2"

Address 169.254.208.207 Parameters
---------------------------------------------------------
Interface Luid     : Ethernet 2
Ubuntu
Identify the network interface name.
ip addr
1: lo: <LOOPBACK,UP,LOWER_UP> mtu 65536 qdisc noqueue state UNKNOWN group default qlen 1000
   link/loopback 00:00:00:00:00:00 brd 00:00:00:00:00:00
   inet 127.0.0.1/8 scope host lo
      valid_lft forever preferred_lft forever
   inet6 ::1/128 scope host
      valid_lft forever preferred_lft forever
2: eno1: <NO-CARRIER,BROADCAST,MULTICAST,UP> mtu 1500 qdisc fq_codel state DOWN group default qlen 1000
   link/ether e8:6a:64:d3:52:51 brd ff:ff:ff:ff:ff:ff
   altname enp0s31f6
3: wlp2s0: <BROADCAST,MULTICAST,UP,LOWER_UP> mtu 1500 qdisc noqueue state UP group default qlen 1000
   link/ether 98:2c:bc:af:a5:19 brd ff:ff:ff:ff:ff:ff
   inet 192.168.2.165/20 brd 192.168.15.255 scope global dynamic noprefixroute wlp2s0
      valid_lft 85346sec preferred_lft 85346sec
   inet6 fe80::e2b2:f4ff:e2f:b629/64 scope link noprefixroute
      valid_lft forever preferred_lft forever
Obtain link-local IP address.
It is possible to configure Link-Local via netplan. First we verify existing configurations.
ls /etc/netplan/
01-network-manager-all.yaml
In our case we add a new configuration for our interface.
sudo nano /etc/netplan/99_config.yaml
network:
version: 2
renderer: networkd
ethernets:
   eno1:
      link-local: [ipv4]
sudo netplan apply
Once the network settings are configured, connect the camera and wait more than 45 seconds. Then check if a link-local IP address has been assigned.
ip addr
1: lo: <LOOPBACK,UP,LOWER_UP> mtu 65536 qdisc noqueue state UNKNOWN group default qlen 1000
   link/loopback 00:00:00:00:00:00 brd 00:00:00:00:00:00
   inet 127.0.0.1/8 scope host lo
      valid_lft forever preferred_lft forever
   inet6 ::1/128 scope host
      valid_lft forever preferred_lft forever
2: eno1: <BROADCAST,MULTICAST,UP,LOWER_UP> mtu 1500 qdisc fq_codel state UP group default qlen 1000
   link/ether e8:6a:64:d3:52:51 brd ff:ff:ff:ff:ff:ff
   altname enp0s31f6
   inet 169.254.242.125/16 brd 169.254.255.255 scope link eno1
      valid_lft forever preferred_lft forever
3: wlp2s0: <BROADCAST,MULTICAST,UP,LOWER_UP> mtu 1500 qdisc noqueue state UP group default qlen 1000
   link/ether 98:2c:bc:af:a5:19 brd ff:ff:ff:ff:ff:ff
   inet 192.168.2.165/20 brd 192.168.15.255 scope global dynamic noprefixroute wlp2s0
      valid_lft 80799sec preferred_lft 80799sec
   inet6 fe80::e2b2:f4ff:e2f:b629/64 scope link noprefixroute
      valid_lft forever preferred_lft forever
Next Steps
You have now configured the camera and PC to link-local. Go to Connecting to the camera.