Gamma校正
本教程演示如何使用可配置的Gamma校正捕获2D图像。
首先,我们连接到相机。
然后我们从user获取gamma作为命令行参数。
接下来我们在没有Gamma校正(Gamma=1.0)和给定Gamma校正(在这种情况下,Gamma=0.6)的情况下捕获图像。
下面展示了如何实现捕获彩色图像。
cv::Mat captureBGRImage(Zivid::Camera &camera, const double gamma)
{
    std::cout << "Configuring settings" << std::endl;
    const auto settings2D = Zivid::Settings2D{ Zivid::Settings2D::Acquisitions{ Zivid::Settings2D::Acquisition{} },
                                               Zivid::Settings2D::Processing::Color::Gamma{ gamma } };

    std::cout << "Capturing 2D frame" << std::endl;
    const auto frame2D = camera.capture(settings2D);
    const auto image = frame2D.imageRGBA();
    auto bgr = imageToBGR(image);

    return bgr;
}
def _capture_bgr_image(camera: zivid.Camera, gamma: float) -> np.ndarray:
    """Capture and extract 2D image, then convert from RGBA and return BGR.

    Args:
        camera: Zivid Camera handle
        gamma: Gamma correction value

    Returns:
        bgr: BGR image (HxWx3 ndarray)

    """
    print("Configuring Settings")
    settings_2d = zivid.Settings2D(
        acquisitions=[zivid.Settings2D.Acquisition()],
    )
    settings_2d.processing.color.gamma = gamma

    print("Capturing 2D frame")
    with camera.capture(settings_2d) as frame_2d:
        image = frame_2d.image_rgba()
        rgba = image.copy_data()
        bgr = cv2.cvtColor(rgba, cv2.COLOR_RGBA2BGR)
        return bgr
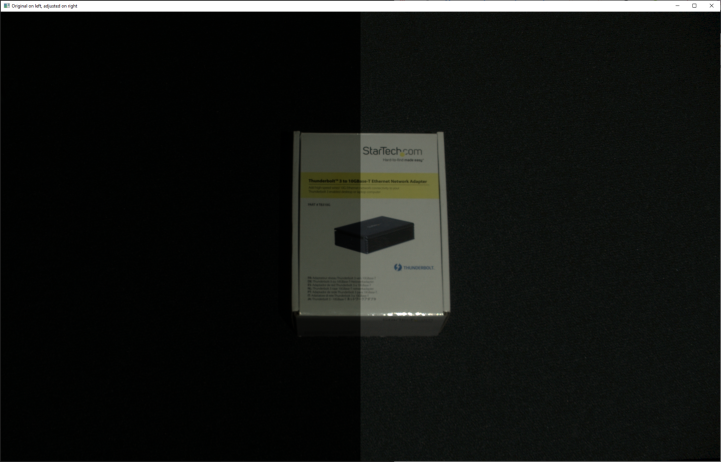
为了比较使用了Gamma校正的图像和没有使用Gamma校正的图像的差异,将创建一个组合图像。
cv::Mat combineImages(const cv::Mat &imageOne, const cv::Mat &imageTwo)
{
    cv::Mat combinedImage;
    int height = imageOne.rows;
    int width = imageOne.cols;
    cv::hconcat(
        imageOne(cv::Range(0, height), cv::Range(0, width / 2)),
        imageTwo(cv::Range(0, height), cv::Range(width / 2, width)),
        combinedImage);

    return combinedImage;
}
def _combine_images(image_one: np.ndarray, image_two: np.ndarray) -> np.ndarray:
    """Column-wise concatenate each half of two images together as one.

    Args:
        image_one: Left side of concatenated image
        image_two: Right side of concatenated image

    Returns:
        combined_image: Combined halves of each image

    """
    width = (int)(image_one.shape[1] / 2)
    combined_image = np.hstack([image_one[:, :width], image_two[:, -width:]])

    return combined_image
然后可以将两张图片在一幅图像中显示。
生成的组合图像如下所示,左侧是原始的一半图像,右侧是经过Gamma校正的一半图像。
