Connectivity and Power Supply
Zivid cameras connect to power and to your computer via two M12 connectors: a power connector and an Ethernet connector.
Connectors
Zivid 3

M12-5: Power Connector 24V, 5A DC
M12X: Ethernet Connector CAT 6A
Check Zivid Data Cables for more information.
Zivid 2+

M12-5: Power Connector 24V, 5A DC
M12X: Ethernet Connector CAT 6A
Check Zivid Data Cables for more information.
For the factory reset button, see Factory Reset Button.
Zivid 2
M12-5: Power Connector 24V, 5A DC
M12X: Ethernet Connector CAT 6A
Check Zivid Data Cables for more information.
For the factory reset button, see Factory Reset Button.
Power supply interface
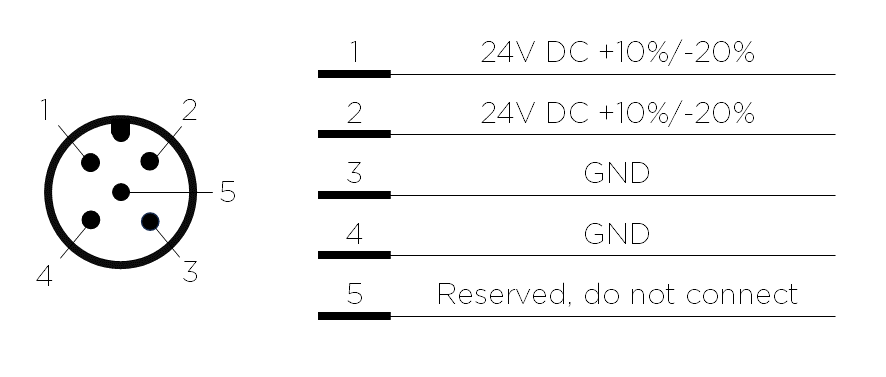
It is required to use both pins for 24V and for GND.
Zivid 3: optional mating connector TE Connectivity AMP, 1838274-3 (Digikey: A97642-ND).
Zivid 2+ and Zivid 2: optional mating connector TE Connectivity AMP, 1838275-3 (Digikey: A97645-ND).
Warning
Power supplies or cables that do not meet the specified requirements can damage the camera and void the warranty, particularly when using third-party or custom solutions. See Power Supply and Cables for more information.
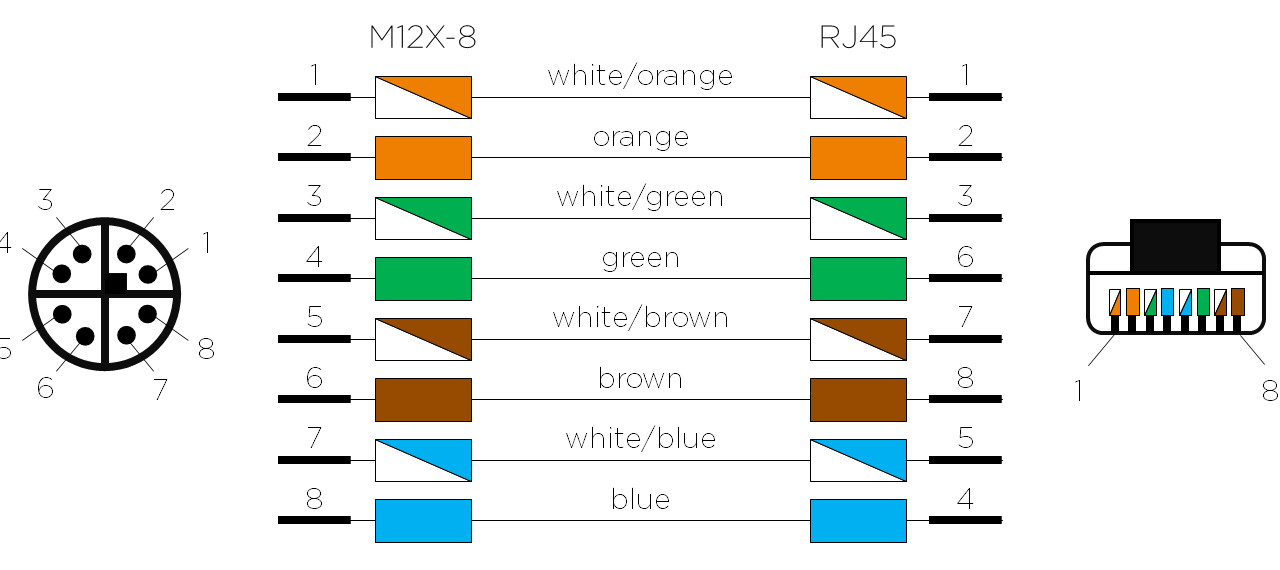
Data cable
Zivid camera uses a dedicated ethernet cable for data transmission. See Zivid Data Cables for more information.
The table below provides the Zivid Ethernet cable pinout.
Connecting to the computer
To connect the camera, plug in power first, then the Ethernet cable to your computer.
Plug the power supply into the camera’s power connector (“24V”).
Plug the Ethernet cable into the camera and connect it to your computer.
Plug the power supply into a power outlet.
Note
Use the AC/DC adapter supplied with the unit to ensure compliance with emission and immunity standards.
The Zivid camera is protected against reverse polarity and against overheating by a thermistor that physically removes the power.
The Zivid camera uses Ethernet communication and needs 10 Gbps for best performance. Not all computers have a port for 10 Gigabit Ethernet. In that case, you can connect to it using an adaptor for 10GBASE-T (10 Gbps copper Ethernet) to Thunderbolt 3. At a reduced performance you can also use 1000BASE-T and NBASE-T (1 Gbps, 2.5 Gbps, and 5 Gbps over copper) to USB adapters.
Recommended network cards and adapters
We have successfully tested and recommend the following hardware:
Caution
USB-based network adapters have reduced and more variable capture speed, and can occasionally give errors when using the camera. Our recommendation is to use 10Gb PCI Express cards for optimal performance.
Warning
Use only Zivid approved Ethernet cables.
Network Topology
Zivid camera supports the following network topologies:
Direct connection |
Connection via switch |
|---|---|
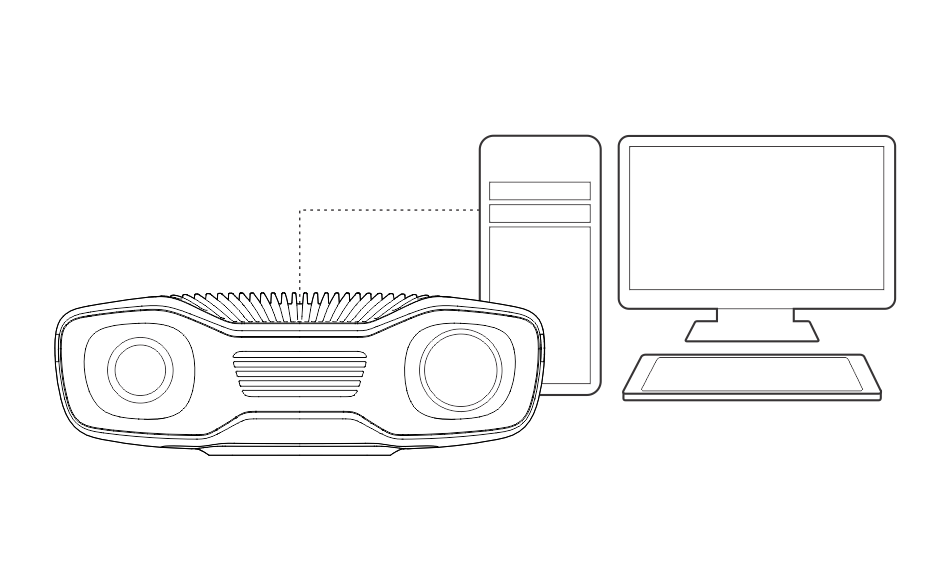
|
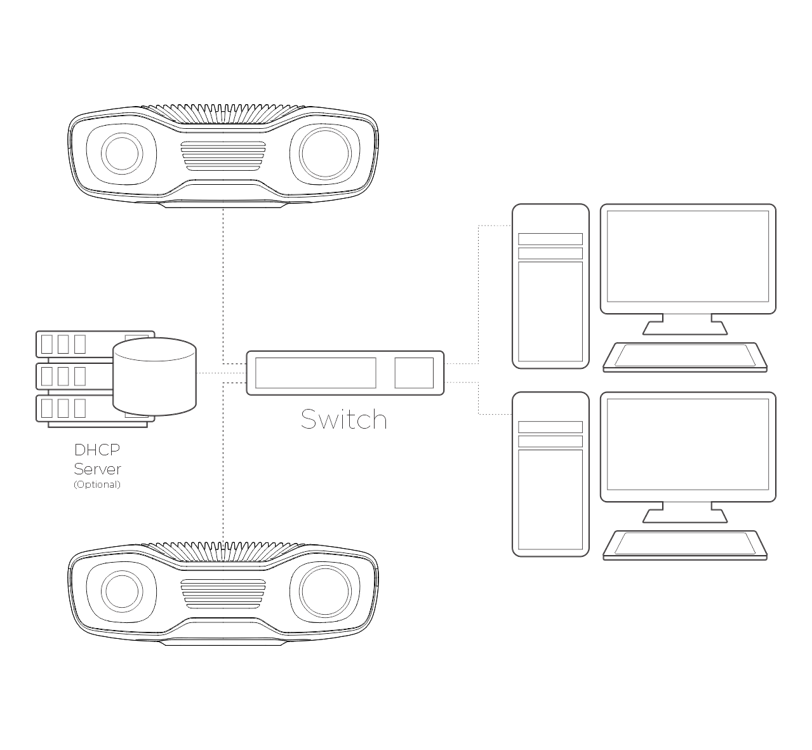
|
Continue to Software Installation where you will also find Network Configuration.
Version History
SDK |
Changes |
|---|---|
2.17.0 |
Added support for Zivid 3 XL250. |
2.14.0 |
Added support for Zivid 2+ MR130, LR110, and MR60. |
2.12.0 |
Zivid One+ has reached its End-of-Life and is no longer supported. |
2.4.0 |
Multiple Zivid 2 camera support added. |