在Visual Studio中使用Zivid .NET API构建C# “Hello World”应用程序
介绍
本教程展示了如何在Visual Studio 2017中创建和开始开发Zivid C# 应用程序。
要求
说明
下面的屏幕截图提供了分步说明。
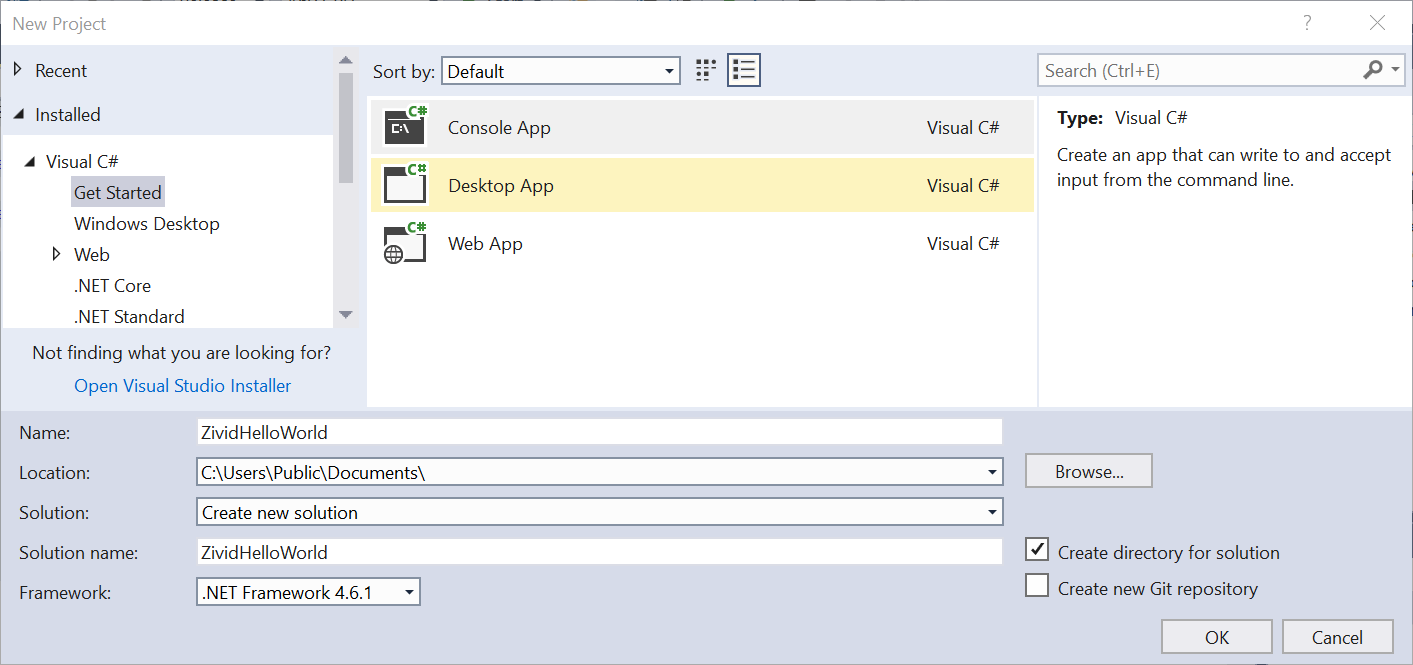
创建一个新项目
运行Visual Studio,然后单击 File → New → Project…。
选择Visual C#的控制台应用程序,然后添加名称(ZividHelloWorld)和位置 (C:\Users\Public\Documents\)。
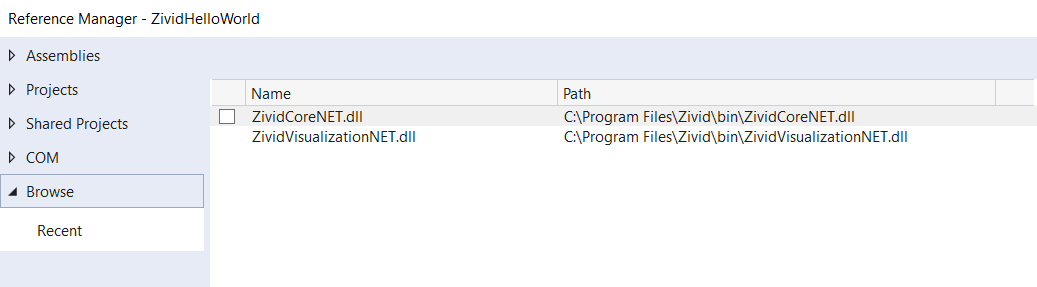
添加对Zivid .NET API的引用
在解决方案资源管理器中右键单击您的项目,然后单击 Add → Reference… → Browse。导航到C:\Program Files\Zivid\bin并添加ZividCoreNET.dll和 ZividVisualizationNET.dll。
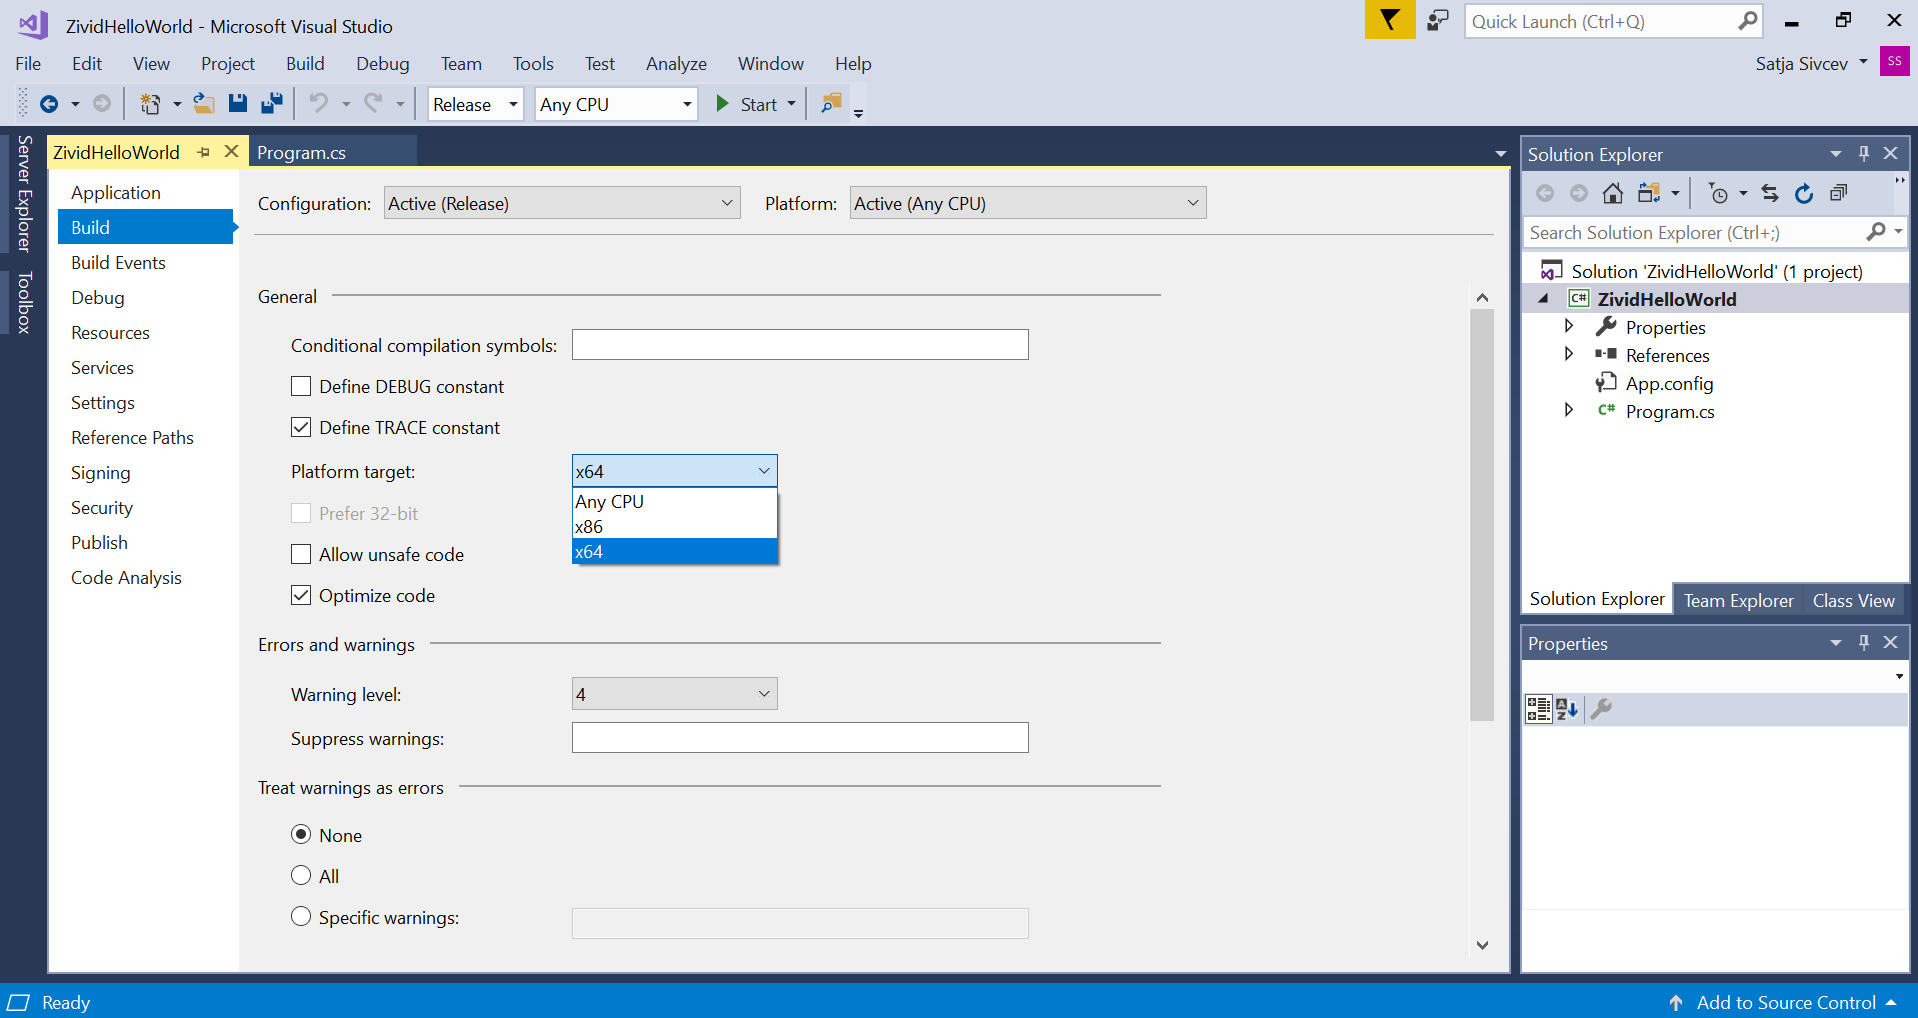
选择正确的platform target
右键单击您的项目,然后单击 Properties。 在 Build 中,将Platform target更改为 x64。
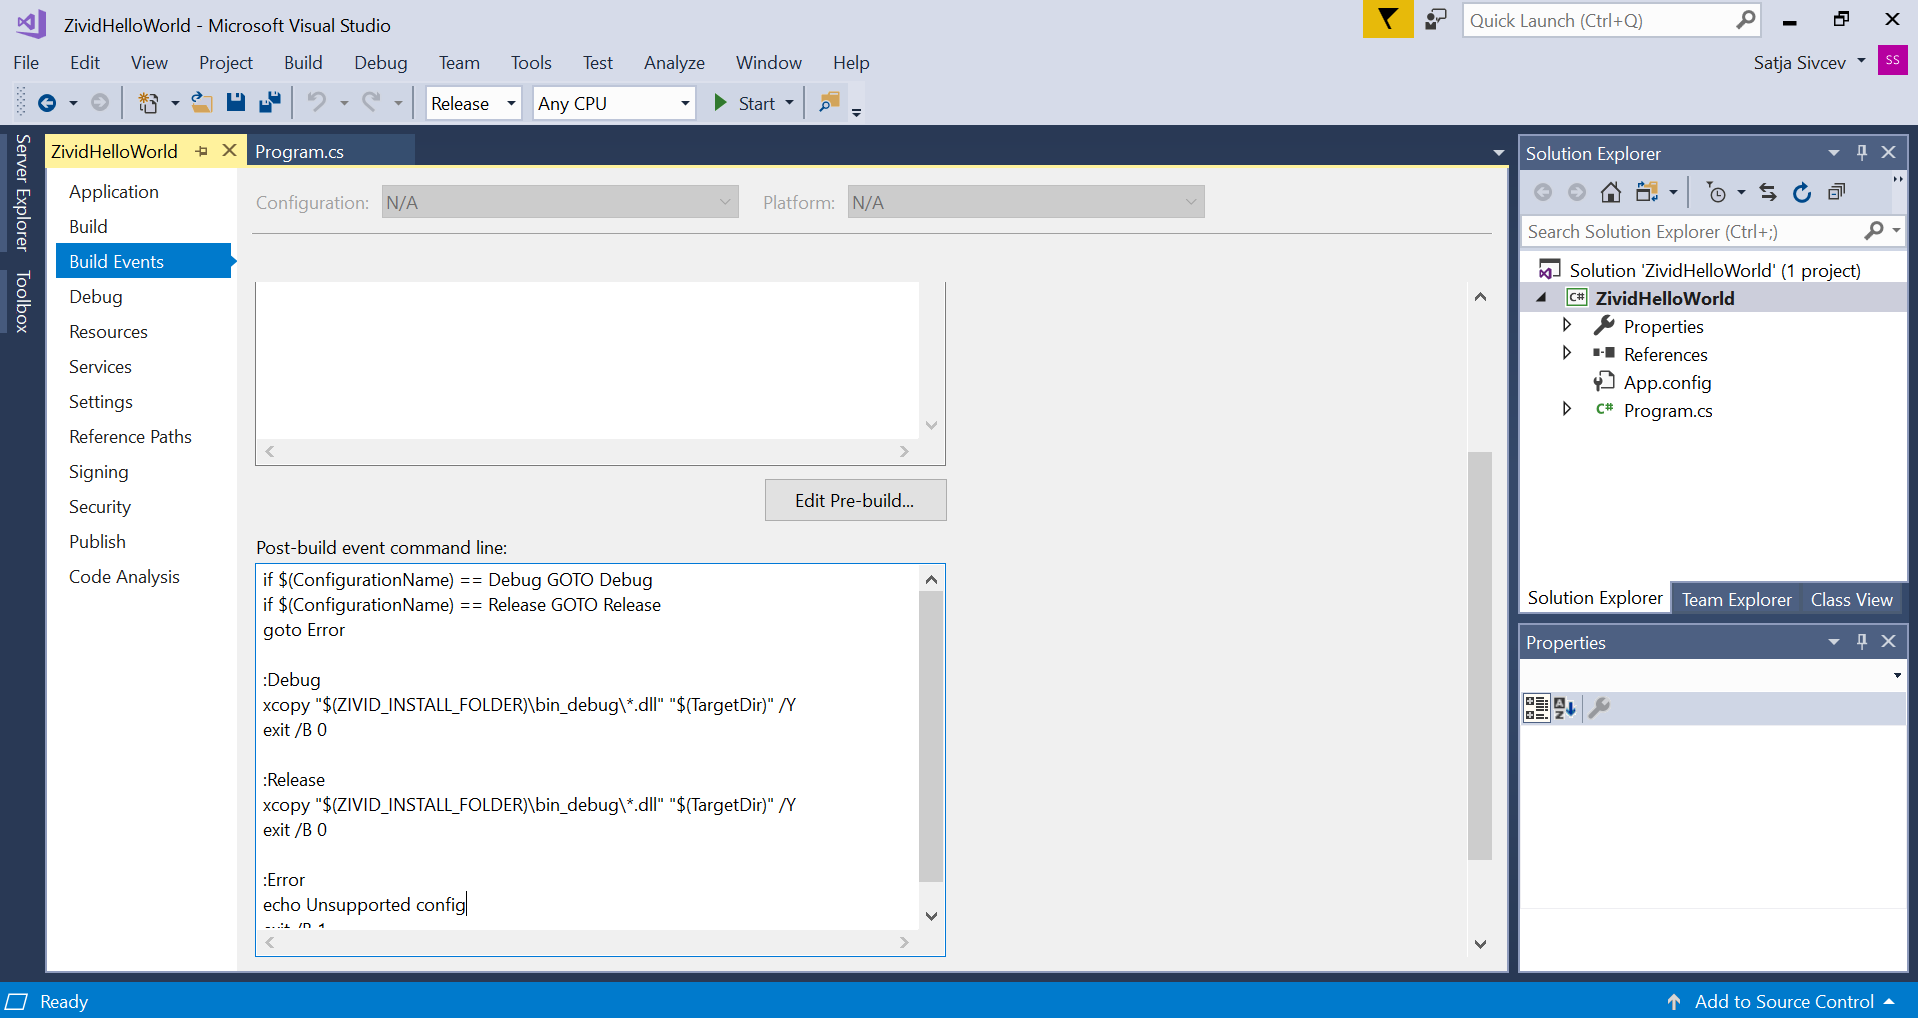
添加构建后事件命令行代码
在 Build Events 下,将以下代码块添加到Post-build事件命令行:
if $(ConfigurationName) == Debug GOTO Debug
if $(ConfigurationName) == Release GOTO Release
goto Error

:Debug
xcopy "$(ZIVID_INSTALL_FOLDER)\bin_debug\*.dll" "$(TargetDir)" /Y
exit /B 0

:Release
xcopy "$(ZIVID_INSTALL_FOLDER)\bin\*.dll" "$(TargetDir)" /Y
exit /B 0
:Error
echo Unsupported config
exit /B 1
添加主C#代码
返回到您的程序并将代码替换为以下代码块:
using System;

namespace ZividHelloWorld
{
    class ZividHelloWorld
    {
        static int Main()
        {
            try
            {
                var zivid = new Zivid.NET.Application();
                Console.WriteLine("Hello World!");
            }
            catch(Exception ex)
            {
                Console.WriteLine("Error: " + ex.Message);
                return 1;
            }
            return 0;
        }
    }
}
要继续使用Zivid 和 C#进行开发,请查 看 Zivid .NET API reference 和下一页的教程 使用Visual Studio构建C#示例 。