基于ArUco标记的坐标转换
本教程展示了如何估计ArUco标记的位姿并使用4x4齐次变换矩阵将点云转换到ArUco标记坐标系。
小技巧
Zivid calibration board 包含了一个 ArUco 标记。
This tutorial uses the point cloud of an ArUco marker displayed in the image below.
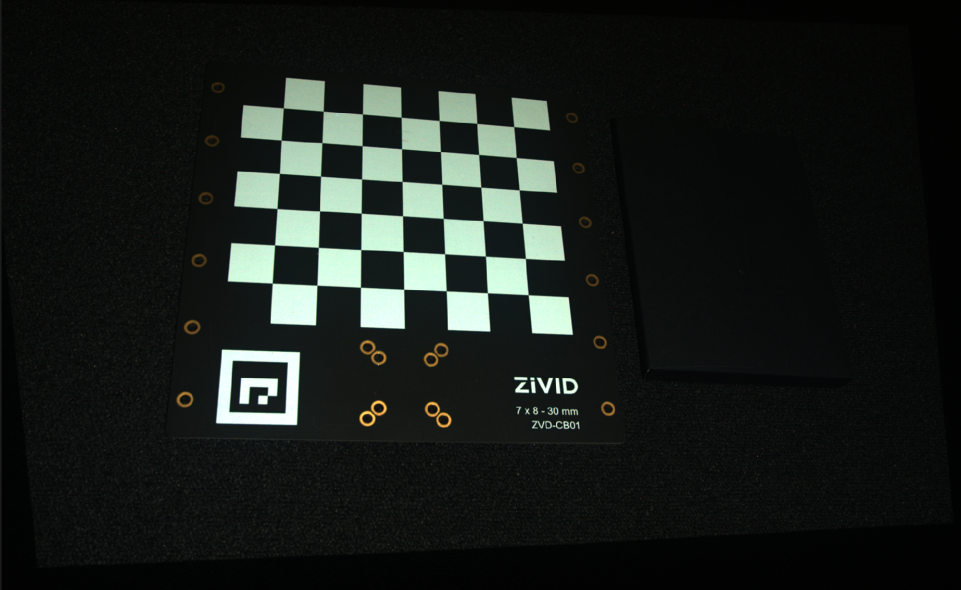
We can open the original point cloud in Zivid Studio and inspect it.
备注
原始点云在 Sample Data(示例数据) 中。
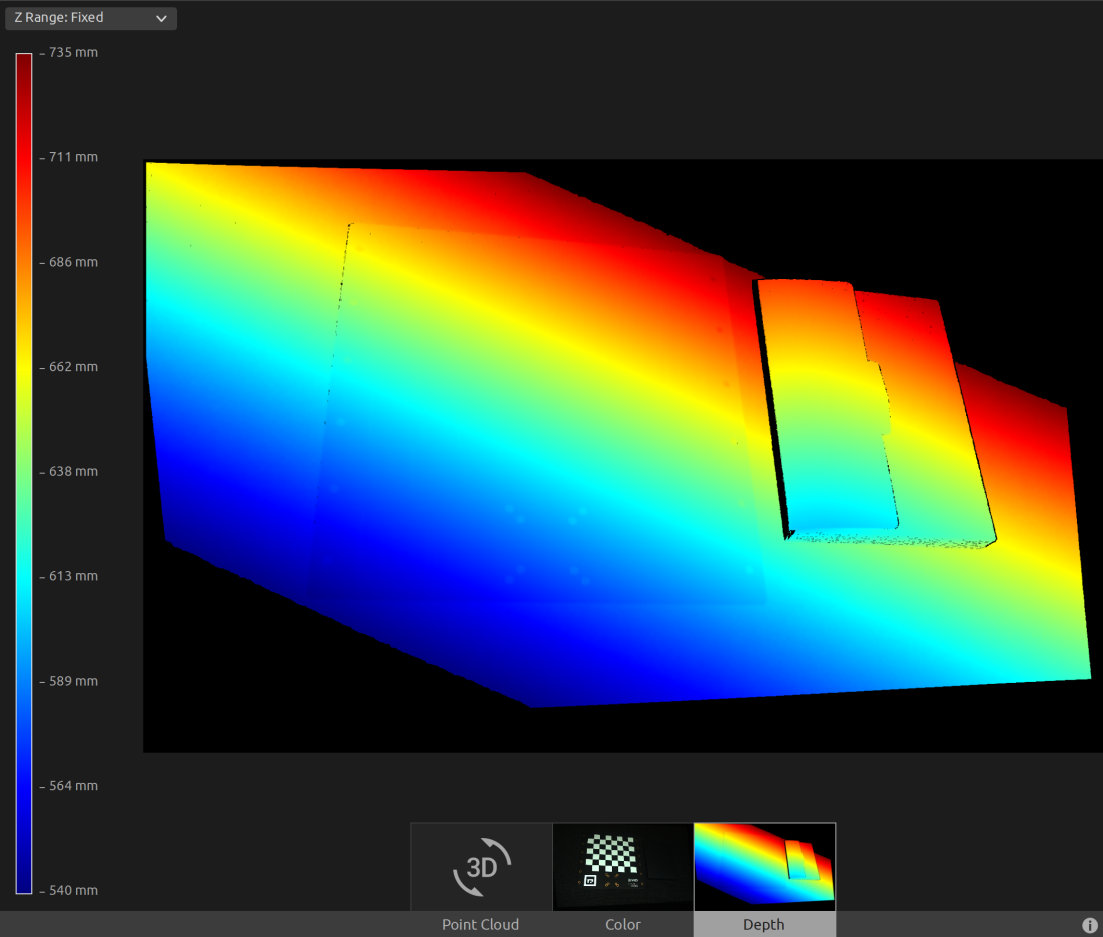
Now, we can manually set the Z Range from 540 mm to 735 mm in the Depth view. This allows us to see that the marker is at approximately 570 mm distance, and that there is an angle between the camera and the marker frame.
首先,我们加载一个 ArUco 标记的点云。

由于我们使用的是OpenCV,我们需要将2D图像转换为OpenCV的图像格式。
然后我们将配置ArUco标记。
std::cout << "Configuring ArUco marker" << std::endl;
const auto markerDictionary = cv::aruco::getPredefinedDictionary(cv::aruco::DICT_4X4_100);
std::vector<int> markerIds;
std::vector<std::vector<cv::Point2f>> markerCorners;
cv::Ptr<cv::aruco::DetectorParameters> detectorParameters = cv::aruco::DetectorParameters::create();
detectorParameters->cornerRefinementMethod = cv::aruco::CORNER_REFINE_SUBPIX;
接下来我们需要检测出2D图像中的ArUco标记并显示它。
std::cout << "Detecting ArUco Marker" << std::endl;
cv::aruco::detectMarkers(grayImage, markerDictionary, markerCorners, markerIds, detectorParameters);

std::cout << "Displaying detected ArUco marker" << std::endl;
cv::aruco::drawDetectedMarkers(bgrImage, markerCorners);
displayBGR(bgrImage, "ArucoMarkerDetected");
然后我们估计 ArUco 标记的位姿。
std::cout << "Estimating pose of detected ArUco marker" << std::endl;
const auto transformMarkerToCamera = estimateArUcoMarkerPose(pointCloud, markerCorners[0]);
std::cout << "Camera pose in ArUco marker frame:" << std::endl;
std::cout << transformMarkerToCamera << std::endl;
const auto transformCameraToMarker = transformMarkerToCamera.inverse();
最后,我们将点云转换到ArUco标记坐标系,并将转换后的点云保存到磁盘。
提示
Learn more about 位置、方向和坐标变换.
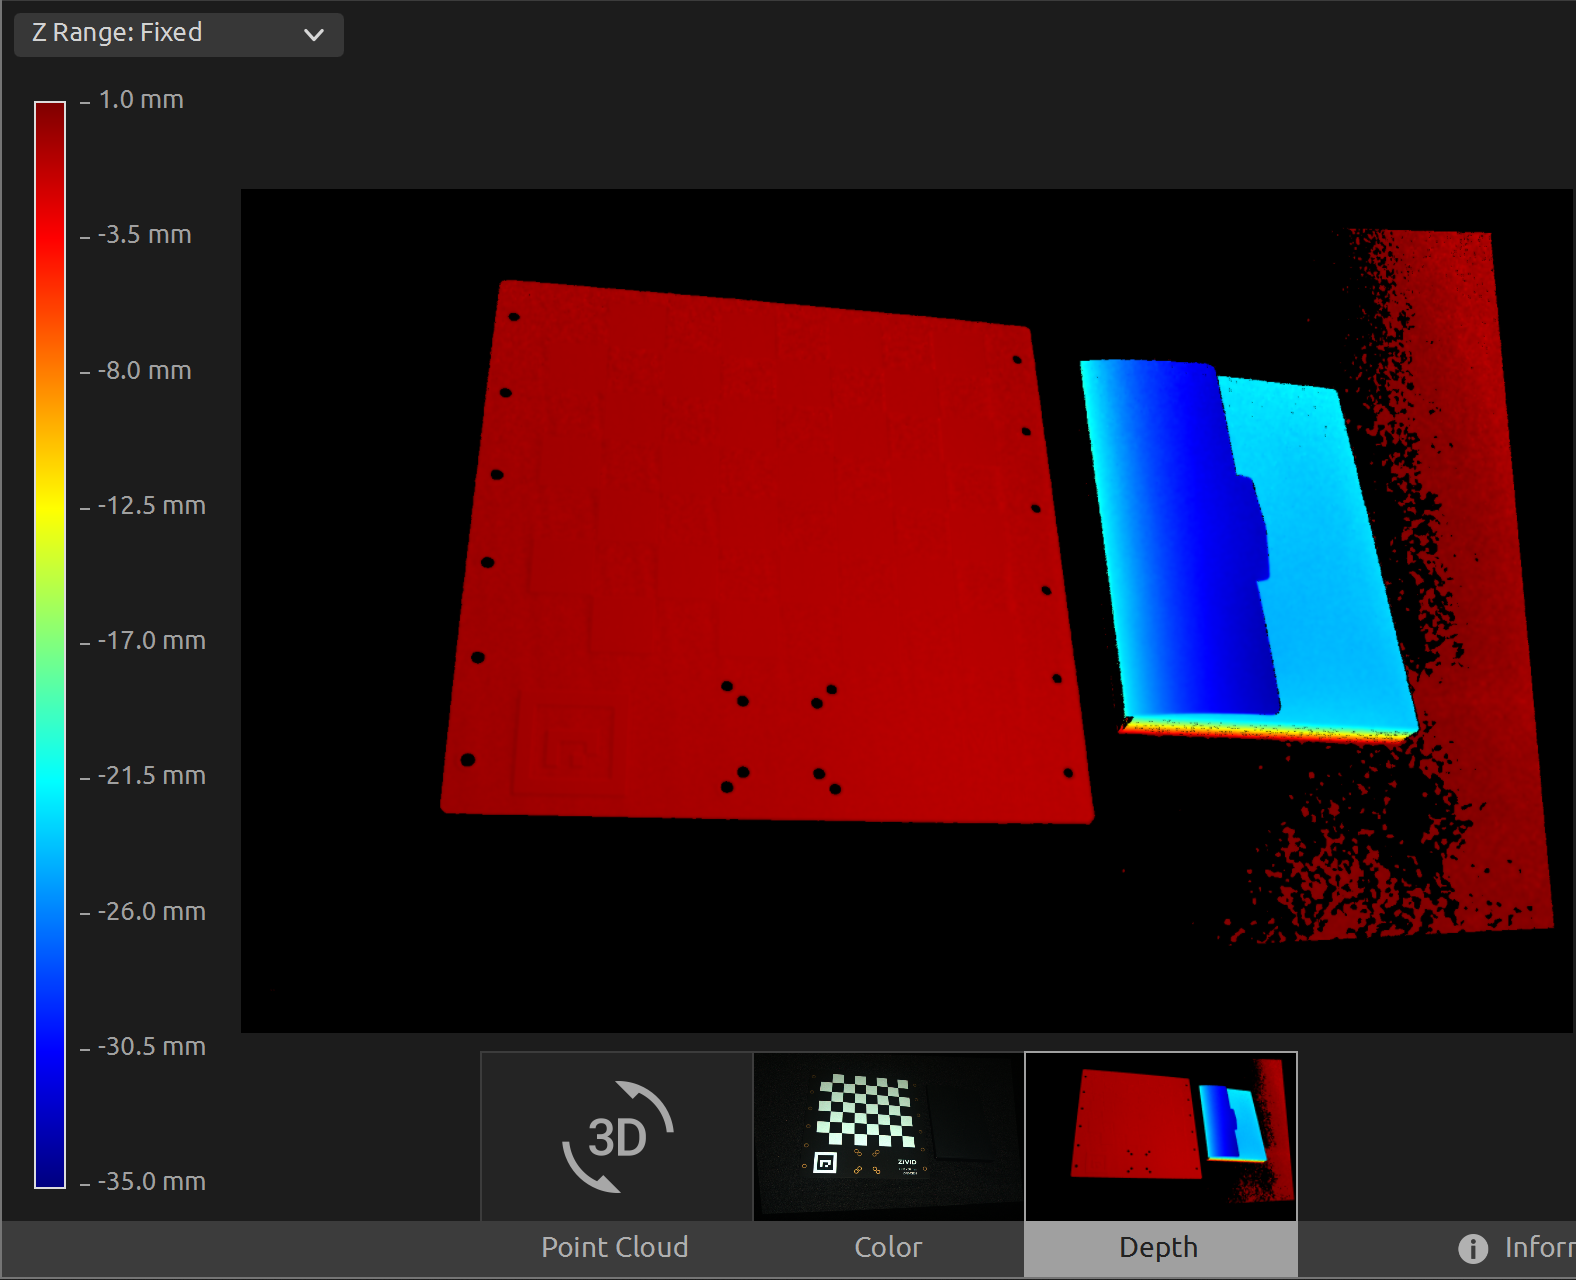
现在我们可以在Zivid Studio中打开 转换后的点云 进行检查。
备注
在Zivid Studio中缩小显示图像以查找数据,因为视点原点不适合观察转换后的点云。
We can now manually set the Z Range from -35 mm to 1 mm in the Depth view. This way we can filter out all data except the calibration board and the object located next to it. This allows us to see that we have the same Z value across the calibration board, and from the color gradient we can check that the value is 0. This means that the origin of the point cloud is on the ArUco marker.