オクルージョンの計算
In any triangulation based 3D vision system occlusion can occur. For guidance on positioning the camera to minimize occlusion in a real setup, see the positioning pages for bin-picking, piece-picking, and depalletization.
Occlusion from Object Height
Occlusion can also occur from the height of an object itself, independent of any bin wall or divider. In the illustration below, the taller blue object hides the shorter orange object.
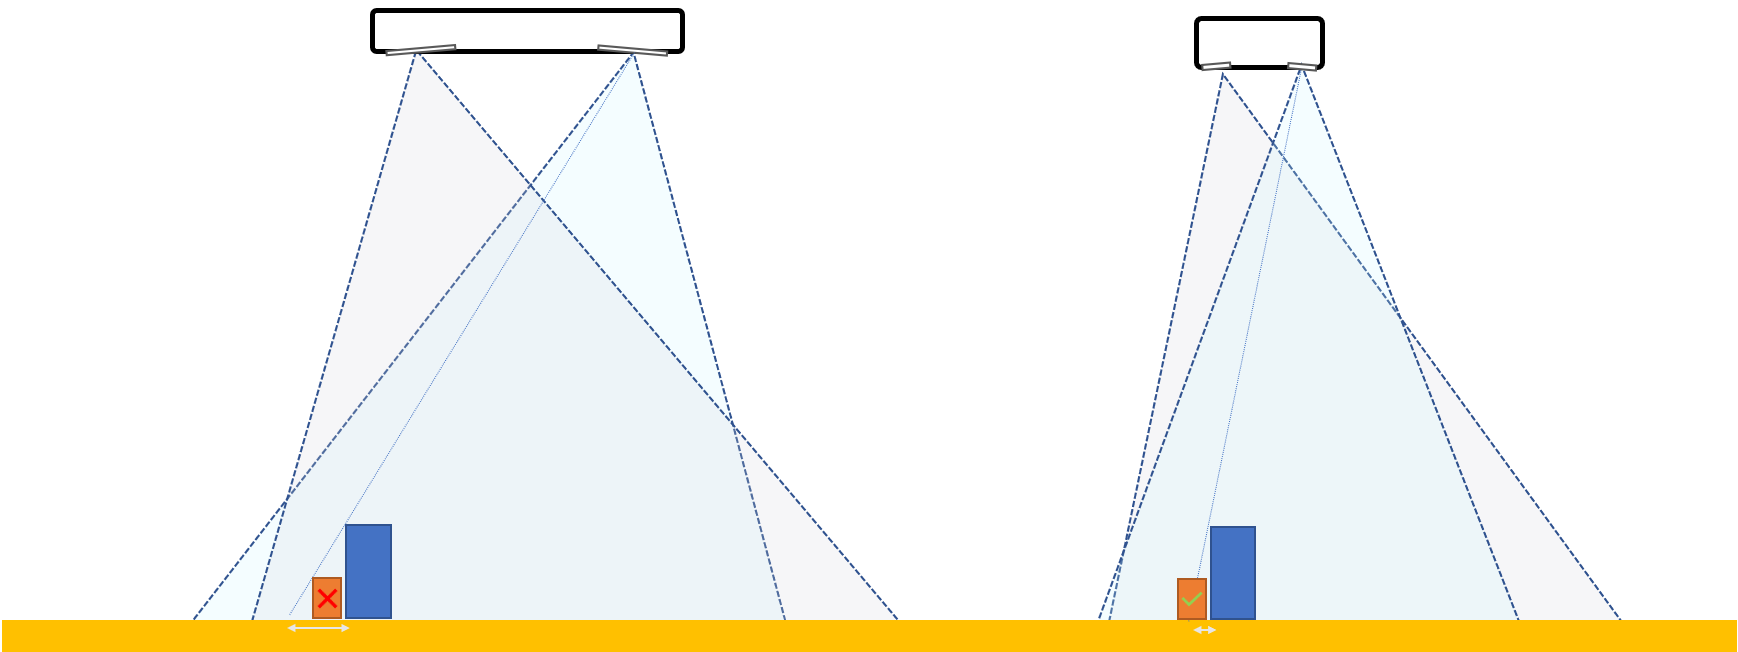
Whether a tall object occludes its neighbors depends on several factors: where it sits along the camera's horizontal axis, its height and width, and its distance from the camera. The camera's baseline also plays a role.
How does the calculator work?
The camera and projector each sit offset from the camera's horizontal center by half the baseline, on opposite sides.
The object is not a single point: it spans from object_position - object_width / 2 to object_position + object_width / 2.
An emitter's shadow reaches as far as the ray through the object's farthest corner from that emitter: the camera (on the left) is bounded by the object's right face, the projector (on the right) by its left face.
The ray through the near face lands short of that point, so it is not the binding constraint: everything between the two rays is still blocked by some part of the object's silhouette as seen from that emitter.
A ray from an emitter grazing the top of the face that bounds it continues in a straight line down to the surrounding scene, marking one edge of the shadow that emitter casts.
The calculator computes each edge as:
face_position + (face_position - emitter_position) * (object_height / distance_to_top)
face_positionis the object's right face for the camera's ray, and its left face for the projector's ray.emitter_positionis-baseline / 2for the camera and+baseline / 2for the projector.object_heightis the height of the object in mm.distance_to_topis the distance from the camera to the top of the object in mm, computed asdistance_to_bottom - object_height.
The camera's ray extends the shadow beyond the object's right face, so the right occlusion is that edge minus the right face's position.
Likewise, the left occlusion is the object's left face minus the projector's edge.
If a ray lands back inside the object's own footprint instead of beyond it, the occlusion on that side is clamped to 0.
Neither depends on the object's position, only on its height, width, and distance, so moving the object along the horizontal axis shifts the shadow without changing the occlusion on either side.
When the object's width is negligible and it is centered directly below the camera (object_position is 0), the left and right occlusion are equal and this reduces to the same object_height * tan(atan(baseline / 2 / distance_to_top)) form used for the shared-wall case below.
The range of the object-position slider comes from the camera's field of view at distance_to_bottom (the same working distance used by the field of view calculator), so the object can only be placed where the camera can actually see it.
Occlusion from Multiple Bins
固定設置型のビンピッキングまたはピースピッキングでは、ビンの壁や仕切りがこの状況を引き起こす可能性があります。カメラが 2 つのコンパートメントを見ている場合は、カメラのベースラインを共有の壁または仕切りに合わせることでオクルージョンを回避できます。 3 つ以上のコンパートメントがある場合、そのような位置合わせは不可能です。例えば:
2 つ以上の箱からピッキングする
2 つ以上の仕切りのあるビンからピッキングする
ベースラインが大きい ➞ オクルージョン効果が悪化する
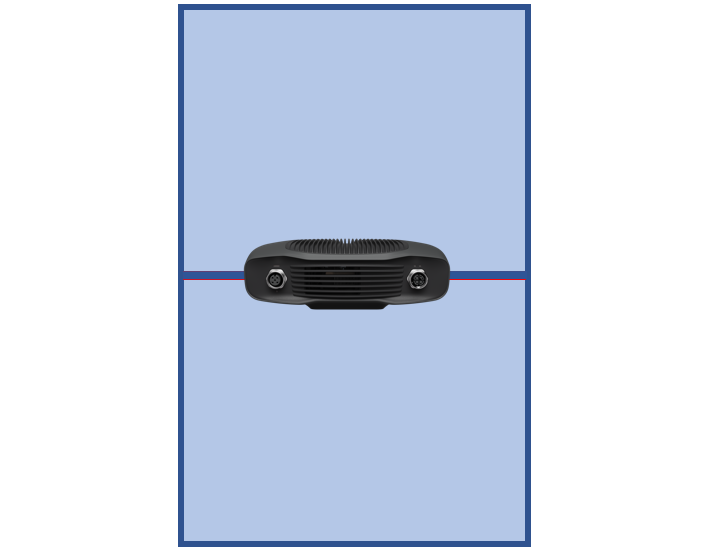
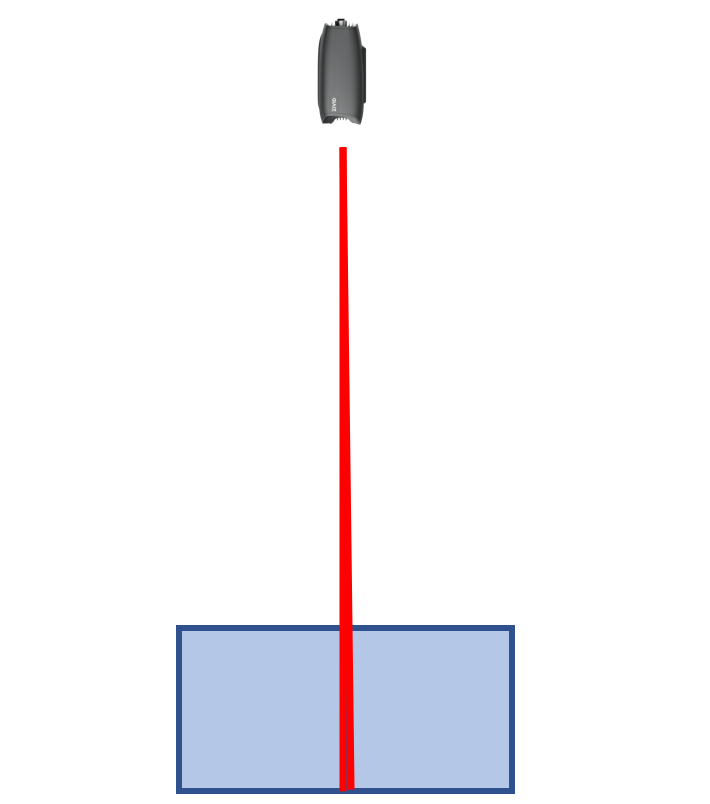
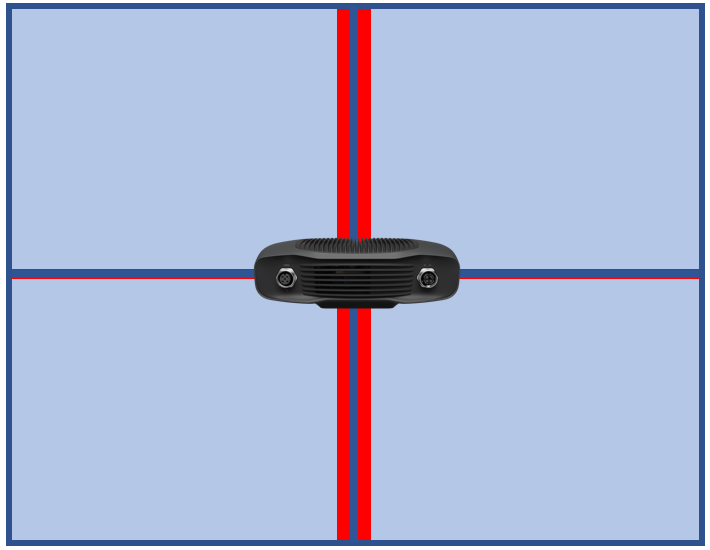
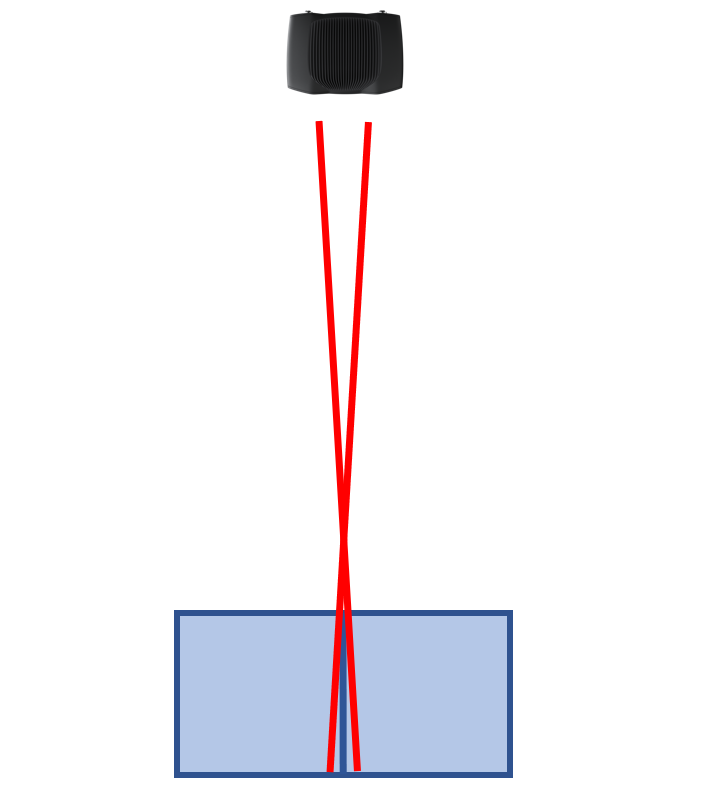
次の計算ツールは、単一の壁または間仕切り全体にわたるオクルージョン効果を示しています。最悪の場合の遮蔽を最小限に抑えるために、カメラは壁の真上に配置されます。オクルージョンが壁に対して対称であることがわかります。
How does the calculator work?
The calculator computes occlusion as bin_depth * tan(atan(baseline / 2 / distance_to_bin)).
baselineis the camera's baseline in mm.distance_to_binis the distance from the camera to the top of the bin in mm.bin_depthis the depth of the bin (or divider height) in mm.
The 2D camera and projector each sit offset from the camera's center by half the baseline. With the camera centered above the shared wall, the one further from a given side is the one whose view over that wall is blocked first, so its offset (half the baseline) sets the occlusion angle on that side. The examples below use this formula directly, with real camera baselines and the calculator's own AutoStore bin depths.
Camera |
Baseline |
Bin depth |
Distance to top |
Occlusion |
Note |
|---|---|---|---|---|---|
Zivid 2+ |
110 mm |
200 mm (Small AutoStore) |
500 mm |
Approximately 22.0 mm |
A shorter camera-to-bin distance increases occlusion even with a shallower bin. |
Zivid 2+ |
110 mm |
330 mm (Medium AutoStore) |
1000 mm |
Approximately 18.2 mm |
|
Zivid 3 XL250 |
250 mm |
425 mm (Large AutoStore) |
1000 mm |
Approximately 53.1 mm |
At the same 1000 mm distance, the larger baseline accounts for most of the increase in occlusion from the row above; the deeper bin adds comparatively little on its own. |