Static IP Network Configuration - Camera
Caution
The correct instructions for network configuration will depend on your SDK version. Choose your SDK version in the top left drop-down.
Open Zivid Studio and click Cameras → All Cameras to open the camera menu.
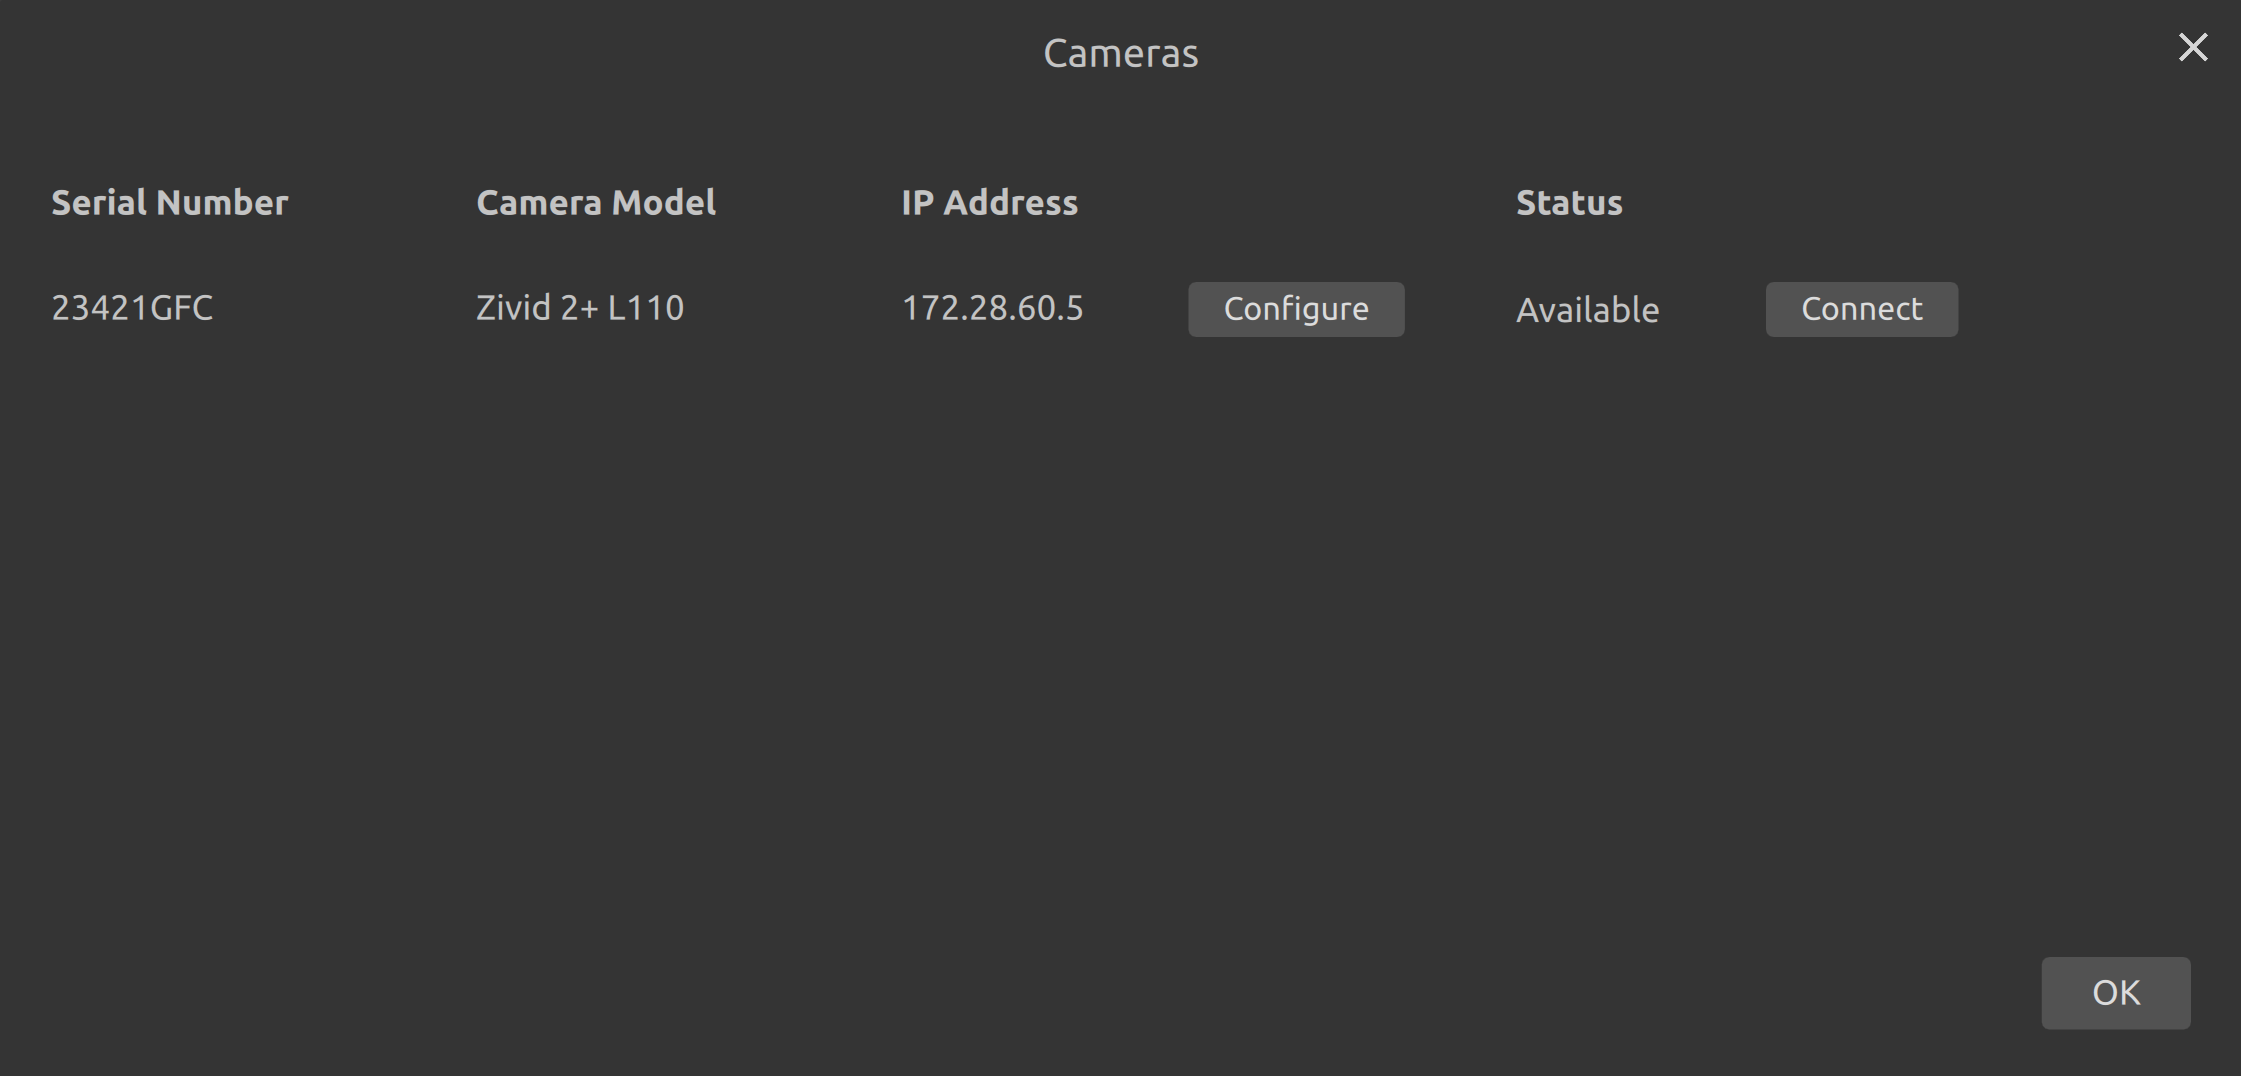
Click Configure on the camera that you want to configure.
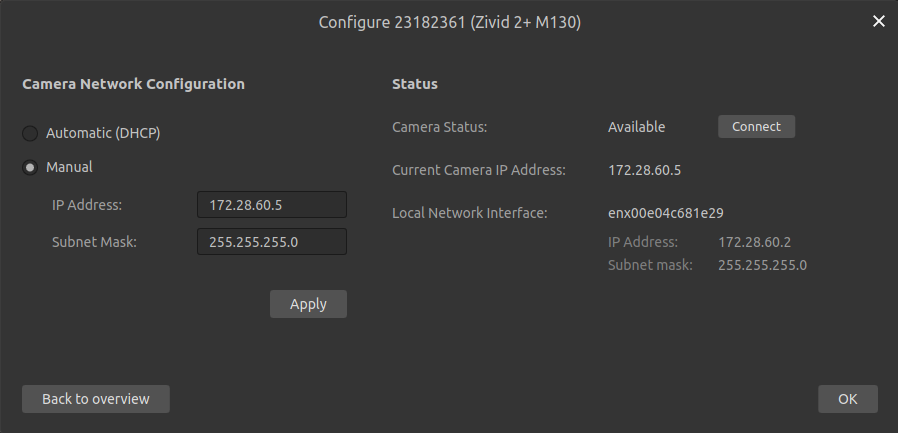
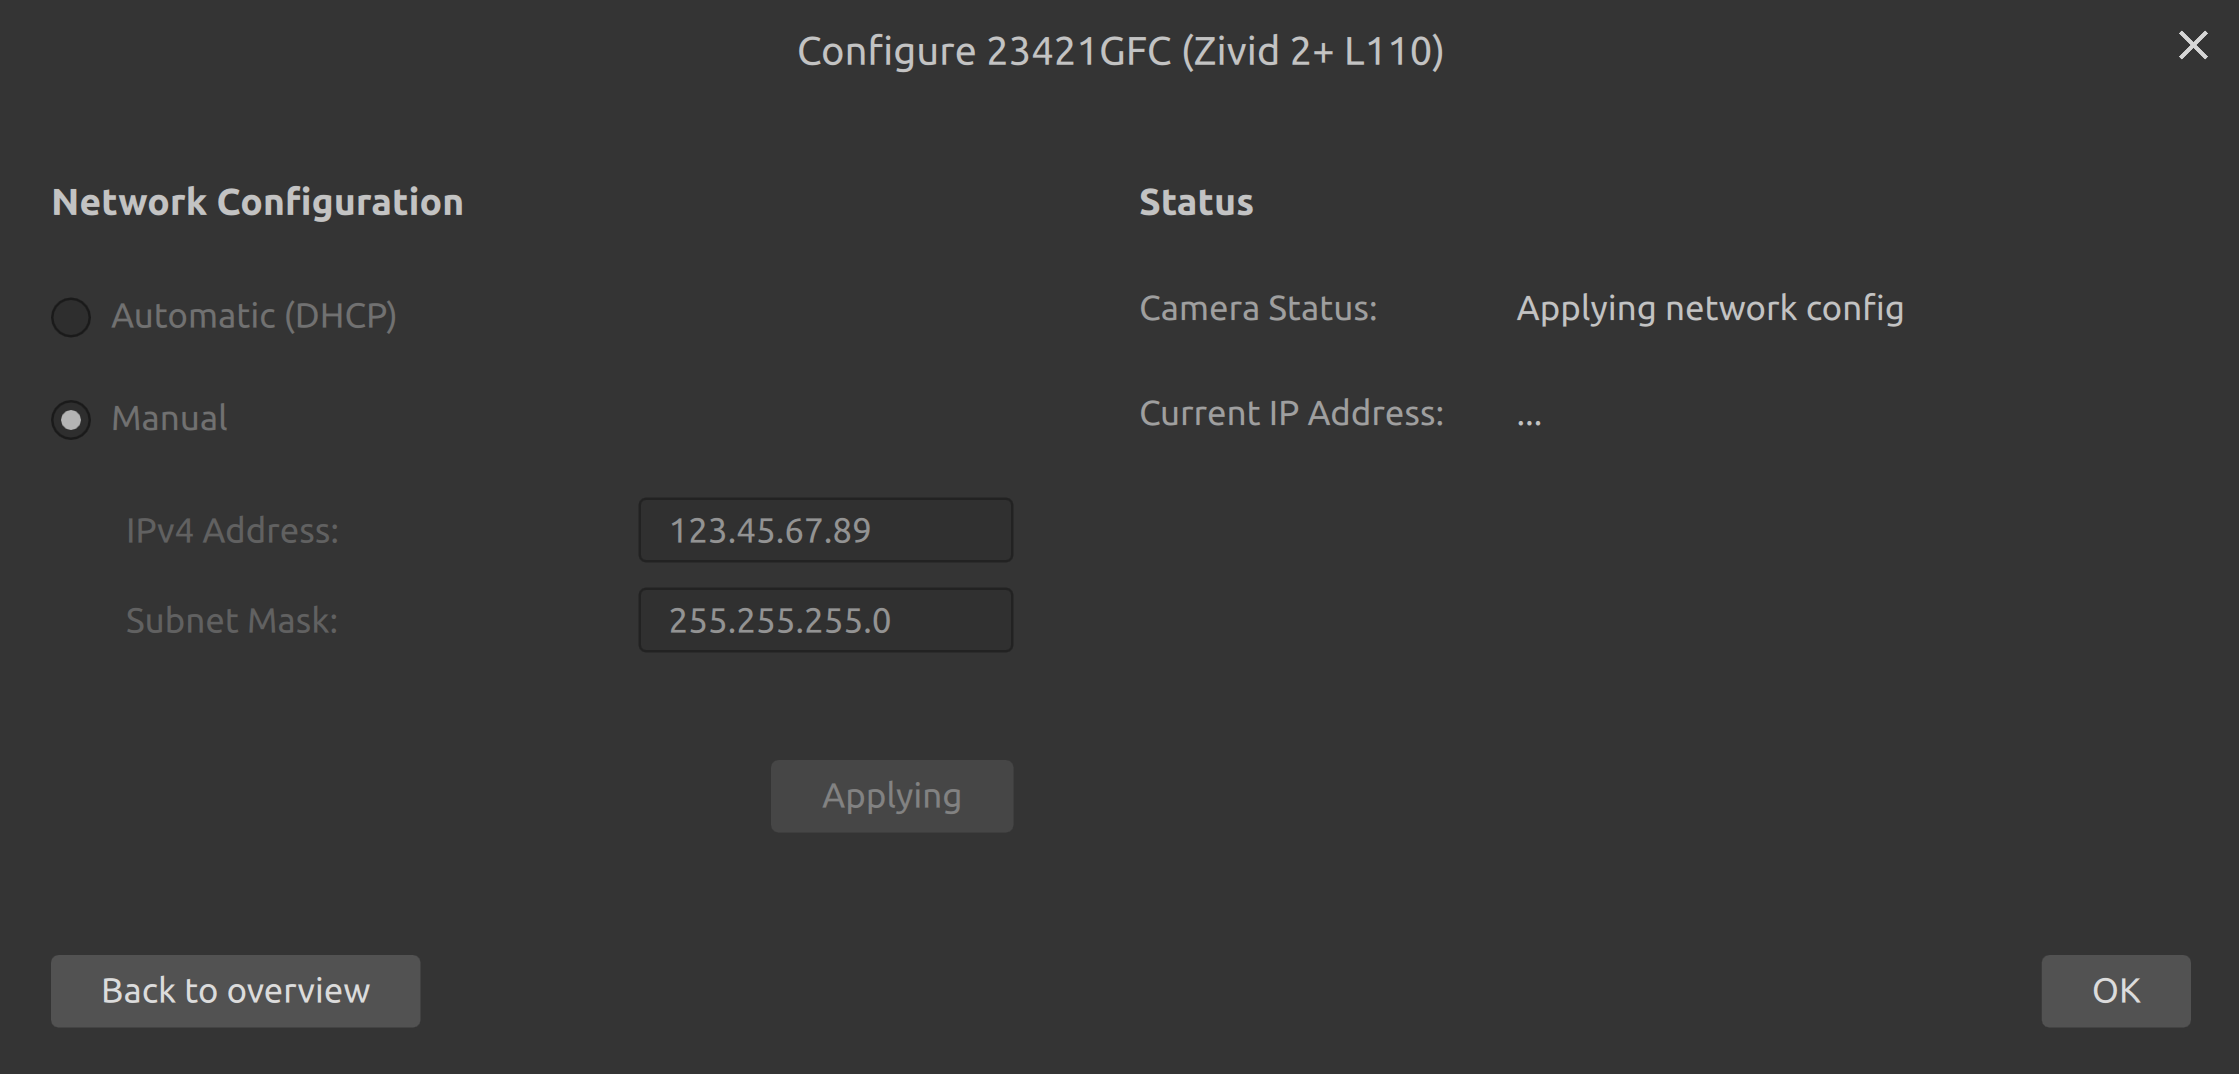
Select the manual network configuration mode, and enter your desired IP address and subnet mask. Make sure the IP address is not colliding with anything else on your network. Click Apply to apply the configuration to the camera.
The CLI tool ZividNetworkCameraConfigurator allows you to change the camera network configuration of one camera at a time.
This tool is installed alongside the Zivid SDK on Windows, and with the Zivid Tools package on Ubuntu.
Open a terminal/Command Prompt.
Connect the camera.
Verify that your camera is found by running:
ZividListCameras.exe
ZividListCameras
Set the camera with current IP
<host>in static IP mode with a specific IP address<ip>, subnet mask<mask>and gatewaygateway. Make sure the IP address is not colliding with anything else on your network.ZividNetworkCameraConfigurator.exe set-config <host> --static --ip <ip> --subnet-mask <mask> --gateway <gateway>
ZividNetworkCameraConfigurator set-config <host> --static --ip <ip> --subnet-mask <mask> --gateway <gateway>
For example, changing the static IP from
172.28.60.5to172.28.60.6:ZividNetworkCameraConfigurator.exe set-config 172.28.60.5 --static --ip 172.28.60.6 --subnet-mask 255.255.255.0 --gateway 172.28.60.1
ZividNetworkCameraConfigurator set-config 172.28.60.5 --static --ip 172.28.60.6 --subnet-mask 255.255.255.0 --gateway 172.28.60.1
The SDK provides the functions to configure the camera network configuration.
Connect to your camera.
Set the mode to manual.
Define the IP address and the Subnet Mask.
Create a network configuration object.
Apply the new network configuration to the camera.
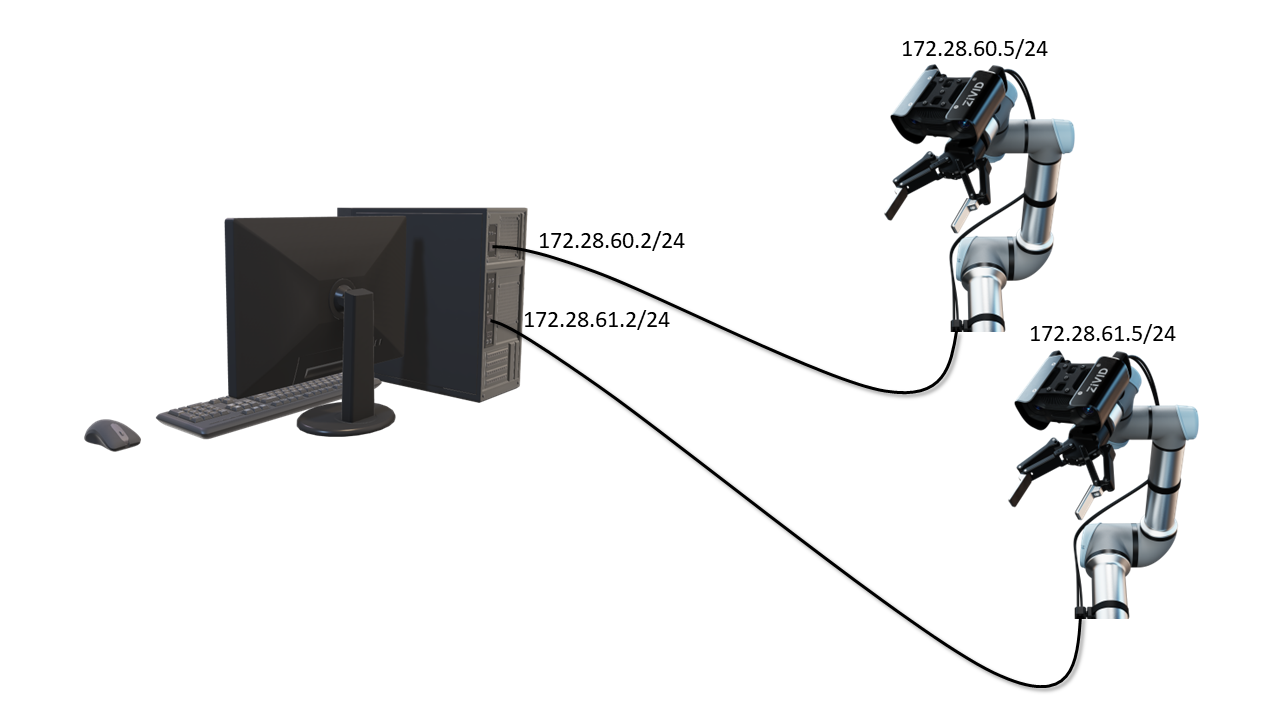
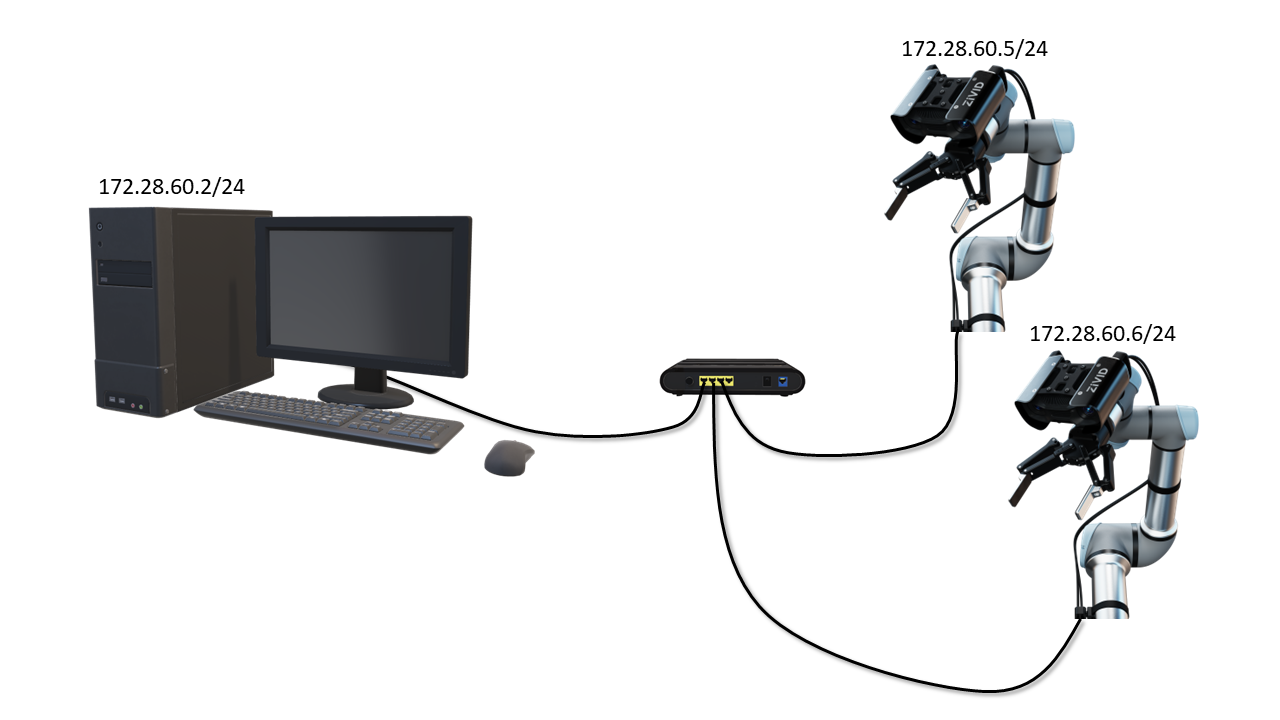
If you are configuring IP addresses of multiple cameras, repeat the steps with a different IP address for each camera. For each camera, remember to use an IP address within the same subnet range of its interfacing network card.
Tip
You can physically connect one or more cameras to your PC and use code to automatically configure their IP addresses. Each IP address aligns with the subnet of the detected corresponding local network interface.
You have now configured the camera(s) with a specific static IP address.
If the camera(s) IP is in a different subnet range than the PC, it will be inaccessible and you may not connect to it. If so, go to Static IP Network Configuration - PC to configure the IP of your PC. Otherwise, go to straight to Connecting to the camera.
Version History
SDK |
Changes |
|---|---|
2.15.0 |
Added section about automatic network configuration sample. |
