DHCP or Link Local IP Network Configuration - Camera
Caution
The correct instructions for network configuration will depend on your SDK version. Choose your SDK version in the top left drop-down.
Open Zivid Studio and click Cameras → All Cameras to open the camera menu.
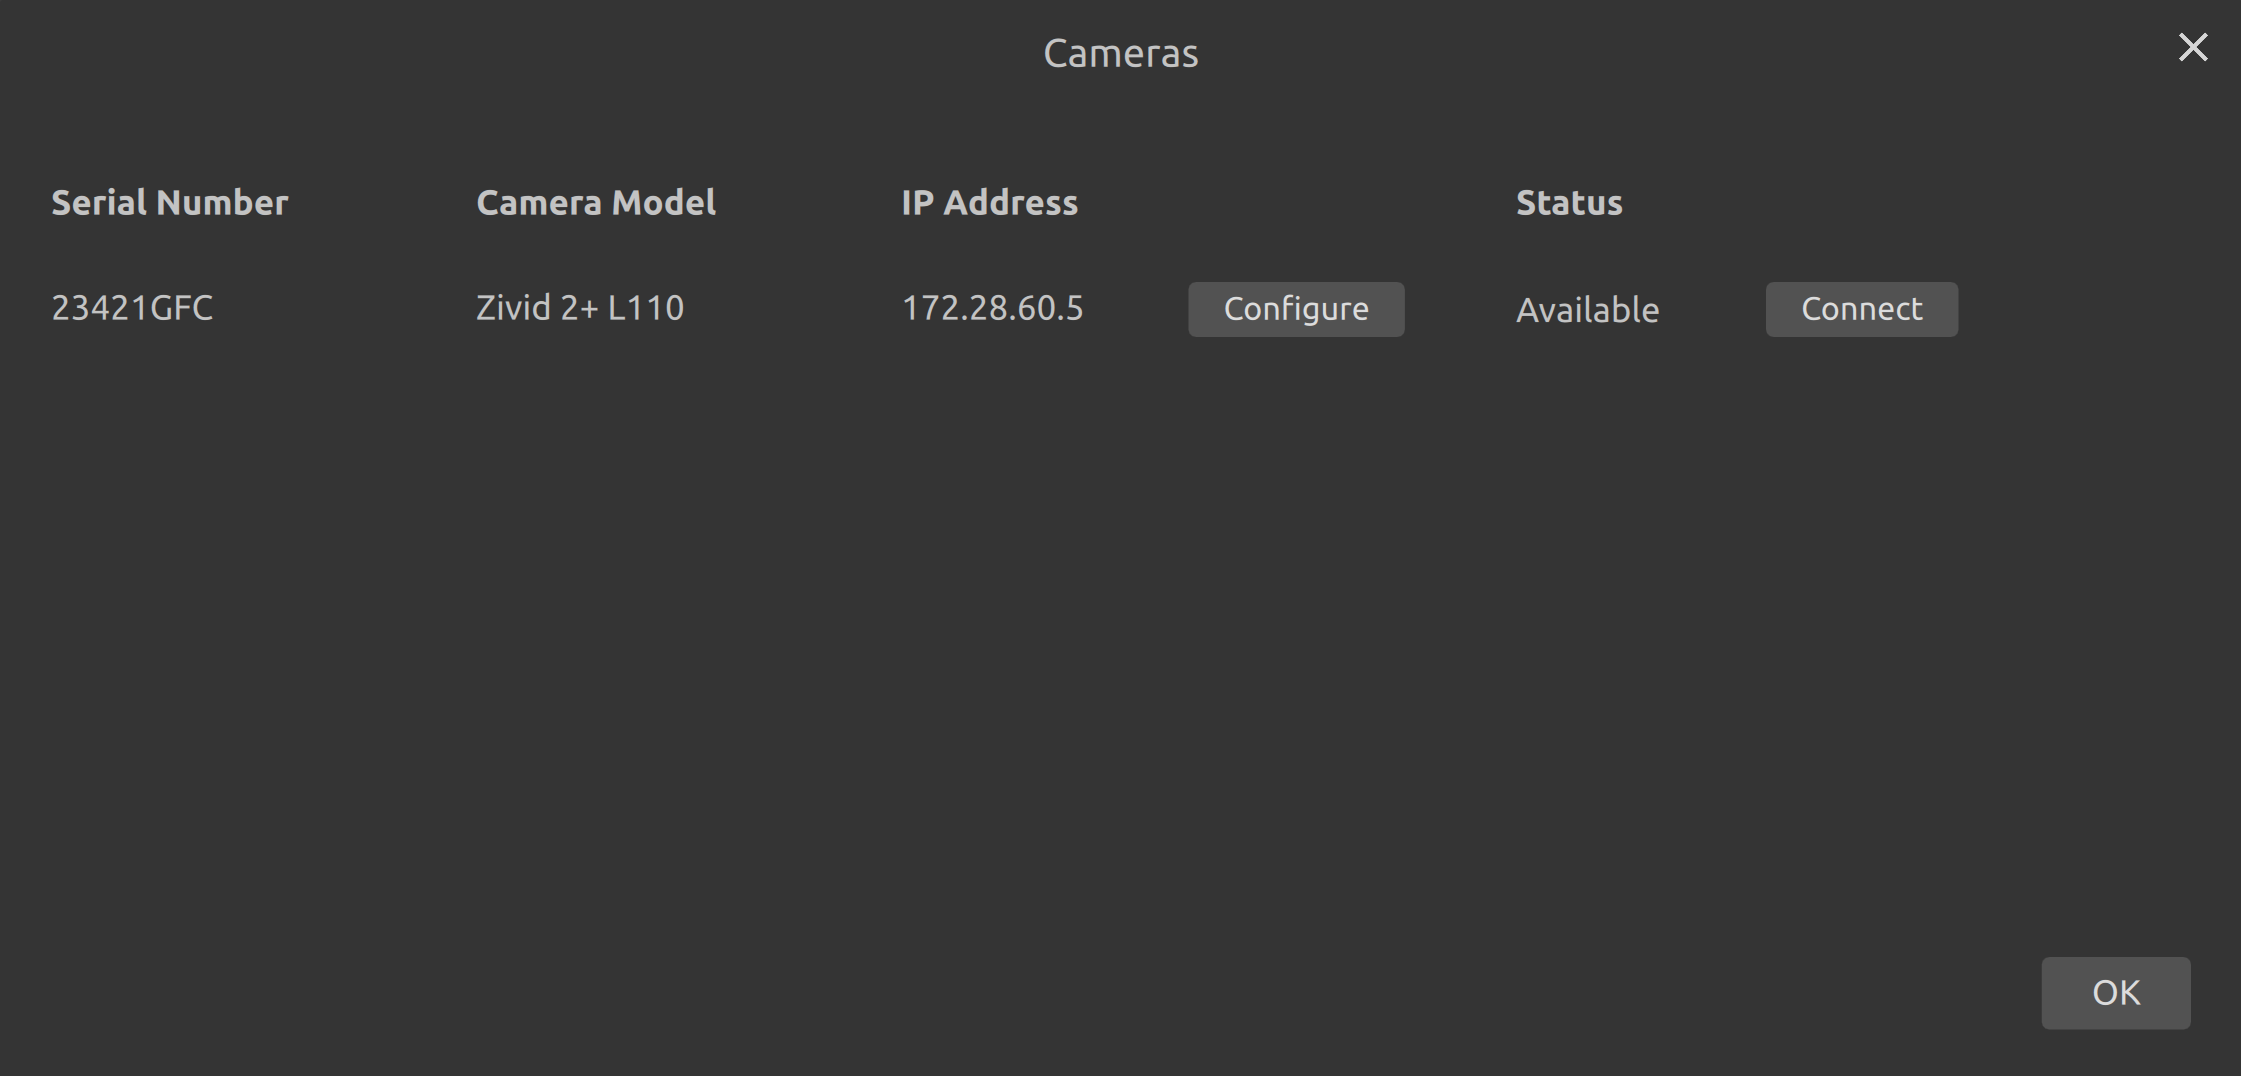
Click Configure on the camera that you want to configure.
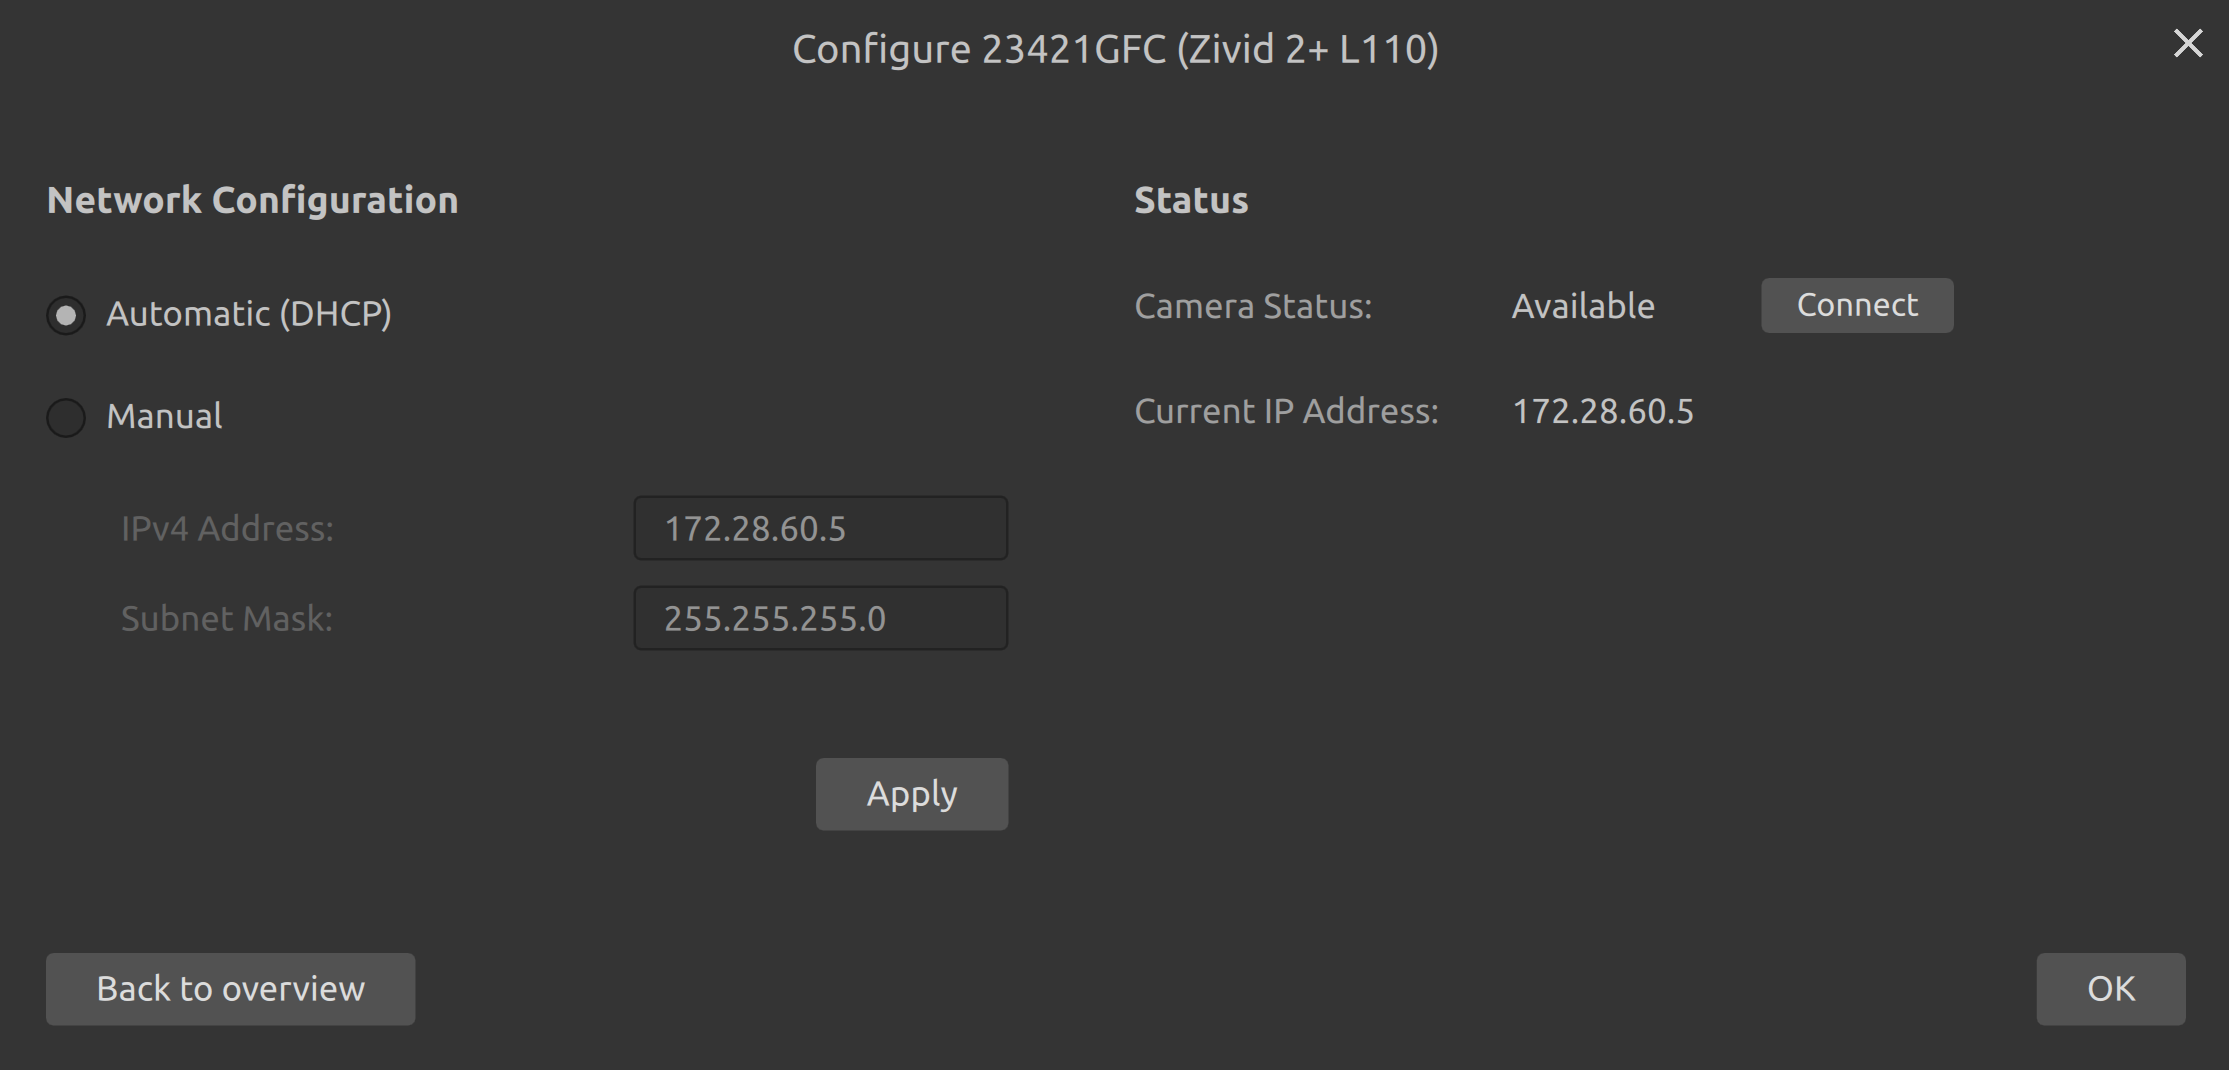
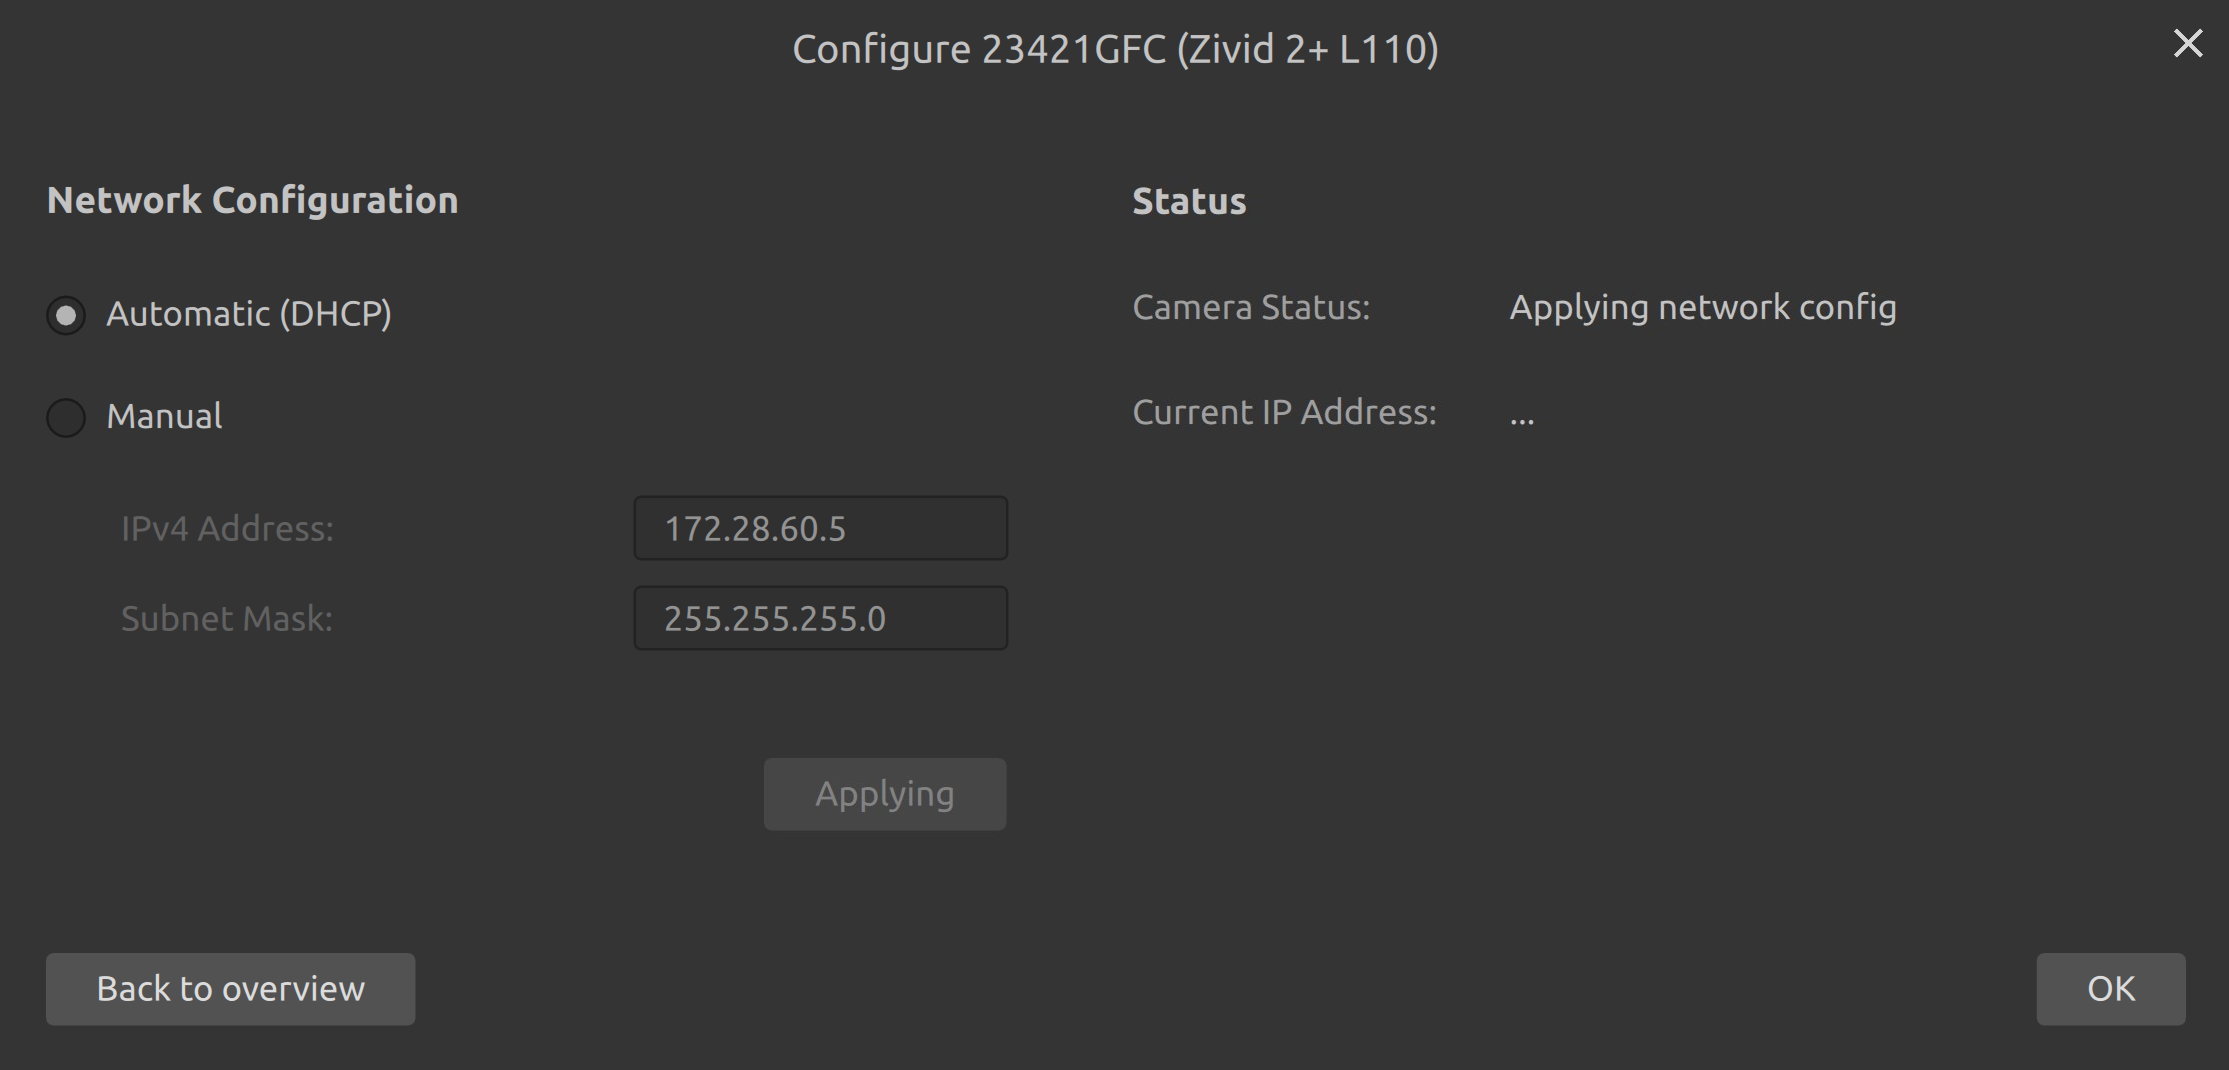
Select the automatic (DHCP) configuration mode. Click Apply to apply the configuration to the camera.
The CLI tool ZividNetworkCameraConfigurator allows you to change the camera network configuration of one camera at a time.
This tool is installed alongside the Zivid SDK on Windows, and with the Zivid Tools package on Ubuntu.
Open a terminal/Command Prompt.
Connect the camera.
Verify that your camera is found by running:
ZividListCameras.exe
ZividListCameras
Set the camera with current IP
<host>in DHCP mode by:ZividNetworkCameraConfigurator.exe set-config <host> --dhcp
ZividNetworkCameraConfigurator set-config <host> --dhcp
For example, changing the mode from static to DHCP for a camera with IP
172.28.60.5:ZividNetworkCameraConfigurator.exe set-config 172.28.60.5 --dhcp
ZividNetworkCameraConfigurator set-config 172.28.60.5 --dhcp
You can also set a hostname by using the optional argument
[--hostname <hostname>]. All ethernet-based Zivid cameras come with a pre-defined hostname with the following format zivid-serialnumber, e.g., zivid-2234AB12.If you are configuring IP addresses of multiple cameras, repeat steps 2 to 4.
If you are using Cameras.yml
It is highly recommended to use hostnames when using a dynamic IP. If not you have to list all possible IP addresses in
Cameras.yml, or find the IP address assigned to the camera and list them. When you use hostnames you only have to list the expected hostnames, and it doesn’t matter if the IP address is reassigned. The default hostname has the following format:zivid-<serialnumber>, e.g.,zivid-2234AB12.Go to Cameras.yml and how to restrict discoverable cameras for more information about
Cameras.yml.Configure the PC for either link-local or DHCP.
Make sure a DHCP is not active on the network.
Connect your camera(s), and then wait > 45 seconds.
Make sure a DHCP is active on the network. You can host your own - see DHCP Network Configuration - PC.
Connect your camera(s).
The SDK provides the functions to configure the camera network configuration.
Connect to your camera.
Set the mode to DHCP.
Create a network configuration object.

Zivid::NetworkConfiguration newConfig(Zivid::NetworkConfiguration::IPV4(mode, address, subnetMask));
var newConfig = new Zivid.NET.NetworkConfiguration()
{
    IPV4 = {
        Mode = mode,
        Address = address,
        SubnetMask = subnetMask,
    }
};
Apply the new network configuration to the camera.
You have now configured the camera to work with link-local and DHCP.
If you haven’t configured the PC for either link-local or DHCP, go to Link Local IP Network Configuration - PC or DHCP Network Configuration - PC before going onwards. If you have done that, go to Connecting to the camera.