Dealing with Smooth (Insufficiently Sharp) 3D Edges
Sharp 3D edges are critical for objects with fine features, thin parts, and overlapping geometry. Accurate object detection and pose estimation depend on keeping true shape and clear depth differences. If your point cloud has rounded, blurry, or over-smoothed edges resulting in boundaries that are not clearly visible, defocus or aggressive filtering is usually the cause. This article covers camera, setup, and filter choices that produce sharper edges.
Note
These recommendations are general-purpose. Aggressive edge trimming is usually best for stitched multi-view workflows, where missing edge points from one view can be recovered in neighboring views. For single-capture workflows, tune more conservatively to avoid removing valid edge geometry.
How to improve the shape of objects with more pronounced and sharper 3D edges, and clearer depth differences?
Choose the right camera
Some Zivid models have a narrower FOV and higher 2D resolution, which captures finer detail at the same distance. Select a model based on your working distance, maximizing spatial resolution while staying within the camera’s optimal range. Useful selection tools:
Physical setup
Position the camera closer to the scene. At shorter distance, illuminance increases, strengthening signal while ambient-light noise stays the same. Higher SNR improves data quality and confidence, and shorter imaging distance also increases spatial resolution for finer details.
Use the right presets
For Zivid 2+ and 3, dedicated presets for this use case provide high-resolution point clouds. These presets can reduce dynamic range and cause data loss, especially on dark or specular surfaces. In applications such as 3D template matching, this trade-off can be worthwhile because edges often matter more than large flat surfaces.
Application |
Capture Time (3D) |
Camera Settings |
||
|---|---|---|---|---|
High-End PC |
Mid-End PC |
Low-End PC |
||
Small Features |
~1800 ms |
~2300 ms |
~2800 ms |
|
If presets are not sufficient, fine-tune settings and filters manually.
Acquisition settings
Projector Brightness: Increase projector brightness to maximum to increase signal intensity and SNR.
Gain: Reduce gain to minimum (
1.0) to limit noise amplification.Aperture/f-number: Out-of-focus captures increase noise and degrade shape. If supported, configure aperture/f-number while considering depth of focus.
Exposure Time: Increase exposure time to compensate for reduced gain and aperture.
If unsure how to configure these settings manually, follow Getting the Right Exposure for Good Point Clouds.
HDR
Capture HDR acquisitions with similar or identical exposure to improve SNR. Read more about this averaging technique.
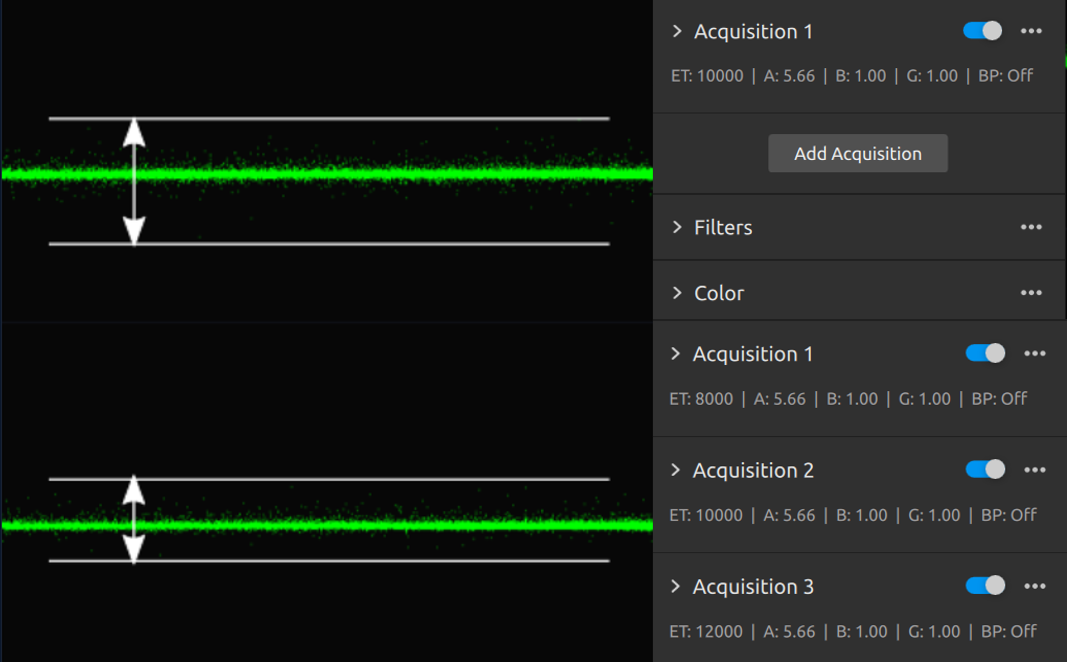
Filters
Clean edges
Start by removing the “wing” artifacts from the edges.
Cluster Filter: Aggressive use can remove valid 3D edges. Start with
MinArea=300andMaxNeighborDistance=5. If wing artifacts appear, reduceMaxNeighborDistanceto3.0and lowerMinAreaas needed to separate edge outliers from valid surfaces. This is most useful when stitching multiple captures, where edge points removed in one view are often recovered in another.Hole Repair Filter: Disable, or use conservative settings to preserve 3D edges:
HoleSize<=0.25andStrictness=3or4.Noise Filter: Tune
Thresholdfor your application; higher values keep only high-confidence points. DisableNoise Suppression.Gaussian Smoothing: Disable the filter or set the
Sigmavalue between0.5and1.Contrast Distortion Filter: If your scene is not affected by contrast distortion, disable the correction component to preserve shape accuracy and edge sharpness. Use the removal component to remove bad points and edge artifacts. As with cluster filtering, this is most useful when stitching multiple captures, where removed edge points are often recovered in another view.
In the following examples, point clouds captured with presets were improved by increasing the Contrast Distortion Removal → Threshold from 0.3 to 0.4 and the Noise Removal → Threshold from 7 to 15.
This aggressive filtering cleaned edges around holes.
In one scene, Hole Repair → HoleSize was increased from 0.1 to 0.25 to recover some lost data.
See the point clouds before (left) and after (right) tuning the filters in the images below.

Edges and shapes improved by increasing the Contrast Distortion Removal → Threshold to 0.4 and the Noise Removal → Threshold to 15.

Edges and shapes improved by increasing the Contrast Distortion Removal → Threshold to 0.4, the Noise Removal → Threshold to 15, and the Hole Repair → HoleSize to 0.25.
Correct shape geometry
Most scenes need some smoothing to reduce surface noise.
The best option depends on scene and reflectance, so compare Gaussian Smoothing, Contrast Distortion Correction, and Noise Suppression on your own data. Test one mechanism at a time, then combine conservatively if needed, and re-check the full filter chain after each change because interactions can re-introduce wing artifacts.
The examples below show how Gaussian Smoothing and Noise Suppression can each provide the best balance of surface noise, shape trueness, and edge sharpness, depending on the scene.

Gaussian Smoothing (right) providing better results than Noise Suppression

Noise Suppression (left) providing better results than Gaussian Smoothing
For a specific guide on how to deal with wing artifacts on 3D edges while keeping the best possible shape geometry, check out Over-smoothed surfaces/corners and “wing” artifacts on edges in the Point Cloud.
Version History
SDK |
Changes |
|---|---|
2.17.0 |
Added download link for Zivid 3 settings. |