使用 CMake 配置 C++ 示例并在 Windows 的 Visual Studio 中构建它们
本教程展示了如何使用CMake配置Zivid C++示例,然后在Windows中使用Visual Studio构建它们。
要求
CMake - version 3.24 or higher
Optional requirements
一些示例依赖于外部库,特别是:
说明
克隆C++示例
Clone the GitHub Zivid C++ Samples repository. To clone it, launch the Command Prompt by pressing Win + R keys on the keyboard, then type cmd and press Enter.
Navigate to a location where you want to clone the repository.
cd C:\Users\Public
然后运行以下命令:
git clone https://github.com/zivid/zivid-cpp-samples
使用CMake配置解决方案
Run CMake either through the Command Prompt or CMake GUI.
Create a build directory in the source directory of zivid-cpp-samples and configure the solution by running:
cd source
mkdir build && cd build
cmake -A x64 -DUSE_EIGEN3=OFF -DUSE_OPENCV=OFF -DUSE_PCL=OFF ..
小技巧
Make sure cmake is in your system PATH to use the above command.
See the below dropdown for how to add CMake to your system PATH.
Add CMake to the system PATH
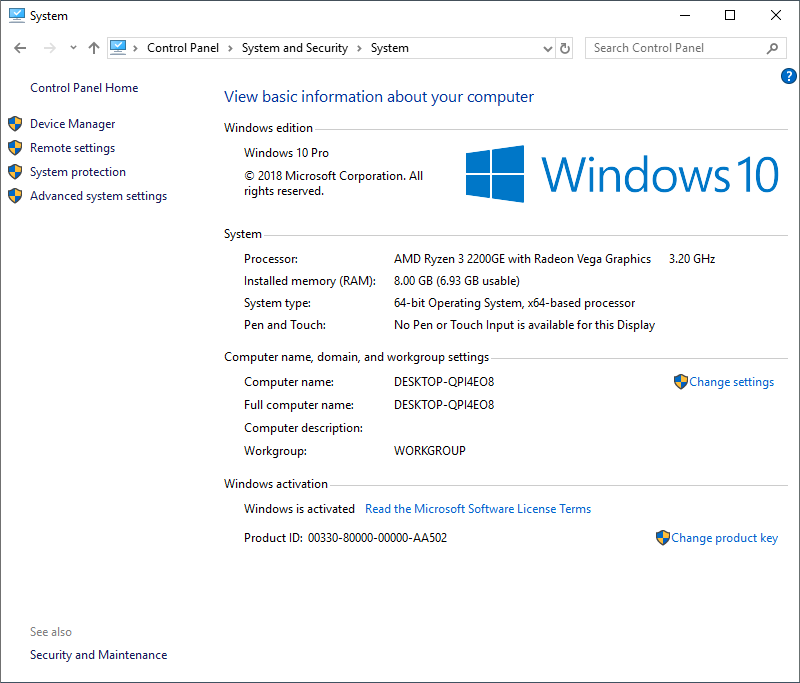
On your PC, navigate to Control Panel → System and Security → System → Advanced System Settings → Environment Variables.
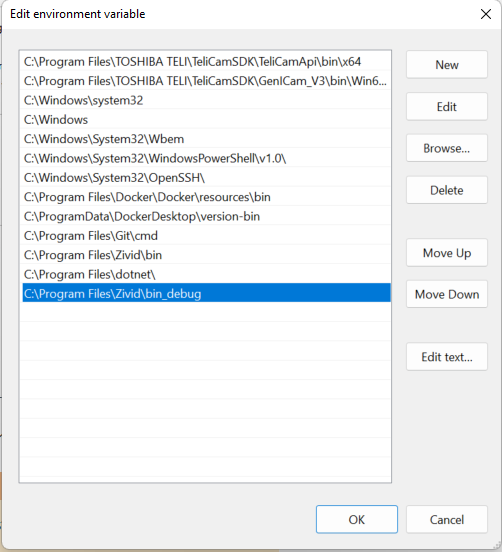
Under System variables, select the Path variable and click Edit.
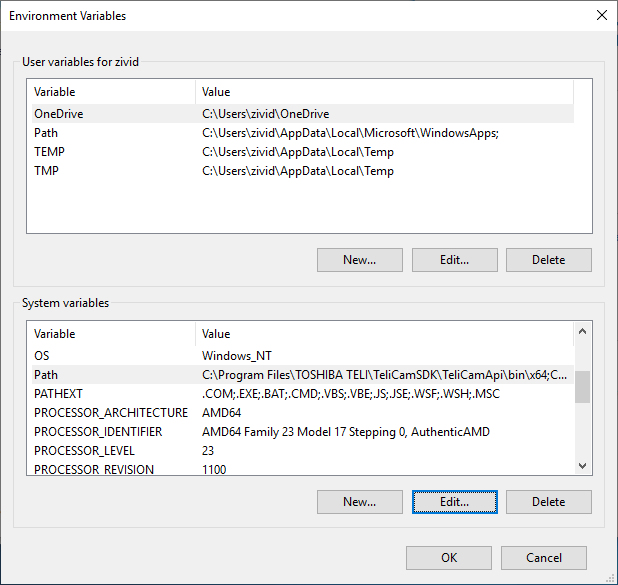
In the Edit environment variable window, click New and add the path to CMake binaries, e.g.
C:\Program Files\CMake\bin
if you have installed CMake in Program Files.
警告
You may have to sign out of your Windows account and in again for the changes to take place.
Open the generated Visual Studio solution ZividCppSamples.sln in File Explorer to further build the samples.
Open CMake GUI and select the source folder and destination for the build folder.
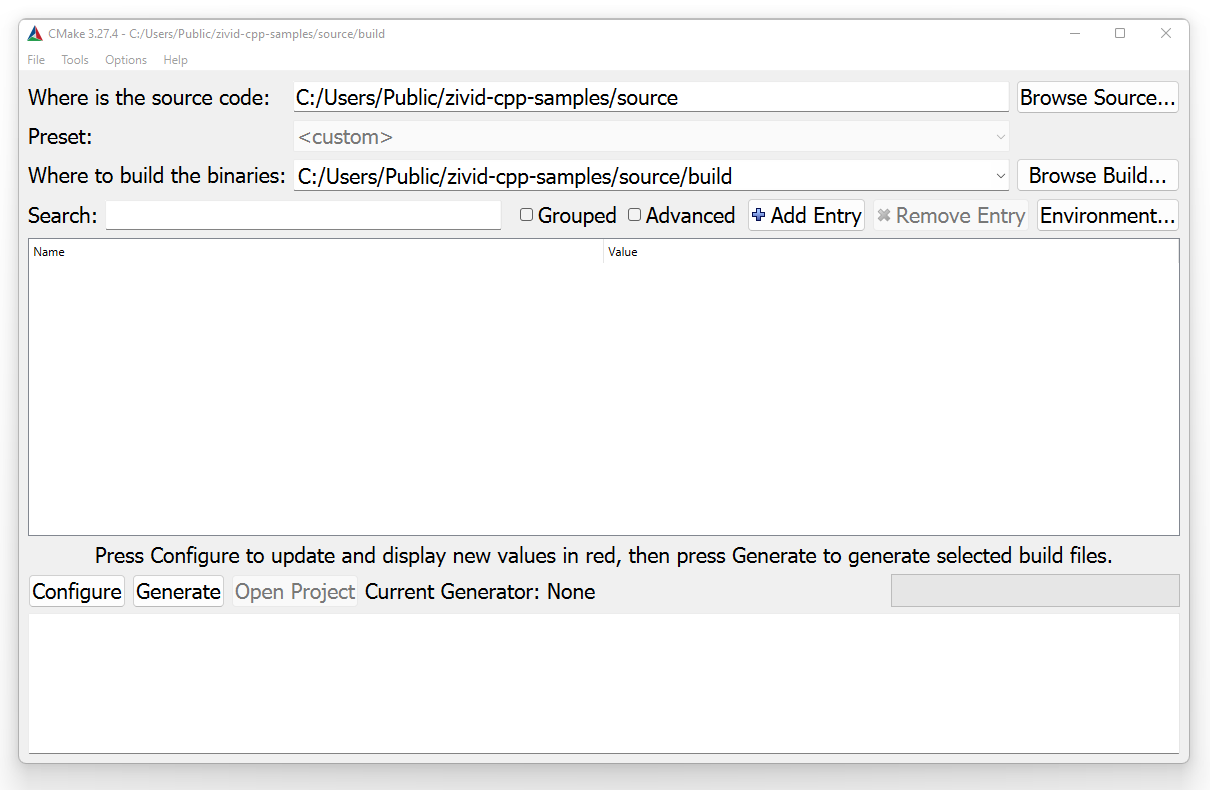
Click Configure.
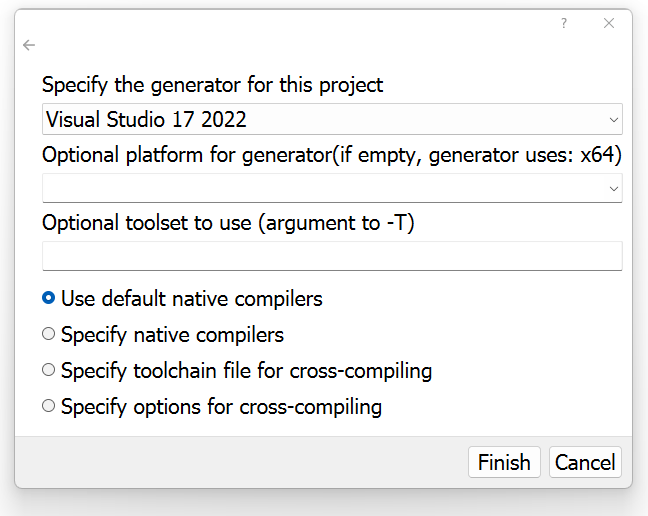
Specify your generator for the project and make sure the (optional) platform is x64.
Click Finish.
再次点击 Configure 。
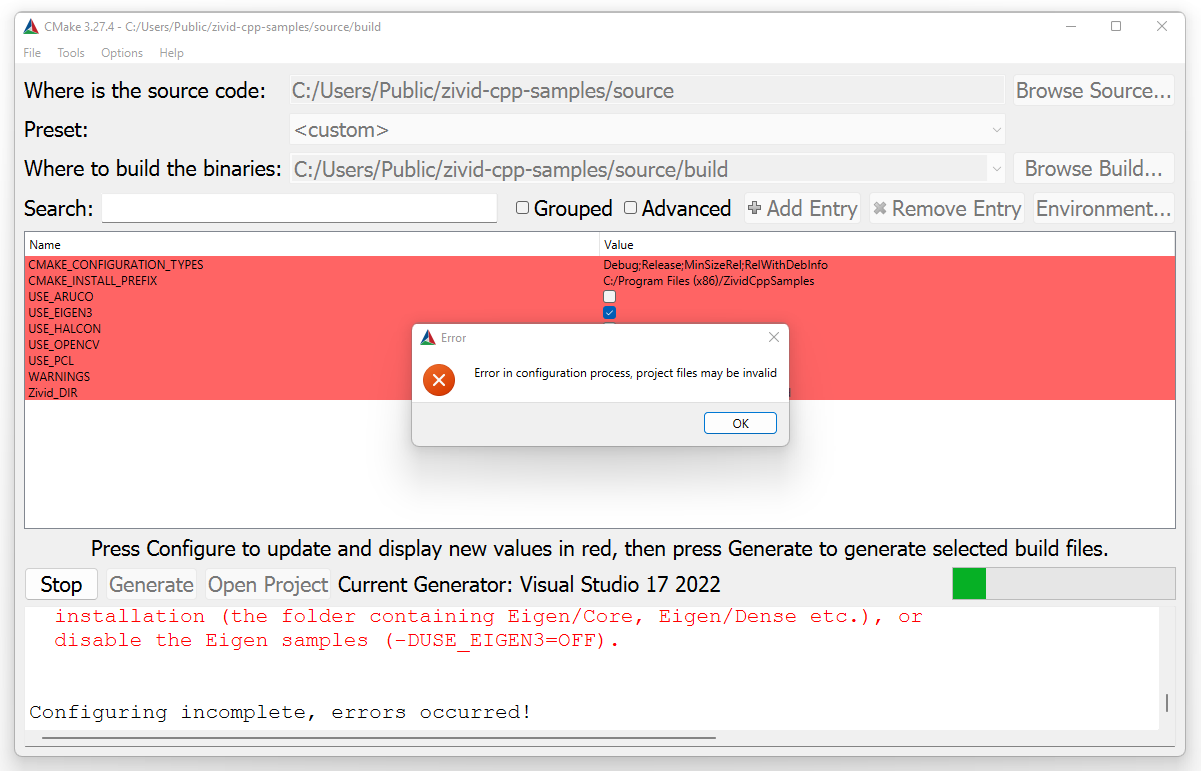
Click OK on the CMake error and disable the variables USE_EIGEN3, USE_OPENCV and USE_PCL to configure the solution without these dependencies.
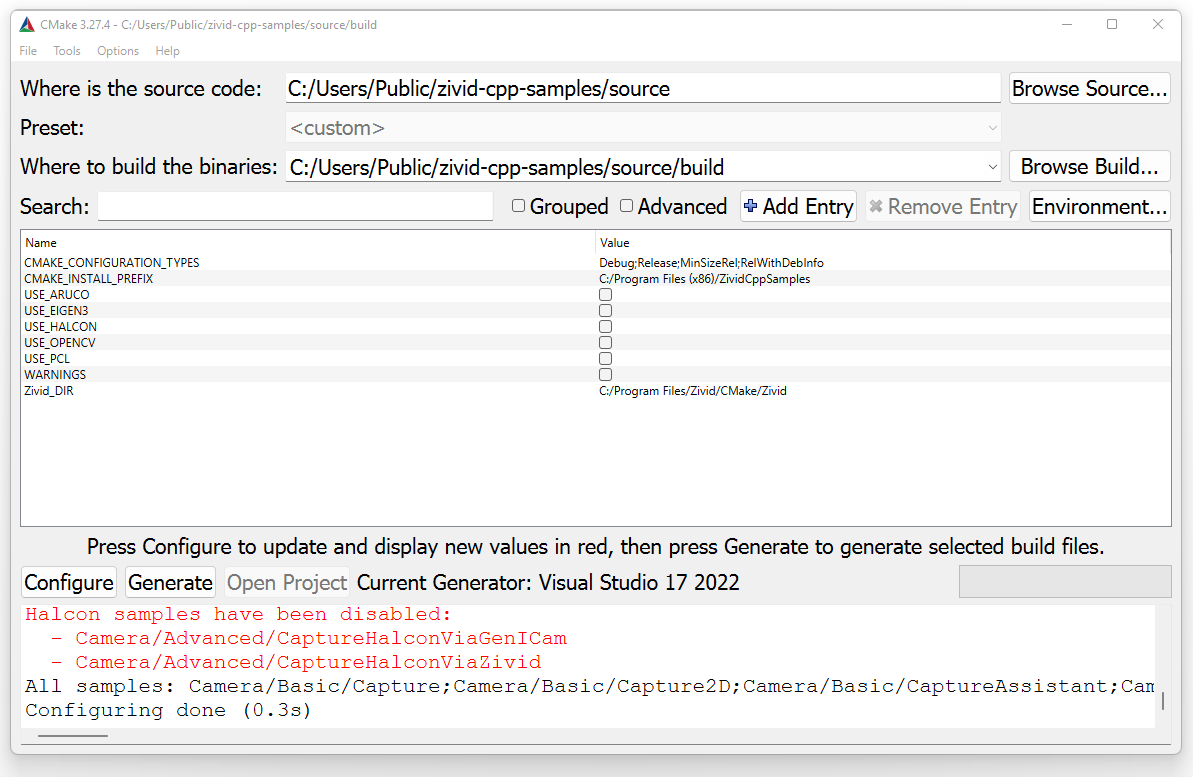
Finally click Configure one last time and click Generate and Open Project to open the Visual Studio solution.
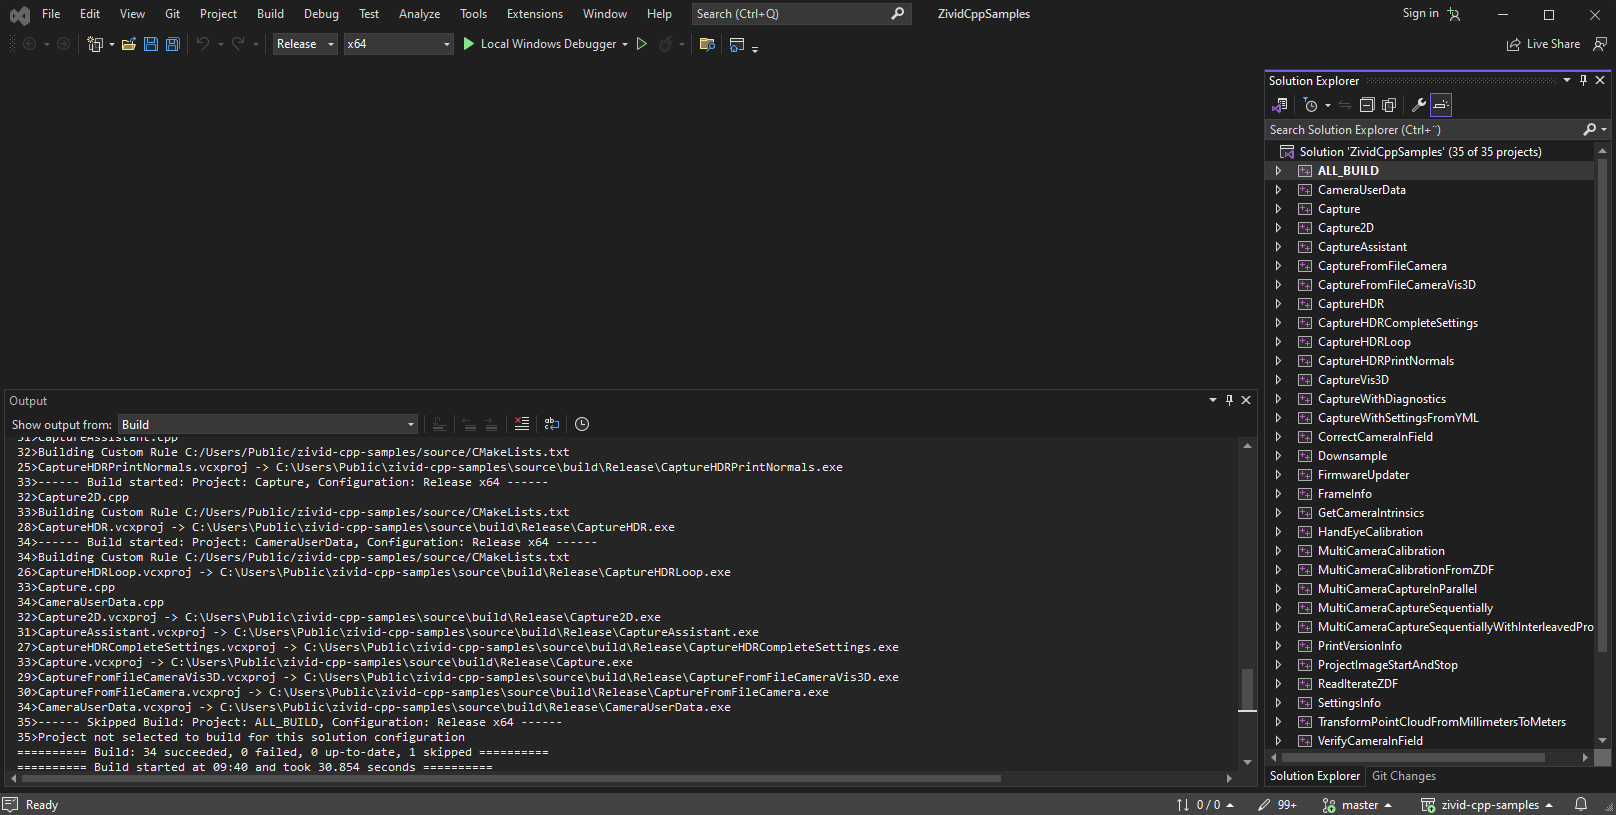
构建解决方案
In Visual Studio, change the build configuration from Debug to Release. Build the solution by pressing Ctrl + Shift + B.
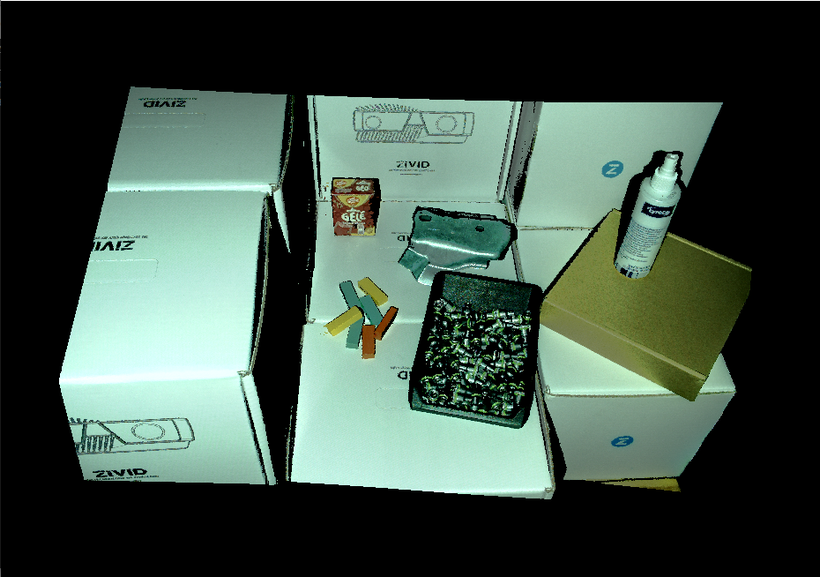
运行示例程序
Navigate to the Release folder and run a sample program either by double clicking the exe in File Explorer or using the Command Prompt, e.g.
.\CaptureVis3D.exe
Running samples that require Sample Data
Some of the samples require additional data to run, like point clouds, file cameras, transformations, etc. Go to Sample Data for instructions on how to download and install these.
Configuring the samples with optional dependencies
Some of the samples depend on Point Cloud Library, Eigen, OpenCV and/or Halcon. If you want to run samples with one or more of these dependencies, follow the instructions in the below dropdown.
Optional dependencies
Install the required dependencies based on the sample programs you want to run; see the table below.
示例程序 |
PCL |
Eigen |
OpenCV |
OpenCV_Contrib |
Halcon |
|---|---|---|---|---|---|
ReadPCLVis3D |
YES |
||||
CaptureWritePCLVis3D |
YES |
||||
CaptureHDRVisNormals |
YES |
||||
StitchByTransformation |
YES |
||||
StitchByTransformationFromZDF |
YES |
||||
MaskPointCloud |
YES |
YES |
|||
ROIBoxViaCheckerboard |
YES |
||||
UtilizeHandEyeCalibration |
YES |
||||
PoseConversions |
YES |
||||
ROIBoxViaArucoMarker |
YES |
YES |
|||
CaptureUndistort2D |
YES |
||||
CreateDepthMap |
YES |
||||
ProjectAndFindMarker |
YES |
||||
ReprojectPoints |
YES |
||||
ReadAndProjectImage |
YES |
||||
GammaCorrection |
YES |
||||
AllocateMemoryForPointCloudData |
YES |
||||
TransformPointCloudViaCheckerboard |
YES |
||||
TransformPointCloudViaArucoMarker |
YES |
||||
CaptureHalconViaGenICam |
YES |
||||
CaptureHalconViaZivid |
YES |
Download the latest stable release of Eigen from http://eigen.tuxfamily.org/ and extract the folder to your desired destination. When configuring the CMake project, include Eigen to configure the samples that depend on it.
Navigate to the build directory you created in zivid-cpp-samples and run
cmake -A x64 --fresh -DEIGEN3_INCLUDE_DIR=<path> -DUSE_OPENCV=OFF -DUSE_PCL=OFF ..
where <path> is the full path to the Eigen folder, e.g. C:/Users/Public/eigen.
In CMake GUI, click Add Entry to add the path to Eigen.
Add EIGEN3_INCLUDE_DIR and point the value to where you extracted the folder.
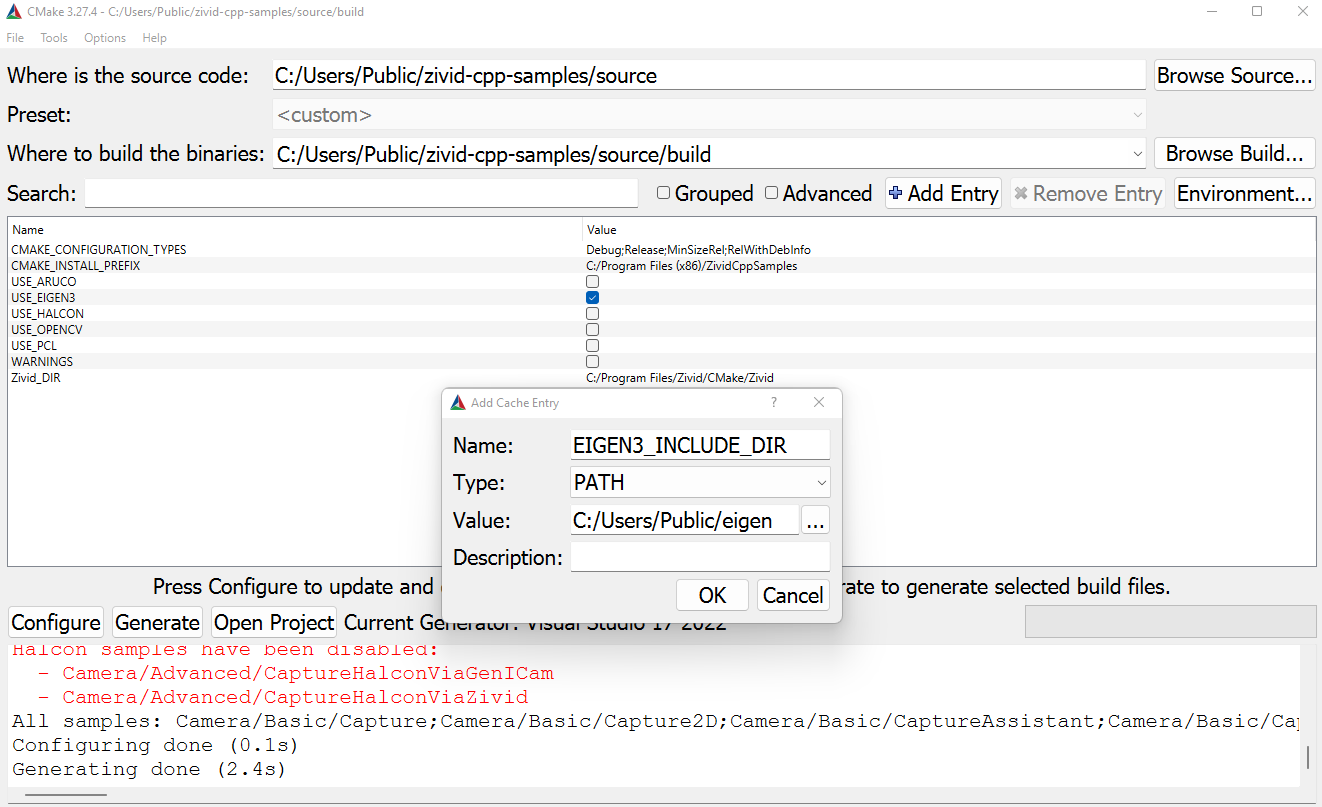
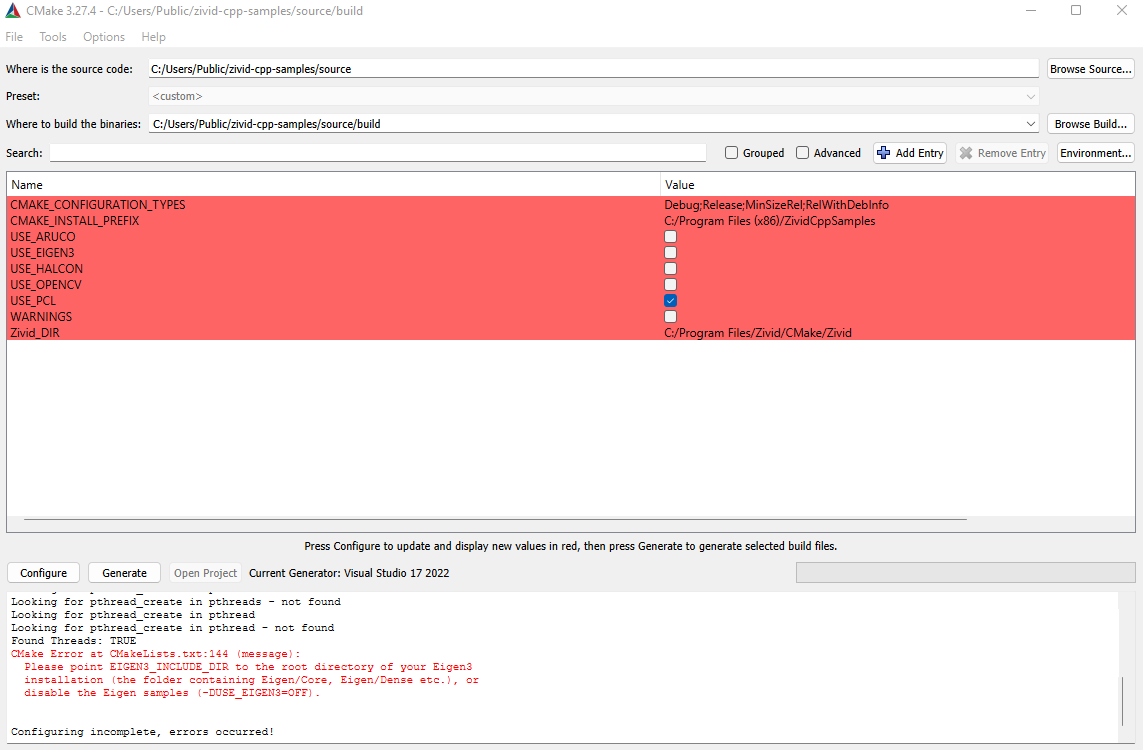
Ensure that the box USE_EIGEN3 is checked and click Configure.
Then click Generate and Open Project to open the Visual Studio solution.
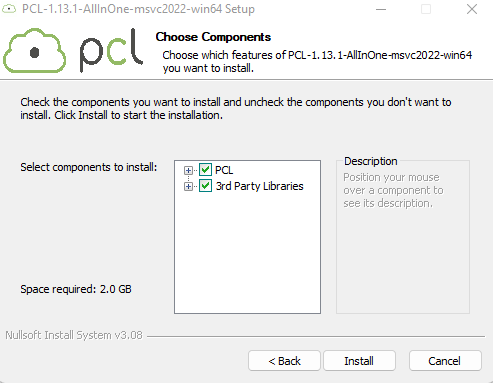
Download and install prebuilt PCL binaries by choosing the .exe at https://github.com/PointCloudLibrary/pcl/releases.
Check the option to install 3rd Party Libraries.
Some settings must be included in the PATH system variable before you can configure the Zivid PCL code samples.
On your PC, navigate to Control Panel → System and Security → System → Advanced System Settings → Environment Variables.
Under System variables, select the Path variable and click Edit.
In the Edit environment variable window, click New and add the paths to the PCL binaries and OpenNI2 (3rd party library), e.g.
C:\Program Files\PCL 1.13.1\bin
C:\Program Files\OpenNI2\Tools
if you have installed PCL 1.13.1 and OpenNI2 in Program Files.
警告
You may have to sign out of your Windows account and in again for the changes to take place.
When configuring the CMake project, the paths to PCL should already be configured.
Navigate to the build directory you created in zivid-cpp-samples and run
cmake -A x64 --fresh -DUSE_PCL=ON -DUSE_EIGEN3=OFF -DUSE_OPENCV=OFF ..
In CMake GUI, ensure that the box USE_PCL is checked and click Configure.
Click Generate and Open Project to open the Visual Studio solution.
警告
The code samples that depend on OpenCV have been tested for OpenCV 4.6.0. Newer versions of OpenCV may not be compatible with the code samples.
Download and install prebuilt OpenCV binaries from https://opencv.org/releases/. Extract them to your desired destination, e.g.
C:\Users\Public
警告
The prebuilt OpenCV binaries are not alone sufficient for the code samples that depend on OpenCV_Contrib. These samples require building OpenCV with extra modules. Follow the instructions in the below dropdown for this.
Building OpenCV with extra modules
If you want to use the code samples that depend on OpenCV Contrib modules like ArUco marker detection, you need to build OpenCV from scratch with these modules. The general instructions for doing this are given in https://github.com/opencv/opencv_contrib, but also repeated here.
Clone the opencv_contrib repository in your desired location, e.g.
cd C:\Users\Public
git clone https://github.com/opencv/opencv_contrib
Then configure CMake for OpenCV by Command Prompt or CMake GUI.
Navigate to your OpenCV build folder and configure CMake by
cd <path-to-opencv-build>
cmake -A x64 -DOPENCV_EXTRA_MODULES_PATH=<path-to-extra-modules> ..\sources
where <path-to-opencv-build> is the path to the OpenCV build directory, e.g., C:/Users/Public/opencv/build and <path-to-extra-modules> is the path to the OpenCV Contrib modules, e.g., C:/Users/Public/opencv_contrib/modules.
Open the Visual Studio solution OpenCV.sln.
Open CMake GUI and select the path for the source and build folders for OpenCV.
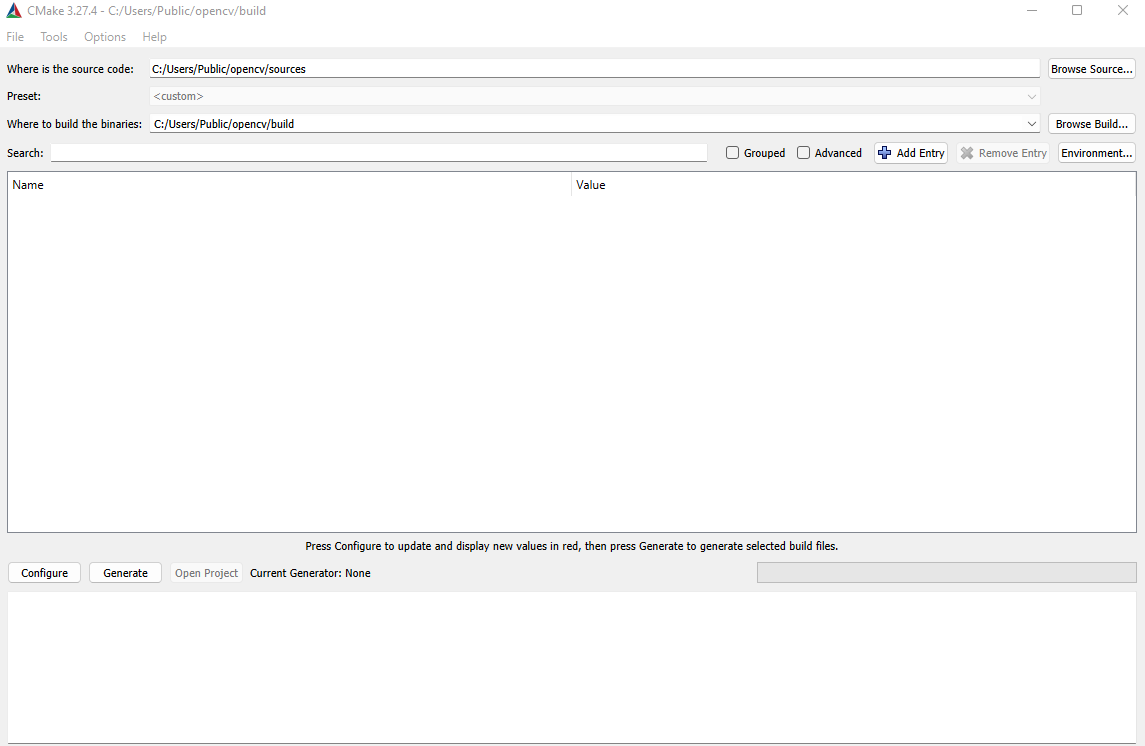
Click Add Entry and add OPENCV_EXTRA_MODULES_PATH with the path to it.

Click Configure, Generate and Open Project to open the Visual Studio solution.
In Visual Studio, build OpenCV by pressing Ctrl + Shift + B (this may take a long time). After building OpenCV with extra modules you can continue with the steps below.
Some settings must be included in the PATH system variable before you can configure the Zivid OpenCV code samples.
On your PC, navigate to Control Panel → System and Security → System → Advanced System Settings → Environment Variables.
Under System variables, select the Path variable and click Edit.
In the Edit environment variable window, click New and add the path to the OpenCV binaries, e.g.
C:\Users\Public\opencv\build\x64\vc16\bin
if you have installed OpenCV 4.8.0 and extracted it to C:/Users/Public.
警告
You may have to sign out of your Windows account and in again for the changes to take place.
When configuring the CMake project, include OpenCV to configure the samples that depend on it.
Navigate to the build directory you created in zivid-cpp-samples and run
cmake -A x64 --fresh -DOpenCV_DIR=<path> -DUSE_EIGEN3=OFF -DUSE_PCL=OFF ..
where <path> is the full path to the OpenCV build folder, e.g. C:/Users/Public/opencv/build.
If you have built OpenCV with extra modules from OpenCV Contrib, remember to also set USE_ARUCO by
cmake -A x64 --fresh -DOpenCV_DIR=<path> -DUSE_ARUCO=ON -DUSE_EIGEN3=OFF -DUSE_PCL=OFF ..
In CMake GUI, click Add Entry to add the path to OpenCV.
Add OpenCV_DIR and point the value to the OpenCV build folder.
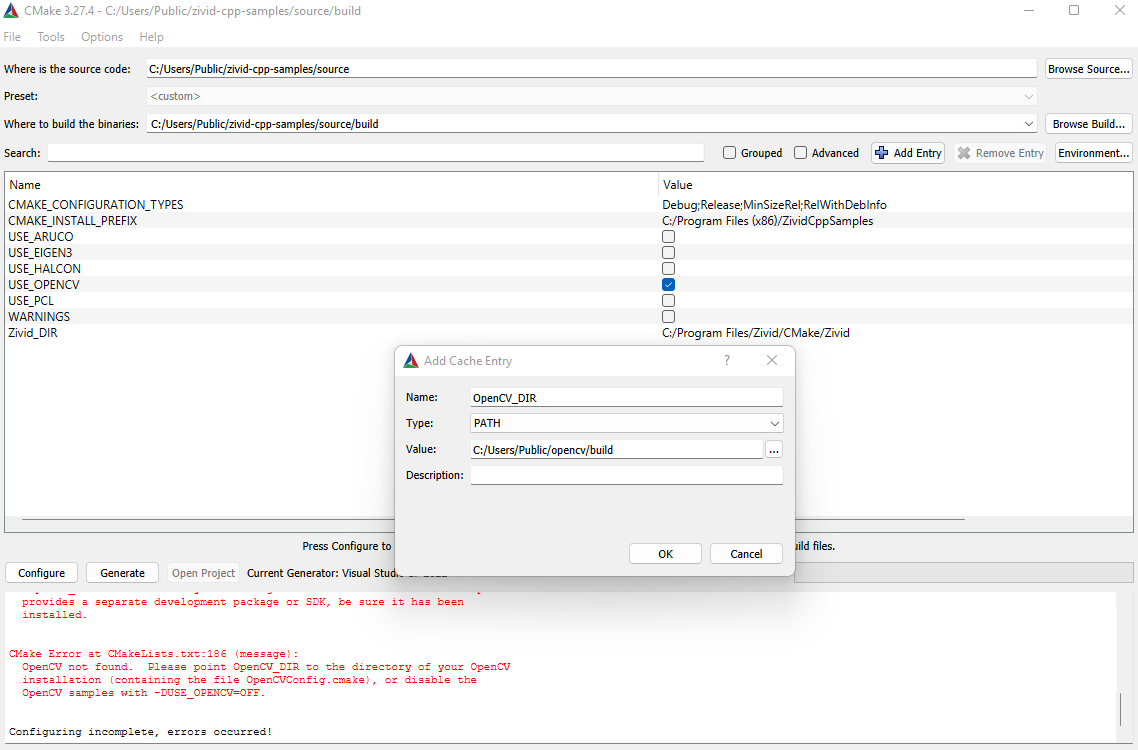
Ensure that the box USE_OPENCV is checked and click Configure.
If you have built OpenCV with extra modules from OpenCV Contrib, remember to also check USE_ARUCO.
Then click Generate and Open Project to open the Visual Studio solution.
You need Halcon installed on your PC to run the Halcon C++ samples. Go to 在Windows中安装Zivid + HALCON for further instructions.
After you have installed Halcon, configure CMake to use Halcon samples.
Navigate to the build directory you created in zivid-cpp-samples and run
cmake -A x64 --fresh -DUSE_HALCON=ON -DUSE_EIGEN3=OFF -DUSE_OPENCV=OFF -DUSE_PCL=OFF ..
Ensure that the box USE_HALCON is checked and click Configure.

Then click Generate and Open Project to open the Visual Studio solution.
If you want to configure multiple dependencies at once, you can simply add multiple dependencies at the same time in CMake. For example, if you want to use all samples that require Eigen, PCL and OpenCV, you can run
cmake -A x64 --fresh -DEIGEN3_INCLUDE_DIR=<path-to-eigen> -DUSE_PCL=ON -DOpenCV_DIR=<path-to-opencv>
where <path-to-eigen> and <path-to-opencv> are the paths to your Eigen and OpenCV folders.
调试示例程序
To debug a sample you must add C:/Program Files/Zivid/bin_debug to your PATH environment variable.
Follow the instructions in the below dropdown to do this.
Debugging a sample program
在您的PC上,导航到 Control Panel → System and Security → System → Advanced System Settings → Environment Variables。
Under System variables, select Path variable and click Edit.
在 Environment variables 窗口中,单击 New (窗口右上角,在用户变量部分)并添加以下值:
C:\Program Files\Zivid\bin_debug
备注
If you want to debug a program that depends on an input file you must change Working Directory to ${TargetDir}.

将构建配置从 Debug 更改为 Release 。然后点击 F5 构建并运行调试。