How To Get Good Quality Data On Zivid Calibration Board
This tutorial aims to present how to acquire good quality point clouds of Zivid checkerboard for hand-eye calibration. It is a crucial step to get the hand-eye calibration algorithm to work as well as to achieve the desired accuracy. The goal is to configure a Zivid HDR setting that gives high-quality point clouds regardless of where the Zivid checkerboard is seen in the working space.
It is assumed that you have already specified the robot poses at which you want to take images of the Zivid checkerboard. Check out how to select appropriate poses for hand-eye calibration.
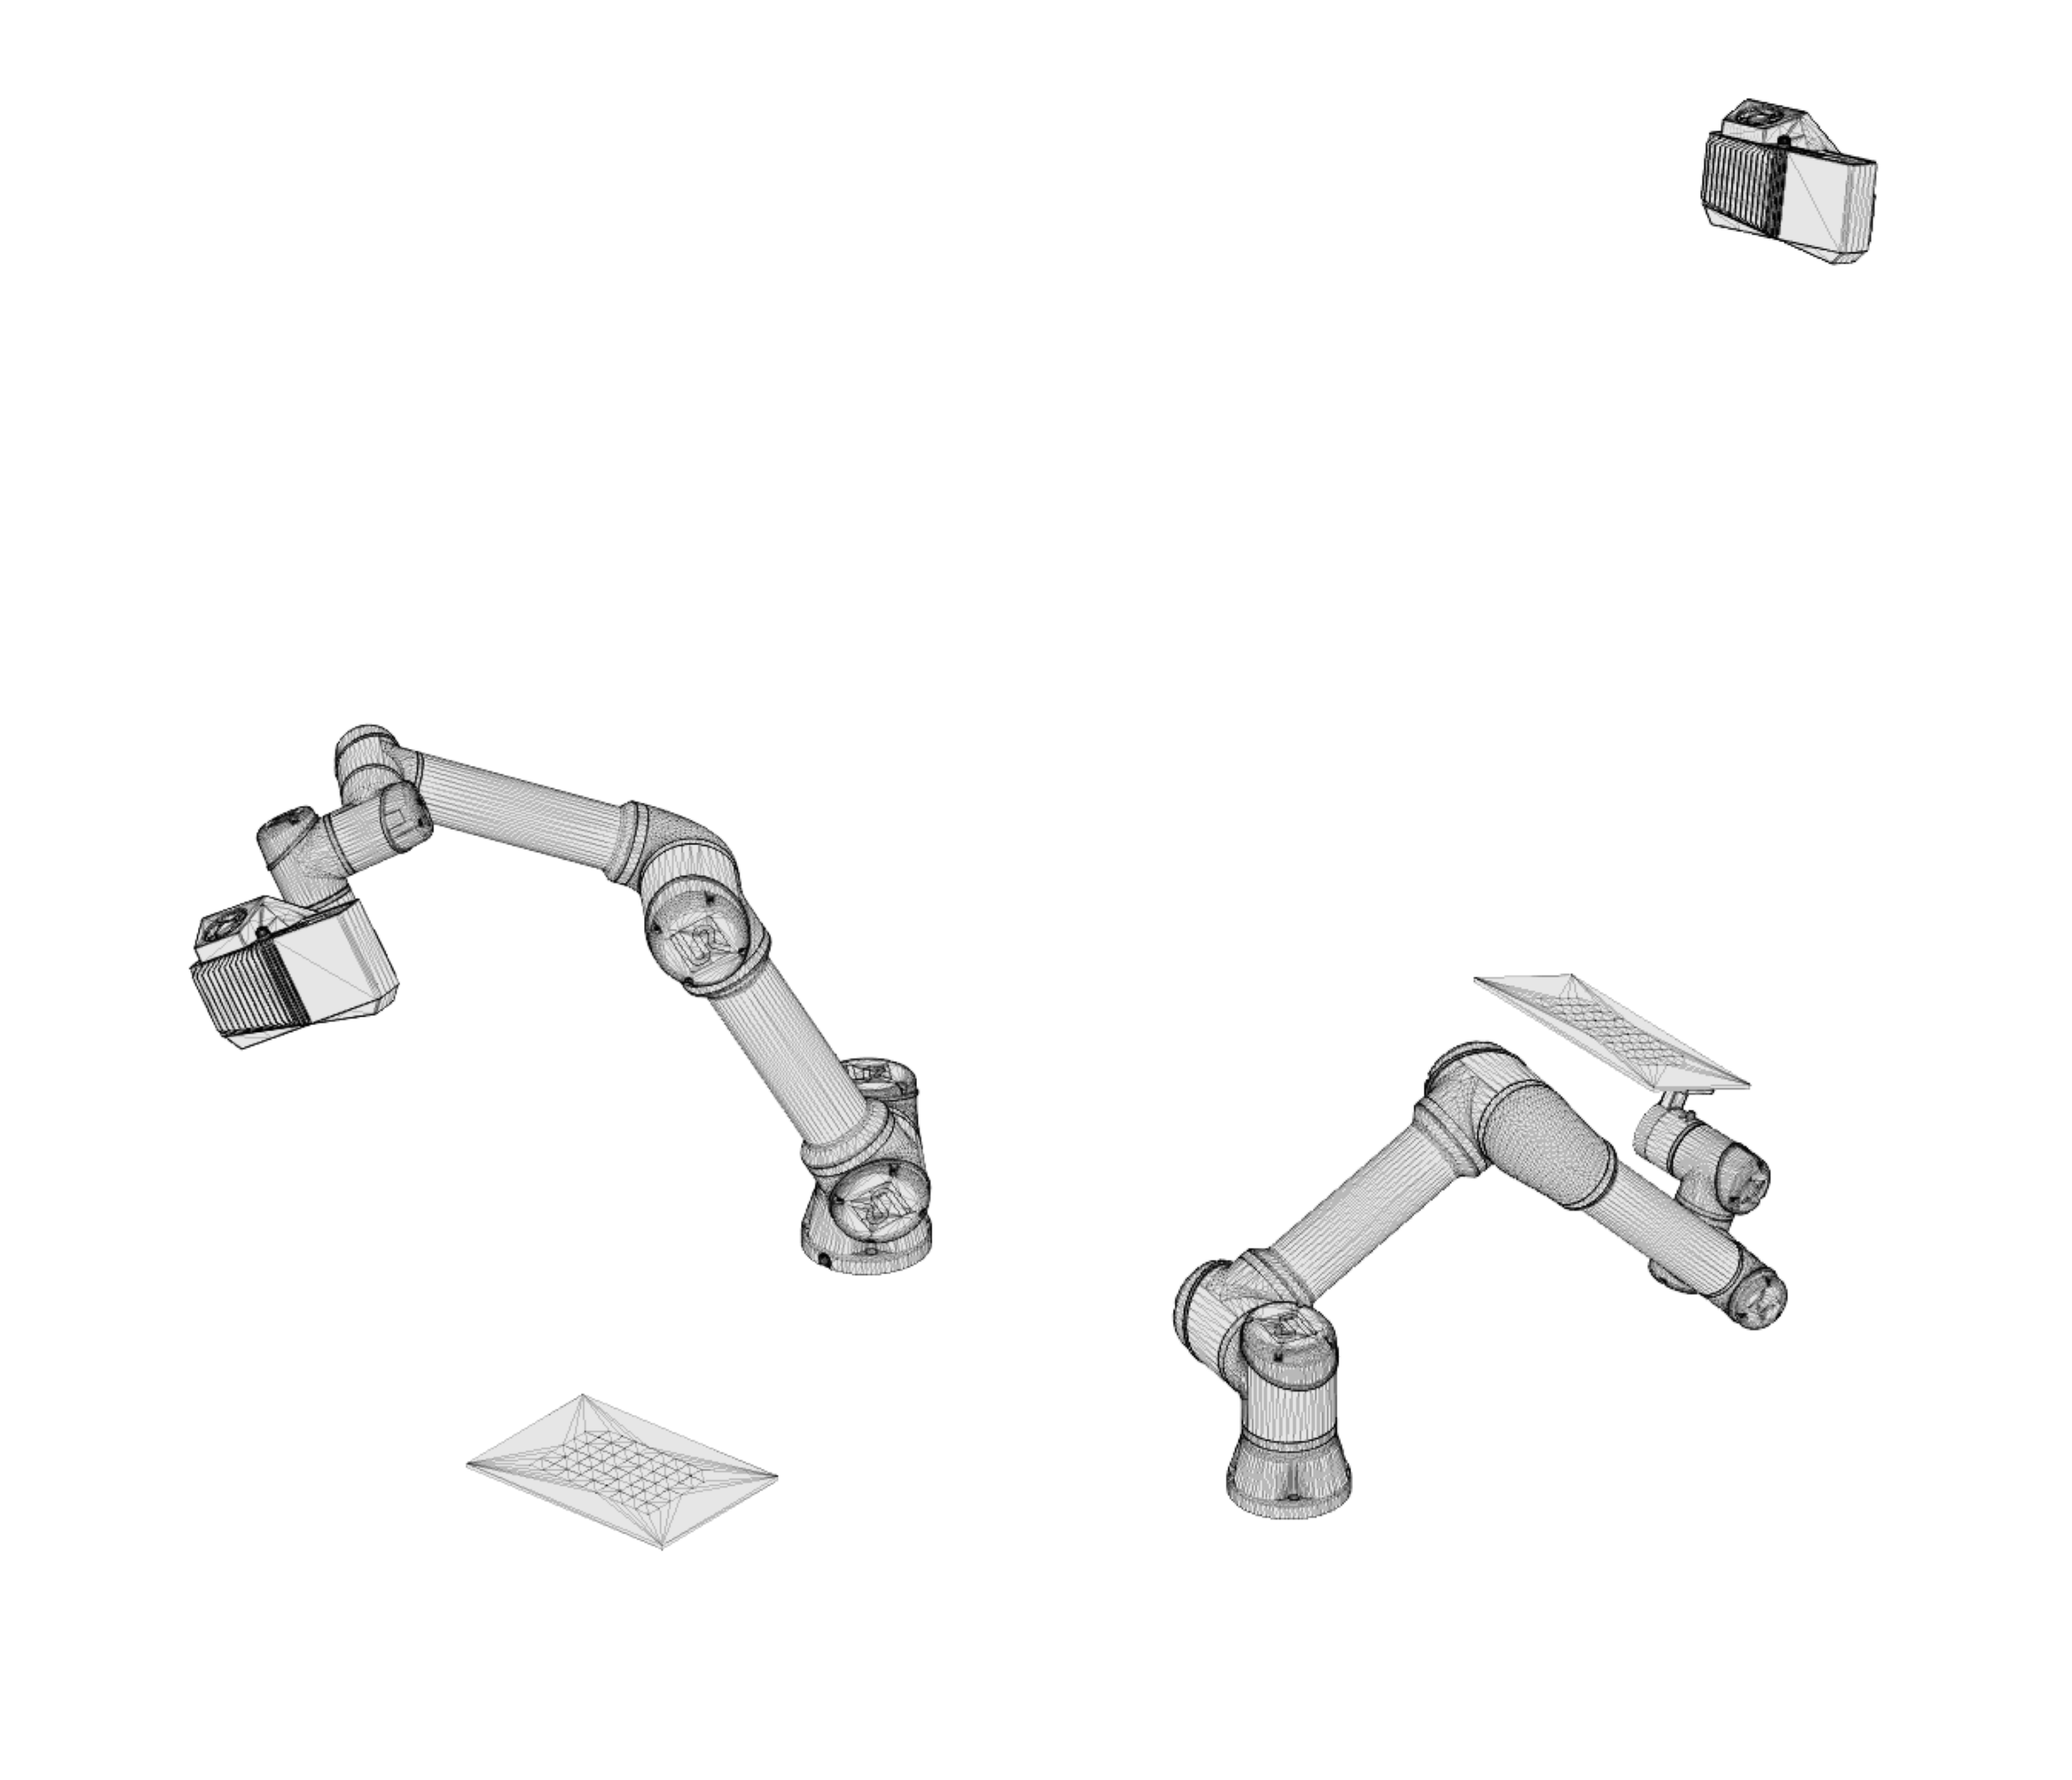
We will talk about two specific poses, the ‘near’ pose, and the ‘far’ pose. The ‘near’ pose is the robot pose where the imaging distance between the camera and the checkerboard is the least. For eye-in hand systems, that is the pose where the robot mounted camera approaches closest to the checkerboard. For eye-to-hand systems, it is the one where the robot positions the checkerboard closest to the stationary camera.
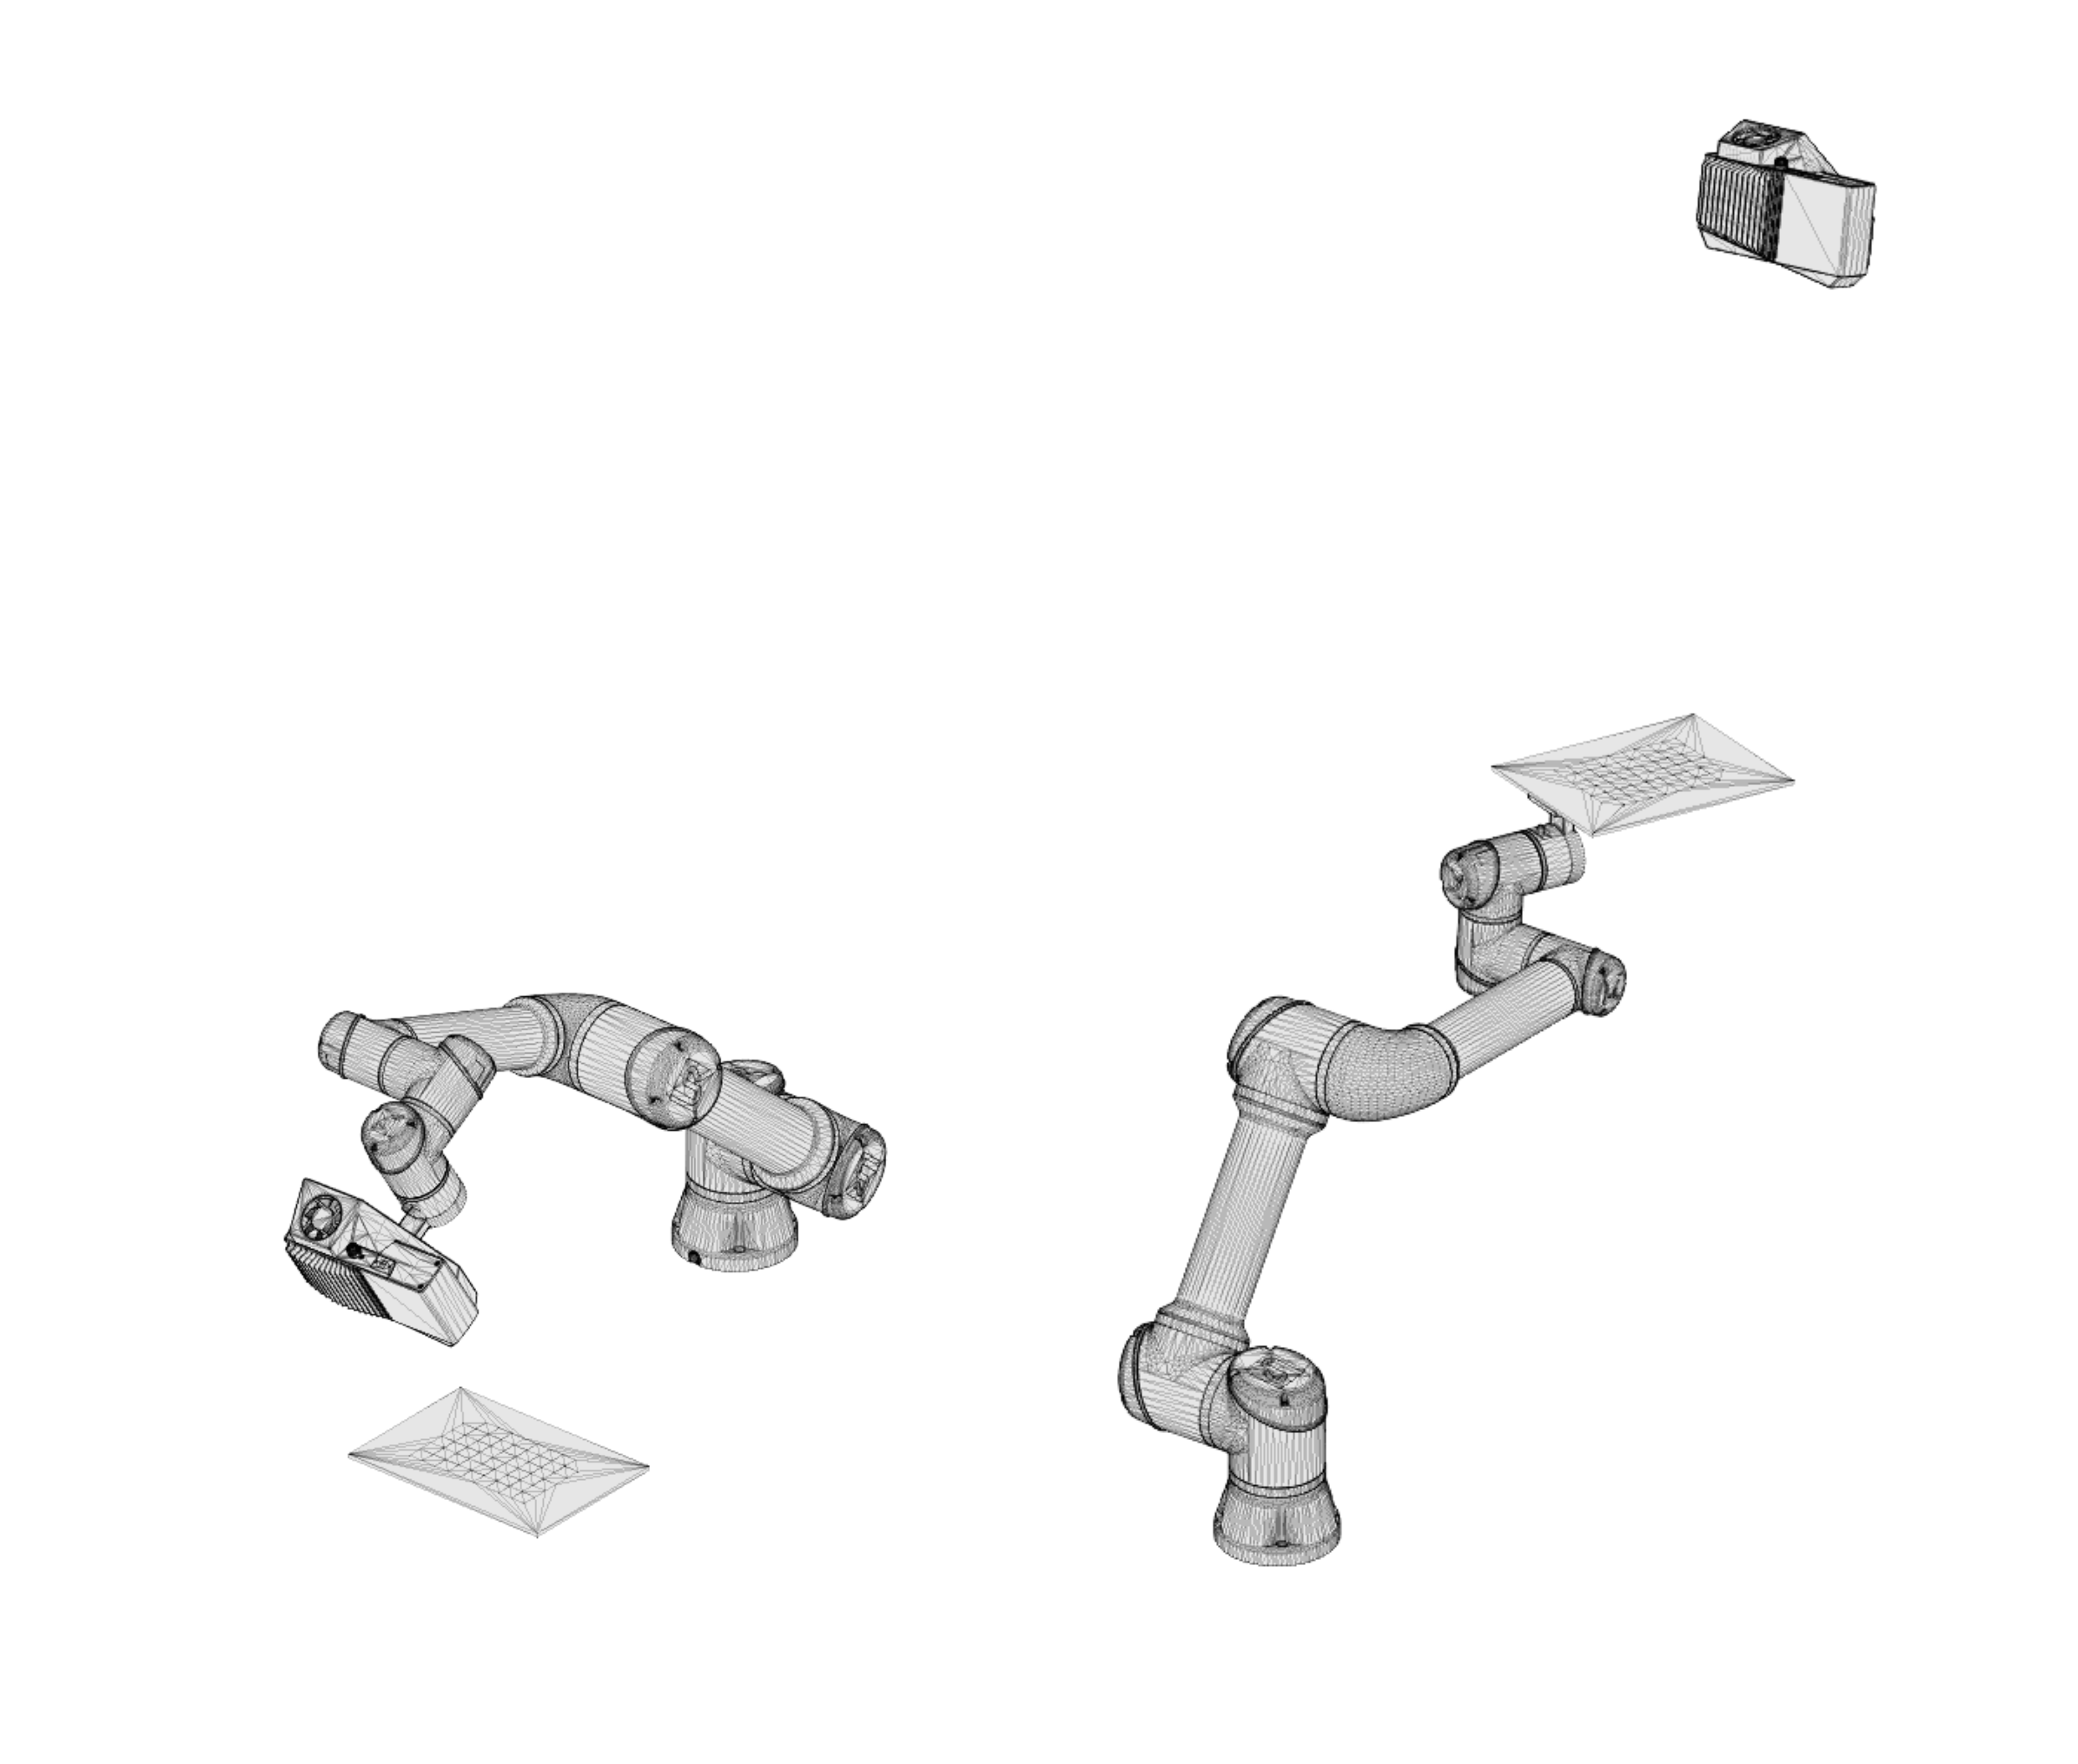
The ‘far’ pose is the robot pose where the imaging distance between the camera and the checkerboard is the largest. For eye-in hand systems, that is the pose where the robot mounted camera pulls furthest away from the checkerboard. For eye-to-hand systems, it is the one where the robot positions the checkerboard furthest away from the stationary camera.
Depending on the calibration target you are using for multi-camera calibration the process for ensuring the best quality point cloud is different. The calibration target with the fiducial marker has importable settings that work at all angles and distances within range. For the grey-white calibration target, go down to step one to follow the process for acquiring good quality point clouds.
Import the
configurationfile to get the best results with the Zivid black calibration target.Note
The images captured with the black calibration objects will have a high rate of point removal. This is to prevent errors based on contrast distortion. Thus it is expected to get fewer points for this type of checkerboard.
As mentioned, the goal is to configure a Zivid HDR setting that consists of settings optimized for the ‘near’ pose and one for the ‘far’ pose. A step by step process in acquiring good point clouds for hand-eye calibration is presented as follows.
Optimizing Zivid settings for the ‘near’ pose
Move the robot to the ‘near’ pose.
Start Zivid Studio and connect to the camera.
For the white-grey calibration object the following settings can be used for best detections:
Exposure time: 20000 us (50Hz grid frequency) or 16667us (60Hz grid frequency)
Aperture (\(f\)-number):
Zivid One+ Small: 11
Zivid One+ Medium: 8
Zivid One+ Large: 5.66
Zivid Two: 8
Brightness:
Zivid One+ Small and Medium: 1
Zivid One+ Large: 1.8
Zivid Two: 1
Leave all other settings to their default value
Capture a single acquisition.
Turn on the histogram and select the Logarithmic view.
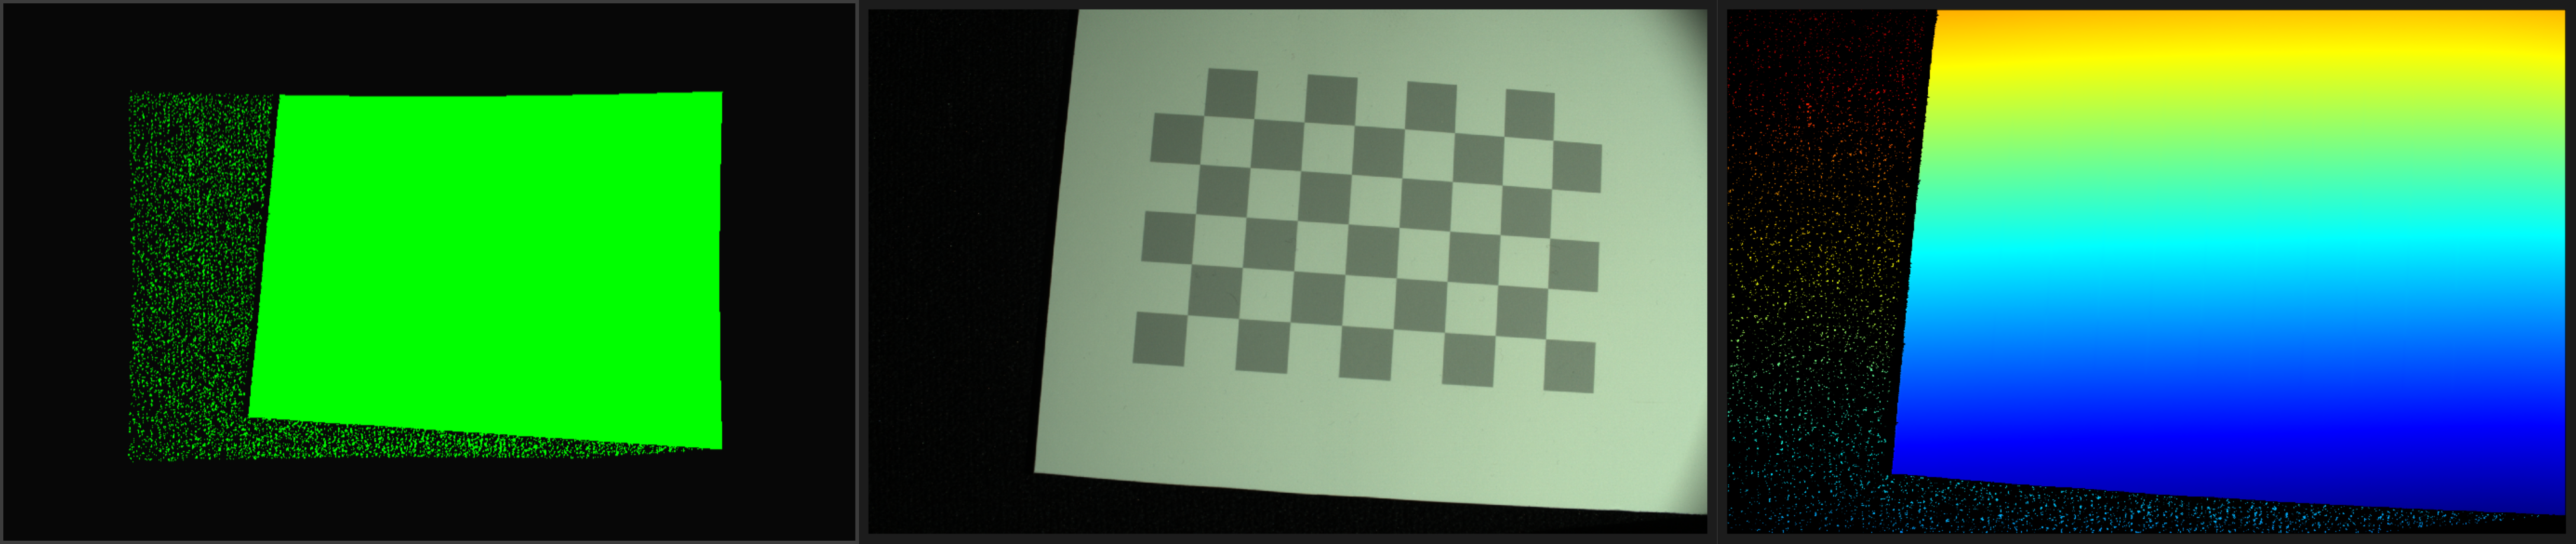
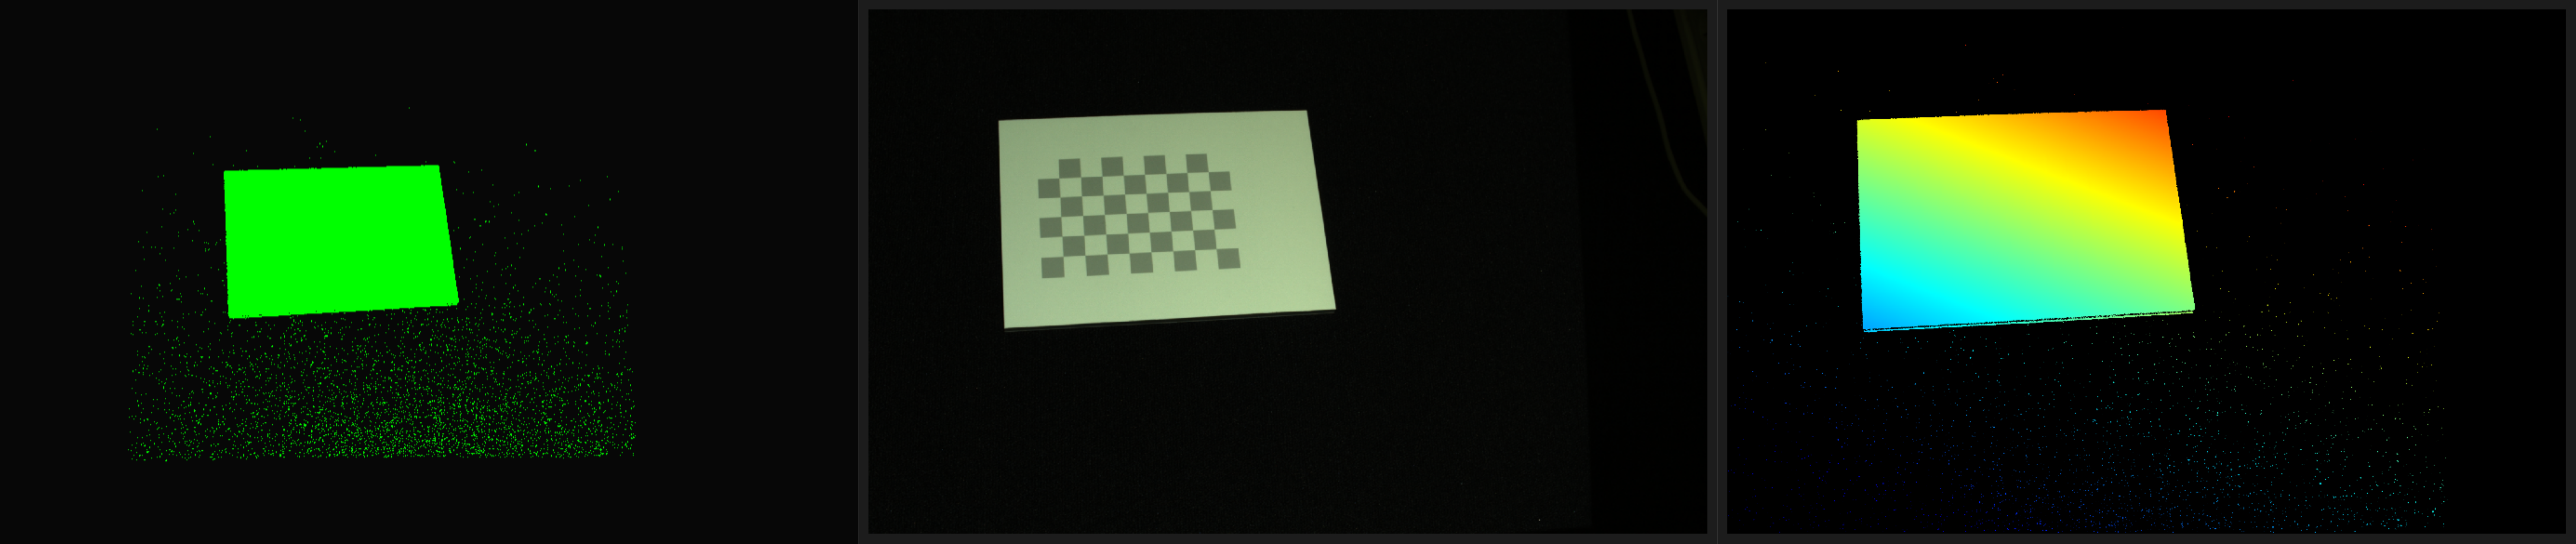
Now is the time to tune the settings according to the following instructions. The goal is for your point cloud to look similar to the one shown below. All the pixels that form the checkerboard are placed at the very right in the histogram (two last segments with values 64 - 256).
If your image is overexposed (white pixels are saturated), increase the \(f\)-number value until the white checkerboard squares are not overexposed. You can then fine-tune the projector brightness in order to place the checkerboard pixels in the right place in the histogram.
If your image is underexposed (white pixels are too dark), increase the exposure time by increments of 10000 (50Hz) or 8333 (60Hz). This will move the checkerboard pixels towards the right side of the histogram. After the exposure time, the next parameter to fine-tune is the projector brightness.
Caution
Be careful not to overexpose the image.
It is recommended to keep the gain equal to 1. The only case where you may have to change it is when using Zivid Large camera at large imaging distances. It is also recommended to use higher f-number values to make sure the depth of focus is preserved.

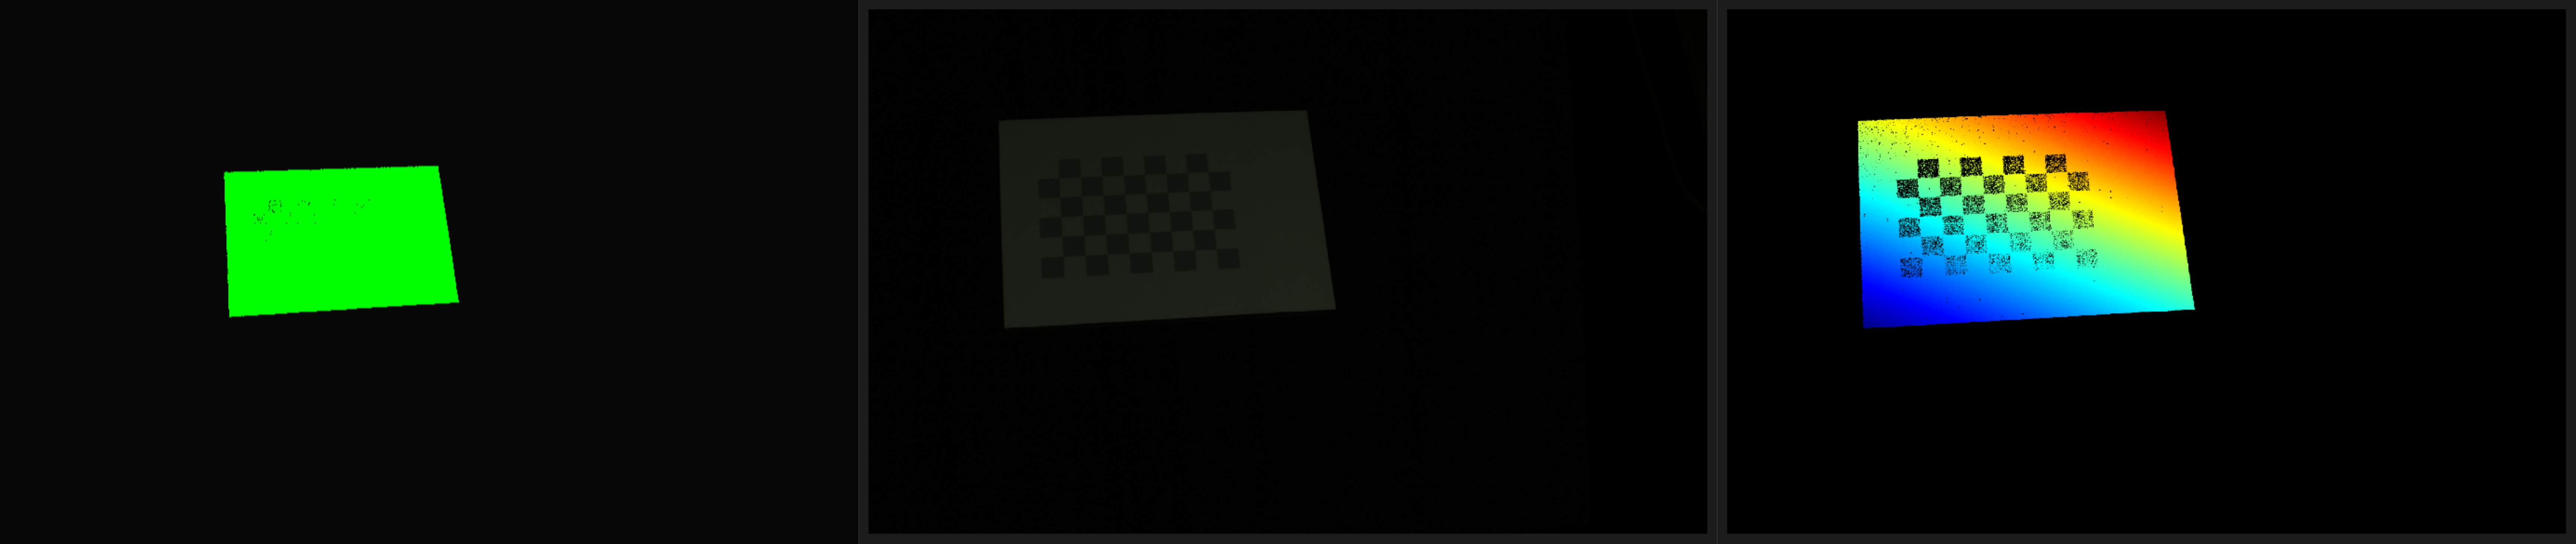
Here is an example of what your checkerboard point cloud and histogram should not look like! The image is overexposed, pixels saturated, and therefore, the points crucial for the algorithm to work, are missing in the point cloud.


Optimizing Zivid settings for the ‘far’ pose
Move the robot to the ‘near’ pose.
Start Zivid Studio and connect to the camera.
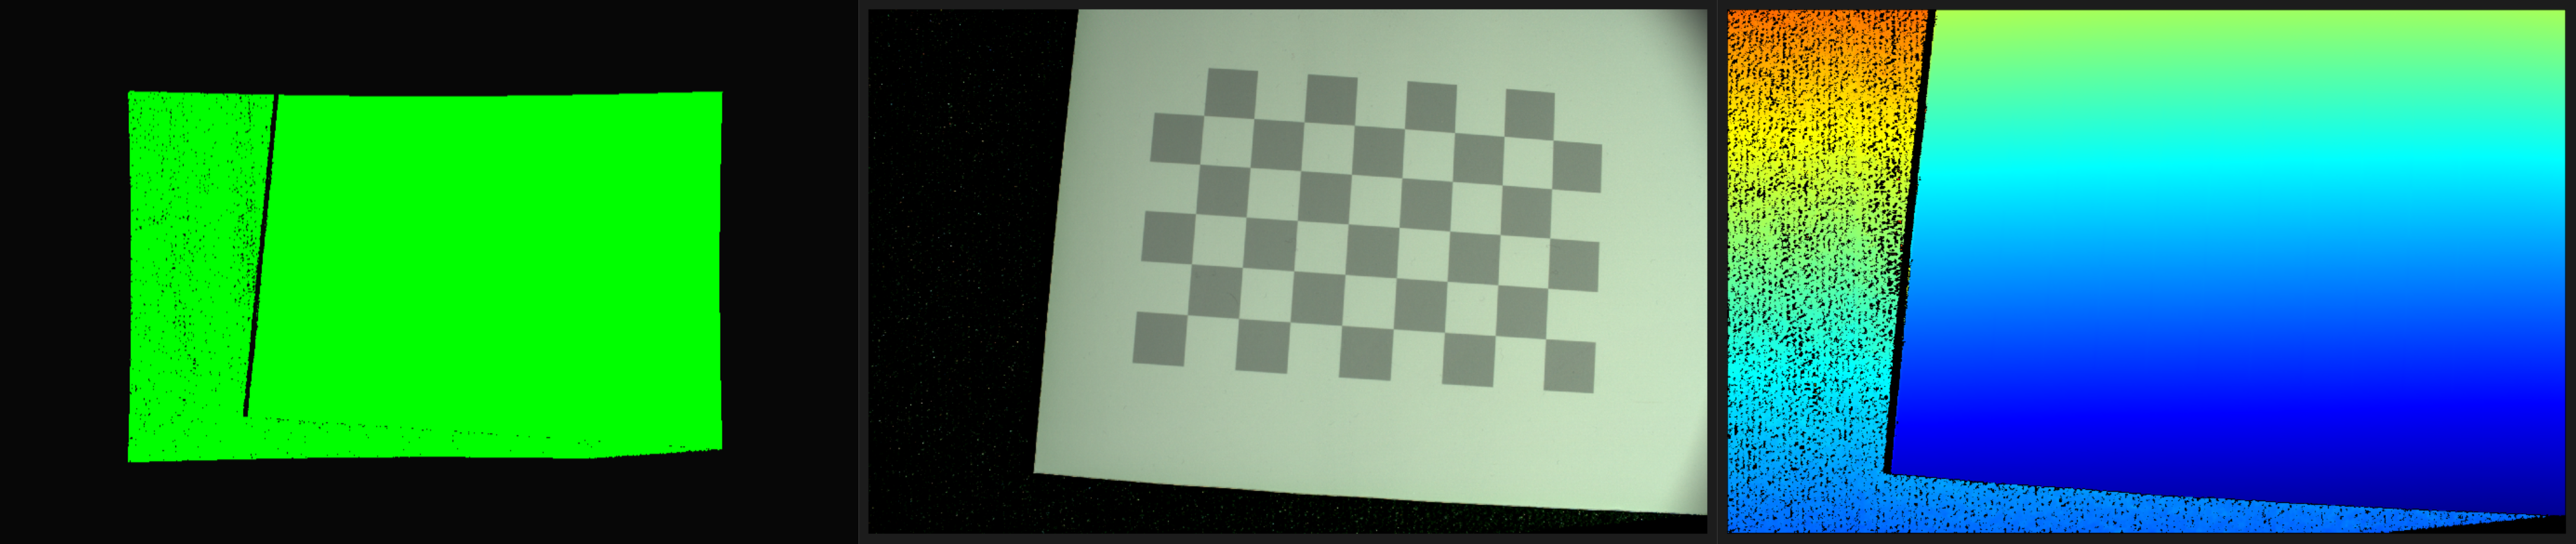
In the screenshot below all the pixels that form the checkerboard are placed in the last three/four segments of the histogram. If your point cloud looks like this, then you can capture checkerboard images for all the poses with a single acquisition with the same settings. This means that the dynamic range of the image with the configured settings is wide enough to cover any in-between poses.

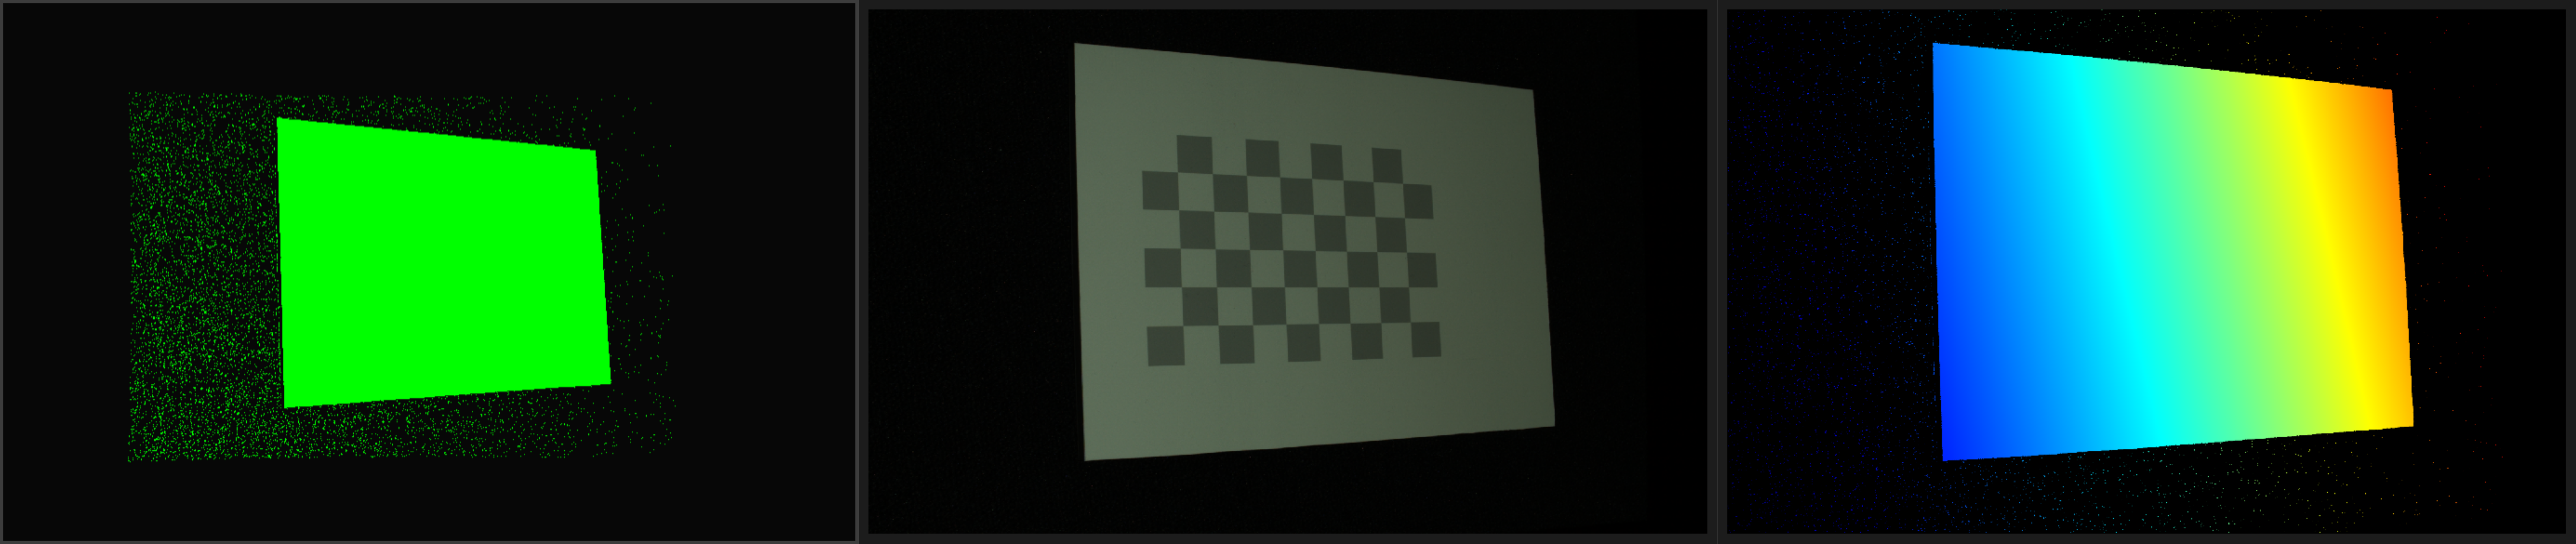
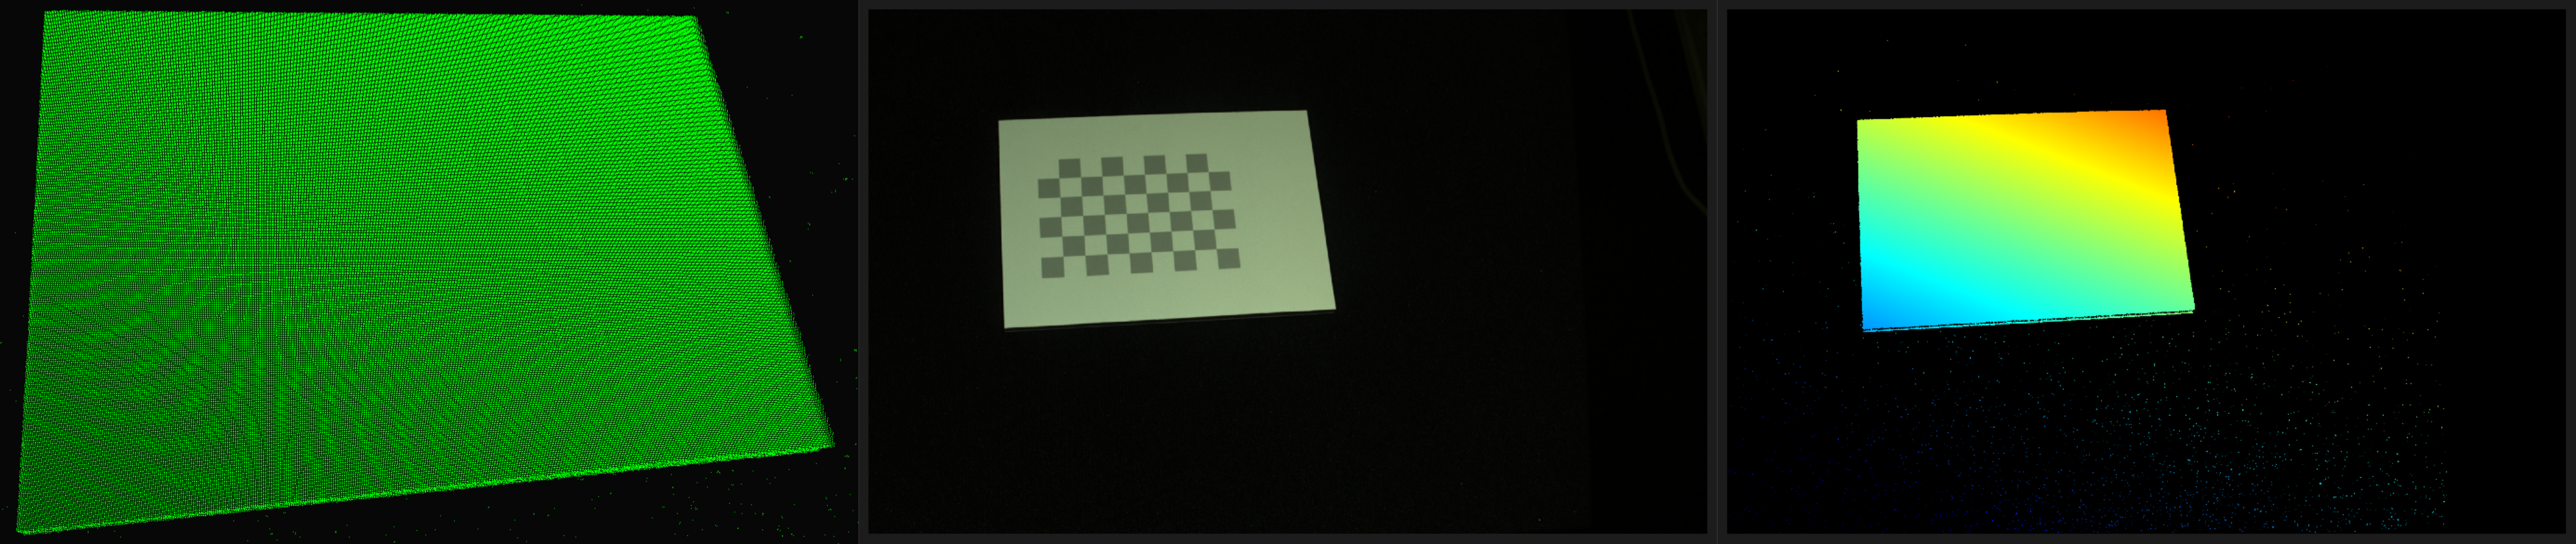
In the capture below, the checkerboard is barely visible by a human eye and some points on the checkerboard are missing from the point cloud/depth map. If your point cloud looks like this, then you need to use HDR mode. We will now demonstrate how to find settings for the second HDR acquisition.

Clone the frame in Zivid studio and disable the first acquisition. We will now tune the second acquisition. The goal is again to move the pixels that form the checkerboard in the two rightmost segments of the histogram (values 64 - 256) while not overexposing the image. We want to keep the \(f\)-number the same as in the first acquisition. To find the right exposure, start increasing the exposure time with increments of 10000 (50Hz) or 8333 (60Hz). For fine-tuning, use the projector brightness. Use gain only if you have to, e.g. if you use a Zivid Large camera at large imaging distance.

Once you are happy with the settings for the second acquisition, you can enable the first acquisition and take an HDR image.
Now you can move the robot back to the ‘near’ pose and take an HDR image with the same settings:
In most cases, an HDR image composed of two acquisitions that are optimized for ‘near’ and ‘far’ poses will be sufficient for all other in-between poses.
In extreme cases, where there is a huge difference in imaging distance (camera to checkerboard) between the robot poses, you may need another acquisition. In that case, move the robot to a ‘middle’ pose and repeat this process to find the optimal settings for that pose. Then, for all the poses that are between ‘near’ and ‘middle’ use an HDR acquisition comprised of the settings optimized for the ‘near’ and ‘middle’ pose. For the other poses, between the ‘middle’ and ‘far’ pose, use an HDR acquisition comprised of the settings optimized for the ‘middle’ pose and the ‘far’ pose.
An alternative option to find the correct imaging settings is to use the Capture Assistant. However, as of now, the capture assistant can provide optimal settings for the whole scene (maximizing the coverage) and not just the for checkerboard, which is what you want. In most cases the capture assistant will work just fine for this application so feel free to try it out, however, the method described above should always work well.
Let’s see how to realize the Hand-Eye Calibration Process.