Toolbar
The toolbar is located at the top of Zivid Studio. It consists of drop-down menus to handle files, control the GUI, configure cameras, use maintenance tools, and get information about the Zivid software.
File
Zivid Studio offers various saving options for point clouds, color images, and settings to disk.
Save/Export Point Cloud
To save the point cloud in file ZDF format:
Click on File → Save.
Navigate to the location where you want to save the point cloud.
Write down the file name.
Click Save.
Note
ZDF is the native Zivid file format that includes point cloud, color image, and depth image data. It’s the preferred format when reporting an issue to the Zivid Customer Success Team.
To export to one of our supported point cloud formats, unordered or ordered Polygon (PLY), ASCII (XYZ), or Point Cloud Data (PCD) file format:
Click on File → Export.
Navigate to the location where you want to save the point cloud.
Write down the file name.
Select the file format type.
Click Save.
Choose Export options.
Click Export.
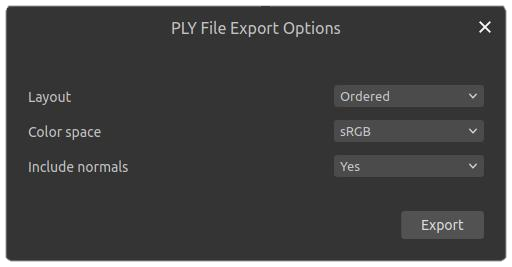
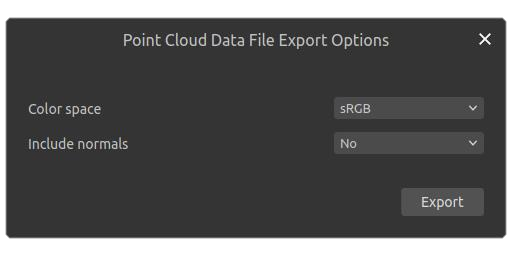
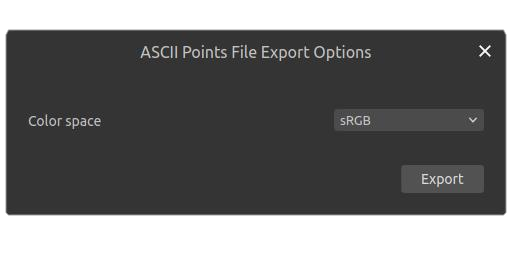
Export options for PLY, PCD, and XYZ file formats.
Open Point Cloud / File Camera
Opening a point cloud in Zivid Studio is only supported for ZDF file format. A file camera can be opened in Zivid Studio in the ZFC file format.
Click on File → Open.
Navigate to the location of your ZDF / ZFC file.
Click Open.
You can also drag and drop a ZDF / ZFC file into Zivid Studio, or double-click it.
To open or create a file camera from the Cameras panel, click the ⋯ menu and select one of:
Open ZDF file as file camera - loads a ZDF file as a file camera. The file must have been captured with diagnostics enabled.
Use captured frame as file camera - creates a file camera from the frame currently displayed in the viewer. The frame must have been captured with diagnostics enabled.
See File Camera for details.
Save Color Image / Depth Map / SNR Map / Normal Map
You can save the 2D color image in one of our supported image formats, PNG, BMP and JPG. For all formats, you can choose between sRGB and linear RGB color space. The Depth Map, SNR Map and Normal Map can only be saved in PNG format.
Click on File → Save Color Image / Save Depth Map / Save SNR Map / Save Normal Map.
Navigate to the location where you want to save the image.
Write down the file name.
Click Save.
Export Settings
It is possible to save all settings to disk.
Click on File → Export Capture Settings.
Navigate to the location where you want to save the settings.
Write down the file name.
Click Save.
Import Settings
To import the settings in Zivid Studio:
Click on File → Import Capture Settings.
Navigate to the location of your settings file.
Click Open.
You can also drag and drop a YML file into Zivid Studio to import the settings.
Preferences
To open and modify Zivid Studio preferences:
Click on File → Preferences.
Check the boxes to enable the desired preferences.
You can read more about Preferences in Configuration files.
View
2D Color Image Histogram
To show the 2D image histogram:
Click on View → 2D Color Image Histogram.
Swap between Linear and Logarithmic to change scales.

Information
To open the information panel:
Click View → Information or Information in the bottom right corner.
It is available only after you load a point cloud from a ZDF file or capture a point cloud or a color image.
The top part of the Information panel shows Acquisition Time, Capture Time, and Point Cloud / Color Image Size.
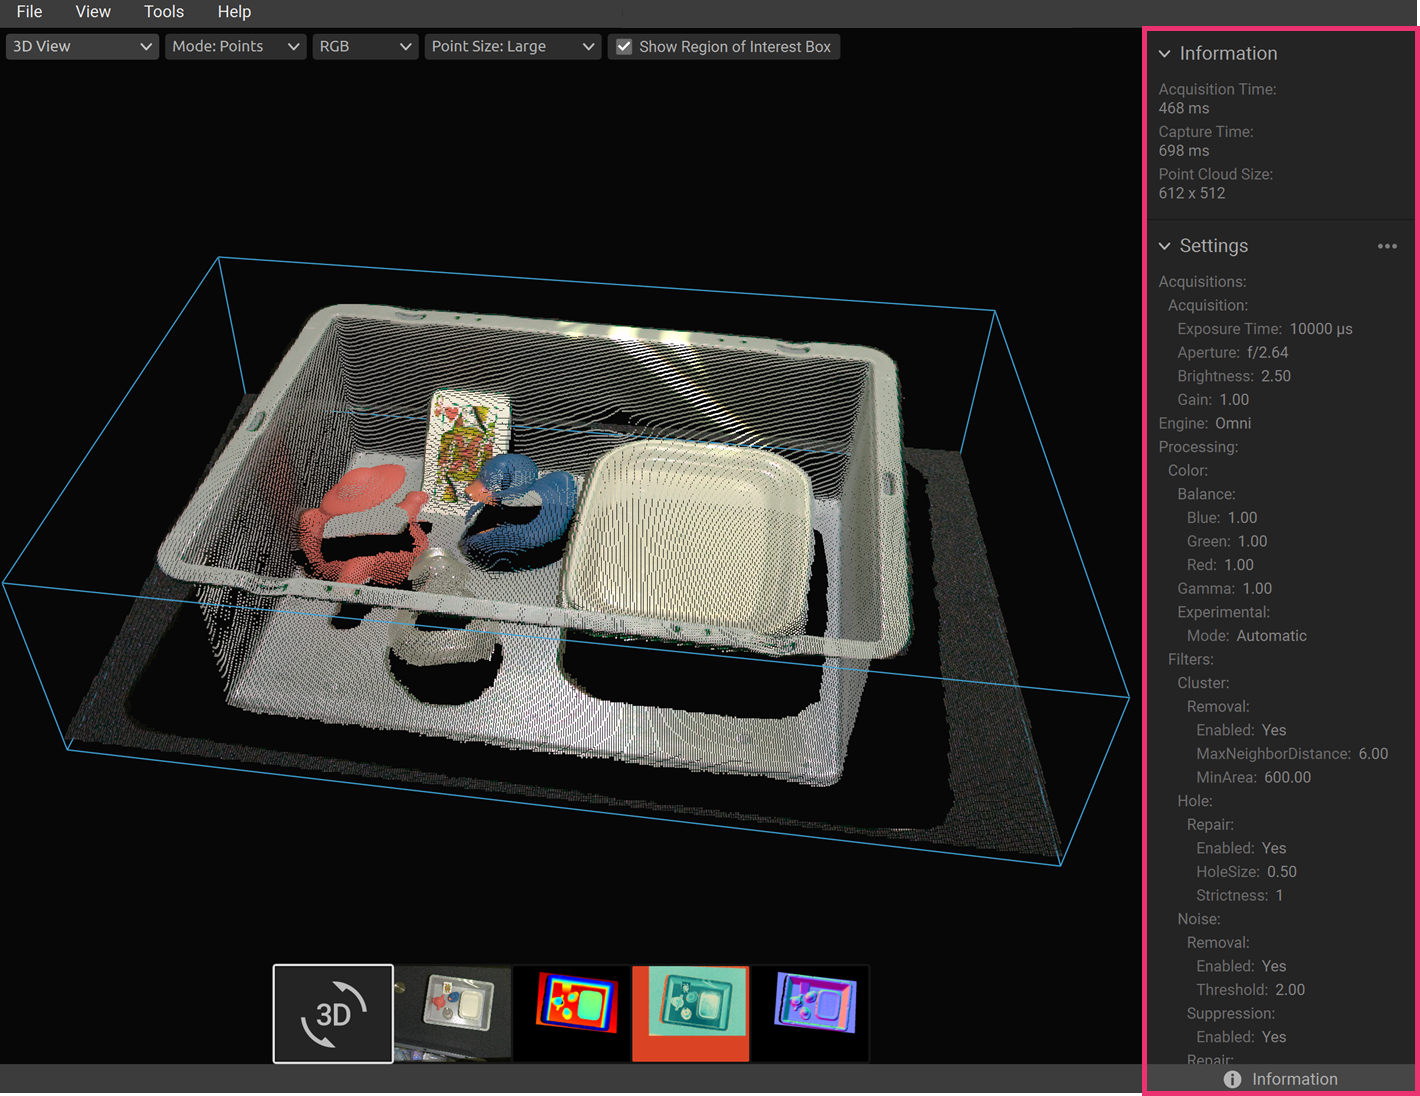
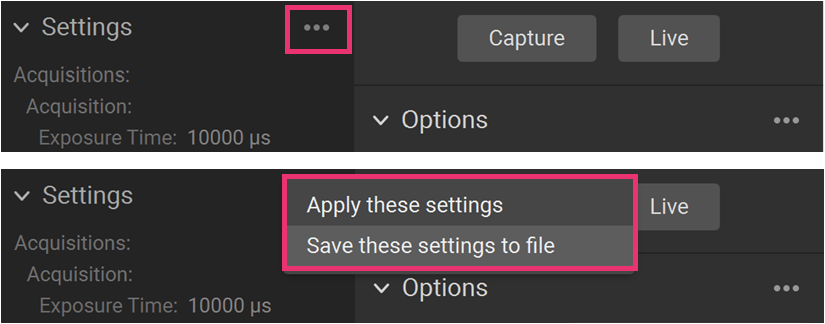
The bottom part shows the settings that were used in the capture. It is possible to save these settings to a file or apply them for use in the next capture.
3D Axis Indicator
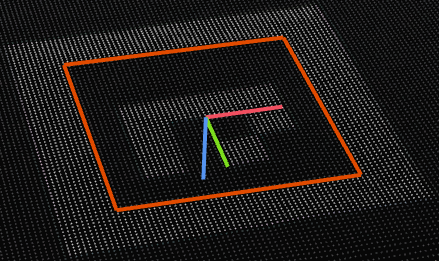
A 3D axis indicator is displayed in the bottom left corner of the point cloud view. To disable/enable it, click on View → 3D Axis Indicator.
Show 4x4 Aruco Markers
To highlight any 4x4 Aruco markers in the point cloud, click on View → Show 4x4 Aruco Markers.
Show barcodes
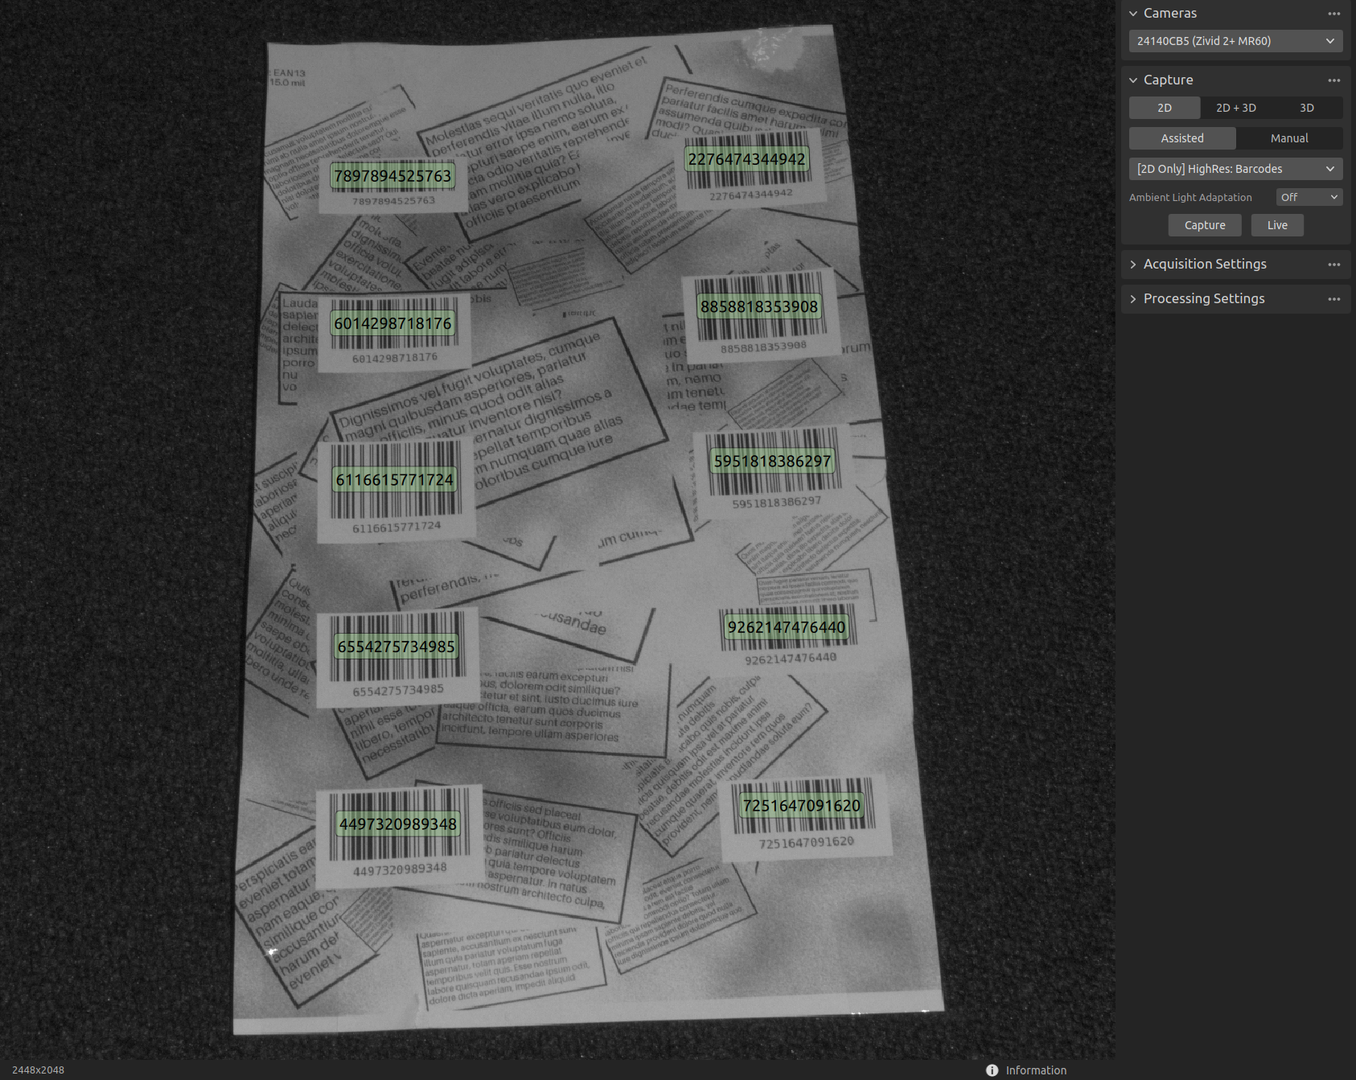
To show barcodes detected in the 2D image, click on View → Show barcodes.
Configure barcodes to detect
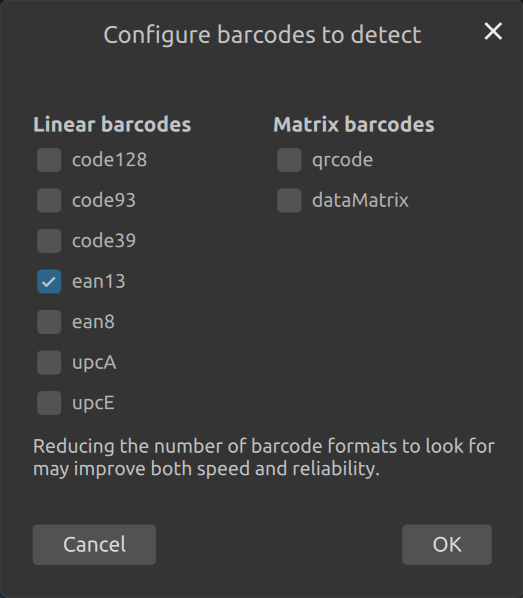
To configure which barcodes to detect in the 2D image, click on View → Configure barcodes to detect.
Reset 3D View When Opening Files
To control whether the 3D view is reset to the default view each time you open a file, click View → Reset 3D View When Opening Files.
Reset View
To reset the point cloud, color image, and depth image view back to the default view, click View → Reset View, or press Backspace.
Reset UI Layout
To restore the Zivid Studio window to its default layout, click View → Reset UI Layout.
Full Screen Mode
To toggle between full screen and regular screen mode, click View → Enter Full Screen Mode / Exit Full Screen Mode, or press F11.
Cameras
All Cameras
To open the Cameras menu:
Click on Cameras → All Cameras.
This will list all discovered cameras and their serial numbers, models, IP addresses and statuses.
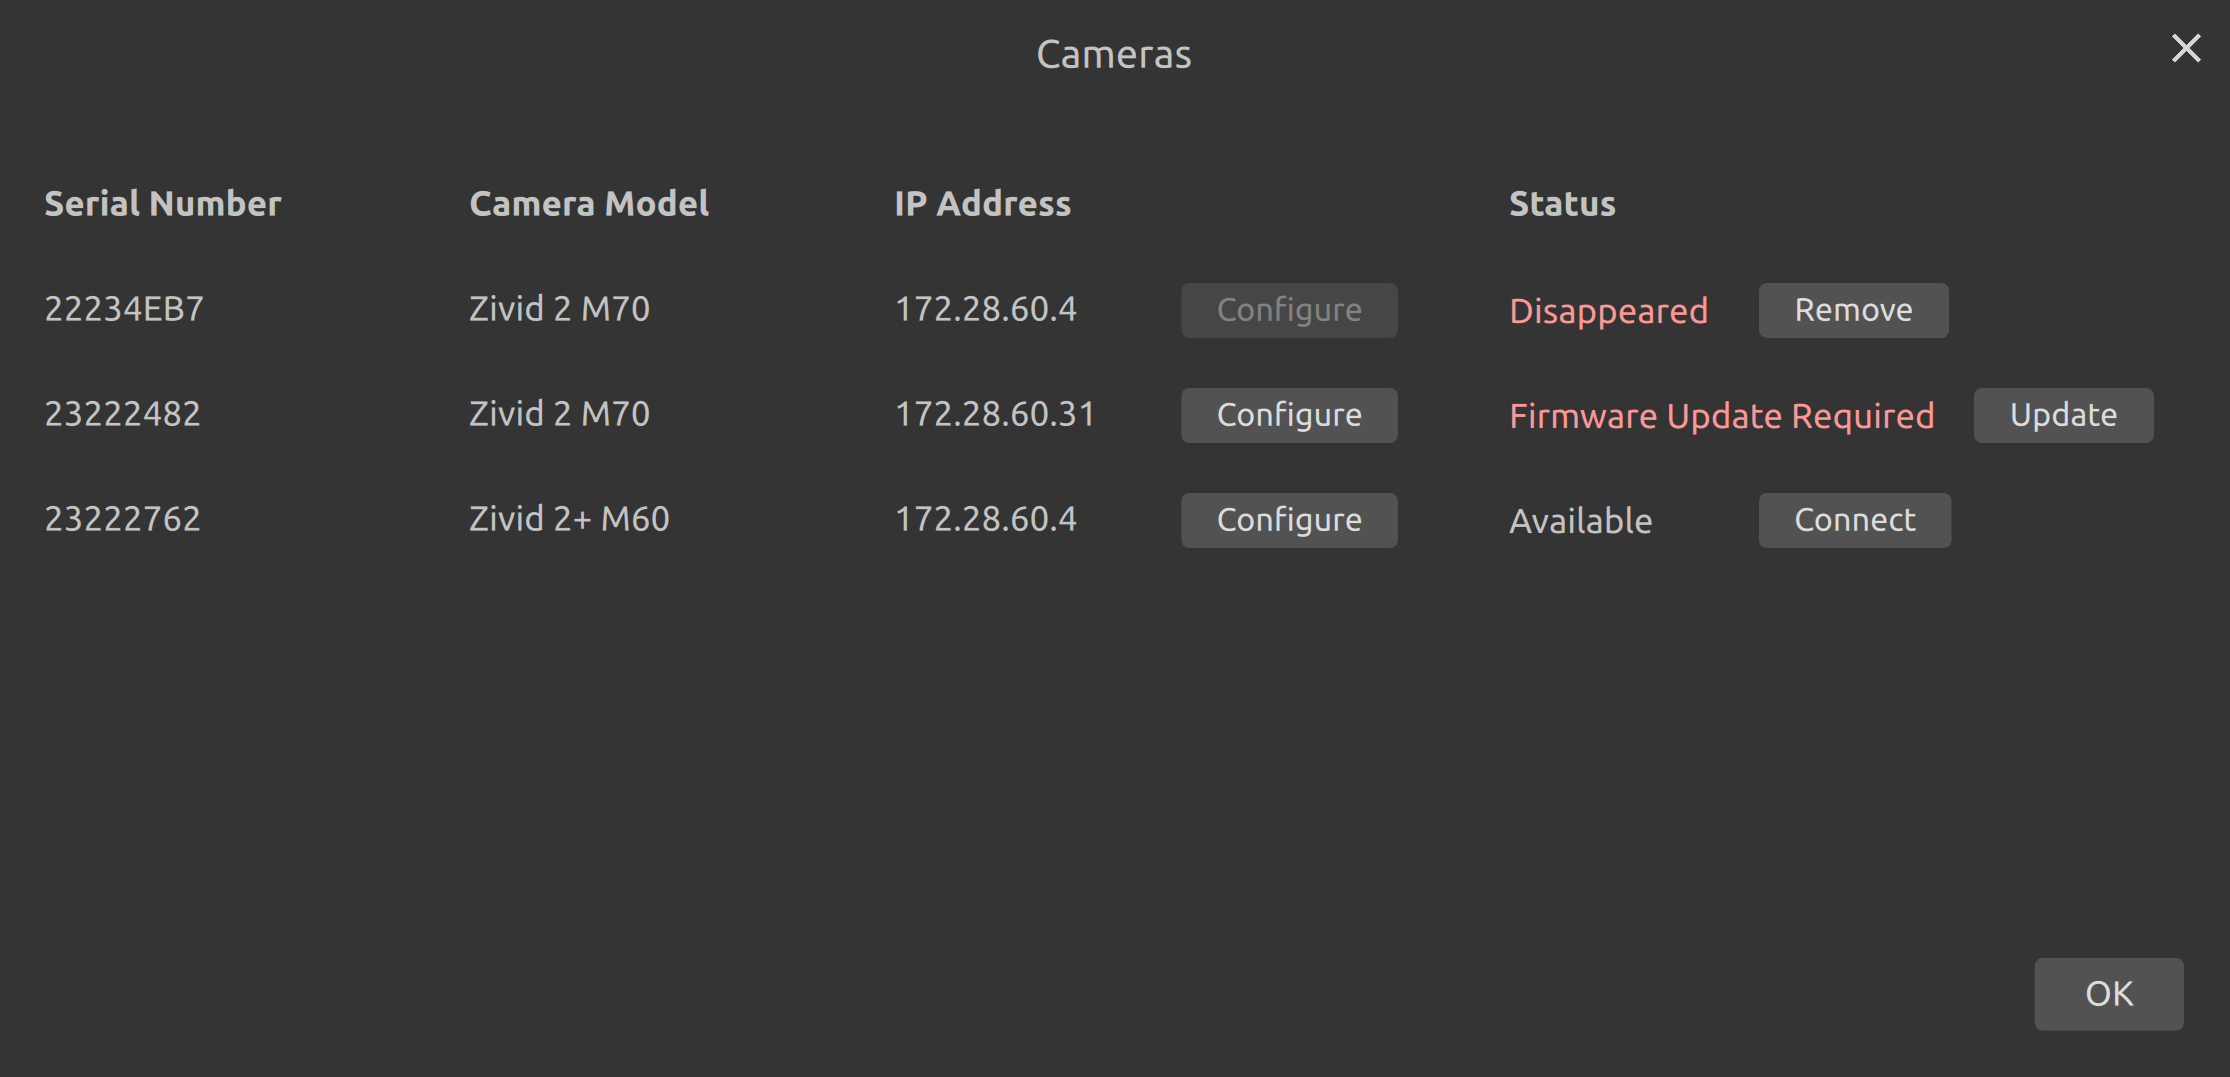
The status-field allows the following actions:
Connect to connect to the camera if it is available.
Disconnect to disconnect from the camera if it is connected.
Update to update the firmware of the camera if it is available but needs a firmware update.
Remove to remove the camera from the list if it is no longer found.
You can change the network configuration of any discovered camera by clicking Configure. This will open the camera network configuration.
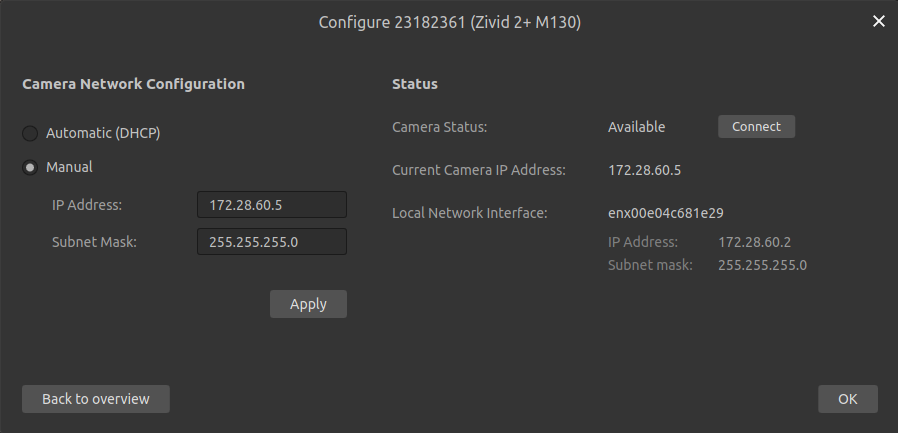
Here you can set the camera to use DHCP or a specific static IP address, and apply the configuration to the camera by clicking Apply. The status of the camera can change after applying the network configuration.
Health Check
The Health Check reports the status of a connected camera, aggregating several individual checks (such as temperatures, fan, memory, and transfer speed) into an overall status. This gives a quick overview of whether the camera is operating within its specified range.
To run a health check, open the Cameras menu (Cameras → All Cameras) and click Check on the row of a connected camera. The Check button becomes active once the camera is connected.
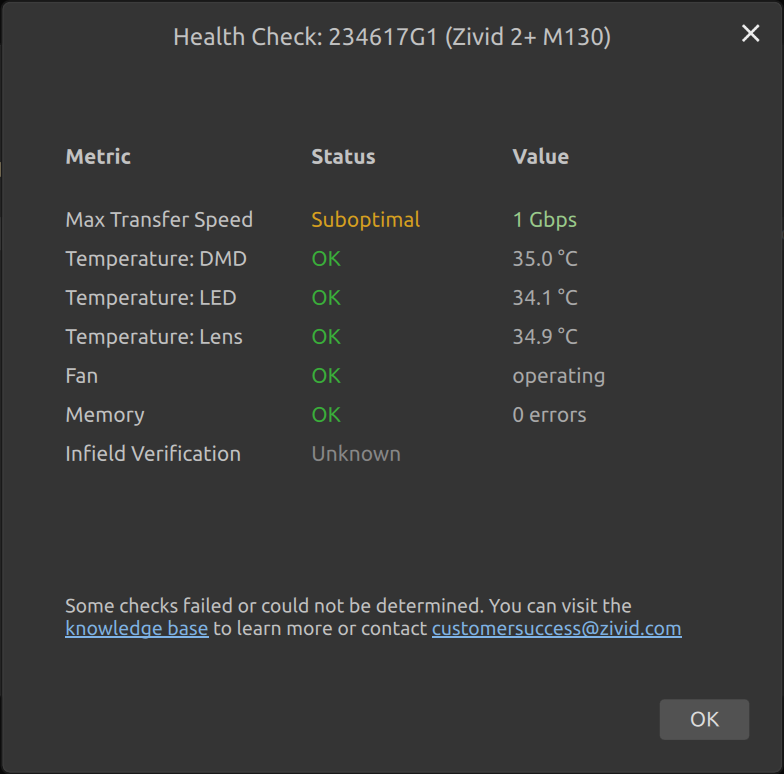
To read the same health check status programmatically, see Camera Health Check.
Tools
Infield Correction
To open the Infield Correction tool:
Click on Tools → Infield Correction.
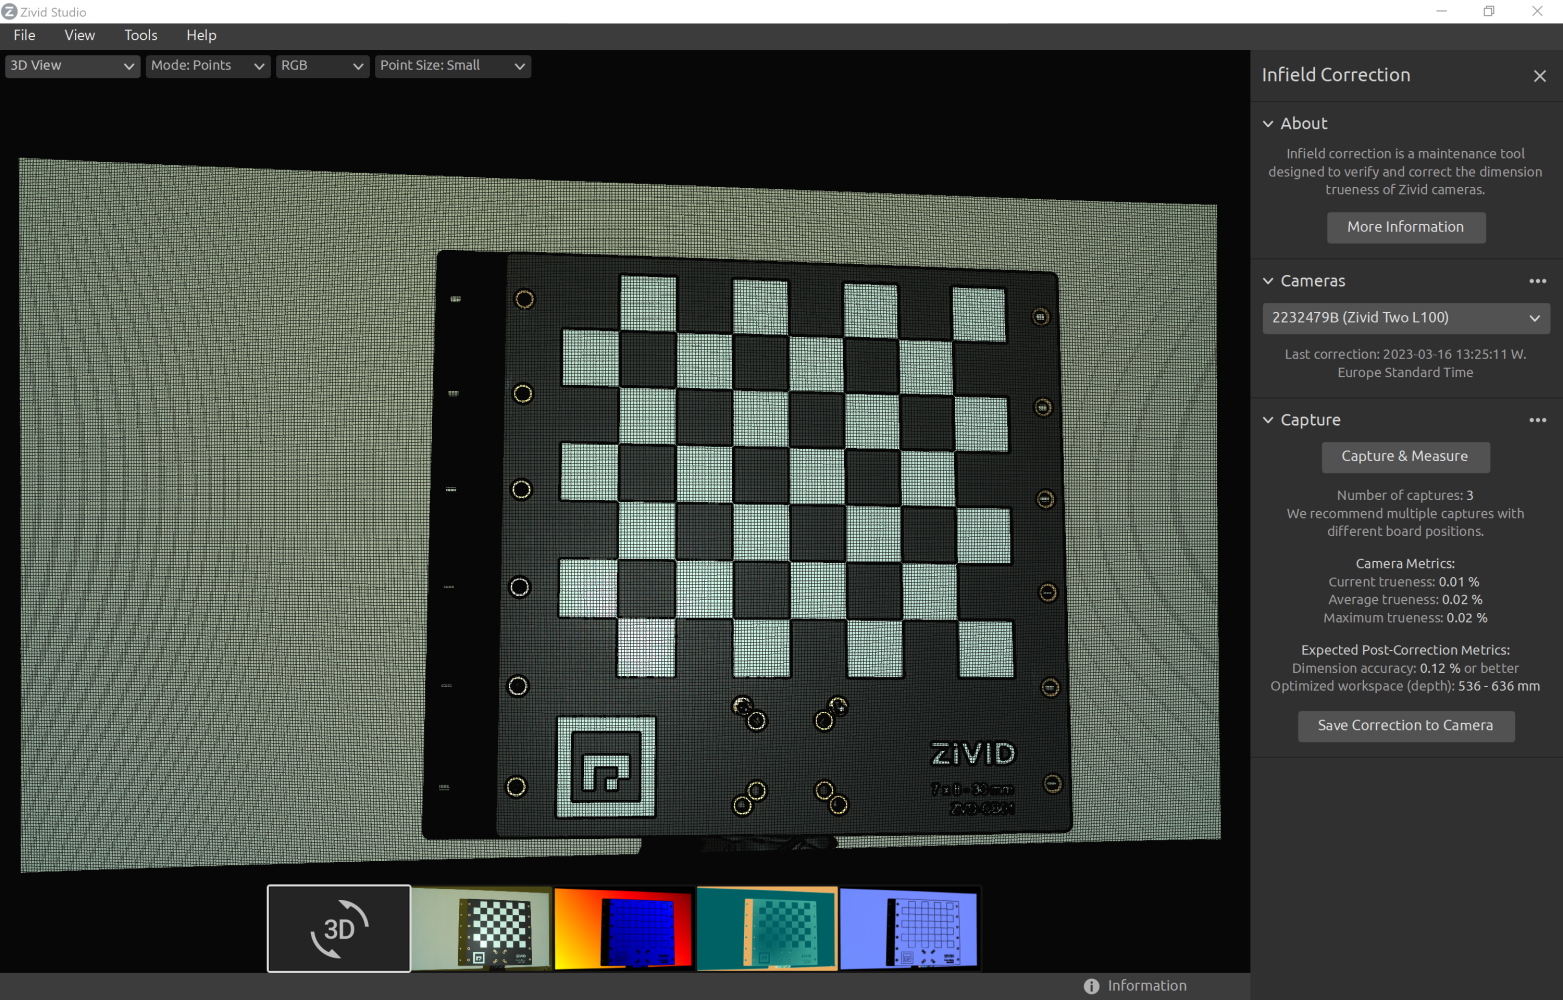
Infield Correction functionality overview
Last correction shows the last date and time an infield correction was written to the camera.
Capture & Measure captures to determine the local dimension trueness error of the point cloud where the Zivid calibration board is placed.
Current Camera Metrics shows the local dimension trueness error for the last capture taken with Capture & Measure, as well as the average and the maximum for all the captures.
Current trueness shows the local dimension trueness error for the last capture taken with Capture & Measure.
Average trueness shows the average of the local dimension trueness errors for all the captures taken with Capture & Measure so far.
Maximum trueness shows the maximum of the local dimension trueness errors for all the captures taken with Capture & Measure so far.
Expected Post-Correction Metrics shows the estimated post-correction error within 1σ statistical uncertainty over the working distances the images were captured at.
Save Correction to Camera writes to the camera the parameters for improving the dimension trueness of the point cloud determined from the captures of the Zivid calibration board taken with Capture & Measure.
Reset Camera Correction removes any infield correction that has been applied in previous correct instances. It is not required to do a reset before doing a new infield correction.
Learn more about Infield Correction.
Help
View Help Online
To open the Zivid Knowledge Base in your browser, click Help → View Help Online.
About Zivid Studio
To view detailed information about Zivid, third-party software licenses, and system info, click Help → About Zivid Studio.