Camera Selector based on Scene Volume
This section aims to help you choose the correct Zivid camera based on the length, width, height of the Volume Of Interest (VOI), and the number of bins in the scene. Bins with the standardized size used for bin picking are Euro Containers and Standard Plastic Totes. It is also common to use steel mesh cages, heavy-duty steel bins, and wooden crates, and sometimes, picking is done straight from a pallet.
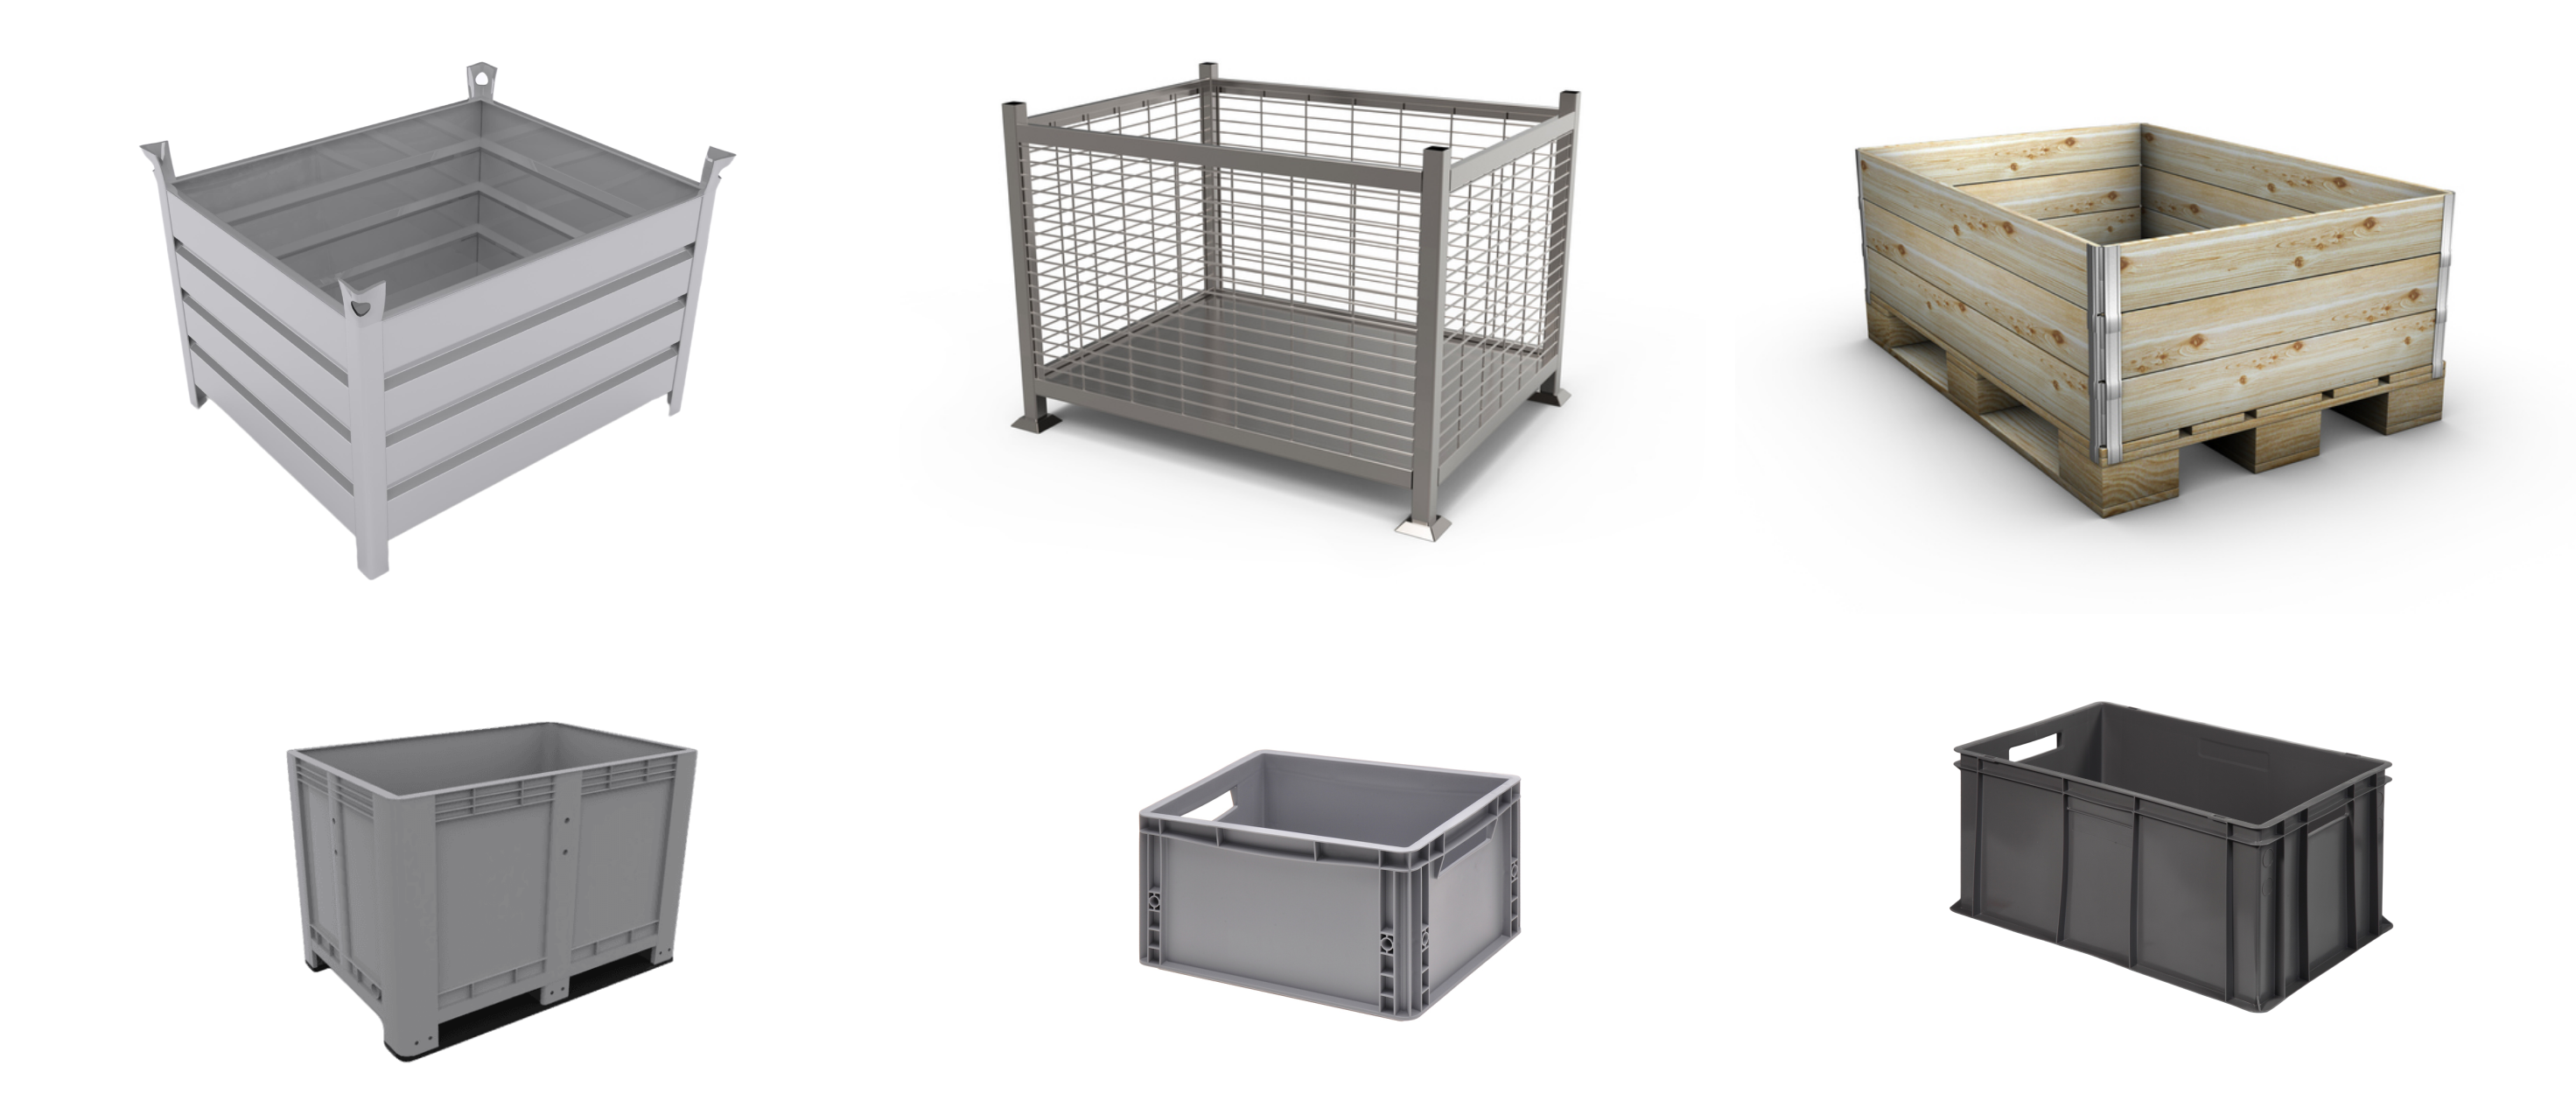
Typical Scene Volumes
Dimensions |
|||||||||||
|---|---|---|---|---|---|---|---|---|---|---|---|
Length |
600 |
800 |
800 |
800 |
1000 |
1000 |
1000 |
1100 |
1100 |
1200 |
1200 |
Width |
400 |
600 |
800 |
800 |
750 |
1000 |
1000 |
1100 |
1100 |
800 |
1200 |
Height |
400 |
500 |
500 |
800 |
500 |
500 |
1000 |
500 |
1000 |
800 |
400 |
All dimensions are given in mm.
Camera Selector
Choose whether you have an on-arm or a stationary camera.
On-Arm Mounting
Find the camera model that suits your application based on the bin size. Our recommended capture distance (to bin top) is in the same row.
Bin length |
Bin width |
Bin height |
Camera |
To bin top |
To bin bottom |
|---|---|---|---|---|---|
600 |
400 |
400 |
Z2+ MR60 |
600 |
1000 |
800 |
600 |
500 |
Z2+ LR110 |
800 |
1300 |
800 |
800 |
500 |
1050 |
1550 |
|
1000 |
750 |
500 |
Z3 XL250 |
1500 |
2000 |
1000 |
1000 |
500 |
1500 |
2000 |
|
1100 |
1100 |
500 |
1600 |
2100 |
|
1200 |
800 |
800 |
1700 |
2500 |
|
1200 |
1200 |
400 |
1700 |
2100 |
Complete option analysis
Bin length |
Bin width |
Bin height |
Camera |
To bin top |
To bin bottom |
|---|---|---|---|---|---|
600 |
400 |
400 |
Z2+ MR60 |
600 |
1000 |
Z2 M70 |
700 |
1100 |
|||
Z2+ MR130 |
1020 |
1420 |
|||
800 |
600 |
500 |
Z2+ LR110 |
800 |
1300 |
Z2 L100 |
900 |
1400 |
|||
Z2+ MR130 |
1300 |
1800 |
|||
800 |
800 |
500 |
Z2+ LR110 |
1050 |
1550 |
Z2 L100 |
1250 |
1750 [2] |
|||
Z2+ MR130 |
1600 |
2100 [2] |
|||
1000 |
750 |
500 |
Z2+ LR110 |
1050 |
1550 |
Z2 L100 |
1200 |
1700 [2] |
|||
Z2+ MR130 |
1650 |
2150 [2] |
|||
Z3 XL250 |
1500 |
2000 |
|||
1000 |
1000 |
500 |
Z2+ LR110 |
1300 |
1800 [2] |
Z3 XL250 |
1500 |
2000 |
|||
1100 |
1100 |
500 |
Z2+ LR110 |
1400 |
1900 [2] |
Z3 XL250 |
1600 |
2100 |
|||
1200 |
800 |
800 |
Z2+ LR110 |
1200 |
2000 [2] |
Z3 XL250 |
1700 |
2500 |
|||
1200 |
1200 |
400 |
Z2+ LR110 |
1550 |
1950 [2] |
Z3 XL250 |
1700 |
2100 |
The camera in bold is the recommend one.
All dimensions are given in mm.
Stationary Mounting
Choose the size of the bin in your scene. Our recommendation for the camera and mounting distance (to bin top), i.e., robot clearance, for your application is in the same row.
Bin length |
Bin width |
To bin top |
Bin height |
Camera |
To bin bottom |
|---|---|---|---|---|---|
600 |
400 |
1000 |
400 |
Z2+ MR130 |
1400 |
800 |
600 |
1300 |
500 |
1800 |
|
800 |
800 |
1500 |
500 |
Z3 XL250 |
2000 |
1500 |
800 |
2300 |
|||
1000 |
750 |
1500 |
500 |
2000 |
|
1000 |
1000 |
1500 |
500 |
2000 |
|
1100 |
1100 |
1600 |
500 |
2100 |
|
1200 |
800 |
1700 |
1000 |
2700 |
|
1200 |
1200 |
1700 |
400 |
2100 |
If you have different robot clearance requirements, check out the Complete option analysis below to find the right camera for your application.
Complete option analysis
Bin length |
Bin width |
To bin top |
Bin height |
Camera |
To bin bottom |
|---|---|---|---|---|---|
600 |
400 |
600 |
400 |
Z2+ MR60 |
1000 |
700 |
Z2 M70 |
1100 |
|||
1000 |
Z2+ MR130 |
1400 |
|||
800 |
600 |
800 |
500 |
Z2+ LR110 |
1300 |
900 |
Z2 L100 |
1400 |
|||
1300 |
Z2+ MR130 |
1800 |
|||
1500 |
Z3 XL250 |
2000 |
|||
800 |
800 |
1050 |
500 |
Z2+ LR110 |
1550 |
1500 |
Z3 XL250 |
2000 |
|||
1600 |
800 |
Z2+ MR130 |
2400 |
||
1500 |
Z3 XL250 |
2300 |
|||
1000 |
750 |
1050 |
500 |
Z2+ LR110 |
1550 |
1650 |
Z2+ MR130 |
2150 |
|||
1500 |
Z3 XL250 |
2000 |
|||
1000 |
1000 |
1300 |
500 |
Z2+ LR110 |
1800 [4] |
1500 |
Z3 XL250 |
2000 |
|||
1100 |
1100 |
1600 |
500 |
Z3 XL250 |
2100 |
1200 |
800 |
1700 |
1000 |
Z3 XL250 |
2700 |
1200 |
1200 |
1700 |
400 |
Z3 XL250 |
2100 |
The camera in bold is the recommend one.
All dimensions are given in mm.
Euro Containers
Small Euro Containers
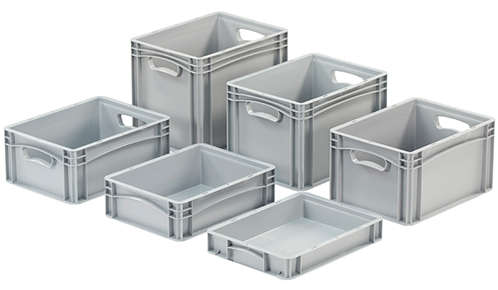
Outside dimensions |
Inside dimensions |
|||
|---|---|---|---|---|
Length |
Width |
Length |
Width |
Height |
400 mm |
300 mm |
367 mm |
268 mm |
70 mm |
120 mm |
||||
170 mm |
||||
220 mm |
||||
270 mm |
||||
320 mm |
||||
Medium Euro Containers
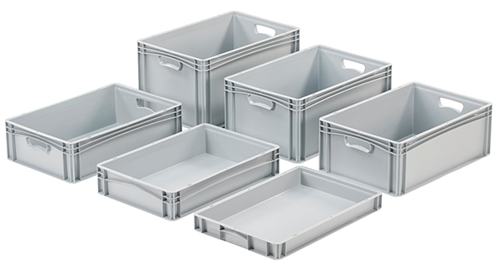
Outside dimensions |
Inside dimensions |
|||
|---|---|---|---|---|
Length |
Width |
Length |
Width |
Height |
600 mm |
400 mm |
576 mm |
367 mm |
70 mm |
120 mm |
||||
170 mm |
||||
220 mm |
||||
270 mm |
||||
320 mm |
||||
Large Euro Containers

Outside dimensions |
Inside dimensions |
|||
|---|---|---|---|---|
Length |
Width |
Length |
Width |
Height |
800 mm |
600 mm |
766 mm |
567 mm |
120 mm |
220 mm |
||||
320 mm |
||||
420 mm |
||||
520 mm |
||||
Camera Selector
On-Arm Mounting
Find the camera model that suits your application based on the number and size of Euro Containers in your scene and on bin height. Our recommended capture distance (to bin top) is in the same row.
Euro Container(s) |
Bin length |
Bin width |
Bin height |
Camera |
To bin top |
To bin bottom |
|---|---|---|---|---|---|---|
One Small |
400 |
300 |
70 - 320 |
Z2+ MR60 |
500 |
570 - 820 |
One Medium or two Small |
600 |
400 |
70 - 320 |
Z2+ MR60 |
600 |
670 - 920 |
One Large or two Medium |
800 |
600 |
70 - 520 |
Z2+ LR110 |
800 |
870 - 1320 |
Two Large |
1200 |
800 |
70 - 520 |
Z2+ LR110 |
1200 |
1270 - 1720 |
You can also check out the Complete option analysis below to find the right camera for your application.
Complete option analysis
Euro Container(s) |
Bin length |
Bin width |
Bin height |
Camera |
To bin top |
To bin bottom |
|---|---|---|---|---|---|---|
One Small |
400 |
300 |
70 - 320 |
Z2+ MR60 |
500 |
570 - 820 |
Z2 M70 |
600 |
670 - 920 |
||||
Z2+ MR130 |
800 |
870 - 1120 |
||||
One Medium or two Small |
600 |
400 |
70 - 320 |
Z2+ MR60 |
600 |
670 - 920 |
Z2 M70 |
700 |
770 - 1020 |
||||
Z2+ MR130 |
1000 |
1070 - 1320 |
||||
One Large or two Medium |
800 |
600 |
70 - 520 |
Z2+ LR110 |
800 |
870 - 1320 |
70 - 120 |
Z2 M70 |
900 |
970 - 1020 |
|||
170 - 520 |
Z2 L100 |
1070 - 1420 |
||||
70 - 520 |
Z2+ MR130 |
1320 |
1390 - 1840 |
|||
Two Large |
1200 |
800 |
70 - 520 |
Z2+ LR110 |
1200 |
1270 - 1720 |
120 - 420 |
Z2 L100 |
1250 |
1370 - 1670 [5] |
|||
70 - 520 |
Z2+ MR130 |
2000 |
2070 - 2520 |
|||
70 - 520 |
Z3 XL250 |
1700 |
1770 - 2220 |
The camera in bold is the recommend one.
All dimensions are given in mm.
Stationary Mounting
Choose the number and size of Euro Containers in your scene. Our recommendation for the camera and mounting distance (to bin top), i.e., robot clearance, for your application is in the same row.
One Small
Bin length |
Bin width |
To bin top |
Bin height |
Camera |
To bin bottom |
|---|---|---|---|---|---|
400 |
300 |
800 |
70 - 320 |
Z2+ MR130 |
870 - 1120 |
If you have different robot clearance requirements, check out the Complete option analysis below to find the right camera for your application.
Complete option analysis
Bin length |
Bin width |
To bin top |
Bin height |
Camera |
To bin bottom |
|---|---|---|---|---|---|
400 |
300 |
500 |
70 - 320 |
Z2+ MR60 [6] |
570 - 820 |
600 - 700 |
70 - 320 |
Z2+ MR60 [6] |
670 - 1020 |
||
Z2 M70 |
|||||
800 |
70 - 320 |
Z2+ MR130 |
870 - 1120 |
||
70 - 220 |
Z2+ MR60 |
870 - 1020 |
|||
Z2 M70 |
|||||
270 - 320 |
Z2+ LR110 |
1070 - 1120 |
|||
Z2 L100 |
|||||
900 |
70 - 320 |
Z2+ MR130 |
970 - 1220 |
||
70 - 120 |
Z2+ MR60 |
970 - 1020 |
|||
Z2 M70 |
|||||
170 - 320 |
Z2+ LR110 |
1070 - 1220 |
|||
Z2 L100 |
|||||
1000 - 1300 |
70 - 320 |
Z2+ MR130 |
1070 - 1620 |
||
Z2+ LR110 |
|||||
Z2 L100 |
The camera in bold is the recommend one.
One Medium or two Small
Bin length |
Bin width |
To bin top |
Bin height |
Camera |
To bin bottom |
|---|---|---|---|---|---|
600 |
400 |
1000 |
70 - 320 |
Z2+ MR130 |
1070 - 1320 |
If you have different robot clearance requirements, check out the Complete option analysis below to find the right camera for your application.
Complete option analysis
Bin length |
Bin width |
To bin top |
Bin height |
Camera |
To bin bottom |
|---|---|---|---|---|---|
600 |
400 |
600 |
70 - 320 |
Z2+ MR60 [7] |
670 - 920 |
700 |
70 - 320 |
Z2+ MR60 [7] |
770 - 1020 |
||
Z2 M70 [7] |
|||||
800 |
70 - 320 |
Z2+ MR130 |
870 - 1120 |
||
70 - 220 |
Z2+ MR60 |
870 - 1020 |
|||
Z2 M70 |
|||||
270 - 320 |
Z2+ LR110 |
1070 - 1120 |
|||
Z2 L100 |
|||||
900 |
70 - 320 |
Z2+ MR130 |
970 - 1220 |
||
70 - 120 |
Z2+ MR60 |
970 - 1020 |
|||
Z2 M70 |
|||||
170 - 320 |
Z2+ LR110 |
1070 - 1220 |
|||
Z2 L100 |
|||||
1000 - 1300 |
70 - 320 |
Z2+ MR130 |
1070 - 1620 |
||
Z2+ LR110 |
|||||
Z2 L100 |
The camera in bold is the recommend one.
One Large or two Medium
Bin length |
Bin width |
To bin top |
Bin height |
Camera |
To bin bottom |
|---|---|---|---|---|---|
800 |
600 |
1300 |
70 - 320 |
Z2+ MR130 |
1370 - 1620 |
If you have different robot clearance requirements, check out the Complete option analysis below to find the right camera for your application.
Complete option analysis
Bin length |
Bin width |
To bin top |
Bin height |
Camera |
To bin bottom |
|---|---|---|---|---|---|
800 |
600 |
800 |
70 - 120 |
Z2+ MR60 [8] |
870 - 920 |
170 - 520 |
Z2+ LR110 [8] |
970 - 1320 |
|||
900 |
70 - 120 |
Z2+ MR60 [8] |
970 - 1020 |
||
Z2 M70 [8] |
|||||
170 - 520 |
Z2+ LR110 [8] |
1070 - 1420 |
|||
Z2 L100 [8] |
|||||
1000 - 1200 |
70 - 320 |
Z2+ LR110 [8] |
1070 - 1520 |
||
Z2 L100 [8] |
|||||
1300 |
70 - 320 |
Z2+ MR130 |
1370 - 1620 |
||
Z2+ LR110 |
|||||
Z2 L100 |
|||||
1400 |
70 - 520 |
Z2+ MR130 |
1470 - 1920 |
||
70 - 320 |
Z2+ LR110 |
1470 - 1670 |
|||
Z2 L100 |
|||||
1500 |
70 - 520 |
Z2+ MR130 |
1570 - 2020 |
||
Z3 XL250 |
|||||
70 - 170 |
Z2+ LR110 |
1570 - 1670 |
|||
Z2 L100 |
|||||
1600 |
70 - 520 |
Z2+ MR130 |
1670 - 2120 |
||
Z3 XL250 |
|||||
70 |
Z2+ LR110 |
1670 |
|||
Z2 L100 |
The camera in bold is the recommend one.
Two Large
Bin length |
Bin width |
To bin top |
Bin height |
Camera |
To bin bottom |
|---|---|---|---|---|---|
1200 |
800 |
1700 |
120 - 520 |
Z3 XL250 |
1820 - 2220 |
If you have different robot clearance requirements, check out the Complete option analysis below to find the right camera for your application.
Complete option analysis
Bin length |
Bin width |
To bin top |
Bin height |
Camera |
To bin bottom |
|---|---|---|---|---|---|
1200 |
800 |
1200 |
120 - 420 |
Z2+ LR110 |
1320 - 1620 |
1300 |
120 - 320 |
Z2+ LR110 [10] |
1420 - 1620 |
||
Z2 L100 [10] |
|||||
1400 |
120 - 320 |
Z2+ LR110 [10] |
1520 - 1620 |
||
Z2 L100 [10] |
|||||
1500 |
120 |
Z2+ LR110 [10] |
1620 |
||
Z2 L100 [10] |
|||||
1700 |
120 - 520 |
Z3 XL250 |
1820 - 2220 |
The camera in bold is the recommend one.
All dimensions are given in mm.
Considerations taken for Camera Selector
On-Arm mounting
The camera has to be mounted on a robot in such a position that it can see the entire length and width of the bin top during capture. At this position, the gripper needs to be entirely outside of the bin. The camera also has to be mounted far enough away from the gripper tip so it does not collide with the bin edges during picking. This should hold even when picking at an angle, e.g., 45 degrees.
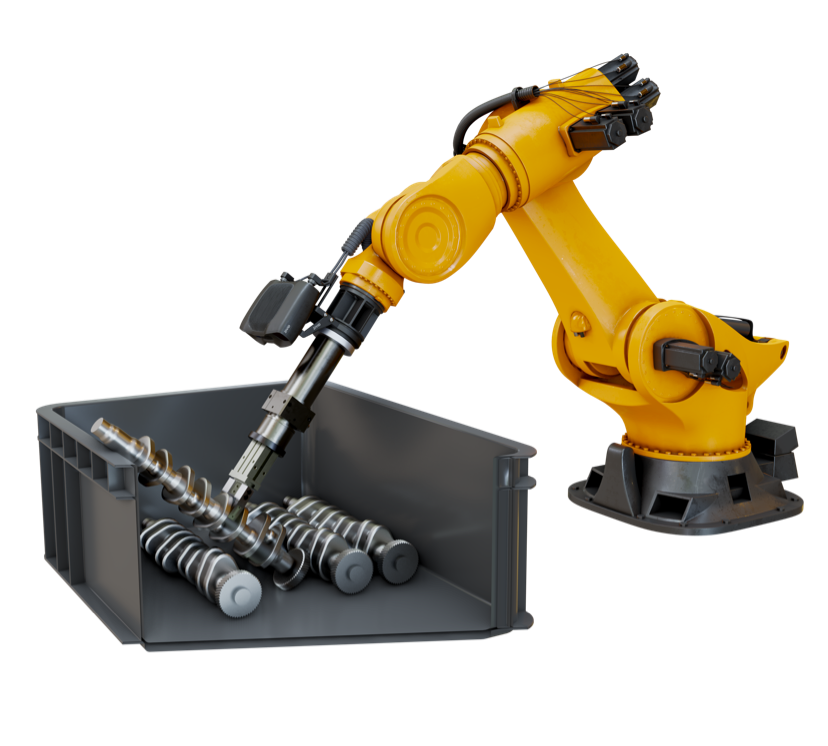
Stationary mounting
The robot must have enough clearance to move between the camera and the bin freely without colliding with the camera. The total distance of clearance to the bin top depends on several elements. The first one is the total gripper length. The gripper must be entirely above the bin before entering the bin. The second element is the largest height of the object in the pose the robot is taking it out from the bin. If the robot picks the object up using, e.g., a mechanical gripper, the object will be suspended from the gripper. The robot must move the object above and across the bin edge, not colliding with the bin’s edge during robot motion. Lastly, there is the camera size and some safety margin.
Spatial resolution
Spatial resolution is an important factor when selecting the distance of imaging. To find spatial resolution requirements, we need to consider the smallest object feature to be seen at the largest desired distance of imaging. As an exercise, let us take a cube of 1 cm x 1 cm in size. A spatial resolution of 1 mm gives 8-10 points in each dimension, which is 64-100 points. This number of points should be sufficient to detect the object from the point cloud and estimate its pick pose. To be safe, we recommend a spatial resolution of 0.5 - 0.8 mm for most objects, and 0.25 - 0.5 for small objects and objects with fine details / small features.
If you have a custom scene or use different bins, you can always Calculate FOV and Imaging Distance or check out our Mounting Specifications diagrams. It is also important to Calculate Depth of Focus when selecting the right camera model.
The next section is about the correct positioning of the camera for the best imaging results.
Version History
SDK |
Changes |
|---|---|
2.17.0 |
Added support for Zivid 3. |
2.14.0 |
Added support for Zivid 2+ MR130, LR110, and MR60. |
2.12.0 |
Zivid One+ has reached its End-of-Life and is no longer supported. |