Gamma校正
本教程演示如何使用可配置的Gamma校正捕获2D图像。
首先,我们连接到相机。

然后我们从user获取gamma作为命令行参数。
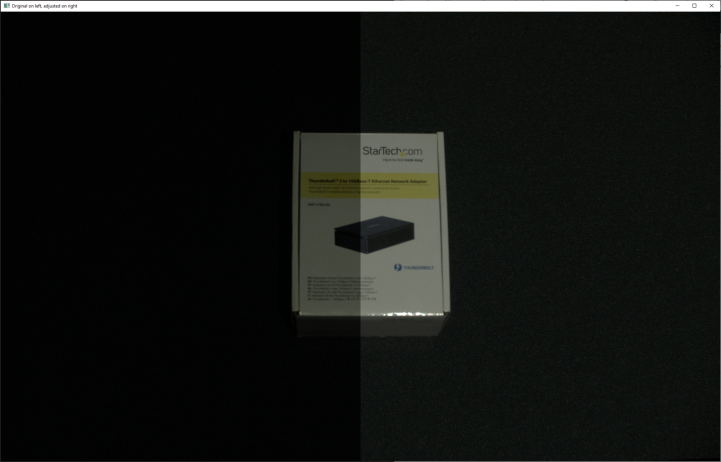
接下来我们在没有Gamma校正(Gamma=1.0)和给定Gamma校正(在这种情况下,Gamma=0.6)的情况下捕获图像。
下面展示了如何实现捕获彩色图像。
def _capture_bgr_image(camera: zivid.Camera, gamma: float) -> np.ndarray:
    """Capture and extract 2D image, then convert from RGBA and return BGR.

    Args:
        camera: Zivid Camera handle
        gamma: Gamma correction value

    Returns:
        bgr: BGR image (HxWx3 ndarray)

    """
    print("Configuring Settings")
    settings_2d = zivid.Settings2D(
        acquisitions=[zivid.Settings2D.Acquisition()],
    )
    settings_2d.processing.color.gamma = gamma

    print("Capturing 2D frame")
    with camera.capture(settings_2d) as frame_2d:
        image = frame_2d.image_rgba()
        rgba = image.copy_data()
        bgr = cv2.cvtColor(rgba, cv2.COLOR_RGBA2BGR)
        return bgr
最后,我们需要显示这两张图像。