Configure C++ Samples With CMake and Build Them in Visual Studio in Windows
This tutorial shows how to configure the Zivid C++ Samples with CMake and then build them with Visual Studio in Windows.
Requirements
Optional requirements
Some of the samples depend on external libraries, in particular:
Note
The following instructions have been tested with these versions of the dependencies:
Visual Studio 2019 and higher
CMake 3.24 and higher
PCL 1.12.1
Eigen 3.4.0
OpenCV 4.7.0
If you are using other versions, you may encounter issues.
Instructions
Clone C++ Samples
Clone the GitHub Zivid C++ Samples repository. To clone it, launch the Command Prompt by pressing Win + R keys on the keyboard, then type cmd and press Enter.
Navigate to a location where you want to clone the repository, e.g.
cd C:\Users\Public
Then run the following command:
git clone https://github.com/zivid/zivid-cpp-samples
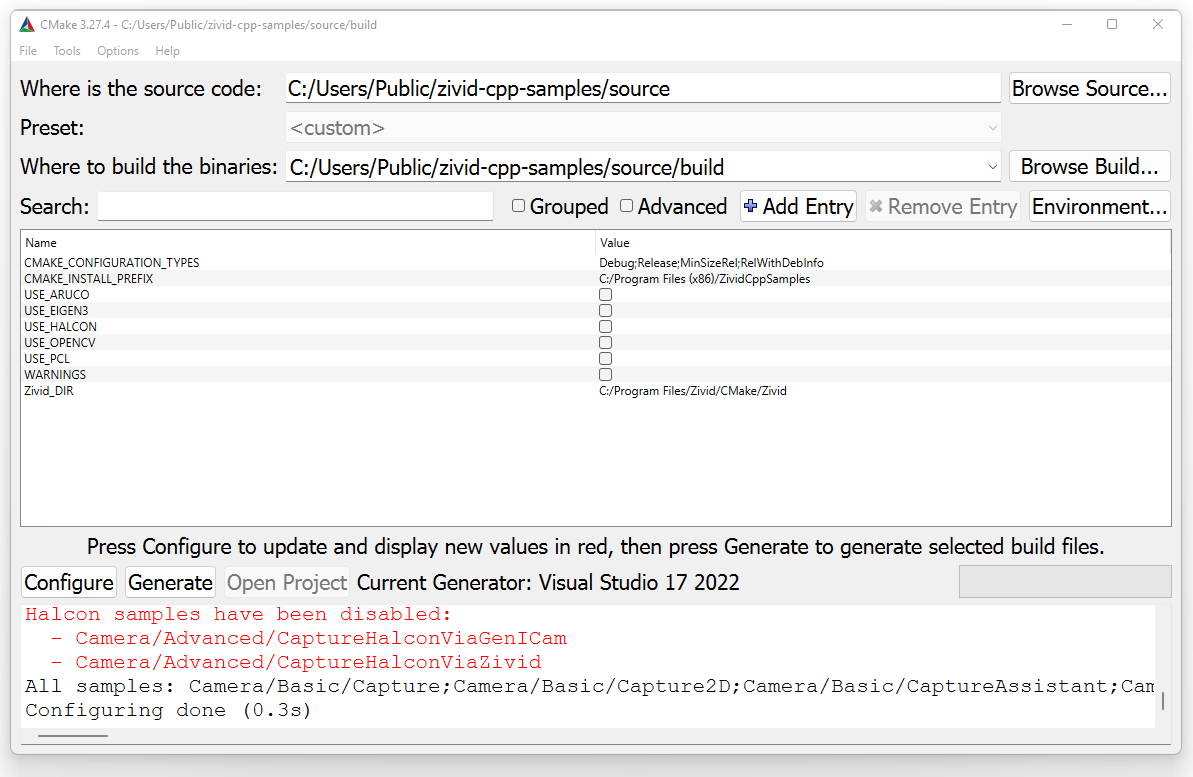
Configure the solution with CMake
Run CMake either through the Command Prompt or CMake GUI.
Create a build directory in the directory of zivid-cpp-samples and configure the solution by running:
mkdir build && cd build
cmake -DUSE_EIGEN3=OFF -DUSE_OPENCV=OFF -DUSE_PCL=OFF ../source
Tip
Make sure cmake is in your system PATH to use the above command.
See the below dropdown for how to add CMake to your system PATH.
Add CMake to the system PATH
On your PC, navigate to Control Panel → System and Security → System → Advanced System Settings → Environment Variables.
Under System variables, select the Path variable and click Edit.
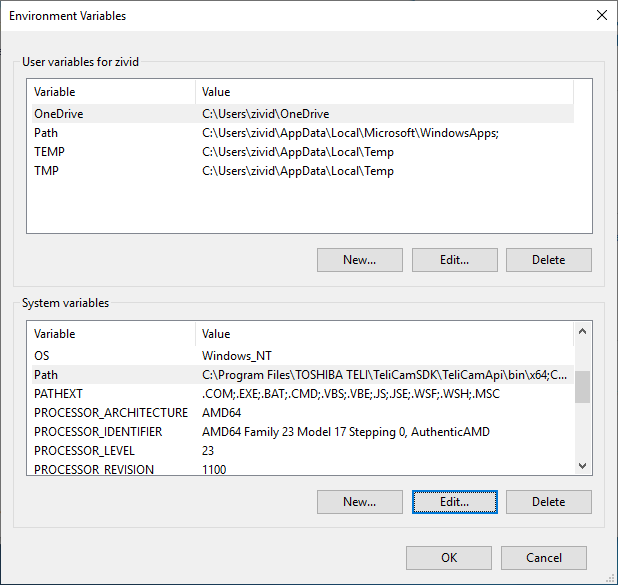
In the Edit environment variable window, click New and add the path to CMake binaries, e.g.
C:\Program Files\CMake\bin
if you have installed CMake in Program Files.
Warning
You may have to sign out of your Windows account and in again for the changes to take place.
Open the generated Visual Studio solution ZividCppSamples.sln in File Explorer to further build the samples.
Open CMake GUI and select the source folder and destination for the build folder.
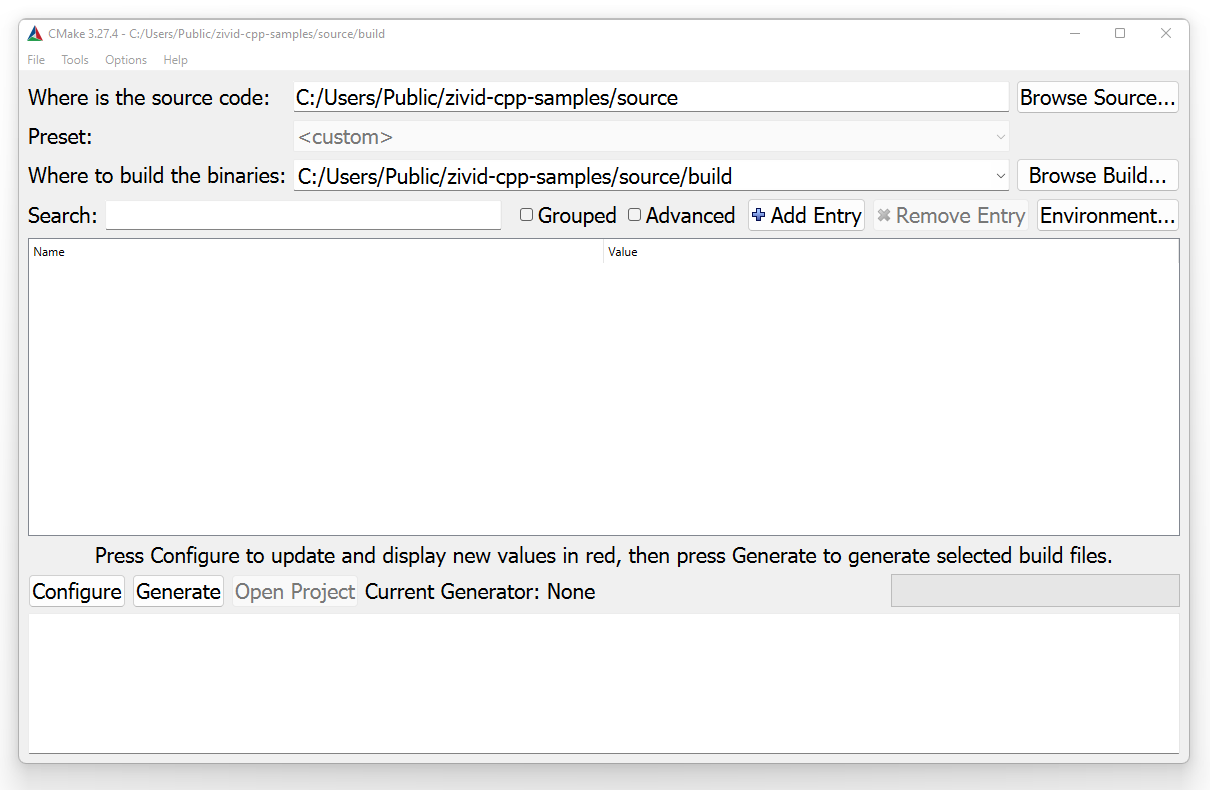
Click Configure.
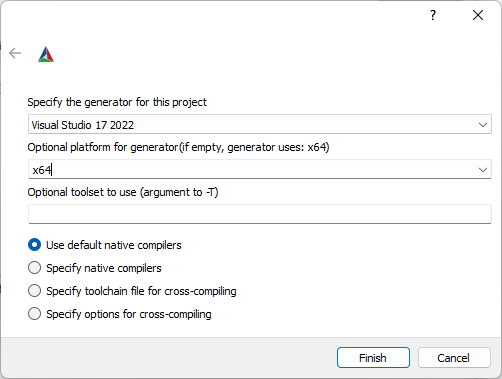
Specify your generator for the project and make sure the (optional) platform is x64.
Click Finish.
Click Configure again.
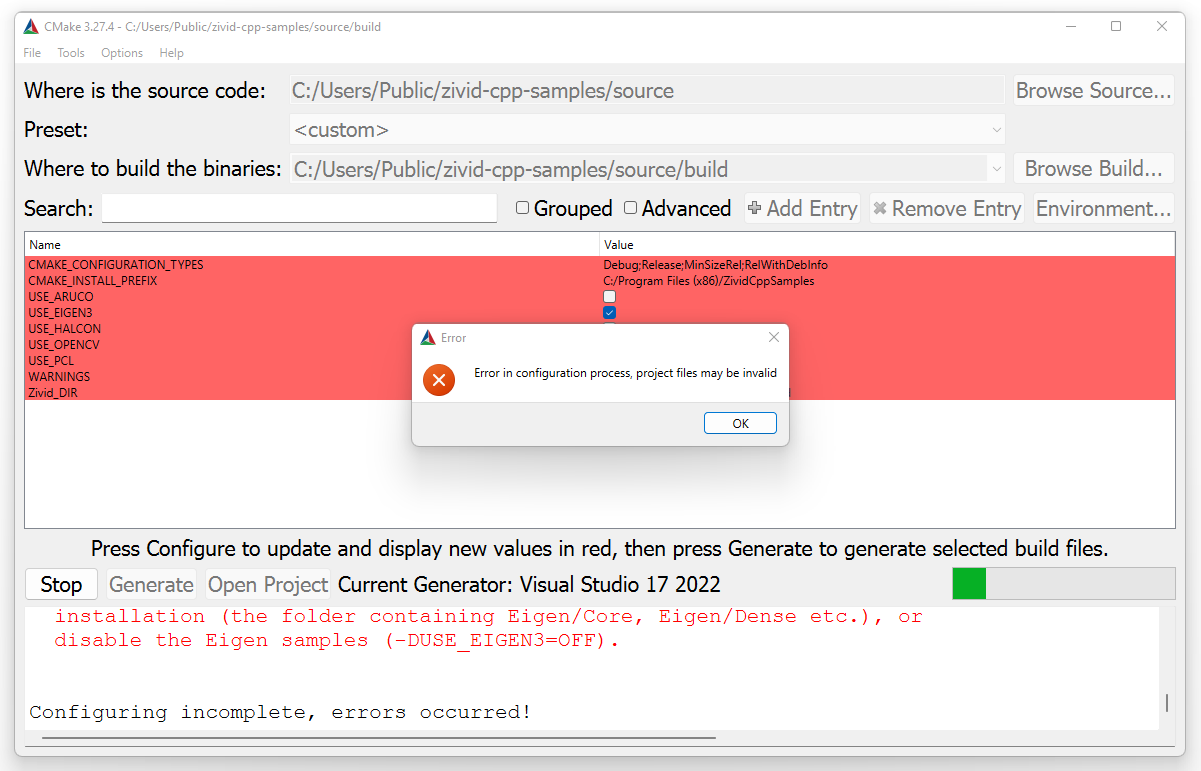
Click OK on the CMake error and disable the variables USE_EIGEN3, USE_OPENCV and USE_PCL to configure the solution without these dependencies.
Finally click Configure one last time and click Generate and Open Project to open the Visual Studio solution.
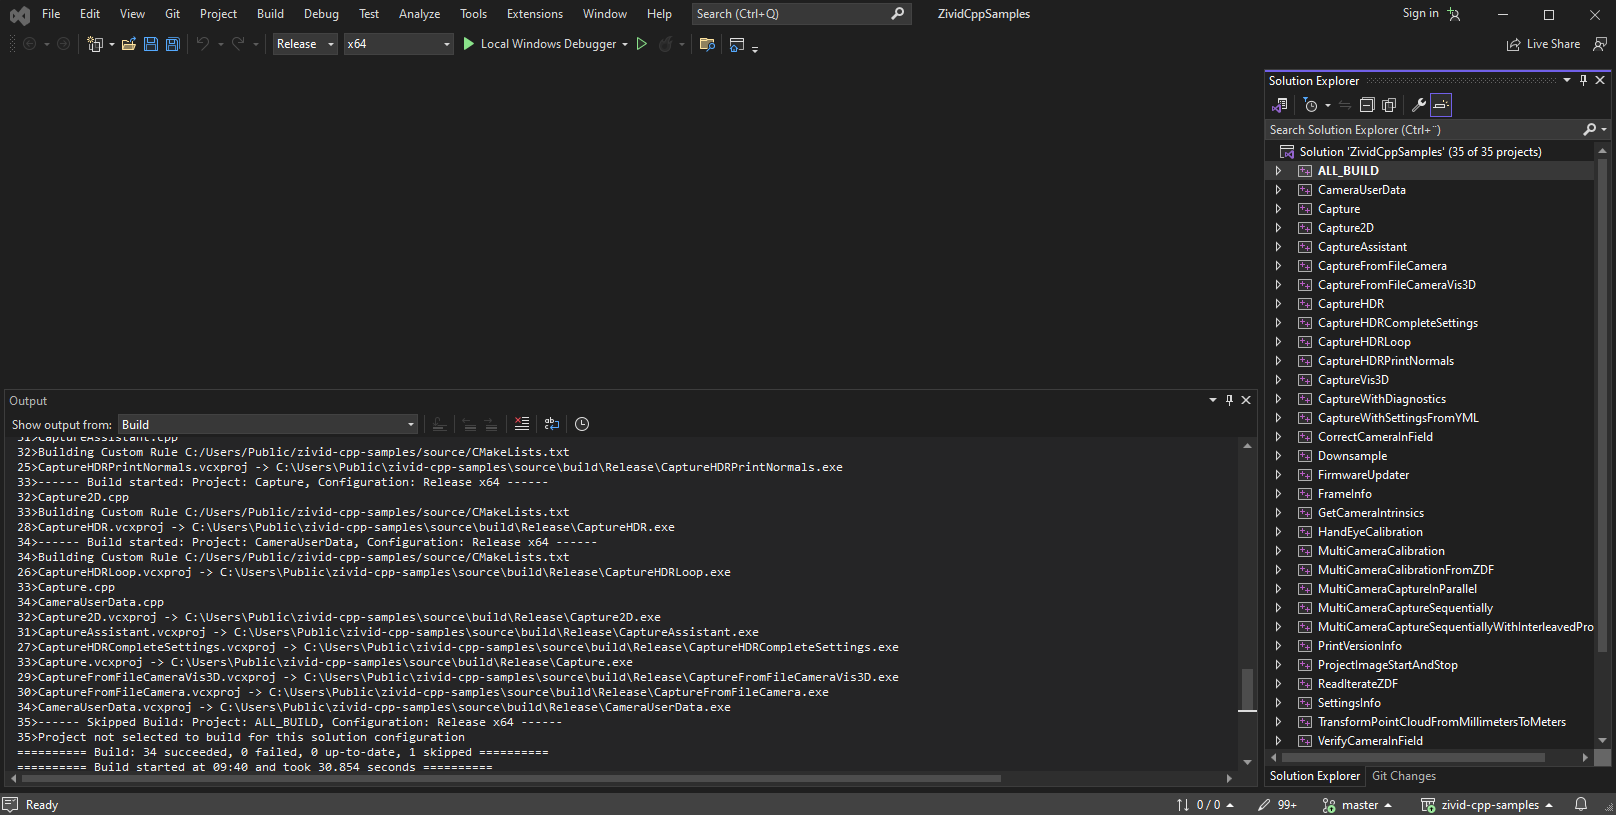
Build the solution
In Visual Studio, change the build configuration from Debug to Release. Build the solution by pressing Ctrl + Shift + B.
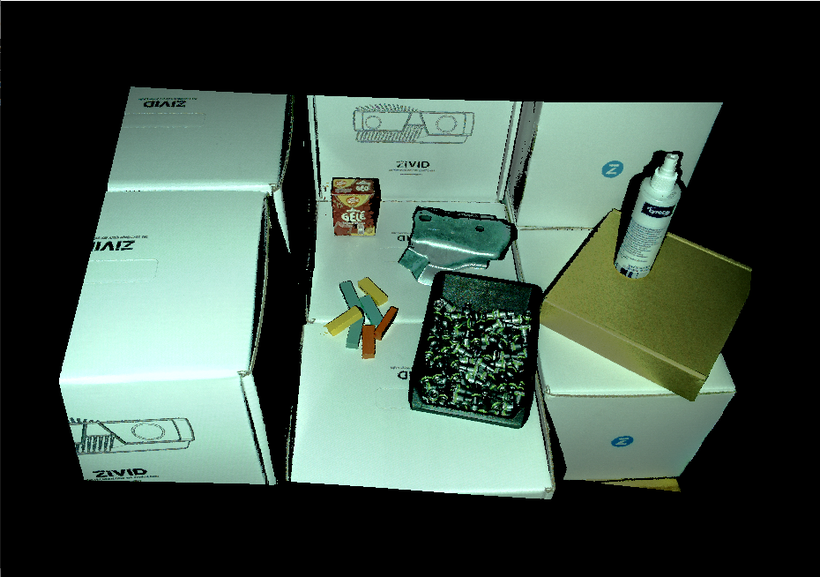
Run the sample program
Navigate to the Release folder and run a sample program either by double clicking the exe in File Explorer or using the Command Prompt, e.g.
.\CaptureVis3D.exe
Running samples that require Sample Data
Some of the samples require additional data to run, like point clouds, file cameras, transformations, etc. Go to Sample Data for instructions on how to download and install these.
Configuring the samples with optional dependencies
Some of the samples depend on Point Cloud Library, Eigen, OpenCV, and/or Halcon. If you want to run samples with one or more of these dependencies, follow the instructions in the below dropdown.
Optional dependencies
Install the required dependencies based on the sample programs you want to run; see the table below.
Sample program |
PCL |
Eigen |
OpenCV |
Halcon |
|---|---|---|---|---|
ReadPCLVis3D |
YES |
|||
CaptureWritePCLVis3D |
YES |
|||
CaptureAndVisualizeNormals |
YES |
|||
StitchByTransformation |
||||
StitchByTransformationFromZDF |
||||
ROIBoxViaCheckerboard |
YES |
|||
UtilizeHandEyeCalibration |
YES |
|||
PoseConversions |
YES |
|||
ROIBoxViaArucoMarker |
YES |
YES |
||
CaptureUndistort2D |
YES |
|||
CreateDepthMap |
YES |
|||
ProjectAndFindMarker |
YES |
|||
ReprojectPoints |
YES |
|||
ReadProjectAndCaptureImage |
YES |
|||
GammaCorrection |
YES |
|||
AllocateMemoryForPointCloudData |
YES |
|||
TransformPointCloudViaCheckerboard |
YES |
|||
TransformPointCloudViaArucoMarker |
YES |
|||
CaptureHalconViaGenICam |
YES |
|||
CaptureHalconViaZivid |
YES |
Download the latest stable release of Eigen from http://eigen.tuxfamily.org/ and extract the folder to your desired destination. When configuring the CMake project, include Eigen to configure the samples that depend on it.
Navigate to the build directory you created in zivid-cpp-samples and run
cmake -DEIGEN3_INCLUDE_DIR=<path> -DUSE_OPENCV=OFF -DUSE_PCL=OFF ../sourcewhere
<path>is the full path to where you installed Eigen, e.g.C:/Program Files/Eigen.In CMake GUI, click Add Entry to add the path to Eigen. Add
EIGEN3_INCLUDE_DIRand point the value to where you extracted the folder.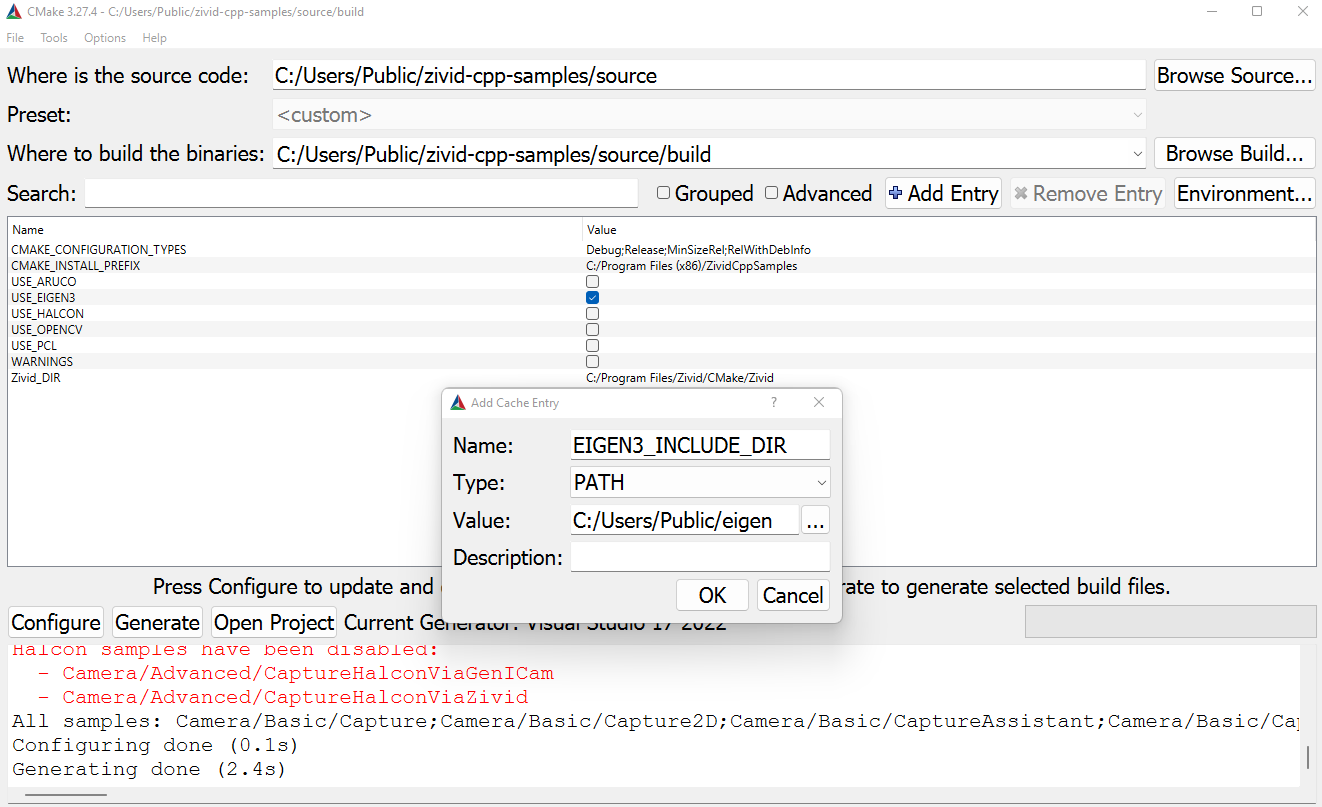
Ensure that the box
USE_EIGEN3is checked and click Configure. Then click Generate and Open Project to open the Visual Studio solution.Download and install prebuilt PCL binaries by choosing the
.exeat https://github.com/PointCloudLibrary/pcl/releases. Check the option to install 3rd Party Libraries.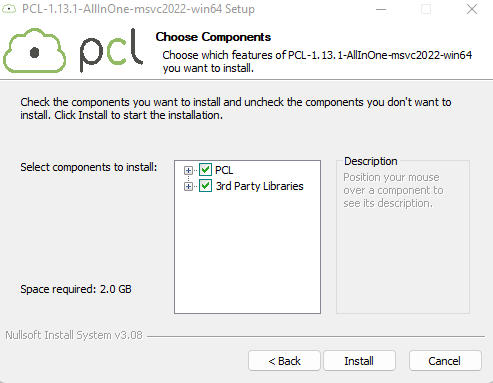
Some settings must be included in the PATH system variable before you can configure the Zivid PCL code samples. On your PC, navigate to Control Panel → System and Security → System → Advanced System Settings → Environment Variables. Under System variables, select the
Pathvariable and click Edit.In the Edit environment variable window, click New and add the paths to the PCL binaries and OpenNI2 (3rd party library), e.g.
C:\Program Files\PCL 1.12.1\bin
C:\Program Files\OpenNI2\Tools
if you have installed PCL 1.12.1 and OpenNI2 in Program Files. You may have to sign out of your Windows account and in again for the changes to take place.
Warning
You may have to manually link to some of the third-party PCL libraries, like VTK. If you encounter errors, add the path to the binaries of the library in the PATH system variable. E.g. for VTK, you would add
C:/Program Files/PCL 1.12.1/3rdParty/VTK/binif you installed PCL 1.12.1 in Program Files.When configuring the CMake project, the paths to PCL should already be configured.
Navigate to the build directory you created in zivid-cpp-samples and run
cmake -DUSE_PCL=ON -DUSE_EIGEN3=OFF -DUSE_OPENCV=OFF ../sourceIn CMake GUI, ensure that the box
USE_PCLis checked and click Configure.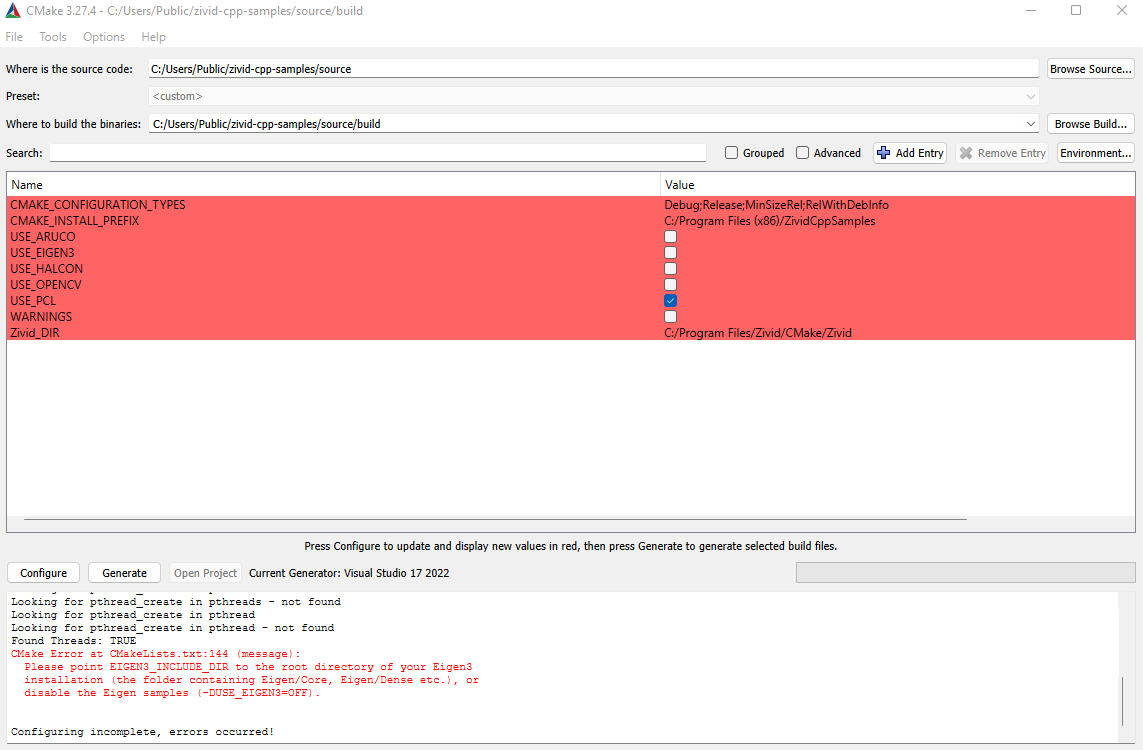
Click Generate and Open Project to open the Visual Studio solution.
Download and install prebuilt OpenCV binaries from https://opencv.org/releases/. Extract them to your desired destination, e.g.
C:\Users\PublicSome settings must be included in the PATH system variable before you can configure the Zivid OpenCV code samples. On your PC, navigate to Control Panel → System and Security → System → Advanced System Settings → Environment Variables. Under System variables, select the
Pathvariable and click Edit.In the Edit environment variable window, click New and add the path to the OpenCV binaries, e.g.
C:\Program Files\opencv\build\x64\vc16\binif you have installed OpenCV 4.7.0 and extracted it to
C:/Program Files/opencv.Warning
You may have to sign out of your Windows account and in again for the changes to take place.
When configuring the CMake project, include OpenCV to configure the samples that depend on it.
Navigate to the build directory you created in zivid-cpp-samples and run
cmake -DOpenCV_DIR=<path> -DUSE_EIGEN3=OFF -DUSE_PCL=OFF ../sourcewhere
<path>is the full path to the OpenCV build folder, e.g.C:/Program Files/opencv/build.In CMake GUI, click Add Entry to add the path to OpenCV. Add
OpenCV_DIRand point the value to the OpenCV build folder.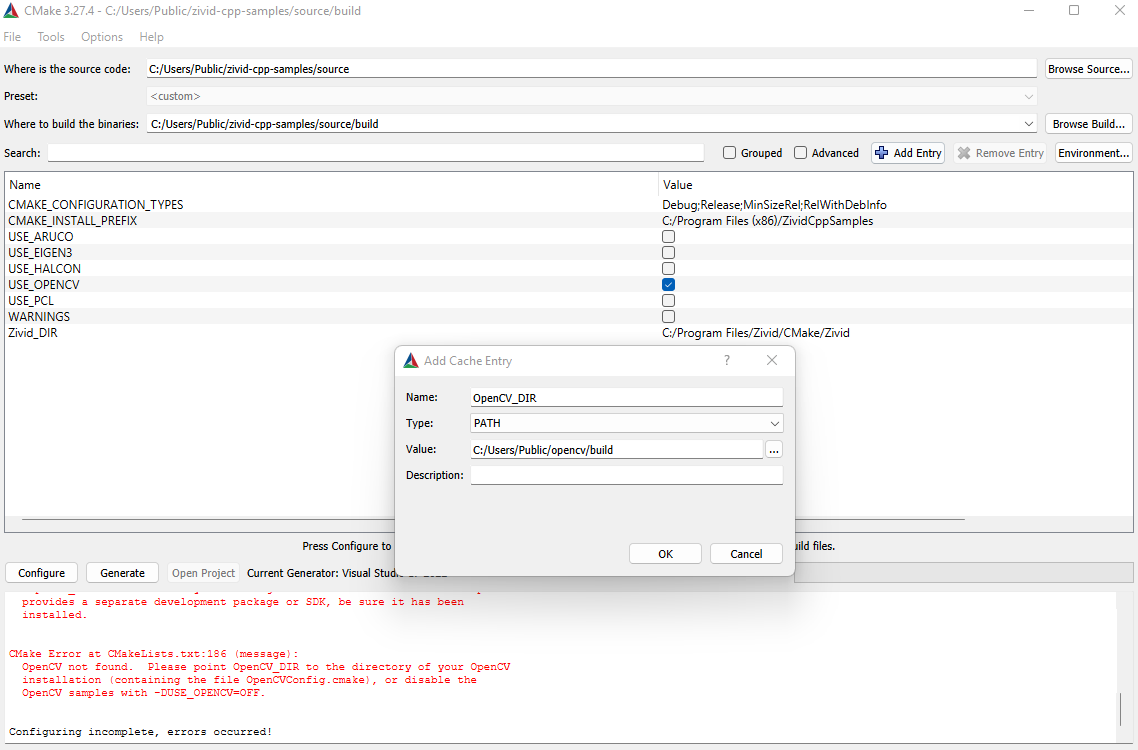
Ensure that the box
USE_OPENCVis checked and click Configure. Then click Generate and Open Project to open the Visual Studio solution.You need Halcon installed on your PC to run the Halcon C++ samples. Go to Install Zivid + HALCON for Windows for further instructions.
After you have installed Halcon, configure CMake to use Halcon samples.
Navigate to the build directory you created in zivid-cpp-samples and run
cmake -DUSE_HALCON=ON -DUSE_EIGEN3=OFF -DUSE_OPENCV=OFF -DUSE_PCL=OFF ../sourceEnsure that the box
USE_HALCONis checked and click Configure.
Then click Generate and Open Project to open the Visual Studio solution.
If you want to configure multiple dependencies at once, you can simply add multiple dependencies at the same time in CMake. For example, if you want to use all samples that require Eigen, PCL and OpenCV, you can run
cmake -DEIGEN3_INCLUDE_DIR=<path-to-eigen> -DUSE_PCL=ON -DOpenCV_DIR=<path-to-opencv> ../source
where <path-to-eigen> and <path-to-opencv> are the paths to your Eigen and OpenCV folders.
Debug the sample program
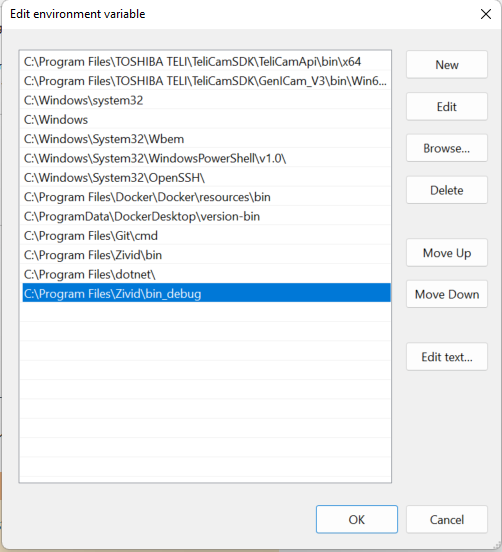
To debug a sample you must add C:/Program Files/Zivid/bin_debug to your PATH environment variable.
Follow the instructions in the below dropdown to do this.
Debugging a sample program
On your PC, navigate to Control Panel → System and Security → System → Advanced System Settings → Environment Variables.
Under System variables, select Path variable and click Edit.
In the Environment variables window, click New (top-right corner of the window, in the section for user variables) and add the following value:
C:\Program Files\Zivid\bin_debug
Note
If you want to debug a program that depends on an input file you must change Working Directory to ${TargetDir}.
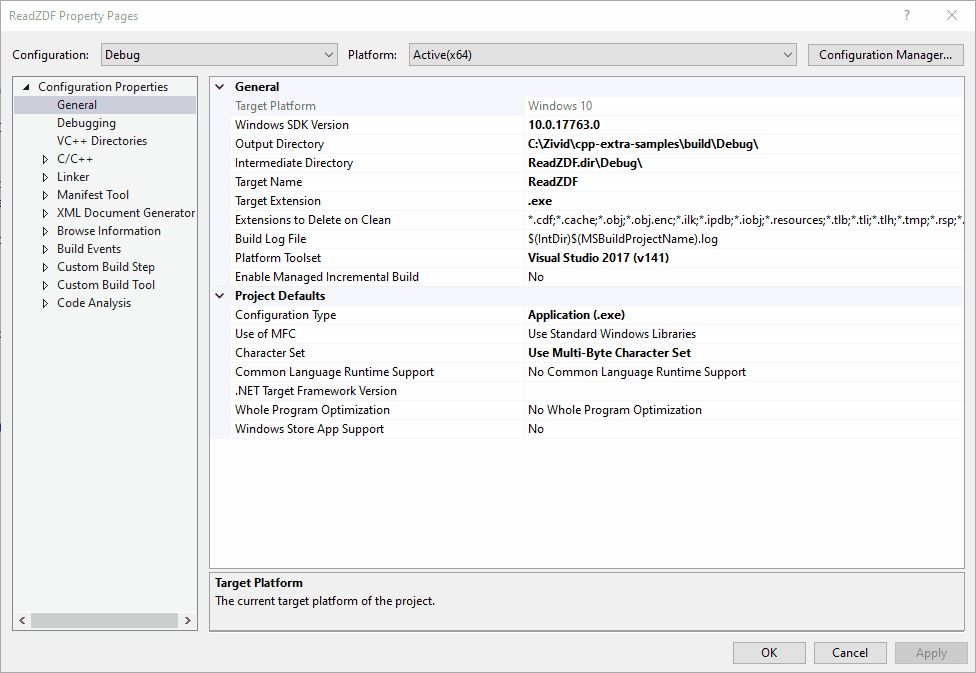
Change the build configuration from Release to Debug. Then click F5 to build and run with debug.
Version History
SDK |
Changes |
|---|---|
2.17.0 |
Removed dependency on Open3D due to native support for visualization of unorganized point clouds. |
2.16.0 |
Added instructions for configuring C++ samples with optional dependencies on Ubuntu. Added instructions for configuring Open3D on both Ubuntu and Windows. |