Build a C++ “Zivid Hello World” Application in Visual Studio on Windows
This tutorial shows how to create and develop a C++ application with Zivid in Visual Studio 2022.
Requirements
Note
The CMake version tested is 3.24.0.
Instructions
Create ZividHelloWorld.cpp and CMakeLists.txt
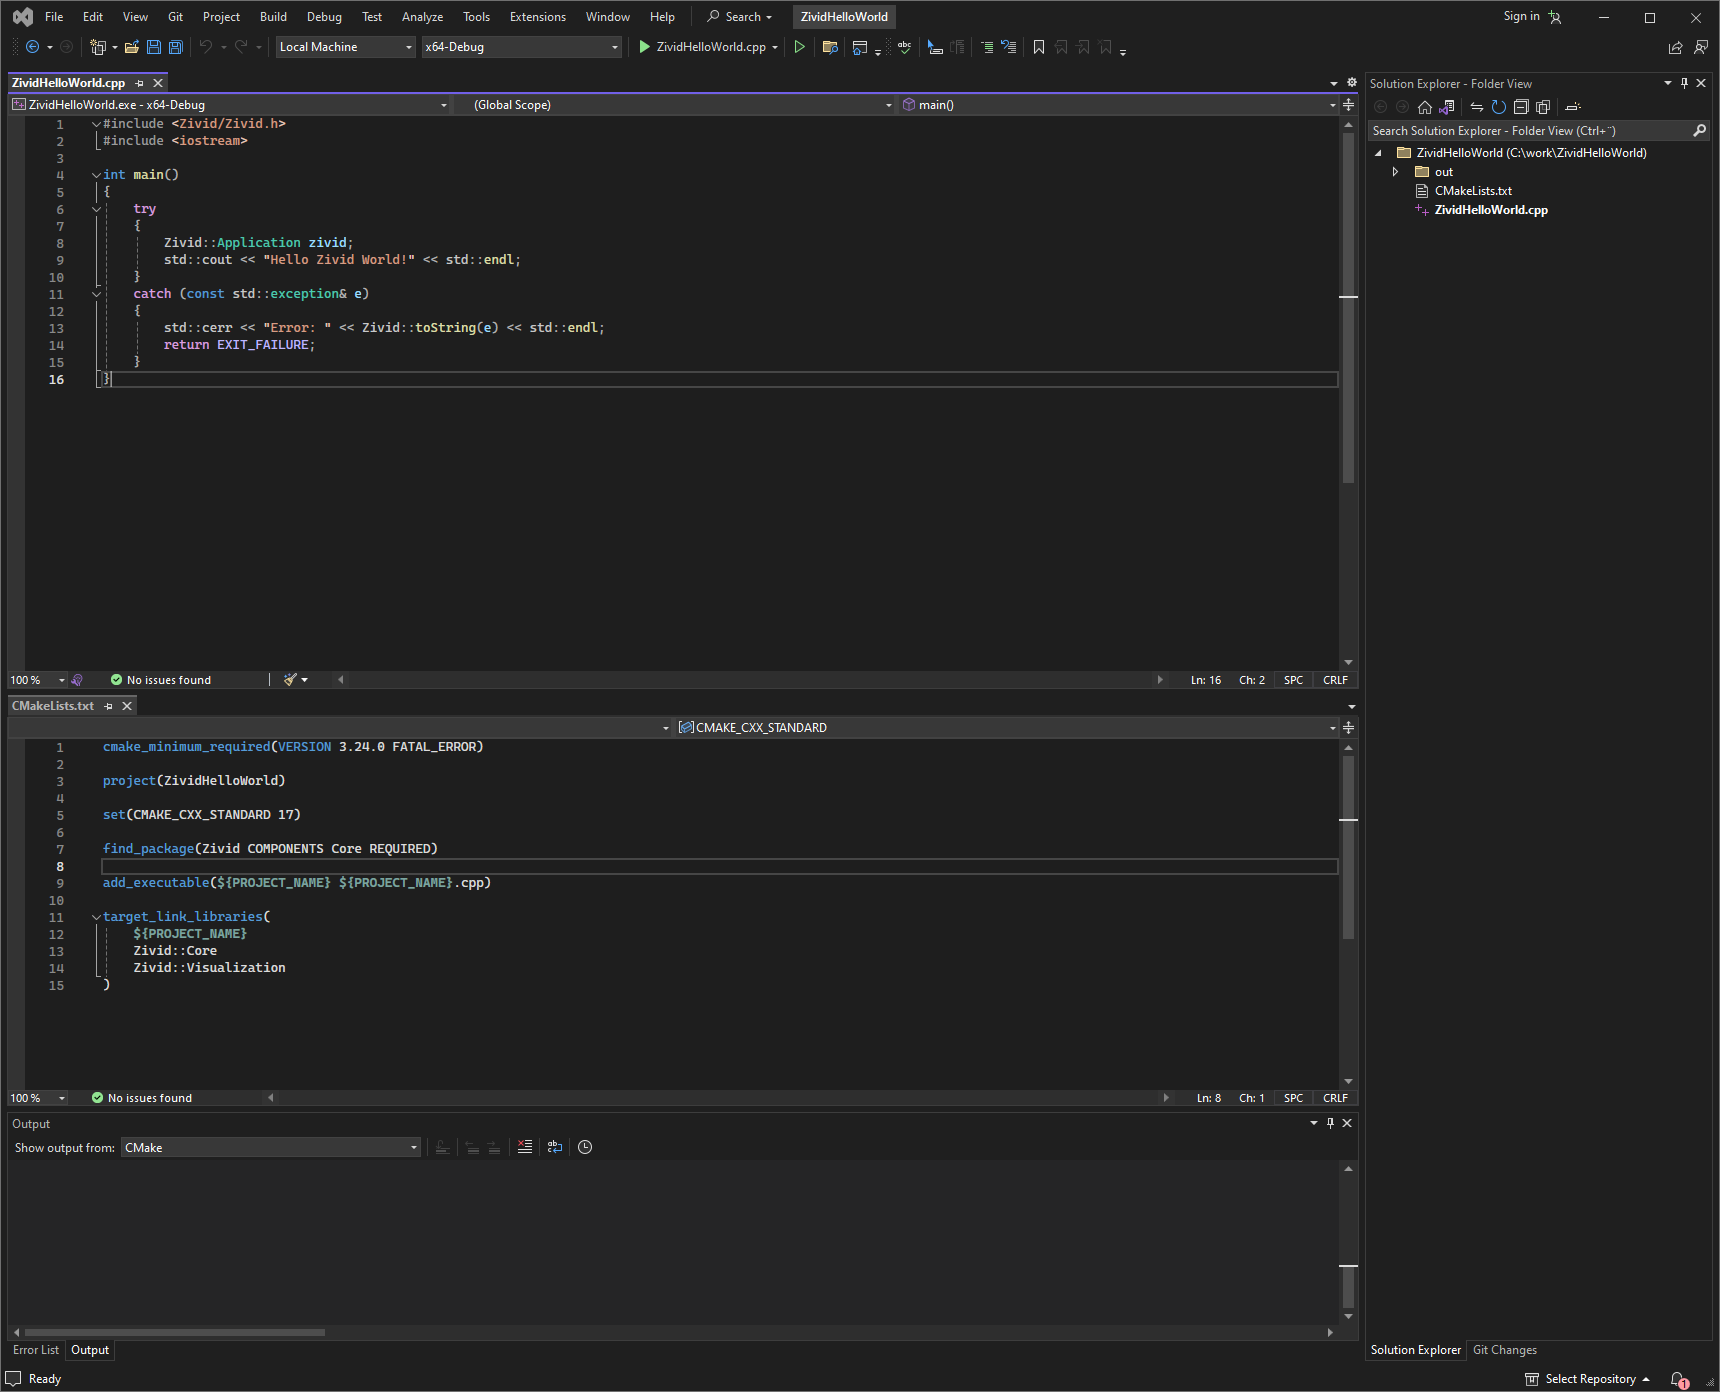
First, we must create a CMakeLists.txt file and a main cpp file for the project. Open Visual Studio 2022, then click Open a folder. This is where we will create the project. In this tutorial, we will use the following file names and source path:
Source path |
|
Cpp file name |
|
CMake file name |
|
Second, copy and paste the following code into ZividHelloWorld.cpp and CMakeLists.txt;
#include <Zivid/Zivid.h>
#include <iostream>

int main()
{
    try
    {
        Zivid::Application zivid;
        std::cout << "Hello Zivid World!" << std::endl;
    }
    catch(const std::exception &e)
    {
        std::cerr << "Error: " << Zivid::toString(e) << std::endl;
        return EXIT_FAILURE;
    }
}
cmake_minimum_required(VERSION 3.24.0 FATAL_ERROR)

project(ZividHelloWorld)

set(CMAKE_CXX_STANDARD 17)

find_package(Zivid COMPONENTS Core REQUIRED)

add_executable(${PROJECT_NAME} ${PROJECT_NAME}.cpp)

target_link_libraries(
    ${PROJECT_NAME}
    Zivid::Core
    Zivid::Visualization
)
Tip
Visual Studio 2019 and newer can automatically configure CMakeLists and build the solution. You don’t have to configure it through CMake, and can thus skip the next section and go directly to Run the program.
Configure the solution with CMake
Run CMake either through the Command Prompt or CMake GUI.
Create a build directory in the directory of ZividHelloWorld and configure the solution by running:
cmake -B build
Tip
Make sure cmake is in your system PATH to use the above command.
See the below dropdown for how to add CMake to your system PATH.
Add CMake to the system PATH
On your PC, navigate to Control Panel → System and Security → System → Advanced System Settings → Environment Variables.
Under System variables, select the Path variable and click Edit.
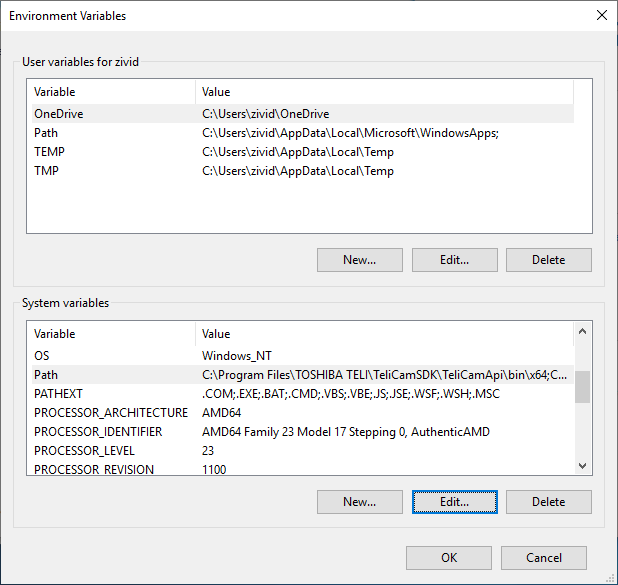
In the Edit environment variable window, click New and add the path to CMake binaries, e.g.
C:\Program Files\CMake\bin
if you have installed CMake in Program Files.
Warning
You may have to sign out of your Windows account and in again for the changes to take place.
Open the generated Visual Studio solution ZividCppSamples.sln in File Explorer or through the prompt to further build the samples.
cmake --open build
Open CMake GUI and select the source folder and destination for the build folder.
Source folder
C:/work/ZividHelloWorlddestination folder
C:/work/ZividHelloWorld/build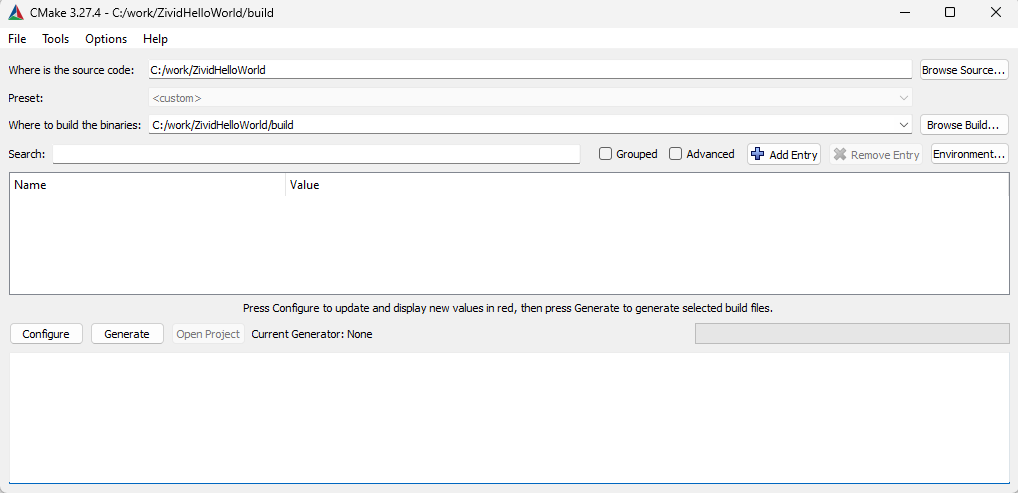
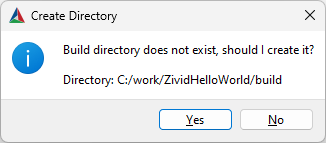
Click Configure. When prompted, click Yes to create a new build directory.
Specify your generator for the project and make sure the (optional) platform is
x64.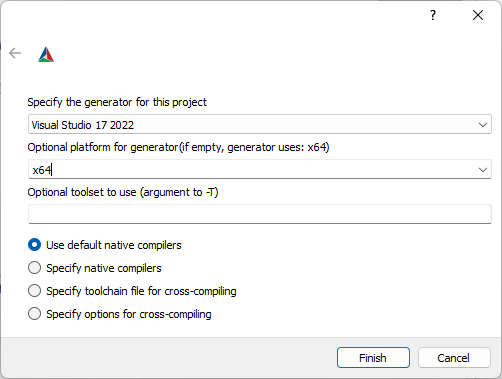
Click Finish. If the value Zivid_DIR is empty, add
C:/ProgramFiles/Zivid/CMake/Zividto it.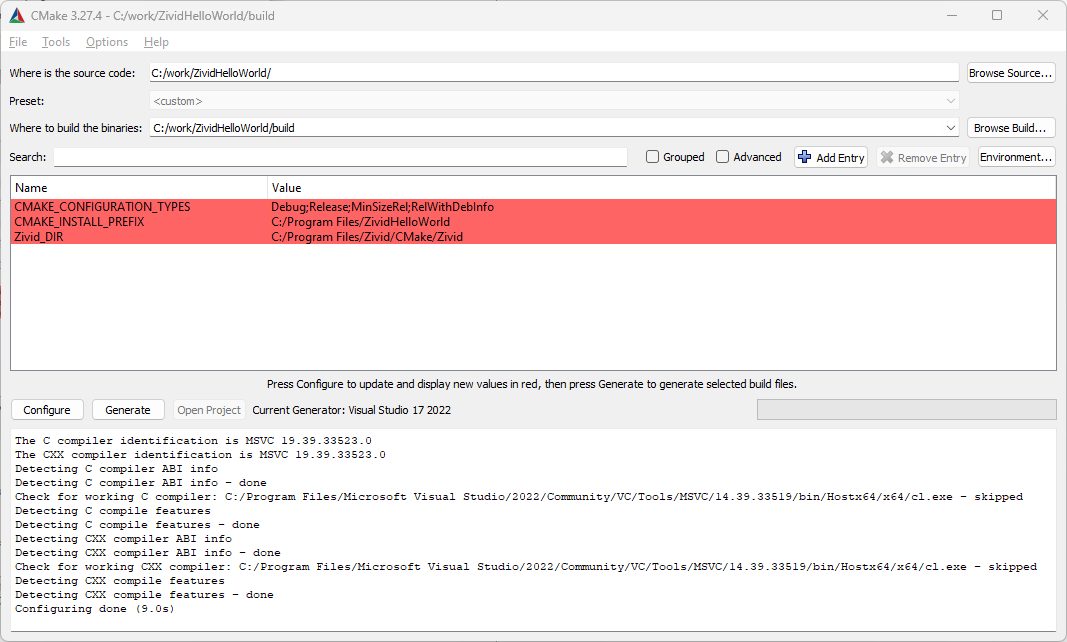
Click Configure again, then click Generate. Press Open Project to open the Visual Studio solution.
Build the solution
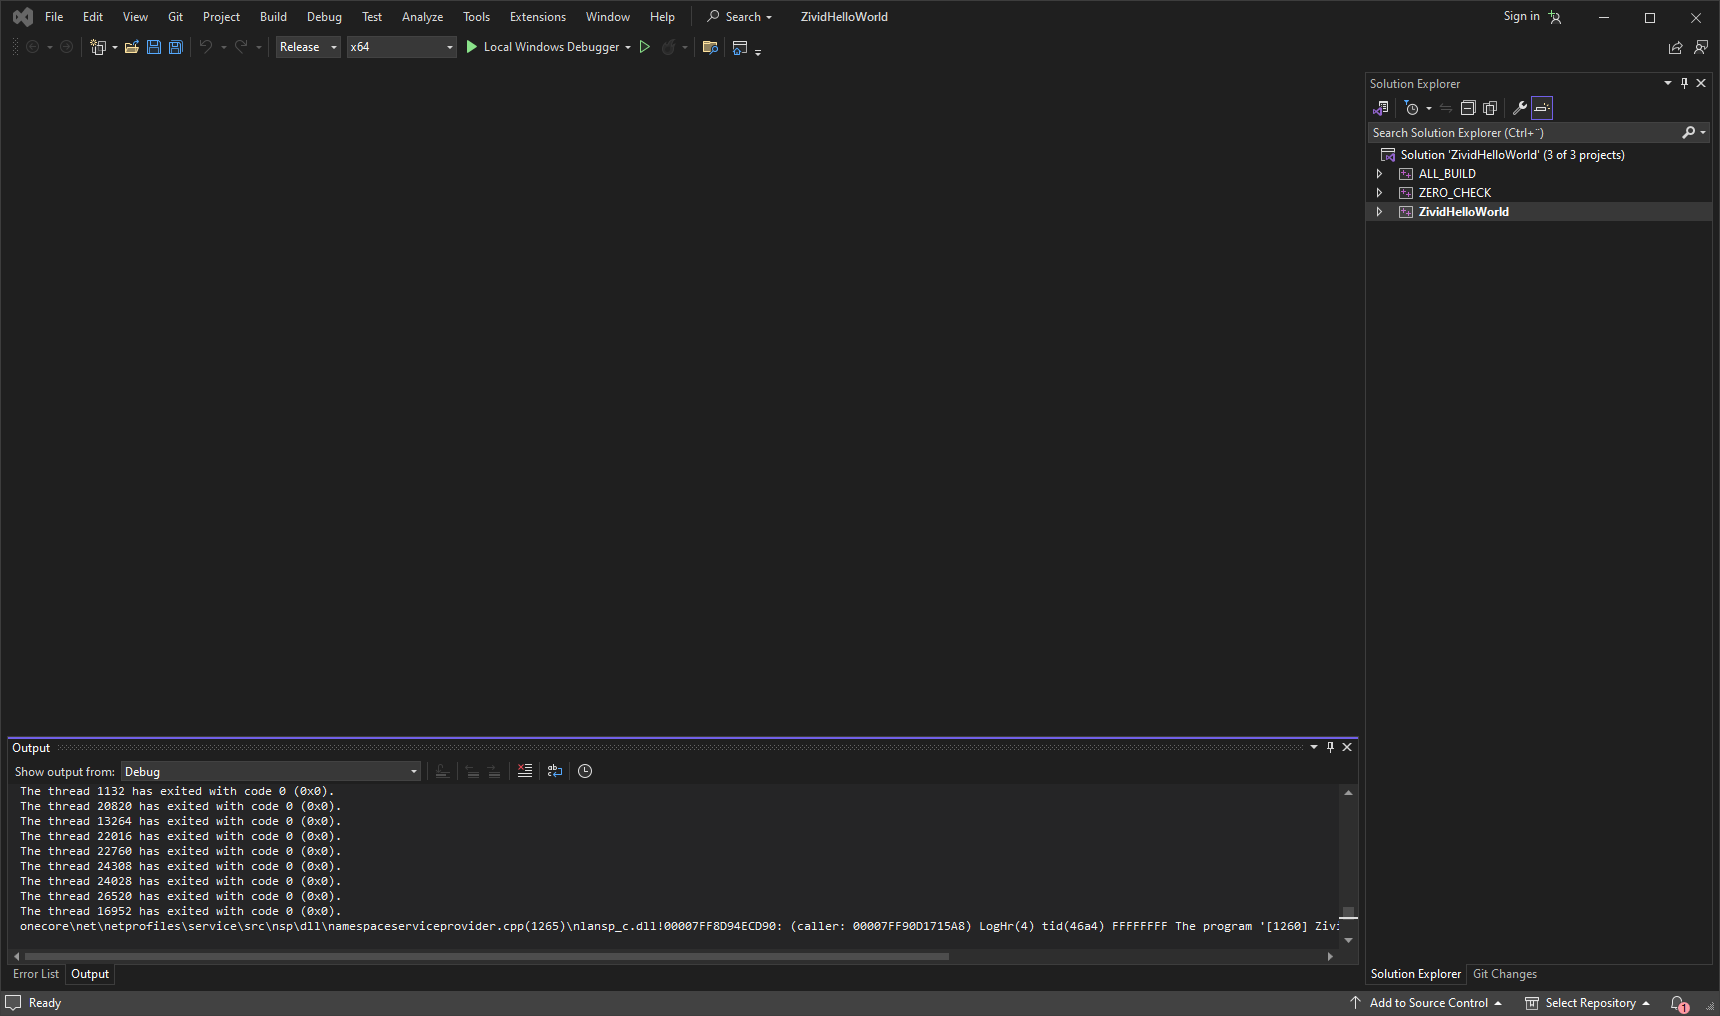
In Visual Studio, change the build configuration from Debug to Release. Build the solution by pressing Ctrl + Shift + B.
Run the program
On the right side, right click on ZividHelloWorld, then click Set as StartUp project. Run the program by pressing F5 key.

The sample program can be located in the build directory under ZividHelloWorld/build/Release.
You can also run the sample either by double clicking the exe in File Explorer or using the Command Prompt, e.g.,
.\ZividHelloWorld.exe
To continue developing with Zivid and C++, check out Zivid C++ API reference and the tutorial to Configure C++ Samples With CMake and Build Them in Visual Studio in Windows on the next page.
Version History
SDK |
Changes |
|---|---|
2.12.0 |
Remove support for Visual Studio 2017. |