User Guide
This guide will help you get started with Zivid 3D color cameras. The detailed datasheet for the Zivid cameras is available at the following links:
Contents
TL;DR (Quick Start Guide)
We recommend that you follow the user guide by starting with Unboxing. If you are time limited, check the quick guide below.
In the Zivid box you will find:
24 V power supply
Optional/as ordered:
- Power cables (straight connector),available in 5 m, 10 m, and 20 m
- (angled connector), available in 3 m
- Ethernet (CAT-6A) cables (straight connector), available in 5 m, 10 m and 25 m
- Ethernet (CAT-6A) extension cables (angled connector), available in 3 m
Mounting accessories included in development kit or ordered separately.
Requirements
- Windows 10 or Ubuntu18.04 / 20.04 / 22.04
Compatible GPU
3 GB RAM or more
Follow the steps outlined in Software Installation.
Download Zivid Software now!
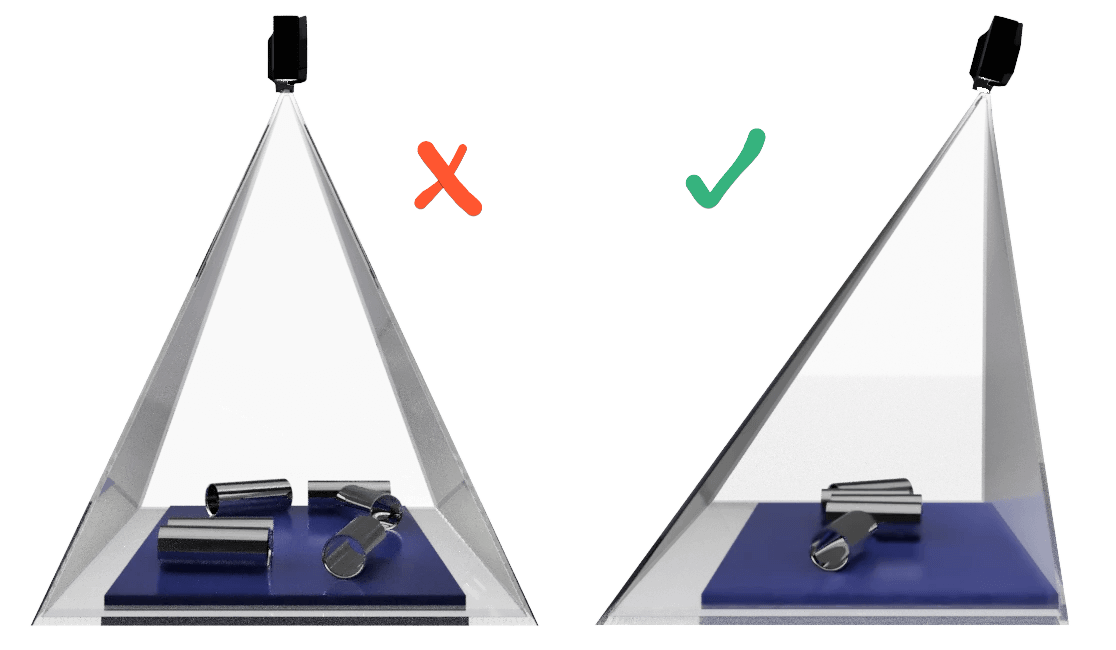
3D cameras use active lighting to detect your target objects. To minimize direct reflections from the background and reduce potential artifacts, it is recommended that you mount your camera at a slight angle to get the best results. You can test different positions in Zivid Studio. See available Zivid mounts.
For more information see Working Distance and Camera Positioning and Mechanical Installation.
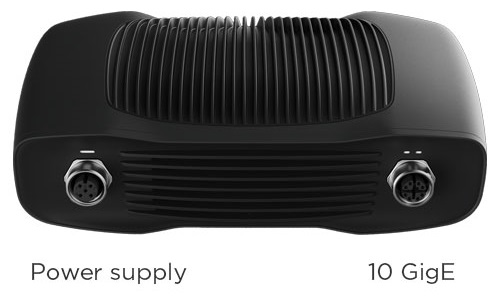
24 V power supply
10 GigE data cable
Ensure that all connections are screwed in tightly.
Configure your network to connect to the camera.
For more information see Connectivity and Power Supply.

Zivid Studio provides an intuitive graphical user interface (GUI) so you can explore the functionality and capture high-definition 3D point clouds.
Control settings and select from these views:
3D color / monochrome point cloud
2D image
Depth map
Click Analyze & Capture to capture!
See the Studio Guide and Camera for tutorials.
In the Zivid box you will find:
24 V power supply
Optional/as ordered:
- Power cables (straight connector),available in 5 m, 10 m, and 20 m
- (angled connector), available in 3 m
- USB cables (straight connector),Copper USB 3.0 cable, available in 5 mActive Optical USB 3.0 cable, available in 15 m
Mounting accessories can be ordered separately.
Requirements
- Windows 10 or Ubuntu18.04 / 20.04 / 22.04
Compatible GPU
3 GB RAM or more
Follow the steps outlined in Software Installation.
Download Zivid Software now!
3D cameras use active lighting to detect your target objects. To minimize direct reflections from the background and reduce potential artifacts, it is recommended that you mount your camera at a slight angle to get the best results. You can test different positions in Zivid Studio. See available Zivid mounts.
For more information see Working Distance and Camera Positioning and Mechanical Installation.
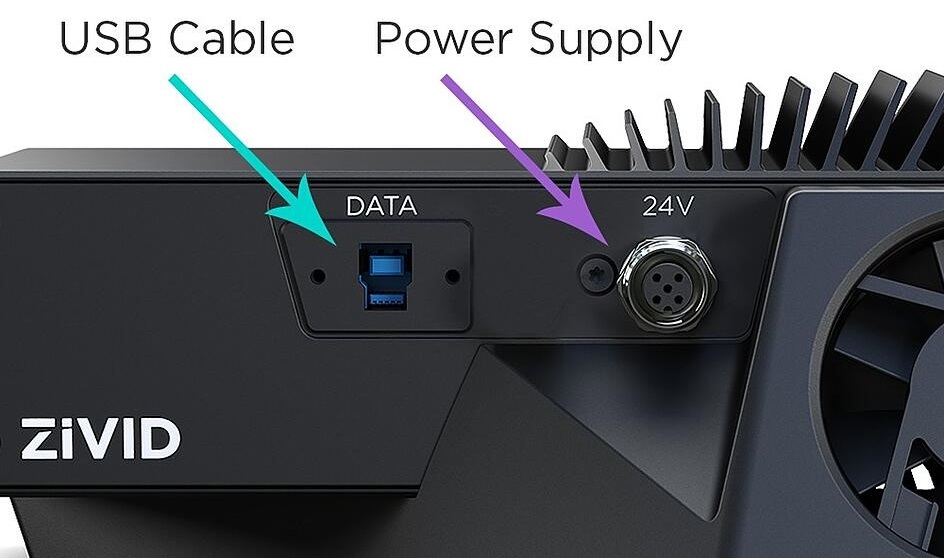
Power supply to 24 V
USB 3.0 cable to DATA
Ensure that all connections are screwed in tightly.
For more information see Connectivity and Power Supply.
Zivid Studio provides an intuitive graphical user interface (GUI) so you can explore the functionality and capture high-definition 3D point clouds.
Control settings and select from these views:
3D color / monochrome point cloud
2D image
Depth map
Click Analyze & Capture to capture!
See the Studio Guide and Camera for tutorials.
The user guide in PDF can be found at the following links: